READ THIS FIRST:
Check the pack and make sure you have all of the
parts listed on the front of this booklet. If not,
contact the outlet where you bought this product.
This product must be installed by a competent
person in accordance with the current building and
IEE wiring regulations.
As the buyer, installer and/or user of this product it
is your own responsibility to ensure that this tting
is t for the purpose for which you have intended
it. Eterna Lighting cannot accept any liability for
loss, damage or premature failure resulting from
inappropriate use.
This product is designed and constructed according
to the principles of the appropriate British Standard
and is intended for normal domestic service.
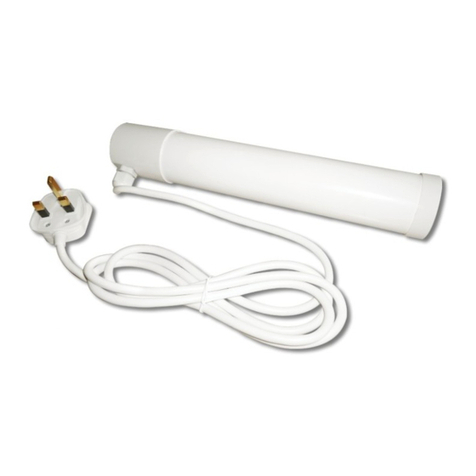
This towel rail must be installed in accordance with
the Building Regulations. These may be obtained
from OPSI or viewed and downloaded from www.
communities.gov.uk following the link for Building
Regulations.
Switch o the mains before commencing installation
and remove the appropriate circuit fuse.
Disconnect the towel rail from the electrical supply
before ash or high voltage testing.
Suitable for indoor use only.
This product is suitable for installation on surfaces
with normal ammability e.g. wood, plasterboard,
masonry.
It is not suitable for use on highly ammable surfaces
(e.g. polystyrene, textiles).
Before making xing hole(s), check that there are no
obstructions hidden beneath the mounting surface
such as pipes or cables.
The chosen location of your new tting should allow
for the product to be securely mounted and safely
connected to the mains supply. This product must be
connected to Earth.
If the location of your new tting requires the
provision of a new electrical supply, the supply
must conform with the requirements of the Building
Regulations.
If the plug supplied tted to this product is not
suitable for your socket outlets, cut the plug o and
destroy it.
Fit an appropriate plug.
This product is designed for use in bathrooms and
laundry rooms. It is safe for use in Zone 2 or outside.
If using this product in a bathroom and connecting
to the mains using the three pin plug, the plug and
socket must be outside the bathroom. Take care not
to create a hazard from trailing the mains lead.
Alternatively, this product may be permanently
connected to the mains supply via a fused spur.
WARNING! The plug cut o of the mains lead with
conductors exposed will be dangerous if inserted
into a socket.
The cores in the mains lead are coloured in
accordance with the following code:
Live - Brown
Neutral - Blue
Green & Yellow - Earth
The plug is tted with a 3Amp fuse. When replacing,
use only a 3 Amp fuse approved to BS1362 and
carrying the relevant approval mark. Never use the
plug with the fuse omitted.
If the external exible cable of this luminaire is
damaged it shall be exclusively replaced by repair or
service agent or similar qualied person.
Use this heated towel rail only for the purpose for
which it was intended. Use for any other purpose
may invalidate any warranty and cause damage or
injury to persons or property.
This heater is not intended for use with an extension
cord and should only be used in the upright position.
You are advised at every stage of your installation to
double-check any electrical connections you have
made. After you have completed your installation
there are electrical tests that should be carried out:
these tests are specied in the Wiring Regulations
(BS7671) referred to in the Building Regulations.
WARNING: This product becomes hot!
This product is not intended to be used by children
and persons with sensory, physical and/or mental
impairments that would prevent them from using it
safely.
Small children should be supervised to ensure that
they do not play with this appliance.
INSTALLATION
01. Choose the location for your new towel rail
according to the guidelines listed above.
02. Position your towel rail on the wall and mark
round the base of the three short support legs
with a pencil.
03. Oer the xing tube brackets up to the marks you
have made and mark the position of the xing
holes as shown in Fig. 1 below.
04. Secure the the xing tube brackets to the wall
using appropriate xings (not supplied). See Fig. 2
below. Note the position of the small grub screws
in the tubes, after securing the xing bracket
tubes, these holes should face downwards.
05. Remove the grub screws from the xing tube
brackets.
06. Locate the towel rail onto the xing tube brackets
secured onto the wall and replace the bracket
grub screws.
07. Route your mains supply cable to the socket or
spur, in order to do this you may need to remove
the plug tted to the mains lead on your towel
rail.
08. If necessary, re-t the plug to the mains lead on
the towel rail according to the wiring code listed
opposite.
09. Restore the power supply and switch on.
SPECIFICATION:
Supply Voltage: 230 Vac / 50Hz
Class 1
Power Consumption: 70W
Weight: 2.2kgs
Fig 2
Fig 1
225cm
60cm240cm
60cm
radius
from tap
ZONE 1
ZONE 0
ZONE 2
ZONE 2
Bathroom Zones Diagram
Bracket
Bracket
Bracket
Wall hole
Wall
Draw around
each of
the 3 long
brackets that
are attached
to the tting
Small
bracket
Plug
Mid sized screw Long screw
Small screw
Long
bracket
Towel rail
Attach the
bracket to
the tting as
shown:
