manuals.online logo
Brands
  1. Home
  2. •
  3. Brands
  4. •
  5. Aztech
  6. •
  7. Adapter
  8. •
  9. Aztech Easy Guide

Aztech Easy Guide

HomePlug Wireless Adapter
Easy Start Guide
Page 2 of 14
© Copyright 2007
All rights reser ed. No part of this document may be reproduced, republished, or retransmitted in any form
or by any means whatsoe er, whether electronically or mechanically, including, but not limited to, by way
of photocopying, recording, information recording, or through retrie al systems without the express written
permission of the owner. The owner reser es the right to re ise this document at any time without the
obligation to notify any person and/or entity of such re isions and/or changes. All other company or
product names mentioned are used for identification purposes only and may be trademarks of their
respecti e owners.
Easy Start Guide
Page 3 of 14
Contents
About the Product ...................................................................................................... 4
System Requirements ................................................................................. 4
Device Design.............................................................................................. 5
HomePlug Turbo (Starter it Bundle).......................................................... 6
Getting Started........................................................................................................... 7
Hardware Installation.................................................................................. 8
Hardware Installation (Starter it).............................................................. 9
Using the CD Setup Utility.......................................................................... 10
Accessing the Web User Interface ............................................................. 11
Configuring TCP/IP..................................................................................................12
Connecting Wireless Devices ..................................................................... 13
Easy Start Guide
Page 4 of 14
About the Product
HomePlug Wireless Adapter is a networking de ice that allows secure transmission of
data through existing power circuits and radio frequencies. It features an Ethernet port
for wired connection and an Access Point for connecting with wireless-enabled de ices.
HomePlug Wireless Adapter is a de ice that utilizes the existing electrical wiring in the
house as a path to create a secured network of computers and Ethernet de ices.
HomePlug Wireless Adapter does not require a de ice dri er to work. With a maximum
data rate of 85 Mbps, HomePlug Wireless Adapter can reliably pro ide Internet
connection among linked de ices.
System Requirements
HomePlug Wireless Adapter can be used out of the box regardless of operating system.
Howe er, you need a computer using Windows 98 SE, Me, 2000, XP, or Vista with a CD-
ROM dri e to use the CD Setup Utility.
Easy Start Guide
Page 5 of 14
Device Design
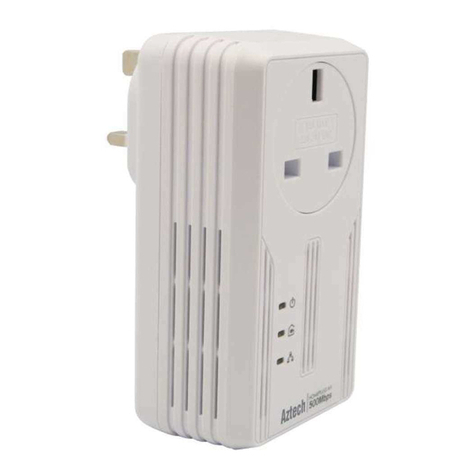
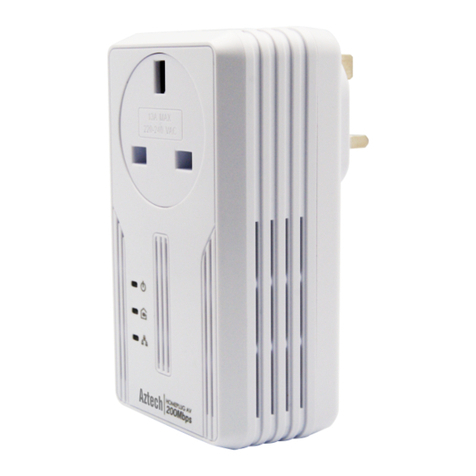
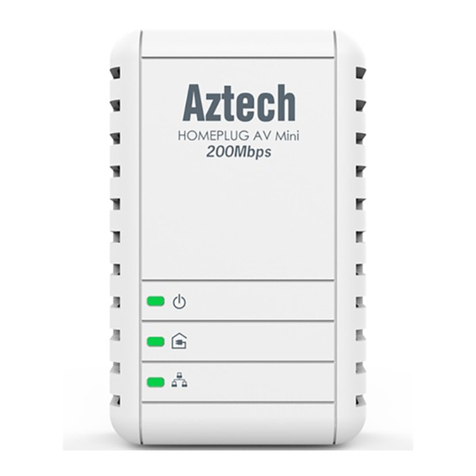
The HomePlug Wireless Adaptor has four LEDs and an Ethernet port.
Icon
IconIcon
Icon
Name
NameName
Name
LED Status
LED StatusLED Status
LED Status
Description
DescriptionDescription
Description
Power On/Off Power is on/off
On/Off Another HomePlug is detected/not detected
HomePlug Flicker Sending/recei ing data with another HomePlug
On/Off Access point is enabled/disabled
Wireless
Flash Sending/recei ing data wirelessly
On/Off Ethernet is connected/not connected
Ethernet Flicker Sending/recei ing data through Ethernet
To reset the HomePlug
Wireless Adapter to default settings, press
RESET
RESETRESET
RESET
for 10 seconds. The Ethernet Port
Ethernet PortEthernet Port
Ethernet Port accepts either cross or
straight Ethernet cable to connect with another Ethernet de ice.
HomePlug
Ethernet
Wireless
Power
Easy Start Guide
Page 6 of 14
HomePlug Turbo (Starter it Bundle)
HomePlug Turbo is a networking de ice that allows secure transmission of data through
existing power circuits. It can be connected to a computer or an existing network (router)
through an Ethernet port.
Name
NameName
Name
LED Status
LED StatusLED Status
LED Status
Description
DescriptionDescription
Description
PWR On/Off Power is on/off
On/Off Another HomePlug is detected/not detected
PL-ACT Flicker Sending/recei ing data with another HomePlug
On/Off Ethernet is connected/not connected
ETH-LINK/ACT Flicker Sending/recei ing data through Ethernet
The Ethernet Port
Ethernet PortEthernet Port
Ethernet Port accepts either cross or straight Ethernet cable to connect
with another Ethernet de ice.
PWR
PL-ACT
ETH-LIN /ACT
Easy Start Guide
Page 7 of 14
Getting Started
You can use your HomePlug Wireless Adapter immediately out of the box. Howe er, if
you want to configure the de ice, you can use the CD Setup Utility or the Web User
Interface. Here are the installation steps you will go through:
Tip:
Tip: Tip:
Tip: As shown in the flowchart, there are se eral ways to configure the HomePlug
settings. We recommend you to use the CD Setup Utility to help you change the
Wireless Network Name (ESSID/SSID) and wireless security option. It helps you to
easily secure your wireless network from ea esdroppers and enjoy using your
HomePlug de ice immediately.
Easy Start Guide
Page 8 of 14
Hardware Installation
You can install the HomePlug Wireless Adapter in se eral ways:
To connect the HomePlug Wireless Adapter with a computer:
1. Insert one end of an Ethernet cable from the computer’s Ethernet port and then
insert the other end into the HomePlug Wireless Adapter’s Ethernet port ( ).
Note:
Note: Note:
Note: When you connect the HomePlug Wireless Adapter with a computer, you ha e
to set the static IP Address in the computer’s network card. For instructions, please
refer to Configuring TCP/IP.
2. Plug the HomePlug Wireless Adapter into the electrical outlet.
To connect the HomePlug Wireless Adapter with an existing network/router:
1. Insert one end of an Ethernet cable from the router’s Ethernet port and then insert
the other end into the HomePlug’s Ethernet port ( ).
2. Plug the HomePlug Wireless Adapter into the electrical outlet.
Easy Start Guide
Page 9 of 14
Hardware Installation (Starter it)
A Starter Kit package includes a HomePlug Turbo and a HomePlug Wireless Adapter.
To install the Starter it:
1. Insert one end of an Ethernet cable from the router’s Ethernet port and then insert
the other end into the HomePlug Turbo’s Ethernet port.
2. Plug the HomePlug into the electrical outlet.
3. Plug the HomePlug Wireless Adapter into the electrical outlet.
If you need to connect through wires with the HomePlug Wireless Adapter, insert
one end of an Ethernet cable into the computer’s Ethernet port and then insert
the other end into the HomePlug Wireless Adapter’s Ethernet port ( ).
If you need to connect wirelessly with the HomePlug Wireless Adapter, check if
the wireless LED is on and then log into the wireless network.
Easy Start Guide
Page 10 of 14
Using the CD Setup Utility
The CD Setup Utility pro ides easy to follow step-by-step instructions to help you change
the wireless network name and wireless security settings. It opens on Windows
operating systems.
Note:
Note: Note:
Note: Using the CD Setup Utility is optional. Right out of the box, you can already use
your HomePlug Wireless Adapter.
To use the CD Setup Utility:
1. Insert the Resource CD
Resource CDResource CD
Resource CD into your CD dri e.
2. If the utility does not open automatically, select Start
StartStart
Start > Run
RunRun
Run, enter D:
D:D:
D:\
\\
\Setup.exe
Setup.exe Setup.exe
Setup.exe
(where D:
D:D:
D: is your CD-ROM dri e), and then click OK
OKOK
OK.
3. Follow the instructions from the CD Setup Utility.
Easy Start Guide
Page 11 of 14
Accessing the Web User Interface
The User Interface can be accessed through a browser running on any operating system.
It pro ides access to all basic and ad anced configuration settings for your de ice. You
enter the HomePlug’s IP Address in the browser to access its Web User Interface. By
default, the IP Address is 192.168.1.254
192.168.1.254192.168.1.254
192.168.1.254. If the HomePlug is connected to a
network/router, the de ice will recei e its own unique IP Address from the
network/router.
To access the Web User Interface:
1. Open a browser.
2. If you are connected to the computer, you ha e to set a static IP address first. For
help on how to manually set your IP address, please refer to Configuring TCP/IP.
3. Enter the IP Address of the HomePlug and then press Enter
EnterEnter
Enter.
 If the HomePlug is connected with the computer, use 192.168.1.254
192.168.1.254 192.168.1.254
192.168.1.254 (default).
Enter the IP Address you used if you changed the default.
 If you are connected to a network/router, you must enter the IP Address
pro ided by the DHCP Ser er. To do this, you need the CD Setup Utili
CD Setup UtiliCD Setup Utili
CD Setup Utility
tyty
ty. Insert
the Resource CD into the CD dri e and allow it to scan your network. After the
scan, it will show the IP Addresses and MAC Addresses of HomePlugs in your
network. Use the IP Address of the HomePlug you want to configure. You can
identify each HomePlug by the MAC Address printed on the de ice itself.
Tip:
Tip:Tip:
Tip: Aside from using the CD Setup Utility, you can also use your router’s Web User
Interface to get your HomePlug’s IP address. Essentially, your router acts as the DHCP
Ser er and your HomePlug is a DHCP Client. Please refer to your router’s
documentation for instructions on how to iew the DHCP Clients in the network. This
is usually discussed in the topic called DHCP Client.
4. Enter the Administrator password. The default Administrator password is ad
adad
admin
minmin
min.
Easy Start Guide
Page 12 of 14
Configuring TCP/IP
Here are instructions on how to manually configure TCP/IP on a Windows operating
system. You need to set the TCP/IP settings manually to access the Web User Interface
and to allow your computer and HomePlug Wireless Adapter to communicate with each
other.
Notes:
Notes: Notes:
Notes: If you are using a non-Windows operating system, please refer to the
operating system’s documentation about how to change the TCP/IP settings.
To set the TCP/IP properties:
1. Select Start
Start Start
Start > Run
RunRun
Run. This opens the Run
Run Run
Run dialog box.
2. Enter control
controlcontrol
control
ncpa.cpl
ncpa.cpl ncpa.cpl
ncpa.cpl and then click OK
OKOK
OK. This opens Network Connections
Network ConnectionsNetwork Connections
Network Connections.
3. Right-click LAN
LAN LAN
LAN and then select Properties
PropertiesProperties
Properties. This opens the Local Area Connection
Local Area Connection Local Area Connection
Local Area Connection
Properties
Properties Properties
Properties dialog box.
4. Select Internet Protocol (TCP/IP)
Internet Protocol (TCP/IP)Internet Protocol (TCP/IP)
Internet Protocol (TCP/IP) and then click Properties
PropertiesProperties
Properties. This opens the I
II
Internet
nternet nternet
nternet
Protocol (TCP/IP)
Protocol (TCP/IP)Protocol (TCP/IP)
Protocol (TCP/IP) dialog box.
5. Select Use the following IP address
Use the following IP addressUse the following IP address
Use the following IP address.
6. Enter the IP Address
IP AddressIP Address
IP Address to be used. You can enter any IP address between 192.168.2
to 192.168.253.
7. Click Subnet mask
Subnet maskSubnet mask
Subnet mask. When you click the field for Subnet mask, 255.255.255.0
automatically appears
8. Click OK
OKOK
OK to close the Internet Protocol (TCP/IP)
Internet Protocol (TCP/IP) Internet Protocol (TCP/IP)
Internet Protocol (TCP/IP) dialog box.
9. Click OK
OK OK
OK to close the Local Area Connection Properties
Local Area Connection Properties Local Area Connection Properties
Local Area Connection Properties dialog box.
Easy Start Guide
Page 13 of 14
Connecting Wireless Devices
HomePlug Wireless Adapter gi es you the capability to connect wireless-enabled de ices
into your computer network.
HomePlug Wireless Adapter allows you to connect with se eral wireless de ices
HomePlug Wireless Adapter allows you to connect with se eral wireless de icesHomePlug Wireless Adapter allows you to connect with se eral wireless de ices
HomePlug Wireless Adapter allows you to connect with se eral wireless de ices
To connect with wireless devices:
1. Turn on your wireless de ice.
2. Open the software you use to detect a wireless connection. This opens a window
to ask for the connection settings. By default, the wireless network name is
yournetworkname
yournetworknameyournetworkname
yournetworkname with no wireless security. If you changed the wireless network
name and applied password encryption during setup, enter the new settings.
Easy Start Guide
Page 14 of 14
Safety Precautions
 Do not open, ser ice, or change any component.
 Only qualified technical specialists are allowed to ser ice the equipment.
 Obser e safety precautions to a oid electric shock.
 Check oltage before connecting to the power supply. Connecting to the wrong
oltage will damage the equipment.

Other manuals for Easy

2

This manual suits for next models

1

Other Aztech Adapter manuals

Aztech 500Mbps 4-Port HomePlugAV Ethernet Adaptor User manual

Aztech

Aztech 500Mbps 4-Port HomePlugAV Ethernet Adaptor User manual

Aztech HL129EP Instructions for use

Aztech

Aztech HL129EP Instructions for use

Aztech WL578USB Instructions for use

Aztech

Aztech WL578USB Instructions for use

Aztech Easy Guide

Aztech

Aztech Easy Guide

Aztech WL562USB User manual

Aztech

Aztech WL562USB User manual

Aztech WL230USB Wireless B+G User manual

Aztech

Aztech WL230USB Wireless B+G User manual

Aztech WL230USB-L User manual

Aztech

Aztech WL230USB-L User manual

Aztech WL568USB User manual

Aztech

Aztech WL568USB User manual

Aztech WL592USB Instructions for use

Aztech

Aztech WL592USB Instructions for use

Aztech HomePlug AV User manual

Aztech

Aztech HomePlug AV User manual

Aztech WL562 User manual

Aztech

Aztech WL562 User manual

Aztech HL110E Instructions for use

Aztech

Aztech HL110E Instructions for use

Aztech WL230USB Wireless B+G User manual

Aztech

Aztech WL230USB Wireless B+G User manual

Aztech HomePlug AV User manual

Aztech

Aztech HomePlug AV User manual

Aztech HL110E User manual

Aztech

Aztech HL110E User manual

Aztech Wireless N USB Adapter Instructions for use

Aztech

Aztech Wireless N USB Adapter Instructions for use

Aztech WL630USB User manual

Aztech

Aztech WL630USB User manual

Aztech HomePlug Turbo Product information sheet

Aztech

Aztech HomePlug Turbo Product information sheet

Aztech 200Mbps HomePlug AV Ethernet Adaptor User manual
Aztech

Aztech 200Mbps HomePlug AV Ethernet Adaptor User manual
Aztech HomePlug Mediaxtream Ethernet Adapter User manual

Aztech

Aztech HomePlug Mediaxtream Ethernet Adapter User manual

Aztech WL558USB User manual

Aztech

Aztech WL558USB User manual

Aztech HL117 E User manual

Aztech

Aztech HL117 E User manual

Aztech WL552USB Instructions for use

Aztech

Aztech WL552USB Instructions for use

Aztech Wireless N USB Adapter User manual

Aztech

Aztech Wireless N USB Adapter User manual

Popular Adapter manuals by other brands

TP-Link TL-PA210 Quick installation guide

TP-Link

TP-Link TL-PA210 Quick installation guide

tell ecoLINE SIA IP Installation and application manual

tell

tell ecoLINE SIA IP Installation and application manual

Novus NVB-SD6CA user manual

Novus

Novus NVB-SD6CA user manual

Samsung SEK-1000 manual

Samsung

Samsung SEK-1000 manual

Linksys WPC54GX Quick installation guide

Linksys

Linksys WPC54GX Quick installation guide

Sharp HNVA100U Operation Operation manual

Sharp

Sharp HNVA100U Operation Operation manual

Linksys USB1000 user guide

Linksys

Linksys USB1000 user guide

Gigaset Gigaset PCI Card 54 owner's manual

Gigaset

Gigaset Gigaset PCI Card 54 owner's manual

YOKOGAWA 772075 user manual

YOKOGAWA

YOKOGAWA 772075 user manual

Feasycom FSC-BP301 Serial instruction manual

Feasycom

Feasycom FSC-BP301 Serial instruction manual

Ara-Unicontrol Uniwifi manual

Ara-Unicontrol

Ara-Unicontrol Uniwifi manual

Feasycom FSC-DB102 user guide

Feasycom

Feasycom FSC-DB102 user guide

SBI AC01214 installation instructions

SBI

SBI AC01214 installation instructions

D-Link DFE-528TX Quick install guide

D-Link

D-Link DFE-528TX Quick install guide

StarTech.com DKT30CHVSDPD quick start guide

StarTech.com

StarTech.com DKT30CHVSDPD quick start guide

Valcom V-9940 datasheet

Valcom

Valcom V-9940 datasheet

shokz Loop100 quick start

shokz

shokz Loop100 quick start

Sophos SG 210 Mounting instructions

Sophos

Sophos SG 210 Mounting instructions

manuals.online logo
manuals.online logoBrands
  • About & Mission
  • Contact us
  • Privacy Policy
  • Terms and Conditions

Copyright 2025 Manuals.Online. All Rights Reserved.