Baader Planetarium Cool-Ceramic Safety Herschel prism Mark II User manual

Visual / Photo
Photo only
Available in the following versions:
• Visual # 2956510V
with 7.5nm Solar Continuum Filter
and ND 3.0 Neutral Density Filter
• Photo # 2956510P
with 7.5nm Solar Continuum Filter
and ND 3.0/1.8/0.9/0.6 Filters
BAADER PLANETARIUM
Zur Sternwarte 4 •D-82291 Mammendorf •Tel. +49 (0) 8145 / 8089-0 •Fax +49 (0) 8145 / 8089-105
www.baader-planetarium.com •kontakt@baader-planetarium.de •www.celestron.de
G
M
B
H
BAADER
MARK
HERSCHEL PRISM
Cool-Ceramic Safety
Instruction Manual
and Application Examples
Congratulations on your purchase of the Cool Ceramic Safety (CCS) Herschel Prism
MarkII. It can give you a lifetime of stunning images if you use it correctly.
For your own safety when observing the sun and for best results, we recommend that you
spend a few minutes reading this instruction manual before using your Herschel prism.
The Herschel prism is available in a visual version (#2956510V) and a photographic version
(# 2956510P). They differ only in the scope of delivery and are described together here.
– ver. 01/23 –

2Manual: Cool-Ceramic Safety Herschel Prism Mark II
Content
SAFETY INSTRUCTIONS .............................................. 3
For photography please note..................................................4
Further important hints ......................................................4
THE SAFETY HERSCHEL PRISM ........................................ 5
Scope of Delivery.................................................... 5
Technical data and most important optional adapters ....................... 6
Recommended accessories ........................................... 6
The Light Path inside of the Herschel prism ............................... 7
Mounting on the telescope ............................................ 7
The lters and the rotating lter holder ................................... 8
The rotatable filter holder for brightness adjustment with a polarising filter ..............9
Baader 7.5 nm Solar Continuum Filter 2" (540 nm) # 2961581 ........................9
The ND-Filters ............................................................10
Accessories on the Herschel prism ..................................... 11
Eyepieces (2" and 1¼") .....................................................11
Bino-viewers on the Safety-Cool-Ceramic Herschel prism ..........................12
Attaching a camera ........................................................14
The FFC Fluorite Projection Lens System on the CCS Herschel Prism Mark II. ..........14
UFC filter drawers .........................................................15
Shortening the overall length for connecting long accessories................ 16
The Herschel prism for Advanced Users ................................. 18
Solar photography in calcium light ............................................18
Infrared pass filter .........................................................18
TriBand and other telescopes ................................................19
OBSERVING TECHNIQUES ........................................... 20
Hints and tips.............................................................20
Visual observation .................................................. 20
Rim darkening ............................................................20
Sunspots ................................................................21
Other phenomena to observe ................................................21
Tips for visual observation ...................................................21
Photography ...................................................... 22
Afocal photography (using a digital camera with a fixed lens)........................22
Projection photography .....................................................23
Tips for photographic observation.............................................24
The H-alpha-Sun ................................................... 25

© Baader Planetarium GmbH | 2023 3
Safety Instructions
Observing the sun in white light (i.e. the photosphere in the continu-
um), including sunspots, granulation and solar ares, is exciting –
but it is not without danger if the following safety instructions are
not observed. If used improperly, eye damage - up to and including complete blindness
– cannot be ruled out. We therefore ask you to study our safety instructions carefully.
The Herschel safety prism was specially designed for solar observation as an acces-
sory for refractors. Even with an inexpensive refractor of about 80 mm aperture, you
can observe all solar phenomena in white light that are accessible to the amateur.
The Safety Herschel Prism is an accessory for the serious amateur. Its use on a tele-
scope requires responsible handling, so the following applies to visual observation:
• Never remove the 2" grey lter / ND lter 1:1000, density 3.0, already pre-mounted
in the prism housing for visual observation, and use at least one other lter, either
the Solar Continuum Filter included in the scope of delivery, a neutral density lter
or a single polarising lter.
• If you are using more than one telescope on your mount, make sure that the light
inlets of all other instruments (including nder scopes) are securely closed before
pointing the telescopes at the Sun.
• Always mount the Herschel prism on the focuser before pointing the telescope at
the Sun.
• Never leave the telescope unattended, especially when observing the sun with
children
• We have successfully used the Herschel prism on telescopes with apertures of
6 and 8 inch. However, because of the intense heat, we still recommend swinging
the telescope out of the sun or covering it when not observing – take a break every
hour or so to allow the equipment to cool down. The limit for the focal length is set
by the 2" nose piece. For every metre of focal length, the solar image is about 1 cm,
so the focal length should be no longer than 4.5 metres. If you can use your tele-
scope with a 2" focuser for solar projection, you can also use the Herschel prism.
• Do not use the Herschel prism on telescopes with an additional corrector, reducer
or attener near the back of the OTA, as these components may otherwise heat up
too much.
• To avoid overheating, we recommend using the Herschel prism only on telescopes
with a focal ratio of f/6 or slower.
With this BAADER safety Herschel prism with light trap ("heat cage") and ceramic
end plate, no more dangerous light escapes from the housing. This makes the Her-
schel prism a safe instrument – also and especially for school astronomy. All necessa-
ry lters – including an optional polarising lter instead of the Solar Continuum Filter
– can remain permanently in the Herschel prism, so there is no danger when changing
eyepieces.

4Manual: Cool-Ceramic Safety Herschel Prism Mark II
For photography, please note:
• Make sure that the lters are strong enough for focal solar photography – start with
the pre-mounted lters for visual observation and gradually replace the 2" ND lter
(1:1000, ND=3.0) pre-mounted in the prism housing with weaker lters, starting
with the ND1.8 (see also page 9). Photographically, we recommend using the Solar
Continuum lter in any case to achieve a better contrast.
• Depending on the focal ratio of the telescope, the image may appear too bright in
the viewnder of a DSLR. In this case, hold a suitable lter (e.g. a neutral density
lter # 2458245 / ND=1.8, 1:64) between the eye and the camera viewnder, or use
the LiveView of the camera if possible.
Further important hints
1. Never screw in any lter in front of the Herschel prism. When observing the sun
with any Herschel prism, the unltered sunlight hits the prism with full energy. For
this reason, additional lters or polarisers must never be mounted between the
telescope objective and the Herschel prism – i.e. "in front of" the Herschel prism
– as the heat load would be so high that any lens or lter installed in front of the
Herschel prism would immediately shatter. In the exact unprotected focus of a 6"
refractor, f/6 to f/15, temperatures of up to 600 degrees Celsius prevail.
2. If the photographic version of the Herschel prism is to be used for visual observati-
on, make sure before each visual observation that the 1:1000 attenuating glass (ND
= 3.0 / # 2458332) has been reinserted telescope-side in the rotatable lter mount
and that the sunlight is sufciently attenuated for visual observation by another l-
ter (solar continuum, ND or polarising lter). Use the article number on the lter cell
(ND 3.0 = # 2458332) to check that the correct lter for visual observation is really
in the beam of light.
3. Under no circumstances should welding glasses, black-exposed lms or similar
aids be used as additional lters for visual observation, since in almost all cases
these allow the infrared heat radiation – which is harmful to the eye – to pass un-
noticed.
4. Refractors with Petzval systems or other telescopes that have glass in the light
path near the focal point are also not suitable for the use of a Herschel prism.
In general, any Herschel prism may only be used on suitable refractors and only
without further lters/optics between the objective and the Herschel prism. Multi-
lens systems pose no problem as long as the optics are at the front of the objecti-
ve. As long as the light has not been focused (i.e. the energy is not yet concentra-
ted close to the focal point), the heat input is not higher than the solar energy on a
white surface in summer. All refractor optics, whether oil or air-gap, which are sold
by the company Baader Planetarium, are suitable for a Herschel prism. The oils
used are all UV-resistant. (However, we can only speak here for the products of the
brands we know – if necessary, check the manual of your telescope to see if it is
suitable for solar projection).
5. Reecting telescopes without a special coating are not suitable for solar observati-
on with a Herschel prism. With them, optical and mechanical components (secon-
dary mirrors, mirror mounts, etc.) are used close to the focal point and can be dest-
royed by the high heat load. The only exception are the triband telescopes from
© Baader Planetarium GmbH | 2023 5
1
2 3
4
5
6
The photographic version
(# 2956510P) has the same acces-
sories as the visual version, and
additionally contains
one 2" neutral density lter
each of the densities
ND0.6 (# 2458321),
ND0.9 (# 2458322) and
ND1.8 (# 2458331).
Baader planetarium, which were specially designed for this purpose (see p. 19).
If you have, for example, a Newtonian, Maksutov, Ritchey-Chretien or Schmidt-
Cassegrain telescope, the light and heat ltering must take place in front of the
light entrance aperture. In the past, plane-parallel glass solar lters were used for
this purpose, but these have largely been replaced by the inexpensive BAADER
AstroSolar lm. You can nd more information on this on our website at:
https://www.baader-planetarium.com/en/solar-observation.html
or visit astrosolar.com
THE SAFETY HERSCHEL PRISM
Scope of Delivery
The Herschel prism is supplied in the visual version (# 2956510V) with the following
accessories:
Cool Ceramic Safety Herschel prism MK II
– with 2" nose piece and 2" Baader ClickLock®eyepiece clamp
2" Baader Neutral Density Filter ND 3.0 (1:1000, transmission 0.01%) # 2458332
Baader 7.5 nm Solar Continuum Filter 2" (540 nm) # 2961581
1.3 mm and 1.5 mm Allen key
sturdy transport case made of ABS plastic with seal and air seal
Both lters ( 2and 3) are already
pre-mounted in the upper part of the
prism housing.
1
2
3
4
5
6

6Manual: Cool-Ceramic Safety Herschel Prism Mark II
Technical data and most important optional adapters
Telescope side connection options (included as standard)
• 2" (50.8 mm) nose piece with safety kerfs and M48 lter thread
• Ring dove tail S58 x 3.7 mm, for connection e.g. to Zeiss M8 and other Baader
connection standards with optional adapters
Additional filters (included as standard)
• 2" neutral density lter density 3.0 (1:1000, transmission 0.1%) # 2458332
• Baader 7.5 nm Solar Continuum Filter (SCT) 2" (540 nm) # 2961581
Both lters are pre-mounted in the rotatable lter mount of the Herschel prism.
The photographic version of the Herschel prism additionally contains the three lters
• Neutral density lter (grey lter) 2", ND 0.6 (T=25%) # 2458321
• Neutral density lter (grey lter) 2", ND 0.9 (T=12,5%) # 2458322
• Neutral density lter (grey lter) 2", ND 1.8 (T=1,5%) # 2458331
These lters are also available separately.
Connection options on the eyepiece side (included as standard)
• 2" (50.8 mm) ClickLock®clamp with brass clamping ring, optical length 30 mm
• S58 ring dovetail, exactly the same as on the Diamond Steeltrack®focusers
Technical data
Optical length: As supplied with ClickLock®eyepiece clamp:
115 mm without lter
With two lters of 2 mm glass thickness (ND 3, SCT): 112.4 mm
With optional SteelTrack M48/M68/T-2 adapter
instead of ClickLock®eyepiece clamp: 85-86 mm without lter
Weight: 650g single unit, ~1,6 kg total weight incl. case
Housing: cast metall, milled
matt black anodised and pearl white textured nish
Three-point adjustment system
Recommended accessories
• 2" polarising lter, single # 2408342, for stepless brightness control
• S58 Steeltrack adapters allow the 2" ClickLock®eyepiece clamp to be replaced
with one of the following short length adapters:
• Diamond Steeltrack® T-2 Adapter # 2957202, optical length 2 mm.
• Diamond Steeltrack® M48 adapter # 2957204, optical length 1 mm
• Diamond Steeltrack® M68i adapter # 2957207, optical length 2 mm
• Reducer to 1¼", e.g. Baader 2" to 1¼" ClickLock®reducer # 2956214

© Baader Planetarium GmbH | 2023 7
The Light Path inside of the Herschel prism
The diagram on the right shows the path of light inside
of the Herschel prism. The sunlight enters the prism
from the left. Approximately 4.6% of the sunlight is
directed upwards at a right angle into the eyepiece or
camera for observation. Further grey lters dim
the light even more to a harmless level.
The disproportionately larger, higher-
energy portion of 95.4% of the
radiation passes through the prism
body and would form a focal point in
the "air" far outside the prism housing.
A heat-absorbing special ceramic as a closure
of the light trap ("heat cage") absorbs radiant heat – like
the heat tiles on the space shuttle – without heating the
surroundings too much. The housing, which is closed except for the ventilation slots,
reliably prevents any risk of glare. Since the "heat cage" is only connected to the prism
housing via four screws, there is practically no heat transfer to the prism itself. The ce-
ramic plate also acts as a viewing screen for the sunlight beam. Positioning the solar
image in the centre of the telescope's eld of view is thus child's play.
The 2" ClickLock®eyepiece clamp is used to hold eyepieces or other accessories.
With a 15° turn you clamp any eyepiece bombproof – even in winter with thick gloves.
Never use Filters in front of the Herschel Prism:
For manufacturing reasons, the 2" nose piece of the Herschel prism also has a
female lter thread of M48 as it is standard to accommodate 2" lters. In the case
of the Herschel prism, however, no lters must be mounted here, as any lter in-
serted at this point will become very hot and thus be destroyed (see also the safety
instructions on page 3). Any optical accessories must be mounted after the prism
(i.e. on the eyepiece side).
Mounting on the telescope
The Herschel prism is attached to the telescope in exactly the same way as a 2" star
diagonal. Make sure that it is securely held in the eyepiece focuser.
Owners of Diamond SteelTrack®focusers can
also attach the Herschel prism permanently to the
focuser. This is particularly interesting for purely
solar telescopes and in public use, so that no one
can remove the Herschel prism. To do this, simply
unscrew the 2" nose piece and attach the Herschel
prism to your Diamond SteelTrack®focuser using
the S58 ring dovetail instead of the eyepiece clamp.

8Manual: Cool-Ceramic Safety Herschel Prism Mark II
The filters and the rotating filter holder
In both versions of the Herschel prism (visual and photographic), two Baader 2" lters
are mounted directly above the prism when delivered. The rst lter when looking
from the telescope (i.e. directly above the prism) is a 2" 7.5 nm Solar Continuum lter
– with the more reective surface oriented towards the prism surface. Above this – i.e.
directly in front of the
eye/eyepiece – a ND3
(1:1000) neutral densi-
ty lter is mounted for
light attenuation. The
orientation of the Solar
Continuum Filter and the
order in which both l-
ters are mounted ensure
that the image of the
sun is free of reections.
To change the pre-installed lters, the 2" ClickLock®eyepiece clamp with the rotating
lter holder is removed from the prism housing by loosening the four screws 1.
Now you can unscrew the Solar Continuum lter, for example, and replace it with
another lter, and/or replace the ND 3.0 with a weaker lter for photography only.
When assembling, make sure that the setting levers of the lter rotator 2and the
ClickLock®are in a favourable position and that they still t into the recesses of the
storage case.
A maximum of two lters with Baader low-prole mount (LPFC – Low Prole Filter
Cell, 6 mm height each) can be inserted into the lter mount on the telescope side.
Further lters must be inserted in the eyepiece, the nose piece of the camera or a 1¼"
reducer; a 2" lter can also be installed upside down in the eyepiece-side thread of the
rotatable lter mount. Take care of the maximum length for eyepieces (page 11)!
Particularly attractive for
visual observations is the
use of a single polarising
lter # 2408342 to adjust
the brightness by simply
rotating it. It is inserted into
the lter holder on the
eyepiece side. To do this,
remove the eyepiece clamp
by loosening the six
screws 3with the Allen
key (you do not have to
remove them completely). Then you can screw in the lter. You can place the lever 2
on the rotator in such a way that the movement covers all brightness levels.
It can also be used instead of the Solar Continuum lter, but only behind the ND3.0.
As already mentioned in the safety instructions, the ND 3 lter should only be removed
during photographic observation in eyepiece projection or with Barlow lenses in order to
achieve particularly short exposure times. To mount another lter, proceed in reverse order.
Open the four screws 1in the prism body with the 1.5 mm allen wrench, to
remove eyepiece clamp and filter holder. The Solar Continuum filter is mounted on
the telescope side, to avoid reflections.
Open the six screws 3with the 1,3 mm allen wrench, to remove the eyepiece
clamp and to install e. g. a polarizing filter from the top in the rotatable filter
holder.
1
2
3

© Baader Planetarium GmbH | 2023 9
*in this conguration, the polarising lter is installed upside down, with the thread
facing the telescope. This is only possible with linear polarising lters like # 2408342;
circular polarising lters only work in one mounting direction. Do not use a polarising
lter with a rotating mount (e.g. from a double polarising lter), as you would not be
able to remove it.
The rotatable filter holder for brightness adjustment with a polarising filter
The biggest innovation of the Cool-Ceramic Safety Herschelprisma Mark II compared
to its predecessor is the revised lter mount, which can now be easily rotated from the
outside via an easy-to-grip adjustment lever 2. This allows a single 2" polarisation
lter (# 2408342) to be permanently mounted in the beam of light. Since the Herschel
prism already partially polarises the light, the image brightness can thus be conveni-
ently adjusted to different magnications by rotating the lter – without having to
purchase several polarising lters for each eyepiece and/or the 1¼" reducer. This also
means that this lter cannot be forgotten and safe observation of the sun is possible at
all times. The lever 2can be placed in several positions at the rotating lter holder, so
that it covers the brightness levels from dim to bright.
For visual observation, you can simply use the position that provides a comfortable
image brightness. Always place the lter on the eyepiece side, behind the ND3 –
otherwise, it might get damaged.
When photographing the sun, please note that you will need new ats if you move
the camera or the lter pack.
Baader 7.5 nm Solar Continuum Filter 2" (540 nm) # 2961581 (included in delivery)
The Solar Continuum Filter (SC lter for short) is a very narrow band line lter (half-
width 7.5 nm nanometres, see transmission curve on the right) at a central wavelength
of 540 nm at maximum transmission. It brings the following advantages for solar
observation:
Most two-lens achromatic refractor
objectives are not equally well correc-
ted across all colours of the spec-
trum. With these lenses, the Solar
Continuum Filter isolates the spec-
tral range that is best corrected for
these lenses. This brings out the best
possible image from an inexpensive
refractor (all other colour ranges are
completely ltered out). This narrow
Note the order of the filters!
To avoid reections, use the following sequence
Herschel prism - Solar Continuum - ND3 - Filter holder
A polarising lter must always be installed behind the ND3,
i.e. directly in the rotating lter holder, otherwise it can be damaged by the heat:
Herschel prism - Solar Continuum - ND3 - Filter Holder - Polarising Filter* or
Herschel prism - ND3 - Polarising Filter - Filter Holder

10 Manual: Cool-Ceramic Safety Herschel Prism Mark II
band ltering (there is still enough image bright-
ness) is noticeable in a clear increase in contrast of
the solar image. This makes much higher magni-
cations possible.
In addition, the granulation of the sun can be
observed with particularly high contrast in this
spectral range.
Furthermore, the BAADER Solar Continuum Filter
generally minimizes the effects of seeing (air tur-
bulence), because the short-wave light below 535
nanometres is blocked (the longer the wavelength
of the light, the less noticeable are thermally indu-
ced seeing effects).
With apochromatic (very high-quality, colour
error-free) refractors (e.g. Astro Physics, TEC), it
may be possible to work without the Solar Con-
tinuum Filter visually and observe the sun in pure
white light with the same contrast as is possible
with simpler achromatic optics using only the
Solar Continuum Filter. Especially when photogra-
phing with monochrome cameras, however, even
high-quality apochromats benet from the use of
the Solar Continuum Filter.
The two images on the right show the sun once
without and once with the Solar Continuum Filter
in a 150/2250 Zeiss AS refractor. In the upper image, an additional ND 0.9 lter was
used to achieve comparable exposure times and to compensate for the inuence of air
turbulence for this comparison.
The ND-Filters
The plano-optically polished neutral density lter (grey lter) ND 3.0 (T=0.1%) #2458332
is pre-installed on delivery and must not be removed under any circumstances for
visual observation, but must be supplemented by another lter.
The photographic version of the Herschel prism comes with three additional neutral
density lters. These lters are used to achieve a sufciently bright image when photo-
graphing with long focal lengths (or slow focal ratios).
If the camera image is too dark, rst remove any built-in optional polarising lter be-
fore replacing the ND 3.0 with the ND 1.8 or even weaker lters. You can also combine
two lters to achieve the desired brightness.
After each use, always rebuild the Herschel prism to the visual con-
figuration (ND3+SC filters) – this will help you avoid using the it for
visual observation with the wrong filters, when you may not check
beforehand that the correct filters are in place.
The sun in a Zeiss AS 150/2250 telescope,
with similar exposure times. Above: Herschel
prism, ND3 and ND0,9; below: Herschel
prism, ND3 and Solar Continuum 7,5nm.

© Baader Planetarium GmbH | 2023 11
The visual version of the Herschel prism can be upgraded to the photographic versi-
on at any time. All you need are these three lters:
• Neutral Density Filter 2", ND 1,8 (T=1,5%) # 2458331
• Neutral Density Filter 2", ND 0,9 (T=12,5%) # 2458322
• Neutral Density Filter 2", ND 0,6 (T=25%) # 2458321
Accessories on the Herschel prism
Eyepieces (2" and 1¼")
2" eyepieces are used as with any star diagonal and are securely clamped by turning
the ClickLock®a few degrees.
The Baader ClickLock®is a precisely tting, very solid eyepiece clamp without clam-
ping screws. Eyepieces, cameras and similar accessories that are inserted sit securely
and are still not scratched! With a small turn of 20°, each eyepiece is clamped bomb-
proof. You never have to ddle with small clamping screws again – instead, simply
turn the upper part of the eyepiece clamp by a few degrees and the eyepiece is rmly
xed. This is no problem even when wearing gloves!
You do not have to tighten the ClickLock®clamps "until the blood runs out", because
the mechanical principle comes from professional mechanical engineering. This is also
how the tool holder on modern CNC milling centres works. By clever use of the lever
forces, the tightening torque is increased many times over. The inserted object is held
on three sides as with a quick-action chuck and can therefore no longer perform any
tilting movements.
For the use of 1.25" accessories you still need a reducer. We particularly recommend
the Baader 2" to 1¼" ClickLock®reducer # 2956214 with 9.5 mm height, which also
offers the ClickLock®convenience for 1¼" eyepieces, or the Pushx 2" to 1¼" reducer
# 2408151, into which eyepieces can simply be inserted and which then has only
1mm height.
Now you can use all 1¼" accessories for which the backfocus ts. If you have
enough backfocus, you can even use the Q-Turret eyepiece holder, which needs about
four centimetres extra backfocus.
Use the stop ring # 2958027 to avoid a long eyepiece
touching a mirror or prism.
Caution when using
eyepieces with dual
2"/1¼" nose piece:
The maximum insertion depth
is 34.8 mm if a polarising lter
is tted, or 40 mm as supplied. Longer
eyepieces may only be operated with an
additional 2"/1¼" reducer or a 2" stop ring
#2958027, i.e. using the eyepiece's 1¼"
nose piece. Otherwise they would sit on the
top lter.

12 Manual: Cool-Ceramic Safety Herschel Prism Mark II
Bino-viewers on the Safety-Cool-Ceramic Herschel prism
Due to their large optical length of about 11 cm, bino-viewers cannot usually be
operated on the 2" eyepiece clamp of the Herschel prism (or on a 2" star diagonal). In
combination with one of our bino viewers (MaxBright, MaxBright II, Mark V), the Her-
schel prism requires a very large backfocus of about 225 mm (about 110 mm for the
bino viewer and 115 mm for the Herschel prism, plus the focusing reserve depending
on the focus position of the eyepieces and dioptric compensation). In most cases, mo-
dern telescopes have a backfocus of about 150 to 180 mm. The combination therefore
does not come into focus in most cases. You therefore need a glass path corrector
that extends the focal length of your telescope and at the same time compensates for
the colour error of the binocular approach on fast optics.
The overall length of the Herschel prism can also be reduced by 30 mm by replacing
the eyepiece clamp.
The following values can be used as a basis for the necessary backfocus of the Her-
schel prism and the binocular attachment:
Herschel prism
plus bino-viewer
+ 1.25x
Glaspath
corrector
+ 1.7x
Glaspath
corrector
+ 2,6x
Glaspath
corrector
With 2" Clicklock®225 mm 190 mm 175 mm 105 mm
With T-2-Adapter
# 2957202
195 mm 165 mm 130 mm 75 mm
Please note that these are approximate values that also depend on the dioptric cor-
rection setting.
You can easily determine the available backfocus of your refractor as follows.
Point your refractor without eyepiece at the moon and hold a white sheet of paper
behind it. The focuser must be fully retracted. Move the sheet in the air until the moon
is in focus. Then measure the distance between the 2" eyepiece clamp on the refractor
and the sheet of paper.
The measured value is the real backfocus of your telescope
Bino viewer with glasspath corrector and 2"/1,25" nose piece
Especially with the 2.6x glass path corrector you will come into focus in most cases,
even with the Clicklock®clamp. It is simply placed in the 1¼" or 2" nosepiece as de-
scribed in the instructions for your bino viewer. At the same time, it extends the focal
length by a factor of 2.6x, which is no disadvantage on the Sun: in the sky, the Sun
appears about 0.5° large and thus still ts completely into the image even at a higher
initial magnication. A telescope with 1000 mm focal length and 2.6x glass path cor-
rector has an effective focal length of 2600 mm. A 32 mm Plössl with 50° eld of view
still provides a 0.6 degree eld of view at 81x magnication on such a telescope.
Direct adaptation of a bino viewer with a glasspath corrector
For longer focal length telescopes or to use existing glass path correctors, you can
also attach the bino viewer directly to your Herschel prism. For this you need the
Diamond Steeltrack®T-2 adapter # 2957202, which replaces the 2" ClickLock®clamp.
To do this, proceed as described from page 16 in the chapter "Shortening the const-
ruction length".

© Baader Planetarium GmbH | 2023 13
Our bino viewers are equipped
with either Zeiss ring dovetail (Mark
V) or T-2 coupling nut (MaxBright I).
The MaxBright II can be used with
either the T-2 coupling nut or the
ring dovetail. We recommend using
the ring dovetail, as this allows the
glass path correctors 1.25x and
1.7x to be mounted directly in the
bino and makes handling much
more convenient.
For bino viewers with Zeiss ring
dovetail, proceed as follows:
Remove the Clicklock®clamp as described on page 8 and replace it with the Dia-
mond Steeltrack®T-2 adapter # 2957202. Screw the T-2 quick changer (TQC heavy
duty T-2 quick changer # 2456313A or T-2 standard quick changer with Zeiss micro
bayonet # 2456313) to the T-2 thread of # 2957202. Now you can attach the large eld
binocular to the T-2 changer.
The glasspath correctors 1.25x and
1.7x are screwed into the ring dovetail
located on the bino viewer as usual
without the black centering ring.
The glass path corrector 2.6x
is placed in the S58/T-2 adapter
# 2957202. It is then only held in
place by the ring dovetail of the at-
tached binocular. If there is sufci-
ent backfocus, you can also x the black centering ring
with a T-2 intermediate ring 7.5mm # 1508155 and leave
it installed.
For bino-viewers with T-2 thread, proceed as follows:
The optical length with a T-2 coupling nut is only slight-
ly shorter than with a T-2 quick coupler. Therefore, all the
information given above applies accordingly. However,
the bayonet quick coupler is omitted.
In this case, the glass path corrector is always placed
in the S58/T-2 adapter # 2957202 (the at collar points
to the binocular, the lens mount to the telescope) and
clamped through the binocular. Now the black centring
ring can be removed, if necessary, and the binocular
attached to the Herschel prism. If there is sufcient
backfocus, you can also insert the glass path corrector
into a T-2 extension ring 7.5 mm # 1508155 and leave
the centring ring inserted.
The glasspath correctors for bino-
viewers with T-2-thread and the 2.6x
glasspath corrector are simply placed
into the T-2-adapter. The may be fixed
with T-2 extension 7,5mm # 1508155.
The 1,25x and 1,7x glasspath correctors can be mounted in the
bino-viewer's dovetail. On the right is the Herschel prism with
T-2 quick-changer.
The ClickLock®can be replaced with the S58/T-2-adapter
# 2957202. The Filterholder remains at the Herschel prism

14 Manual: Cool-Ceramic Safety Herschel Prism Mark II
Attaching a camera
Cameras with a long ange focal length, such as digital
SLR cameras with a 55 mm ange focal length, do
not usually come into focus, as most refractors are
designed to use these cameras without an additional
star diagonal. In this case, you have to remove the 2"
ClickLock®and replace it with the Diamond Steeltrack®
T-2 adapter # 2957202 with an optical length of 2 mm.
To do this, proceed as described in the chapter "Shor-
tening the overall length".
Astronomical cameras with a 1¼" or 2" nose piece
can usually be used behind the Herschel prism without any problems.
Cameras with a T-2 thread can be used directly on the Herschel prism with the
Baader 2" / T-2 (M48) nosepiece with Safety Kerfs # 2458130. Alternatively, as when
using a DSLR, you can remove the 2" ClickLock®and screw the camera directly to
the Herschel prism via the Diamond Steeltrack®T-2 adapter # 2957202, optical length
2mm, or via an optional T-2 quick release.
The FFC Fluorite Projection Lens System on the CCS Herschel Prism Mark II.
Attention: Use FFC only with great care!
There is a risk of damage to the FFC and loss of warranty.
Probably the world's best projection lens for planetary projection photography is our
Fluorite Flateld Corrector (FFC), which allows a focal
length extension of 3x to 8x.
Together with the Cool-Ceramic Herschel prism,
this enables amazingly high-resolution images of the
solar surface.
However, utmost care is required to avoid overhe-
ating the sensitive FFC lenses made of real uorite
crystal (no ED glass!). A crack in a uorite lens due to
excessive heat exposure can be detected by expert
examination and a warranty claim is excluded. Repair
or replacement of uorite lenses is very expensive.
Firstly, in order to reliably prevent overheating,
at least an ND 3.0 lter or (with a greatly reduced
exposure time) an attenuating glass 1.8 or 0.9 must
always be mounted in the housing of the Herschel
prism (in front of the FFC).
For all types of solar projection photography, it is
tempting to simply remove all the ND lters from the
CCS Herschel prism in order to literally "freeze" the
turbulence in the Earth's atmosphere with the help of
the resulting extremely short exposure times around
3 ms.
Possible configuration for the FFC
Camera with T-
2-thread
Optional:TQC/TCR Heavy
duty T-2 Quick Changing
System
# 2456322
Optional:TQC/TCR Heavy
duty T-2 Quick Changing
System
# 2456322
3x T-2 Extension 40mm
# 1508153
FFC
# 2458200

© Baader Planetarium GmbH | 2023 15
However, this means an extraordinarily rapid, shock-like heat increase for the sen-
sitive uorite crystal and an enormous heat load on all optical components above the
Herschel prism (including the image sensor!). Nevertheless, this type of projection
photography is becoming increasingly popular and, thanks to state-of-the-art mounts
with extreme positioning accuracy and slew speeds of up to 20°/s, it is also possible.
For this type of photography, the telescope may practically only be pointed directly at
the sun for the length of the exposure time (a maximum of 5 seconds in total), and we
cannot accept any liability for the equipment connected to the focuser.
However, we expressly recommend that observers who do not specialise in solar
photography always leave the visually mounted 2" lters in the CCS Herschel prism for
safety's sake!
UFC filter drawers
You can insert a UFC lter drawer between the eyepiece clamp and the rotating lter
holder, for example to quickly switch between solar continuum lters for white light
and the calcium lter during photography.
For this you need either
• Diamond Steeltrack®M48 adapter # 2957204, optical length 1 mm plus
Baader UFC S70 / M48 (w) telescope adapter (height: 1 mm) # 2459129 or
• Diamond Steeltrack®T-2 adapter # 2957202, optical length 2 mm plus
Baader UFC S70 / T-2 (w) telescope adapter (height: 1 mm) # 2459130
as well as
• Baader UFC base, telescopic S70 dovetail (height: 13 mm) # 2459110 and
• a matching UFC camera adapter for your camera, like Baader S52 dovetail Camera-
Adapter for Wide-T-rings (optical height: 2 mm) # 2459119, Baader UFC T-2 (m)
Camera-Adapter (optical height: 2 mm) # 2459115 or Baader UFC M48 (m) Camera-
Adapter (optical height: 2 mm) # 2459116
and of course the matching lter drawers. For T-2 and M48, there are also quick-chan-
gers available, to easily rotate or remove the camera.
Herschel prism with UFC filter drawer and T-2-thread
(left) and an additional T-2 quick changer (right)

16 Manual: Cool-Ceramic Safety Herschel Prism Mark II
Shortening the overall length for connecting long accessories
The overall length of the Herschel prism can be shortened by 28-29 mm by replacing
the 30 mm long 2" eyepiece clamp with one of the Diamond Steeltrack®S58 adapters.
A connection thread is then available directly on the prism housing.
Many manufacturers of refractors do not design the focal point position behind the
end of the focuser with a large enough allowance to connect alternative accessories
from other suppliers. In particular, SLR cameras with 55 mm ange focal length usually
do not come into focus behind a 2" star diagonal or the Herschel prism: To avoid vig-
netting caused by the retracted focuser, the telescopes are designed so that a DSLR
can only come into focus without additional accessories.
In this case, the S58 adapters to T-2, M48 or M68 described on page 6 are the solu-
tion to shorten the mechanical length of the Herschel prism by 28-29 mm by removing
the 2" ClickLock®clamp and still attach the absolutely necessary 2" ND 3.0 lter and
the 2" solar continuum lter at the same place directly above the Herschel prism in the
beam path.
To connect, proceed as follows, using the T-2 adapter # 2957202 as an example:
1. Remove the 2" ClickLock®eyepiece clamp
by unscrewing the six hexagon socket
screws with the 1.3 mm hex key. It is not
necessary to unscrew them completely. The
lter holder with the lters remains mounted
in the Herschel prism.
2. Place the S58 adapter on the rotating lter
holder, hand-tighten the six hexagon socket
screws. The T-2 thread now sits ush with
the housing and can be used.
3. Example: Connecting a camera with a T-2
thread.

© Baader Planetarium GmbH | 2023 17
4. Example: A DSLR with an interchangeable
lens can be connected directly to the T-2
thread via a T-2 ring.
Under certain circumstances, the camera's
ash shoe may bump against the Herschel
prism. In rare cases, another short T-2 exten-
sion (or a quick release) is necessary.
5. With a T-2 quick-change system (# 2456322
or # 2456321, overall length 15 mm), a bino
viewer can be connected directly, or other
accessories such as camers and eyepiece
clamps can be quickly exchanged or aligned.

18 Manual: Cool-Ceramic Safety Herschel Prism Mark II
The Herschel prism for Advanced Users
Solar photography in calcium light
In the dark blue spectral range, around
400 nanometres, photospheric ares
in the vicinity of sunspots, which can
only be observed visually in white light
near the edge of the sun, can also be
made visible further towards the centre
of the sun. To do this, the contrast of
are areas near the edge is dramatically
increased with the Baader calcium lter
# 2961590. This lter, with a half-width of
about ve nanometres, only lets through
the emission lines of calcium.
To use this very narrow band lter, you
should replace the ND3 lter with a wea-
ker lter to achieve a sufciently bright
image. Try the ND1.8 rst before trying even weaker lters if necessary. The Solar
Continuum lter and any polarising lters must also be removed.
Please note: Since the human eye is virtually blind in the spectral range below
420nm, visual observation is not possible. Only cameras can be used as sensors –
preferably astronomical cameras or video modules.
It is a mystery to us why competitors offer "CaK" telescopes for visual use, while
every tanning salon is legally obliged to warn against looking directly into UV-A radiati-
on. Nothing else happens when one visually observes the calcium line below 400 nm.
To take advantage of the high quality of the Baader calcium lter in combination with
a Herschel prism, the refractor objective should also be of high quality (apochromatic).
Simple double-lens achromatic objectives are usually very poorly colour-corrected in
the blue spectral range, so that no sharp images can be obtained in this spectral range
with them.
Infrared pass filter
While focal photography of the whole sun has few problems with air turbulence
(seeing) due to short exposure times and low magnication, projection photography
presents a different picture. The larger the equivalent focal
length, the longer the exposure time. This greatly increases the
susceptibility to seeing effects.
Seeing effects are wavelength-dependent
– stronger in the short-wave spectral range
(blue), less in the long-wave spectral range
(red). Therefore, it can be worthwhile – espe-
cially when shooting with video modules and
long focal lengths – to use a very dark red lter
to completely block the short-wave part of the
spectrum. Ideally suited is the Baader IR pass
Calcium-line-image of the sun. Monochrome camera at
Celestron ED80/600 with Herschel prism, ND1,8-filter und
Baader Calcium-filter # 2961590

© Baader Planetarium GmbH | 2023 19
lter (1¼": # 2458386; 2": # 2458386),
which is also popular in planetary
photography and signicantly reduces
seeing effects there as well. To use an
IR pass lter, the Solar Continuum Filter
must be removed. The lter can only be
used photographically.
TriBand and other telescopes
Even though we wrote in this manual
that the Herschel prism is only meant
for refractors, there are two exceptions:
The Baader TriBand Schmidt-Cassegrain telescopes and Schiefspiegler telescopes.
The Baader TriBand SCT are modied Schmidt-Cassegrain telescopes with 8", 9¼"
and 11" apertures that have an energy protection lter integrated into the Schmidt
corrector plate. Originally designed for high-resolution H-alpha observation with So-
larSpectrum or Baader SunDancer lters,
the special coating also allows deep-sky
narrowband photography and solar ob-
servation with a Herschel prism. Since the
TriBand coating is not transparent at 540
nm, the SolarContinuum must be remo-
ved and replaced with an ND or polarising
lter if necessary.
Schiefspiegler telescopes are somewhat
out of fashion and are not currently in series production. However, they are the only
reecting telescopes that are obstruction-free and can provide sufcient backfocus for
a Herschel prism. Please refer to the operating instructions of your telescope to nd
out whether your model is suitable for solar projection or a Herschel prism, or whether,
for example, correction lenses close to the focus prevent this use.

20 Manual: Cool-Ceramic Safety Herschel Prism Mark II
Observing Techniques
It is particularly appealing to observe a complete solar cycle over its course of about
11 years. The last minimum with a virtually spotless sun was in 2019/2020, since when
the number of spots has been increasing again, probably ending at a spotless Sun
again in 2031.
Hints and tips
Especially for solar observations, seeing (air icker/air turbulence) plays a major role
because the atmosphere heats up strongly during the day, especially in summer.
Depending on the observation site, there is a specic daily curve of seeing conditions
(good and bad). Experience shows that there are two times of day when the seeing
conditions are mostly passable; namely in the morning (before the atmosphere has
heated up) and late in the afternoon (before sunset) when the atmosphere cools down
slowly and continuously.
Furthermore, the line of sight towards the sun is important. If you look at the sun over
an evenly vegetated area (park, meadow, water surface), the seeing conditions will be
better than if you observe over "chaotically" built-up areas (houses, etc.).
As mentioned above, for regular solar observations it is important to determine the
best seeing conditons for your own observing site.
Two further points to improve the seeing conditions – and thus the image quality:
• Use the Solar Continuum Filter as described above.
• During observation breaks, the telescope should not be pointed directly at the sun,
so that the objective, the air column in the tube and also the Herschel prism can
cool down.
Visual observation
Rim darkening
Rim darkening of the sun is a constant solar
phenomenon and is immediately noticeable
when the entire disk of the sun is observed in
the telescope in an overview. Rim darkening
occurs because the sun consists of hot gas
whose temperature decreases towards the
surface. In the centre of the observed solar
disk, deeper, hotter regions can be seen,
which radiate more strongly. Towards the
edge, on the other hand, we are looking at
less hot and therefore also less bright layers. If
the sun were a solid body, no darkening of the
edges would be observed.
Table of contents
Other Baader Planetarium Camera Accessories manuals

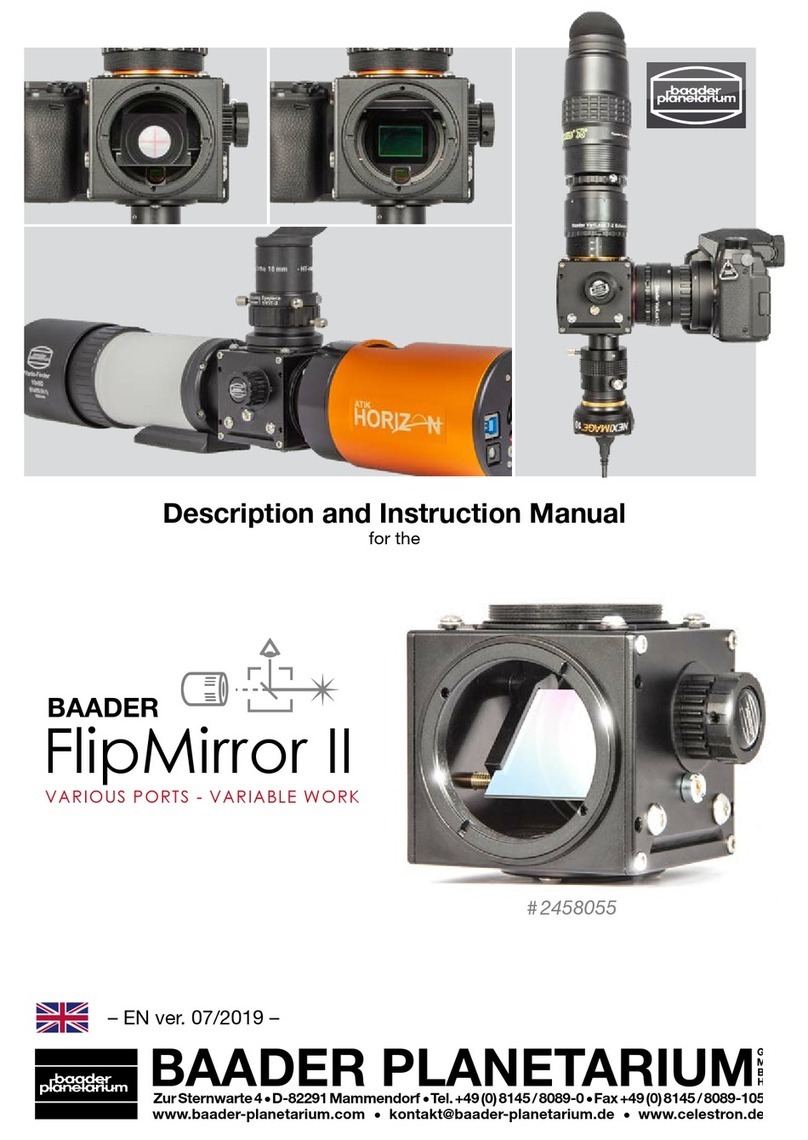
Baader Planetarium
Baader Planetarium FlipMirror II User manual

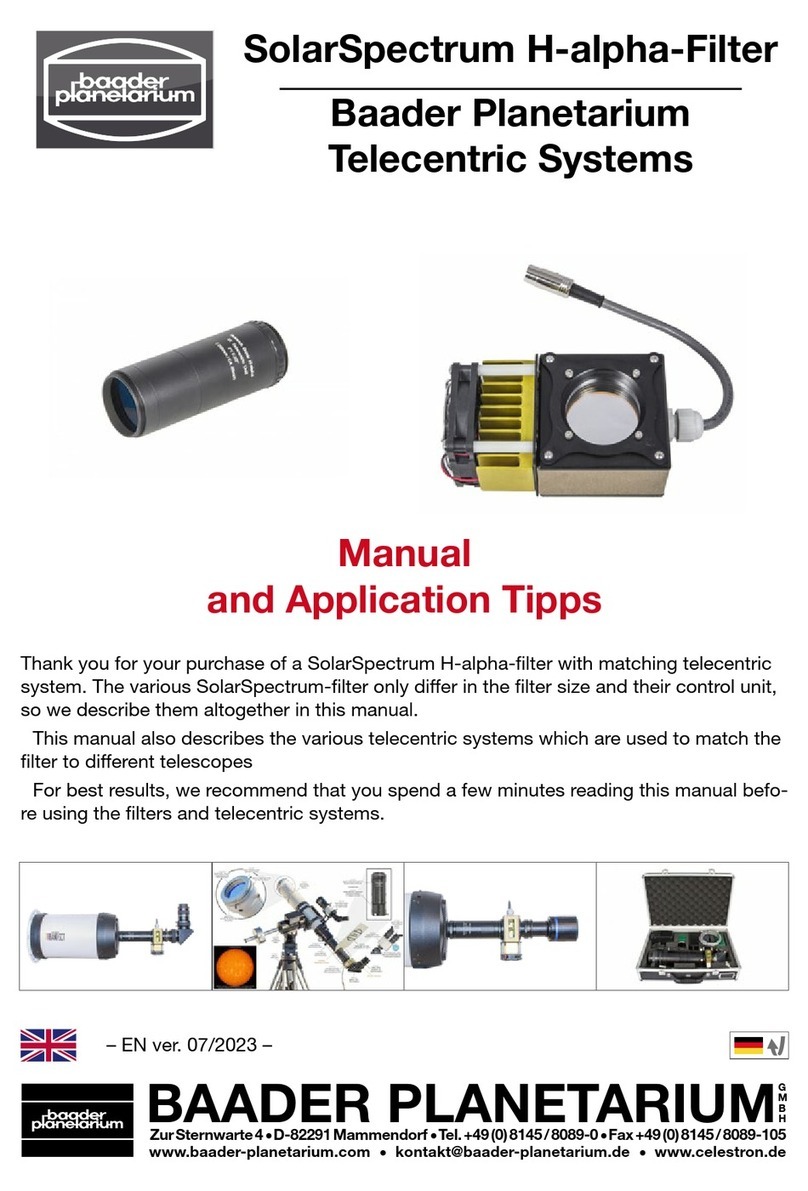
Baader Planetarium
Baader Planetarium SUNDANCER II User manual

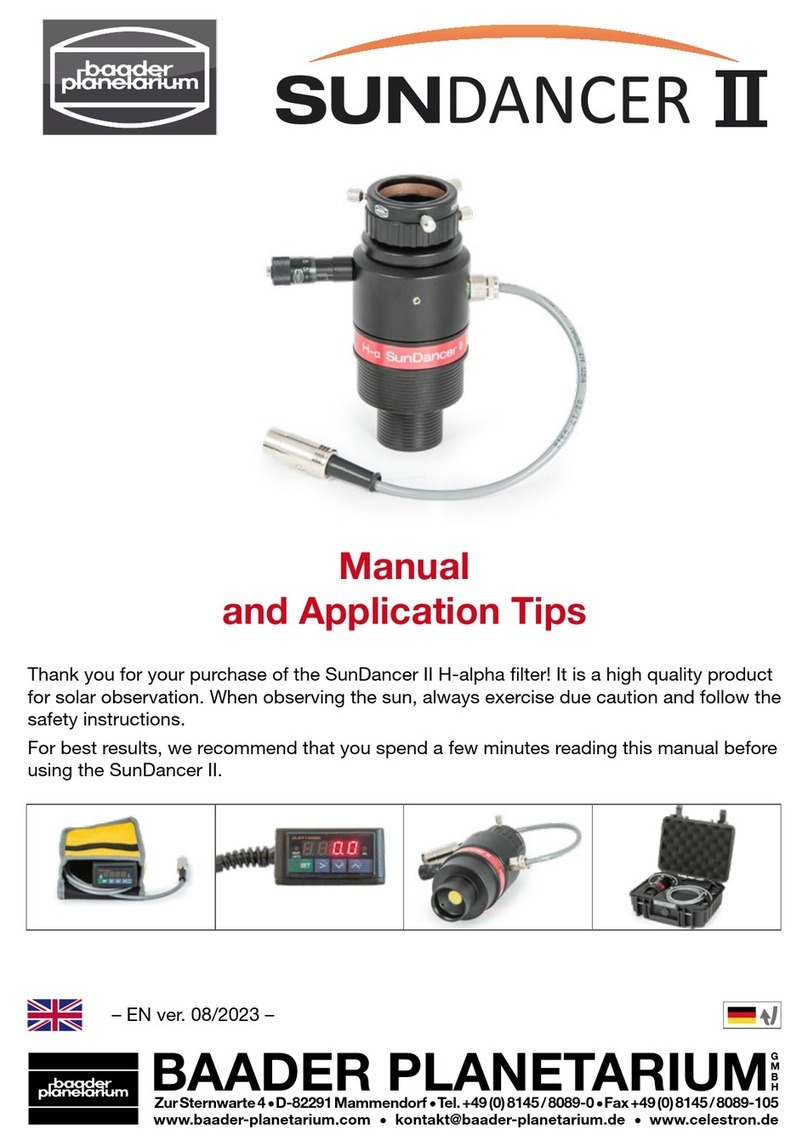
Baader Planetarium
Baader Planetarium FCT I User manual

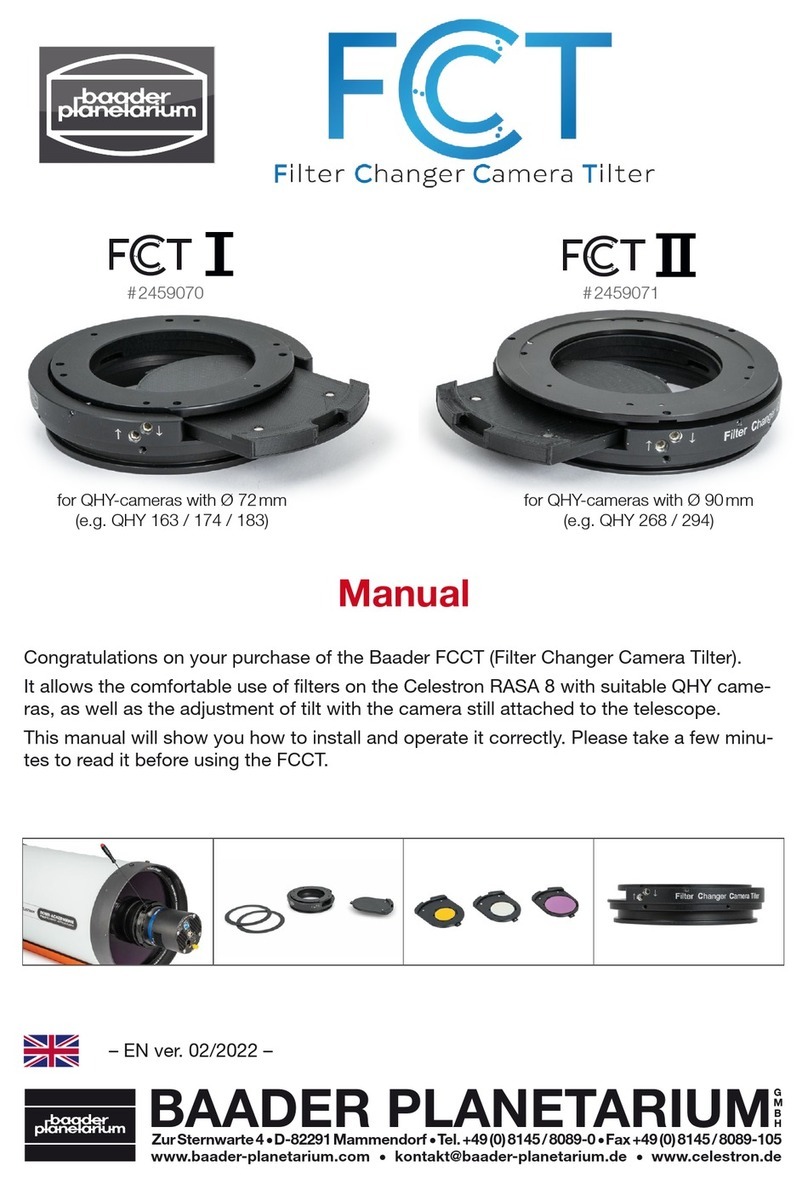
Baader Planetarium
Baader Planetarium SolarSpectrum RG18 User manual

Baader Planetarium
Baader Planetarium 2958550 User manual

Baader Planetarium
Baader Planetarium MicroStage II User manual

Baader Planetarium
Baader Planetarium Astro & Nature User manual