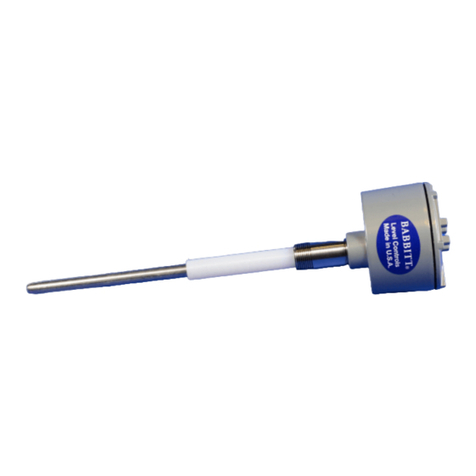
BABBITT LS8500 User manual

LS8500 Presence/Absence Switch
OWNERS MANUAL
♦INSTALLATION
♦CALIBRATION
♦TROUBLESHOOTING
♦WARRANTY
P.O. Box 70094
Houston, TX 77270
(713) 467-4438

www.babbittinternational.com Reference Manual
2021
2
This manual contains important information necessary for the proper operation of this product. Before installing the
unit, please read these instructions and familiarize yourself with the requirements and functions of this device.
Any use or distribution of this document without express consent of Babbitt International, Inc. is prohibited. Any
reproduction is prohibited without written permission.
In no event will Babbitt International, Inc. be liable for any mistake, including lost profits, lost savings, environmental
compliance cost or other incidental or consequential damages or injury arising out of the use or inability to use this
manual. Terms and conditions found on our website at www.babbittinternational.com contain additional liability
limitations related to this product.
If any questions or problems arise during installation, please contact
Customer Service: 1-800-835-8012 or 713-467-4438 (8:00 a.m. to 5:00 p.m. CST US)
Failure to follow safe installation and servicing guidelines could result in death or serious injury.
Make sure only qualified personnel perform the installation.
Use the equipment only as specified in this manual. Failure to do so may impair the protection provided by the
equipment.
Do not perform any services other than those contained in this manual unless you are qualified.
Verify the operating environment of the Babbitt LS8500 is consistent with the appropriate area classification.
Improper use or installation of this device may cause the following:
Personal injury or harm.
Application hazards such as pump run dry and/or burnt pumps.
Damage to the device or system.
High voltage that may be present on leads could cause electrical shock.
Make sure the main power to the Babbitt LS8500 presence/absence switch is off and the lines to any other
external power source are disconnected or not powered while wiring the instrument.
WARNING
NOTICE

www.babbittinternational.com Reference Manual
2021
3
Table of Contents
1. DESCRIPTION ................................................................................................................................................................. 4
1.1 General Description................................................................................................................................................. 4
1.2 Specifications........................................................................................................................................................... 4
1.3 Ordering Information .............................................................................................................................................. 5
1.4 GA Drawing.............................................................................................................................................................. 6
1.5 Sensor Rings ............................................................................................................................................................ 6
2. THEORY OF OPERATION ................................................................................................................................................ 7
3. INSTALLATION ............................................................................................................................................................... 7
3.1 Inspection ................................................................................................................................................................ 7
3.2 Bench Test ............................................................................................................................................................... 7
3.3 Mounting................................................................................................................................................................. 8
3.3.1 Partial-Ring Flange Location ...................................................................................................................... 8
3.3.2 Full-Ring Flange Location........................................................................................................................... 8
3.3.3 Full Faced Gaskets & Flanges..................................................................................................................... 8
3.4 Physical Installation............................................................................................................................................... 10
3.4 Grounding.............................................................................................................................................................. 10
3.5 Ground Continuity Test ......................................................................................................................................... 10
3.6 Installing the Receiver ........................................................................................................................................... 11
3.7 Typical Applications & Wiring Diagrams: .............................................................................................................. 12
4. CALIBRATION ............................................................................................................................................................... 16
4.1 Sensitivity Calibration –Conductive Materials...................................................................................................... 16
4.2 Sensitivity Calibration –Non-Conductive Materials.............................................................................................. 17
4.3 Time Delay............................................................................................................................................................. 18
4.3 Setting the Time Delay .......................................................................................................................................... 18
4.5 Fail Safe Selection.................................................................................................................................................. 18
5. MAINTENANCE AND TROUBLESHOOTING .................................................................................................................. 19
6. WARRANTY .................................................................................................................................................................. 20

www.babbittinternational.com Reference Manual
2021
4
LS8500 PRESENCE/ABSENCE SWITCH
1. DESCRIPTION
1.1 General Description
The LS8500 is an adjustable, radio frequency impedance sensing device, which can be used to detect the
presence or absence of material in a pipe. The basic unit is made up of a solid stainless-steel flange attached to
an explosion proof housing. Inside the explosion proof housing is a transmitter that is connected to the receiver
board by a twisted, shielded pair of wires. The receiver board may be mounted up to one mile from the sensor
flange. All calibration adjustments and indicators are at the receiver. The receiver also has the relay output and
an on-board fuse. The unit is calibrated in the absence of material and an on-board relay at the receiver
changes state when material is detected.
1.2 Specifications
Electrical
Power: 115 VAC (±15%) 50/60 Hz. 2 watts, standard.
(12 VDC, 24 VDC or 230 VAC optional)
Output: 2 Form C contacts, DPDT relay, 5 amp resistive
at 125, 250 VAC; 30 VDC
Fuse: On board, 250 mA @ 125 volts
Fail Safe: Selectable high or low level
Time Delay: Selectable: ON or OFF delay
Adjustable: 1/8 sec to 2 hours
RF Frequency: Approximately 1.3 MHz
Environmental
Enclosure: Transmitter: Cast Aluminum; Class I, Groups C & D; Class II,
Groups E, F & G
Receiver: Open printed circuit board can be put in
enclosure as required by application.
Temperature: Probe: -30° F to 180° F**
Electronics: -40° F to 185° F
Pressure: Probe: 200 PSI @ 75° F**
(**Higher ranges available upon request)
Construction: Probe: All wetted parts, 316 SS Teflon (or UHWMPE) and Viton.
Transmitter: Housed in cast aluminum explosion proof enclosure
Receiver: Printed circuit board mounted on plastic track provided
with each unit.
Specifications subject to change without notice.

www.babbittinternational.com Reference Manual
2021
5
1.3 Ordering Information
LS8500 -115VAC - FP - 4” 150# - PR
Model #
(LS8500)
Power Supply:
(115VAC 24VDC 12VDC 220VAC)
Sensor Type:
(FP-Flange Probe)
Sensor Size:
Flange Model:
(PR-Partial Ring or FR-Full Ring)

www.babbittinternational.com Reference Manual
2021
6
1.4 GA Drawing
Figure 1-1
1.5 Sensor Rings
Figure 1-2

www.babbittinternational.com Reference Manual
2021
7
2. THEORY OF OPERATION
The LS8500 employs a radio frequency (RF) balanced impedance bridge circuit to detect if the sensing
element is in contact with the material that is to be sensed. When material is not in contact with the sensing
element, the bridge is balanced by turning the adjustment pot to find the threshold where the red led goes out.
When material is in contact with the sensing element, the bridge becomes unbalanced and the comparing
circuit realizes the change. This causes the relay to change state.
3. INSTALLATION
3.1 Inspection
Carefully unpack the LS8500 from the shipping box and check each item against the packing list before
destroying any packing material. Visually inspect for any damage that may have occurred during shipping.
Please advise the factory or your local distributor of any damage.
A complete unit should consist of the following:
1. An explosion proof enclosure with flange attached
2. A transmitter module in the explosion proof enclosure
3. The LS8000/R receiver card
4. A plastic snap track to mount the receiver card
3.2 Bench Test
*THIS IS AN EXCELLENT TIME TO TEST AND BECOME FAMILIAR WITH THE TIME DELAY
IF IT IS TO BE USED IN YOUR APPLICATION. (See calibration instructions, section 7.1 and 7.2)
On the bench, hook up the appropriate power to L1 and L2. The operating voltage of the LS8500 is
marked on the power supply board. Hold the unit so that nothing is touching the flange sensing element.
Turn the sensitivity POT CW (right) until the RED LED comes on, then CCW until the RED LED goes
out. Touch the sensing element and the RED LED should come on. This simulates product touching the
sensing element. If a timing mode has been selected it will operate as if installed.
NOTE: The timing mode can be adjusted when checking the unit, but the sensitivity adjustment
MUST BE MADE AFTER the unit is installed where it will be used.
CAUTION: ALL INSTALLATION AND WIRING MUST CONFORM TO NEC AND ALL
OTHER LOCAL ELECTRICAL CODES. TAKE SPECIAL CARE IN OBSERVING
HAZARDOUS AREA SAFETY PROCEDURES. WE ASSUME NO LIABILITY FOR
IMPROPERLY INSTALLED OR WIRED UNITS.

www.babbittinternational.com Reference Manual
2021
8
3.3 Mounting
3.3.1 Partial-Ring Flange Location
The LS8500 is most commonly used for protection of positive displacement pumps in conductive
(water based) media. It is best to install the flange sensor in a position such that fluid will be touching
the sensing element when the pump is running and not touching the sensing element when the pump is
off. Refer to Figure 1-2 for location of the sensing element. When possible, it is preferred that the
sensor flange be mounted in a segment of vertical pipe as close as possible to the inlet side of the
pump or other device to be protected.
If the LS8500 is mounted in a segment of horizontal pipe, it should be located as close as possible to
the inlet side of the pump or other device to be protected. The housing/NPT of the LS8500 should be
in the 12 o’clock position for 1”-6” flanges and 11 o’clock or 1 o’clock position for flange sizes 7”
and greater. Due to the small size of the sensing element, it is particularly important that larger flanges
(7” and above) be mounted in the 11 o’clock or 1 o’clock position.
The flow of material inside a pipe can be difficult to predict, however experience has shown certain
locations to be better than others. Refer to Figures 3-1 to 3-6 as examples of problematic locations
and preferred locations. Areas to avoid include immediately before or after a 90-degree bend –vertical
or horizontal pipe. In some cases, these areas have created air pockets, thus turning the pump off. In
other cases, these areas have led to excess buildup, leaving pumps to run when they should have been
turned off.
3.3.2 Full-Ring Flange Location
Full-ring sensor flanges are primarily used for non-conductive media, such as oils and hydrocarbons.
These sensor flanges can be mounted in either a vertical or horizontal pipe, preferably as close to the
pump inlet as possible. The full ring sensors do not have to be oriented in the 12 o’clock position due
to the fact that the sensor element circles the entire diameter of the flange. Refer to Figure 1-2 for
the sensing element location
3.3.3 Full Faced Gaskets & Flanges
A full-faced type gasket should be used on each side of the sensor flange. This will help prevent
material build up around the sensing area inside the flange.
NOTE: The sensor flange is designed to mate against full-faced gaskets and full-faced pipeline
flanges. These gaskets should have the same inside diameter as the inside diameter of the pipeline.
Mating against raised-faced flanges and gaskets could cause cracking and improper sealing of the
inner insulator ring of the sensor. Improper gaskets may result in leakage of material inside the
flange causing the pump to run dry and/or into the housing resulting in damage to the electronic
boards.

www.babbittinternational.com Reference Manual
2021
9
SENSOR FLANGE MOUNTING

www.babbittinternational.com Reference Manual
2021
10
3.4 Physical Installation
1) Install the LS8500 Presence/Absence into a recommended or “correct” section of pipe as outlined in
Figures 3-1 to 3-6.
2) Position the orientation of the flange sensor as noted –refer to Section 3.3.1 Partial-ring or Section
3.3.2 Full-ring.
3) Mount the sensor between two 150# or 300# flat faced flanges (raised faced only if ordered raised
face). For use with other flanges contact factory.
4) Use full face gaskets compatible with the process material –refer to Section 3.3.3.
5) Tighten the flange bolts evenly to insure a proper seal.
a) All bolts should be put in place and evenly hand tightened.
b) All bolts should be tightened in 10 ft-lb increments using a star pattern.
c) Torque all bolts to 50ft-lb max.
6) The LS8500 has a ¾” NPT conduit entry. When wiring these units, conform to the National Electrical
Code and any other city or company codes.
7) Always install the electrical connection into the ¾” NPT on the LS8500 so water will not follow the
connection routing into the threads of the ¾” NPT hub. To guarantee that condensation and water will
stay outside the unit, install an EYSM unilet before each LS8500 and fill with explosion proof sealing
cement.
CAUTION: Always take the necessary safety precautions when cutting or welding.
a) Tag and lock out the electrical power to the equipment that services the vessels.
b) Check liquid or dry powders that create a gas in the vessel for oxygen as well as the
explosion factor. (All dust will explode.)
c) Vessels that are cross vented have to be isolated.
3.4 Grounding
Proper installation of the LS8500 is critical to help ensure reliable operations. The most important
installation consideration is a proper sensor ground return. If the vessel is non-metallic (i.e. plastic or
plastic lined), a separate ground return must be provided. In such case, the ground return must consist of a
separate metal mounting flange, installed into a pipeline, adjacent to the sensor flange. A ground wire must
be installed between the ground screw on the sensor flange and the ground screw on the metal ground
flange, as shown in Figure 3-7.
3.5 Ground Continuity Test
Refer to Figure 3-7 below.
1) Turn power to LS8500 off.
2) Use ohm meter on lowest scale to check following:
a) Point A to B –less than 1 ohm
b) Point B to C (both ends of metal pipeline) –less than 1 ohm
c) Plastic Pipeline ONLY –Point B to D –less than 1 ohm

www.babbittinternational.com Reference Manual
2021
11
Figure 3-7
3.6 Installing the Receiver
The receiver is a printed circuit board measuring 3” x 4 ½”. It is mounted in a plastic snap track that is
provided with each unit. The snap track can be mounted in existing control panels or enclosures can be
ordered from the factory.
1) Attach the snap track to the panel back pan or other surface using 2 small screws or a suitable
adhesive.
2) Snap the LS8000/R (same as LS8500) receiver card into the snap track.
3) Connect shielded cable to the 3 terminals marked G, S, +. (see page 13 for wiring diagram)
4) Connect the proper supply voltage and relay output wiring for your application. (see page 12)

www.babbittinternational.com Reference Manual
2021
12
3.7 Typical Applications & Wiring Diagrams:
5 AMP RELAY CONTACTS
SUPPLY VOLTAGE
NOTE: EACH LS8000/R RECEIVER IS INTENDED FOR ONLY SUPPLY VOLTAGE –THIS VOLTAGE
IS PRINTED ON THE POWER SUPPLY BOARD.
FOR 115VAC OR 230VAC UNITS HOOK UP THE HOT LEAD TO L1 AND THE NEUTRAL TO L2,
WITH APPROPRIATE GROUND.
FOR 12 VDC OR 24 VDC UNITS, HOOK THE POSITIVE VOLTAGE TO L1 AND THE COMMON OR
GROUND TO L2.
NOTE: LS8000 AND LS8500 ELECTRONIC COMPONENTS ARE INTERCHANGABLE.

www.babbittinternational.com Reference Manual
2021
13

www.babbittinternational.com Reference Manual
2021
14

www.babbittinternational.com Reference Manual
2021
15

www.babbittinternational.com Reference Manual
2021
16
4. CALIBRATION
4.1 Sensitivity Calibration –Conductive Materials
NOTE: The green LED indicates relay status. The relay is energized when the green LED is on

www.babbittinternational.com Reference Manual
2021
17
4.2 Sensitivity Calibration –Non-Conductive Materials
NOTE: The green LED indicates relay status. The relay is energized when the green LED is on.

www.babbittinternational.com Reference Manual
2021
18
4.3 Time Delay
The purpose of the time delay is to allow the pump to prime itself or ignore voids in the process for a
preset period of time. The time delay is adjustable between 1/8 second to 2 hours. If no time delay is
required, turn the time adjustment pot completely CCW and set S1 down, S2 up. The potentiometer has
20 turns and freewheels at the end of its travel without damage. You may hear “clicks” at the end of
travel.
4.3 Setting the Time Delay
1) Setting the timing mode, either on delay or off delay, is done by positioning S3 and S4 as shown in the
chart below.
NOTE: S3 and S4 also select fail safe high level (FSH) or fail safe low level (FSL).
2) Select the timing range using S1 and S2 as shown on the chart below.
3) Adjust the time adjustment potentiometer clockwise to increase time or CWW to decrease until the
exact time delay is reached. The test switch may be depressed to start the timing when checking timing
sequence.
NOTE: For long timing ranges you can set the timer for a shorter range, then
change the range switches (S1 and S2) to increase the time. For example, the desired
time delay is 15 minutes. This is equal to 900 seconds. By setting S1 down and S2 up
and adjusting the timer to approximately 28 seconds, the ratio on this range is 1. To
increase this range by 32, move S1 up and S2 up. 32x28 seconds equals approximately
15 minutes.
4.5 Fail Safe Selection
The failsafe feature provides a “false alarm” in case of power outage or major component failures. When
properly selected, the failsafe feature can protect equipment or alert you of a unit failure. Fail Safe High
(FSH) means that the relay is energized when NO PRODUCT is touching the sensing element. The green
led indicates relay status and is on when the relay is energized. When product comes into contact with the
sensing element, the relay is de-energized. Fail Safe Low (FSL) means that the relay is energized when
PRODUCT IS touching the sensing element.
NOTE: Due to the wide variety of applications and possible control or alarm functions, the proper fail
safe selection will depend on your circumstances. Please call your distributor or the factory if
you need assistance.

www.babbittinternational.com Reference Manual
2021
19
5. MAINTENANCE AND TROUBLESHOOTING
No routine maintenance is required other than keeping the interior of the unit clean and free of dirt, dust and
other contaminants. The LS8500 consists of three main sub-assemblies. These are the enclosure with the
flange sensor, the transmitter module and the receiver card. The following troubleshooting guide will assist in
determining how to correct most of the problems which may occur in the field. Review the Installation and
Calibration procedures in sections 3 and 4.
PROBLEM POSSIBLE CAUSE SOLUTION
RED LIGHT cannot be Transmitter module not connected Plug transmitter into flange.
adjusted to turn on. to flange.
No power to unit. Check for correct power.
Blown on-board fuse. Replace fuse.
Bad receiver card. Repair or replace card.
RED LED remains on at all Flange is shorted to ground. Unplug banana plug and position
times. it so that the bare end is not
touching anything. Turn calibration
Pot 20 turns CCW. LED should go
out. If it does, repair, replace or
clean flange. If LED does not go out,
replace electronics.
Check shielded cable for proper
connection.
Check shielded cable for shorts or
open circuits.
Unit triggers when material Improper mounting of flange. Contact factory or distributor.
touches sensing element, Improper calibration procedure. See Section 4.1 or 4.2
but will not reset when Excessive material build-up on Perform “dirty pipe calibration”;
material recedes from sensing element. recalibrate with built up material
sensing element / unit and on sensing element. See section 4.1
gives false alarm. or 4.2
Unit will not detect material. Improper calibration. See calibration instructions,
Section 4.
Transmitter module not plugged Plug transmitter module into probe.
into probe. Be sure material is not touching
Unit was calibrated with material sensing element and recalibrate.
touching sensing element.
Unit will not stay in Poor grounding of transmitter Provide secure ground connection.
calibration housing to vessel.
Continued Next Page…..

www.babbittinternational.com Reference Manual
2021
20
PROBLEM POSSIBLE CAUSE SOLUTION
Relay operates properly, but Burned or broken lands on receiver Turn off power. Remove module
no signal at terminals. printed circuit board. from housing and inspect lands
On printed circuit for damage.
Replace if necessary.
Bad relay contacts. Replace relay or return for repair.
PLEASE CONTACT THE FACTORY OR YOUR DISTRIBUTOR IF YOU HAVE ANY QUESTIONS
OR NEED ASSISTANCE. Customer Service: 1-800-835-8012 or 713-467-4438 (8:00 a.m. to 5:00 p.m.
CST US)
6. WARRANTY
All components of the LS8500 are warranted to be free from defects in material and workmanship for a
period of two years from the date of purchase. This warranty applies to general purchaser and to
components installed, serviced and operated according to instructions.
Babbitt International, Inc. will repair or replace, at its option, FOB at its plant or any other location
designated, any part which proves to be defective in manufacture or workmanship.
All claims must be made in writing within the warranty period. No claims outside of the warranty period
will be honored.
Warranties are not applied to any components which have been damaged by improper installation, use,
exposure to unusual atmospheric conditions or components which have been misused, abused, damaged
by neglect or accident. This warranty shall not apply to any components which have been altered or
repaired without the prior written consent of Babbitt International, Inc.
Babbitt International, Inc. assumes no responsibility or liability for any labor or material back charges,
without written authorization. Any products returned must be with prior written authorization.
THE FOREGOING IS IN LIEU OF ALL OTHER WARRANTIES, EXPRESSED OR
IMPLIED,INCLUDING ANY WARRANTIES OF MERCHANTABILITY AND/OR FOR FITNESS FOR
PARTICULAR PURPOSE, AND BABBITT INTERNATIONAL, INC. ASSUMES NO OTHER
LIABILITIES EXPRESSED OR IMPLIED. BABBITT INTERNATIONAL, INC. SHALL NOT BE LIABLE
FOR NORMAL WEAR AND TEAR, NOR FOR DIRECT, INCIDENTIAL OR CONSEQUENTIAL
DAMAGES. IN NO EVENT SHALL BABBITT INTERNATIONAL INCORPORATED’S LIABILITY
EXCEED THE PRICE OF ITS PRODUCT AT THE TIME OF PURCHASE.
Other manuals for LS8500
1
Table of contents
Other BABBITT Switch manuals

BABBITT
BABBITT LS8000/2 User manual

BABBITT
BABBITT LS8000 User manual

BABBITT
BABBITT LS7000 User manual

BABBITT
BABBITT LS2000 User manual

BABBITT
BABBITT LS6000 User manual

BABBITT
BABBITT LS7500 User manual

BABBITT
BABBITT LS7000 User manual

BABBITT
BABBITT LS7500 User manual

BABBITT
BABBITT LS7000/2 User manual

BABBITT
BABBITT LS8500 User manual