BABBITT LS8000/2 User manual

L
LS
S8
80
00
00
0/
/2
2
L
LE
EV
VE
EL
L
S
SW
WI
IT
TC
CH
H
O
OW
WN
NE
ER
RS
S
M
MA
AN
NU
UA
AL
L
♦
♦
I
IN
NS
ST
TA
AL
LL
LA
AT
TI
IO
ON
N
♦
♦
C
CA
AL
LI
IB
BR
RA
AT
TI
IO
ON
N
♦
♦
T
TR
RO
OU
UB
BL
LE
ES
SH
HO
OO
OT
TI
IN
NG
G
♦ W
WA
AR
RR
RA
AN
NT
TY
Y
BABBITT
INTERNATIONAL, INC.
P.O. Box 70094
Houston, Texas 77270
(713) 467-4438

TABLE OF CONTENTS
Page
1. Description -------------------------------------------------------------- 1
A. General Description ----------------------------------- 1
B. Specifications -------------------------------------------- 2
C. Ordering Information ----------------------------------- 2
2. Theory of Operation -------------------------------------------- 3
3. Installation-------------------------------------------------------------- 3
A. Inspection ----------------------------------------------------- 3
B. Physical Installation -------------------------------------------- 3
C. Installing the Receiver ----------------------------------- 12
D. Typical Applications and Wiring Diagrams ----------------- 4-11
4. Calibration -------------------------------------------------------------- 12
A. Set Switches 1 and 2 for FSH or FSL ----------------- 12
B. Setting POR and LATCH Dip Switches ----------------- 12
C. Calibrate the Low Setpoint----------------------------------- 13
D. Calibrate the High Setpoint -------------------------- 13
E. 2 Probe Calibration-------------------------------------------- 13
5. Maintenance and Troubleshooting -------------------------- 14
6. Warranty -------------------------------------------------------------- 15

LS8000/2 DUAL POINT
LEVEL SWITCH
1. DESCRIPTION
A. General Description
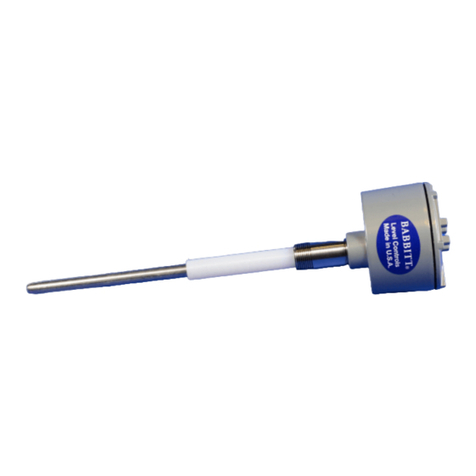
The LS8000/2 dual point level switch is designed to sense material at two points in a tank, hopper or sump. The
unit consists of a receiver which may be remote mounted from the sensing probe(s).
The receiver is designed to work in 4 different modes:
1. Sense 2 points along a vertically mounted probe and maintain a level between them. (Fig 1A)
2. Control 2 separate probes in the same tank and maintain a level between them.( Fig 2A)
3. Control 2 probes in different locations. (Fig 3A)
4. Four set points on one probe. (See page 10 )
The receiver has 3 SPDT 5 amp relays for control: one relay for the high set point, 1 for the low setpoint and a
latching relay for automatic filling or emptying between the 2 setpoints. The latching relay would not be used if
configured as Fig. 3A.
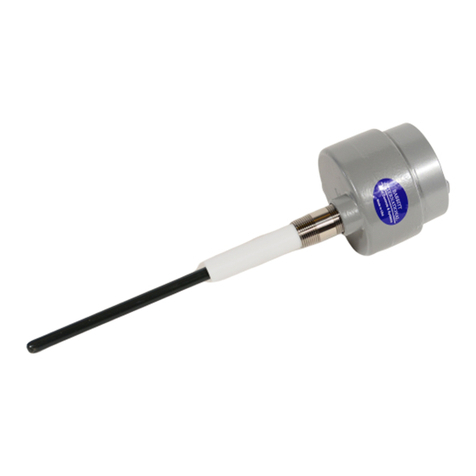
Whenever the LS8000/2 is used in the “2 points or 4 points on 1 probe” configuration, a coated probe (not bare
steel rod) must be used.
1

B. Specifications
Electrical
Power: 115 VAC (±15%) 50/60 Hz. 3 watts,
standard.
(12 VDC, 24 VDC or 230 VAC optional)
Output: 3 relays, each with 1 form C contact, SPDT,
10 amp resistive at 115 vac, 8 amp at 220
VAC, 5 amp at 30 VDC
Fuse: On board, 250 mA
RF Frequency: Approximately 700 KHz
Environmental
Hazardous Area: Class I, Group C & D, Class II, Group E, F
and G
Receiver: open printed circuit board can be
put in enclosure as required by application.
Temperature: Probe: -30° F to 400° F (Higher on request)
Electronics: -40° F to 185° F
Pressure: Probe: 1500 psi @ 75° F. (Higher ranges available on request).
Construction: Probe: All wetted parts, 316 SS, Teflon and Viton. (A coating is applied in
some applications to the 316SS probe.)
C. Ordering Information
2

2. THEORY OF OPERATION
The LS8000/2 employs a radio frequency (RF) balanced impedance bridge circuit to detect the level of material
along a vertically mounted probe.
As the fluid level rises along the probe, the output of the bridge changes proportionally to the fluid level. The
setpoint potentiometers determine at what level the circuit detects the low and high setpoints.
The receiver may also control 2 independent probes in the same or different tanks. Each probe has a separate
transmitter and is connected to the receiver with a twisted, shielded pair of wires.
3. INSTALLATION
*CAUTION: ALL INSTALLATION AND WIRING MUST CONFORM TO NEC AND ALL OTHER
LOCAL ELECTRICAL CODES. TAKE SPECIAL CARE IN OBSERVING HAZARDOUS AREA
SAFETY PROCEDURES. WE ASSUME NO LIABILITY FOR IMPROPERLY INSTALLED OR
WIRED UNITS.
A. Inspection
After unpacking the LS8000/2, visually inspect the unit for any damages.
Please advise the factory or your local distributor of any damage.
A complete unit should consist of the following:
1. An explosion proof enclosure(s) with probe(s) attached.
2. A transmitter module in each explosion proof enclosure.
3. The LS8000/2/R receiver card.
4. A plastic snaptrack to mount the receiver card.
B. Physical Installation of Transmitter Module and Probe
1) The LS8000/2 is installed into the vessel wall using a ¾” NPT connection. This can be either a threaded
coupling or a tapped entry such as a flange.
2) The teflon insulator should always extend at least 2” through the vessel wall.
3) Always check for physical room around the location you have chosen to allow for installation. Allow 2 ¾”
turning radius to screw the probe in and clearance above for the length of the probe.
4) CAUTION: Always take the necessary safety precautions when cutting or welding in the
coupling for the LS8000/2.
a) Tag and lock out the electrical power to the equipment that services the vessels.
b) Check liquid or dry powders that create a gas in the vessel for oxygen as well as the explosion factor.
(All dust will explode.)
c) Vessels that are cross vented have to be isolated.
5) Screw the LS8000/2 into the connection provided. In dry material application, no sealant on threads is
required. In liquid, Teflon or a good pipe thread sealant may be used.
6) The LS8000/2 has a ¾” NPT conduit entry. When wiring these units, conform to the National Electrical
Code and any other city or company codes.
7) Always install the electrical connection into the ¾” NPT conduit entry so water will not follow the
connection routing into the threads of the conduit hub. To guarantee that condensation and water will stay
outside the unit, install a EYSM unilet before each LS8000/2 and fill with explosion proof sealing cement
8) When required, the LS8000/2 probe can be bent to meet your special application. Remember to allow 2” of
clearance between the probe and the vessel wall. If the probe is to be used in a pressure application, the
factory must bend the probe to your specifications.
9) Location of probes on high level installations is more critical on dry material than liquids. Note the
following:
a) For dry materials, mount the LS8000/2 in the top of the vessel whenever possible. (This allows you to
lengthen the probe if necessary.)
b) Avoid mounting the LS8000/2 near the product inlet, vent return lines, dust collectors and vessel
discharge openings on dry materials. Turbulence around these areas can cause erratic detection unless
the probe is long enough. On old installations it might be wise to fill the vessel first to determine the
length or location of the probe.
CAUTION: Always take safety precautions before opening vessels inspection.
c) On gravity filled vessels, take into consideration the angle of repose formed by the product.
d) When using the LS8000/2 to stop the flow by means of a butterfly valve or knifegate, make sure the
probe is long enough to allow time to close these slow moving valves.
e) In small vessels where a good location is hard to find, it may be necessary to put a baffle plate between
the probe and the product inlet to keep product off of the probe as it fills.
3
4

5

6

7

8

9

10

11

C. Installing the Receiver
The receiver is a printed circuit board measuring 3”x6”. It is mounted in a plastic
snap track that is provided with each unit.
The snap track can be mounted in existing control panels or enclosures may be
ordered from the factory.
1) Attach the snap track to the panel back pan or other surface using 2 small screws or a suitable adhesive.
2) Snap the LS8000/2/R receiver card into the snap track.
3) Connect shielded cable to the 3 terminals marked GND, SIG, V+. (See page for wiring diagram.)
4) Connect the proper supply voltage and relay output wiring for your application. (See page ___.)
NOTE: All wiring must conform to the National Electric Code or other enforcing authorities that
apply in your area.
D. Typical Applications and Wiring Diagrams Follow
1. LS8000/2 Terminal Layout Page 4
2. Receiver Card Page 5
3. Ladder Diagrams Page 6-9
4. CALIBRATION
There are two methods of using the LS8000/2 RECEIVER, with one probe or with
two probes. If your application uses a single probe with 2 setpoints follow
instructions “A” through “D”.
If your application uses 2 separate probes in the same tank for “Auto Fill” or “Auto
Empty”, use steps A, B and E.
If your application uses 2 separate probes in 2 different tanks and you are not using
the latching relay, use steps A and E.
PLEASE READ THE ENTIRE CALIBRATION PROCEDURE BEFORE CALIBRATING THE
LS8000/2.
There are 4 adjustments required to set the LS8000/2:
A) Set switches 1 and 2 for “FSH” or “FSL”
B) Set switches “POR” and “LATCH”
C) Calibrate the low setpoint
D) Calibrate the high setpoint
E) 2 probe calibration
A. Set Switches 1 and 2 for “FSH” or “FSL”
The fail safe feature provides a “false alarm” in case of power outage or major component failure. When
properly selected, the fail safe feature can protect equipment or alert you of a unit failure.
1. Fail Safe High (FSH) means that the relay is energized when NO PRODUCT is touching the probe. The
green LED indicates relay status and is on when the relay is energized. When product comes into contact
with the probe, the relay is de-energized.
2. Fail Safe Low (FSL) means that the relay is energized when PRODUCT IS touching the probe.
NOTE: Due to the wide variety of applications and possible control or alarm functions, the
proper fail safe selection will depend on your circumstances, please call your distributor or the
factory if you need assistance.
Switch 1 selects FSH or FSL for setpoint 1 relay. Switch 2 selects this function for setpoint 2 relay. Simply
toggle the dip switch toward the FSH or FSL marking on the LS8000/2 receiver card.
B. Setting “POR” and “LATCH” Dip Switches
Switches “POR” and “LATCH” are 2 of the 4 dip switches on the LS8000/2 sensing card.
“LATCH” selects automatic fill or automatic empty.
“AUTOMATIC FILL” is when the latching relay energizes below the low setpoint and de-energizes at the high
setpoint.
“AUTOMATIC EMPTY” is when the latching relay energizes at the high setpoint and de-energizes below the
low setpoint.
The green LED indicates relay status. The green LED is on when the relay is energized.
When “LATCH” is UP, “AUTOMATIC FILL” is selected.
When “LATCH” is DOWN< “AUTOMATIC EMPTY” is selected.
12

“POR” is used to select the “POWER-ON-RESET” mode of the LS8000/2 if the supply voltage should be
interrupted while the fluid level is between the low and high setpoints. If the unit should lose power, and the
level is between the setpoints, the LS8000/2 can not “remember” if it was filling or emptying at the time of
power loss. By properly setting “POR” for your application, the relay will either energize or de-energize when
power is restored to the unit. If the fluid level is below the low setpoint or above the high setpoint, “POR” has
no effect on the operation of the unit.
The following chart will help you set “POR” and “LATCH”:
POR LATCH FILL/EMPTY
Latching Relay Status Power On Reset
UP UP AUTO FILL RELAY OFF
DOWN UP AUTO FILL RELAY ON
DOWN DOWN AUTO EMPTY RELAY OFF
UP DOWN AUTO EMPTY RELAY ON
C. Calibrate the Low Setpoint
There are two ways to calibrate the low setpoint. Method “A” puts the setpoint on the bottom tip of the probe.
Method “B” is for applications where the low setpoint needs to be above the tip of the probe.
METHOD “A”
1. When material IS NOT in contact with the probe, observe the red LED for the low setpoint. If it is
on, go to step 3.
2. If the red LED for the low setpoint is off, turn the low adjustment potentiometer (SP1) CW
(clockwise) until it comes on.
3. Turn the low adjustment potentiometer (SP1) CCW (counter-clockwise) until the low red LED
just goes out.
METHOD “B”
1. Raise the fluid level to where you want the low setpoint to be on the probe.
2. Observe the red LED for the low setpoint. If it is off, go to step 4.
3. If the red LED is on, turn the low adjustment potentiometer (SP1) CCW until the red LED goes
out.
4. Turn the low adjustment potentiometer CW until the low red LED just comes on.
D. Calibrate the High Setpoint
As a rule of thumb, clockwise (CW) rotation of the pot lowers the setpoint; counter-clockwise (CCW) rotation
of the potentiometer raises the setpoint.
1) Raise the fluid level to where you want the high setpoint to be on the probe.
2) Observe the high red LED. If it is off, go to step 4.
3) If the high red LED is on, turn the high adjustment pot (SP2) CCW until the high red LED goes out.
4) Turn the high adjustment pot (SP2) CW until the high red LED just comes on. This adjustment must be
made very carefully.
NOTE: Always fill and empty the vessel to verify the accuracy of the calibration. Repeat the above
procedure if necessary. Contact your local distributor or the factory if you have any questions.
E. 2 PROBE CALIBRATION
If you are using 2 transmitters and probes, they are both calibrated the same way.
SP1 potentiometer calibrates the transmitter and probe hooked to S1 terminal
and the output is setpoint 1 relay.
SP2 potentiometer calibrates the transmitter and probe hooked to S2 terminal
and the output is setpoint 2 relay. The following should be done to SP1 and SP2 independently WHEN NO
MATERIAL IS IN CONTACT WITH THE PROBE.
1. Observe the red LED next to the potentiometer you are setting. If it is on, go to step 3.
2. If the red LED is off, turn the potentiometer CW until it comes on.
3. Turn the potentiometer CCW until the red LED just goes out. If this is too sensitive for your application
you can turn the potentiometer ¼ to 1 turn further CCW to make the probe less sensitive.
NOTE: Always fill and empty the vessel to verify the accuracy of the calibration. Repeat the above
procedure if necessary. Contact your local distributor or the factory if you have any questions.
13

5. MAINTENANCE AND TROUBLESHOOTING
No routine maintenance is required other than to keep the interior of the unit clean and free of dirt, moisture and
other contaminants.
The LS8000/2 consists of three main sub-assemblies. These are the enclosure with the antenna probe, the
transmitter module and the receiver card. The following troubleshooting guide will assist in determining how to
correct most of the problems, which may occur in the field. Review the installation and calibration procedures in
sections 3 and 4.
PROBLEM POSSIBLE CAUSE SOLUTION
RED LED cannot be adjusted to
turn on.
Transmitter module not connected
to probe.
No power to unit.
Blown on board fuse.
Bad receiver card.
Plug transmitter into probe.
Check power to unit.
Replace fuse.
Repair/replace card.
RED LED remains on at all times Antenna probe is shorted to case
or ground.
Shielded cable not correctly
hooked up.
Shielded cable broken or shorted.
Unplug module and position it so
that the bare end is not touching
anything. Turn calibration pot 25
turns CCW. LED should go out.
If so, repair, replace or clean
antenna probe.
Check shielded cable for proper
connection.
Check shielded cable for shorts or
open circuits.
Unit triggers when material
touches probe, but will not reset
when material recedes from probe
or unit and gives false alarm.
Improper mount of probe.
Improper calibration procedure.
Excessive material build-up on
probe.
Contact factory or dist.
See section 4C.
Perform “dirty probe calibration”:
Recalibrate with built up material
on probe. See section 4C.
Unit will not detect material. Improper calibration.
Transmitter module not plugged
into probe.
Unit was calibrated with material
touching probe.
See calibration section 4.
Plug transmitter module into
probe.
Recalibrate without anything
touching probe.
Unit will not stay in calibration. Poor grounding of transmitter
housing to vessel.
Provide secure ground connection.
Fluid must be grounded to
mounting nipple of probe.
Grounding rod may be necessary
for non-metallic or rubber lined
tanks.
Relay operates properly, but no
signal at terminals.
Burned or broken lands on
receiver printed circuit board.
Bad relay contacts.
Turn off power. Remove module
from housing and inspect lands on
printed circuit for damage.
Replace as necessary.
Replace relay or return for repair.
PLEASE CONTACT THE FACTORY OR YOUR LOCAL DISTRIBUTOR IF YOU
HAVE ANY QUESTIONS OR NEED ASSISTANCE.
14

6. WARRANTY
All components of the LS8000/2 are warranted to be free from defects in material and workmanship for a
period of two years from the date of purchase. This warranty applies to general purchaser and to
components installed, serviced and operated according to instructions.
Babbitt International, Inc. will repair or replace, at its option, FOB at its plant or any other location
designated, any part which proves to be defective in manufacture or workmanship.
All claims must be made in writing within the warranty period. No claims outside of the warranty period
will be honored.
Warranties are not applied to any components which have been damaged by improper installation, use,
exposure to unusual atmospheric conditions or components which have been misused, abused, damaged
by neglect or accident. This warranty shall not apply to any components, which have been altered or
repaired without the prior written consent of Babbitt International, Inc.
Babbitt International, Inc. assumes no responsibility or liability for any labor or material back charges,
without written authorization. Any products returned must be with prior written authorization.
THE FOREGOING IS IN LIEU OF ALL OTHER WARRANTIES, EXPRESSED OR IMPLIED,
INCLUDING ANY WARRANTIES OF MERCHANTABILITY AND/OR FOR FITNESS FOR
PARTICULAR PURPOSE, AND BABBITT INTERNATIONAL, INC. ASSUMES NO OTHER
LIABILITIES EXPRESSED OR IMPLIED. BABBITT INTERNATIONAL, INC. SHALL NOT BE
LIABLE FOR NORMAL WEAR AND TEAR, NOR FOR DIRECT, INCIDENTIAL OR
CONSEQUENTIAL DAMAGES. IN NO EVENT SHALL BABBITT INTERNATIONAL
INCORPORATED’S LIABILITY EXCEED THE PRICE OF ITS PRODUCT AT THE TIME
OF PURCHASE.
15
Table of contents
Other BABBITT Switch manuals

BABBITT
BABBITT LS7500 User manual

BABBITT
BABBITT LS8500 User manual

BABBITT
BABBITT LS8000 User manual

BABBITT
BABBITT LS7000 User manual

BABBITT
BABBITT LS7500 User manual

BABBITT
BABBITT LS8500 User manual

BABBITT
BABBITT LS2000 User manual

BABBITT
BABBITT LS6000 User manual

BABBITT
BABBITT LS7000/2 User manual

BABBITT
BABBITT LS7000 User manual