manuals.online logo
Brands
  1. Home
  2. •
  3. Brands
  4. •
  5. Baby Style
  6. •
  7. Stroller
  8. •
  9. Baby Style Prestige User manual

Baby Style Prestige User manual

Primary features
Fitting/Removing the wheels
Adjusting the handle position
Using the parking brake
Unfolding the chassis
Folding the chassis
Folding the chassis with the seat unit fitted
Fitting/Removing the Pram body
Fitting/Removing the seat unit
Adjusting the pram body back rest
Pram body ventilation hood
Lowering the pram body hood
Operating the rocking rails
Fitting the bumper barFitting the bumper bar
Adjusting the footrest
Fitting the apron
Adjusting the seat unit backrest
Prestige harness
Using the safety harness
Car seat options
Fitting/Removing the car seat to/from the chassis
Care and maintenance
Warranty
4 - 5
6
6
7
8
9
10
10
10
11
12
12
12
13
1313
14
14
15
15
16
17
17 - 18
17 - 18
19
20
Handle grip
Safety Clip
Parking brake
Unfolding sliders
Handle height
adjustment
Ventilated hood
window
Wheel release
bar
Shopping
basket
Attachment Device
To adjust the handle position; Stand in the pushing
position, simultaneously press in the adjustment buttons
located on the outside of each side of the chassis handle,
rotate handle to one of the pre-set positions.
Fitting/Removing
the wheels
Press and hold wheel
release bar
To fit the wheels; Turn the chassis on its side; locate the
black button which forms the centre of the wheel, Image 1
and 2. Press the metal release bar attached to this button
inwards as shown by the arrow in image 2 and hold,
gently slide the wheel onto the axle as far as it will go,
release the button, and pull the wheel away from the
chassis until it clicks into position. Ensure the wheels are
securely fitted before use by trying to pull them away from
the chassis. To remove the wheels; Press the metal
release bar, hold in position and pull the wheel away from
the chassis.
To engage the parking brake; firmly press down
the brake bar with your foot. Check that the brake
is fully engaged before letting go of the handle.
Avoid uphill or downhill parking. To release the
brake, lift the brake bar up with your foot until the
wheels move freely.
Press and hold in
buttons on either
side of handle
Rotate handle
1. 2.
3.
Remove any packing and place out of the reach of
children. To unfold the chassis; apply the parking brake,
pull the handle upwards and over following the direction
of the arrows. Check that the chassis has fully locked into
place.
Pull back sliders
simultaneously
in the direction
of the arrow to
release the folding
mechanism
Lift the chassis
safety clip to
release the
chassis to fold
Push in direction
of arrow to fold
2.
3. 4.
1.
The Prestige can be folded with the seat unit facing
either forwards or backwards. For both methods adjust
the seat unit back rest into the lie-flat position, then
follow the process outlined in the section titled ‘Folding
the Chassis’.
To fit the pram body unit; Locate the attachment
devices on each side of the pram body. Line up with the
attachment assemblies on the chassis and lower the
carrycot down until the devices engage and you hear
a click.
To fit the seat unit; Locate the attachment
devices on each side of the seat unit. Line up with the
attachment assemblies on the chassis and lower the
seat unit down until the devices engage and you hear
a click.
To remove the pram body: Locate the attachment
devices on either side of the pram body and squeeze the
release button while lifting away from the chassis.
To remove the seat unit: Locate the attachment
devices on either side of the seat unit and squeeze the
release button while lifting away from the chassis.
The Prestige pram body
has a ventilated hood
window which is
concealed under the flap
at the back of the hood.
To expose the window
lift up the flap.
lift up the flap.
The Prestige pram body rocking rails can be
operated by rocking the pram body from end to end
whilst positioned on the floor. To stabilise the pram
body and cease rocking, locate the stabilising
feet on the pram body base and rotate outwards.
Push the bumper bar into the attachment slots located
on the front of the seat unit until you hear a click. To
remove the bumper bar press the bumper bar release
buttons on either side of the seat unit and pull bumper
bar away.
The pram body hood can
be lowered (reclined
backwards) by simply
pushing it back to the
desired position. To erect
the hood; lift up the hood
until it clicks into position.
The Prestige pram body has a multi-position back rest.
To adjust the pram body back rest; Firstly pull back
the pram body safety mattress. Locate the multi-position
height adjusting mechanism on the pram body internal
base. Lift the plastic back rest and locate the support
bar. Place the support bar in one of the pre-set positions
in the back rest support device, replace the mattress.
12 13
To increase the height of the seat unit footrest;
pull the rest upwards. Locate the footrest support
lever on the side of the footrest and pull it in the
direction of the arrow as shown in image 2. To lower
the footrest; rotate it downwards to the desired position.
To recline the seat unit; locate the lever towards the
top back of the seat unit. Lift the lever and hold in
position whist repositioning the backrest to the pre-set
positions. When the seat backrest is in the required
position, release the lever and the seat will lock into
position.
To fit the pram body or seat unit apron; Locate the
poppers on the apron and press into the
corresponding poppers on the pram body/seat unit. Centre
harness
buckle
Shoulder
strap
& buckle
Shoulder
strap
& buckle
Waist belt
& buckle
Waist belt
& buckle
Pull
Lift
The chassis is compatible with the Prestige matching
car seat and Maxi Cosi Pebble/Cabrio Fix/Citi car seats.
A car seat does not replace a cot or a bed.
To fit the car seat to the chassis (adaptors required);
lower the adapter into the attachment assembly on
both sides of the chassis. Lower the car seat on to the
adapters until you here a click. Ensure the car seat is
secure by trying to lift the car seat away from the
chassis
To remove the car seat from the chassis; Locate the
release buttons on the car seat (left and right). Press
the release buttons and lift the car seat away from the
chassis.The car seat adapters can now be removed
by pressing the release button on the inside of the
adapter while pulling the adapter away from the
chassis.
chassis.

Other Baby Style Stroller manuals

Baby Style Oyster Atom User manual

Baby Style

Baby Style Oyster Atom User manual

Baby Style hyBrid swivel S User manual

Baby Style

Baby Style hyBrid swivel S User manual

Baby Style OYSTER User manual

Baby Style

Baby Style OYSTER User manual

Baby Style TS2 User manual

Baby Style

Baby Style TS2 User manual

Baby Style Oyster2 User manual

Baby Style

Baby Style Oyster2 User manual

Baby Style LUX SBD User manual

Baby Style

Baby Style LUX SBD User manual

Baby Style Lux 3 in 1 User manual

Baby Style

Baby Style Lux 3 in 1 User manual

Baby Style Oyster Zero User manual

Baby Style

Baby Style Oyster Zero User manual

Baby Style OYSTER 2 OY2 User manual

Baby Style

Baby Style OYSTER 2 OY2 User manual

Baby Style OYSTER User manual

Baby Style

Baby Style OYSTER User manual

Baby Style Qyster 3 User manual

Baby Style

Baby Style Qyster 3 User manual

Baby Style OYSTER MAX OM2 User manual

Baby Style

Baby Style OYSTER MAX OM2 User manual

Baby Style EGG User manual

Baby Style

Baby Style EGG User manual

Baby Style OYSTER User manual

Baby Style

Baby Style OYSTER User manual

Baby Style Oyster lite 2 Oyster Air S673 User manual

Baby Style

Baby Style Oyster lite 2 Oyster Air S673 User manual

Baby Style Oyster twin lite User manual

Baby Style

Baby Style Oyster twin lite User manual

Baby Style OYSTER User manual

Baby Style

Baby Style OYSTER User manual
Baby Style light'nmove User manual

Baby Style

Baby Style light'nmove User manual

Baby Style Hybrid 2 User manual

Baby Style

Baby Style Hybrid 2 User manual
Baby Style OYSTER User manual

Baby Style

Baby Style OYSTER User manual
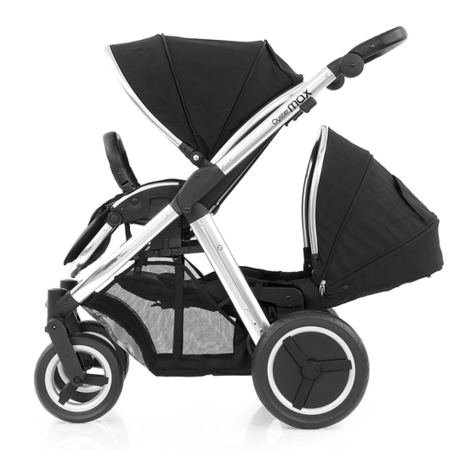
Baby Style hyBrid ezyfold S116 User manual

Baby Style

Baby Style hyBrid ezyfold S116 User manual

Popular Stroller manuals by other brands

Harmony Litewave instruction manual

Harmony

Harmony Litewave instruction manual

Bugaboo Bee6 manual

Bugaboo

Bugaboo Bee6 manual

Britax B-Ready instruction manual

Britax

Britax B-Ready instruction manual

BEBE CONFORT loola Instructions for use & warranty

BEBE CONFORT

BEBE CONFORT loola Instructions for use & warranty

Hauck Malibu XL Instructions for use

Hauck

Hauck Malibu XL Instructions for use

Noordi Polaris City Instructions for use

Noordi

Noordi Polaris City Instructions for use

Hartan VIP instructions

Hartan

Hartan VIP instructions

Joie litetrax E instruction manual

Joie

Joie litetrax E instruction manual

Graco Baby Strollers owner's manual

Graco

Graco Baby Strollers owner's manual

Nuna Pepp instructions

Nuna

Nuna Pepp instructions

Peg-Perego seggiolino pop-up Instructions for use

Peg-Perego

Peg-Perego seggiolino pop-up Instructions for use

Britax B-AGILE 4 PLUS User instructions

Britax

Britax B-AGILE 4 PLUS User instructions

BOB Revolution owner's manual

BOB

BOB Revolution owner's manual

Stokke Scoot user guide

Stokke

Stokke Scoot user guide

Hartan VIP GTS instructions

Hartan

Hartan VIP GTS instructions

CUGGL Elder Twin Pushchair Assembly & user instructions

CUGGL

CUGGL Elder Twin Pushchair Assembly & user instructions

Chariot Carriers Cavalier owner's manual

Chariot Carriers

Chariot Carriers Cavalier owner's manual

Chicco trioLove manual

Chicco

Chicco trioLove manual

manuals.online logo
manuals.online logoBrands
  • About & Mission
  • Contact us
  • Privacy Policy
  • Terms and Conditions

Copyright 2025 Manuals.Online. All Rights Reserved.