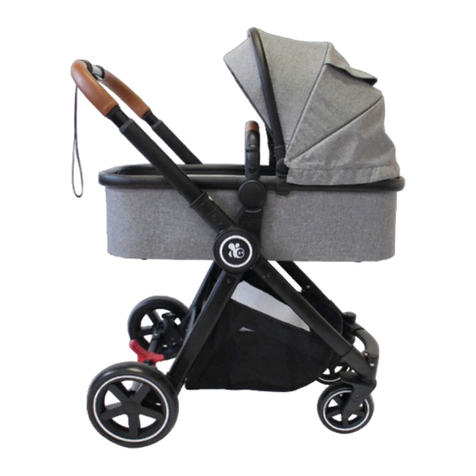
Babybee Comet plus User manual

Comet plus
www. babybeeprams.com.au
Please keep this manual for future reference
babybee prams

2
Hello!
Thanks for choosing the babybee Comet plus. Before you get
started, there’s a few quick things we’d like you to note:
Return Policy
babybee offers a 9 month free
return policy. A condition of this
policy is that we will only accept
returns where the product is
in its original condition (with
no signs of usage) and in all
original packaging including
box, protective plastics and
cardboard so please be mindful
of this when unboxing and
setting up your pram.
Warranty
All of our prams come with a
12 month warranty to cover
against faults in materials and
workmanship when used under
normal conditions, according
to our manuals and technical
specications. Please refer to
page 39 for further information.
Support
If at any stage you require any
assistance with setup or use,
please rst refer to our After
Sales Support page on our
website which has a variety of
instructional videos and FAQ’s.
Keep in touch
We love nothing more than
seeing our customers with the
Comet plus in action so we
hope you connect with us soon
via one of our social media
channels. And don’t forget
there are prizes to be won each
month for simply tagging your
pram photos #babybeeprams
Enjoy the ride,
From all of us at babybee

3
What’s in the box 04
Get to know your Comet plus: Terminology 05
Step One: Install the brake and wheels 06
Collapsing the frame 10
Step Two: Attach the bassinet to the frame 12
Step Three: Attach the canopy 17
Rear brake, adjusting the handlebar and front swivel wheels 19
Switching from bassinet to stroller seat 22
Seat position and 5 point safety harness 27
Setting up your bassinet 30
Setting up the canopy 33
Accessories, Maintenance and Cleaning 36-38
Warranty 39
Safety warnings 40
Safety First
The safety of your family is our
number one priority. Please take
the time to carefully read this
manual before setting up and
using your Comet plus.
The Comet plus is tested to
comply with the Australian Safety
Standard: AS/NZS 20088:2013
Pram and Stroller – Safety
Requirements
WARNING:
With the exception of the
outer cardboard packaging,
to prevent injury from choking,
carefully remove and
immediately move out of reach
all protective packaging. Never
leave your child unattended
with the pram or packaging.
Using your
Comet plus

4
What’s in the box
1Foot cover
2Bassinet cover
3Bassinet, bassinet board,
bassinet mattress and belly
bar (also the seat frame)
4Canopy
5Travel organiser
6Welcome letter
7Manual
8Brake bar
9Mosquito net
10 Rain cover
11 Front swivel wheels
12 Rear air tyres
13 Frame/chassis and basket
14 Stroller seat
15 Seat liner
PLEASE NOTE:
Depending on your order, you may receive multiple boxes.

5
Get to know your
new Comet plus
aExtendable canopy with
magnetic peekaboo
bBelly bar
c5 point safety harness
dSeat liner
eSeat frame (same as o)
fFront swivel wheel lock
gFront swivel wheel
hBassinet/Seat frame release
iSeat recline buttons
jFrame release clips (to
release from folded position)
kHandlebar
lBassinet cover
mHandlebar height
adjustment buttons
nFrame collapse levers
oBassinet frame (same as e)
pShopping basket
qRear wheels
rBrake
Terminology
a
b
k
l
m
j
n
o
p
q
r
c
d
h
i
e
f
g

6
Install the brake
and wheels
To release the frame from
the folded position, pull
back on the black frame
release clip located on the
side of the frame and lift
open.
When the frame is fully open
you will hear a “click”.
Step One
1

7
At the rear of the frame,
take the brake and attach
it to the frame. Push down
until you hear a ‘click’ and
when you can see the two
sliver pins lock into place.
PLEASE NOTE:
The brake should be
attached rmly onto the
pram on both sides, if either
side slips off then you need
to reset the silver pin back
into place.
To reset the silver pin reach
inside the frame with your
nger and feel for the metal
pin, pull it forward with your
nger until it pops back into
place so you can see it stick
out of the frame. You can
then continue to attach
your brake to the pram.
2

8
To attach the air tyres simply
push each wheel onto the
pin until you hear a “click”.
NOTE:
Air tyres will arrive 85%
inated. If you wish to
inate further you can use
a standard bike pump.
To repair a puncture, you
can purchase a tyre repair
kit from Kmart or similar
stores to repair the inner
tube yourself (they’re very
effective, and inexpensive).
Bike shops may be able
to repair the tyre for you.
Alternatively, the tyres are
also available for sale on
the Spare Parts page of our
website.
4
3
Move around to the front
and insert each front wheel
pin into the socket until you
hear a “click”.

9
6. With all 4 wheels now
attached, individually pull
them just to make sure
they are all securely held
in place.
5

10
To fold, press the grey
safety release button rmly
(underneath the right lever)
and hold while pulling both
black frame release levers
up toward you. If this grey
button is not pressed in
completely you won’t be
able to pull the lever back.
Hold the handlebar against
your body for support.
Practice
collapsing the
frame from this
position
1
2

11
Make sure the black frame
release clip has clicked in
to place to secure it from
opening again. Carrying
the frame without the latch
secured can result in injury
caused by moving parts.
Please also bend from
the knees when lifting the
frame.
To release the pram as you
did in step one, simply pull
back on the black frame
release clip and pull the
frame up until it clicks into
place. Practice this a few
times so you’ve got the
hang of it. Don’t worry it will
become second nature in
no time!
Also note that the pram
can be collapsed with the
seat attached when in the
forward facing position,
however the bassinet will
need to be removed rst.
WARNING:
There is potential for ngers or
parts of the body to be injured
when the pram is being folded
or unfolded, due care should be
taken to avoid injury to you and
your child.
Once pulled up, press down
towards the oor on the
frame and it will collapse on
itself.
4
3

12
Attach the
bassinet to the
frame
Step Two
Press the grey seat recline
buttons on the sides of the
bassinet frame and angle
the connectors down so
that they are at a 90 degree
angle with the frame.
1

13
Attach the belly bar
ensuring you hear a ‘click’
so you know it’s securely
attached. Then select
which direction you’d like
the bassinet to face and
simply “click” it on to the
side frame connectors.
(Tip: It’s best for newborns
to face you).
2

14
To release simply push the
grey bassinet frame release
buttons, in the direction of
the arrow, and off it pops!
Don’t worry if it feels tight,
this is to ensure it doesn’t
wobble too much and will
loosen over with time.
3

15
Place the bassinet base
board into the bottom of
the bassinet and secure
with the velcro tabs at
each end. Once secured,
place the bassinet mattress
on top.
4

16
Next zip on the bassinet
cover and fold down the
sides.
5
WARNING:
When carrying your bassinet with
child, please always ensure you
have one hand under the base
of the bassinet incase the belly
bar is not securely attached and
releases.

17
Attach the
canopy
Step Three
Your canopy should
come pre-assembled. To
attach it to the frame, rst
ensure the fabric at the
back is secured under
the back of the frame.
Next secure the bottom
side of one connector to
the frame, then pull and
clip the topside over and
into place. Repeat on the
other side. Make sure the
connectors are as close
to the belly bar as they
can be (as shown in the
pictures below, there should
be no gap between the
belly bar and the canopy
connectors).
NOTE:
It is normal for the canopy
connectors to be quite hard
to put on and take off.
This will help it keep it rm
for longer.
1

18
WARNING:
Only use the bassinet in a at
position. Do not recline. Babies
should not be left unsupervised
in the bassinet. Bassinet is not
suitable for over- night sleeping,
daytime naps are ne as long as
you’ve got your eye on them.
The front peak of the
canopy can be ipped
forward to provide a little
extra sun protection or
pushed back inside for a
better view. Treat this peak
with care to avoid warping
over time.
NOTE:
Take care when opening
and closing the canopy
using the zip to ensure that
you don’t catch the mesh
in the zip.
2Your bassinet is now set up
and ready to use!

19
Please take note of
the following 3 features
before you get going:
Rear brake
When stopping, use the brake
at all times by pressing down
on the black bar with your foot
until you feel it click into place.
To start travelling again, lift the
bar up with your foot and off
you go!

20
Adjusting the
handlebar height
To adjust the handlebar
height, press both of the
grey buttons at the same
time and select your height.
Table of contents
Other Babybee Stroller manuals

Babybee
Babybee DUO3 User manual

Babybee
Babybee MIO User manual

Babybee
Babybee DUO2 User manual

Babybee
Babybee ROVER Bassinet User manual

Babybee
Babybee ROVER User manual

Babybee
Babybee rover3 User manual

Babybee
Babybee DUO User manual

Babybee
Babybee DUO2 User manual

Babybee
Babybee MILES User manual

Babybee
Babybee DUO3 User manual