manuals.online logo
Brands
  1. Home
  2. •
  3. Brands
  4. •
  5. Babybrezza
  6. •
  7. Kitchen Appliance
  8. •
  9. Babybrezza GLASS User manual

Babybrezza GLASS User manual

babybrezza.com
Please visit
For cooking tips, recipes, accessory products and more.
US patent numbers 6,505,545 & 6,703,061
©2018 Baby Brezza Enterprises LLC
One Step Food Maker
Instructions
Limited 1-Year Warranty
The limited warranty is valid only on products bought through authorized resellers and used in
the United States and Canada. Buying through an unauthorized reseller or using this product
outside of the United States and Canada automatically voids this warranty.
This warranty is available to consumers only. You are a consumer if you own a Baby Brezza
Food Maker that was purchased at retail for personal, family or household use. Except as
otherwise required under applicable state law, this warranty is not available to retailers or other
commercial purchasers or owners. We warrant that your Baby Brezza Food Maker will be free
of defects in material or workmanship under normal home use for one year from the date of
original purchase. Customer will be required to present original proof of purchase in order to
obtain the warranty benefits. In the event that you do not have proof of purchase date, the
purchase date for purposes of this warranty will be the date of manufacture. If your Baby
Brezza Food Maker should prove to be defective within the warranty period, we will repair it or,
if we consider it necessary, replace it.
To obtain warranty services, please call Customer Service at 1-888-396-6552 or write to:
Baby Brezza, 250 Passaic Street, Newark, NJ 07104 Attn: Customer Service.
If you are experiencing problems with your Baby Brezza Food Maker,
please call our Customer Service department at 1-888-396-6552 before returning
the product so that we can offer you our best service customized to your particular situation.
1 2
Water
Tank
Power Cord
Components
TECHNICAL DATA
Supply voltage: 120V ~50/60Hz Power - Heater : 400W - Motor 150W
Model: BRZ00131 Current: 3.5A
Get to know your
Baby Brezza Glass
One Step Food Maker.
Bowl Lid
Blade
Bowl
Drive
Shaft
Drive
Shaft
Gasket
Water Tank
Cap
Base Control
Panel
Steam Tank
Lid
Steam Tank
Drive
Shaft
Seal
IMPORTANT SAFEGUARDS
SAVE THESE INSTRUCTIONS
When using electrical appliances, basic safety precautions should always be followed, including the
following:
1. Read all instructions before using.
2. Do not touch hot surfaces. Use handles or knobs.
3. To protect against electric shock do not immerse cord, plug or appliance in water or other liquid.
4. This appliance is not intended for use by persons (including children) with reduced physical, sensory,
or mental capabilities, or lack of experience and knowledge, unless they are closely supervised and
instructed concerning use of the appliance by a person responsible for their safety. Close supervision
is necessary when any appliance is used by or near children. Children should be supervised to ensure
that they do not play with the appliance.
5. Turn the appliance OFF, then unplug from the outlet when not in use, before assembling or
disassembling parts and before cleaning. To unplug, grasp the plug and pull from the outlet. Never pull
from the power cord. Permanently Installed – Make sure appliance is OFF when not in use, before
putting on or taking off parts, and before cleaning.
6. Do not operate any appliance with a damaged cord or plug or after the appliance malfunctions, or is
dropped or damaged in any manner. Contact the manufacturer at their customer service telephone
number for information on examination, repair, or adjustment.
7. The use of accessory attachments not recommended by the appliance manufacturer may cause
fire, electric shock or injury.
8. Use on level surface and be sure there is no debris under the unit and the rubber pads are
touching the surface.
9. Household use only. Do not use outdoors.
10. Do not let cord hang over edge of table or counter, or touch hot surfaces.
11. Do not place on or near hot gas or electric burner, or in a heated oven.
12. Extreme caution must be used when moving an appliance containing hot liquids.
13. Do not use appliance for other than intended use.
14. Do not use the machine without food in the bowl.
15. This appliance has a polarized plug (one blade wider than the other). To reduce risk of electric
shock, this plug is intended to fit into a polarized outlet only one way. If the plug does not fit fully
into the outlet, reverse the plug. If it still does not fit, contact a qualified electrician. Do not attempt
to modify the plug in any way.
16. Make sure machine is turned off before unplugging.
17. A short powder-supply cord should be used to reduce the risk of becoming entangled in or tripping
over a longer cord. Extension cords are available and may be used if care is exercised in their use.
18. If using the machine with an extension cord, make sure the cord is the proper electrical rating for
the machine. The marked electrical rating of the cord set or extension cord should be at least as
great as the electrical rating of the appliance. The extension cord should be arranged so that it
does not drape over countertop or tabletop where it can be pulled on by children or tripped over
unintentionally.
19. Before serving, be sure food is at safe temperature.
20. Avoid contact with moving parts. Never remove lid while blade is moving.
21. Blade has 4 cutting edges and is sharp. Handle carefully. Install and remove by handling top of
plastic column. Bowl must be in place before replacing the blade.
22. Do not disassemble or lubricate drive shaft.
23. The appliance is intended for processing small quantities of food and is especially recommended
for preparing baby food. The appliance is not intended to prepare large quantities of food at a time.
24. Do not blend hard foods in this machine. Use the steam + blend function for hard
foods such as carrots and potatoes. Use the blend only function for soft foods such
as bananas and berries
25. To disconnect from power source, press stop button to turn off any function and remove plug from
wall outlet.
26. Before serving, unplug cord from wall outlet. Do not leave cord within child’s reach.
Safety Switch Function
If the Bowl Lid is opened or the Bowl is removed from the Base during operation, the machine
will automatically shut off and beep rapidly. If the Lid and Bowl are replaced within 5 seconds
after removal, the machine will resume operation, otherwise it will return to standby mode.
Overheating Protection
If the Steam Chamber runs dry during operation, the heater will shut off and the machine will
beep rapidly 5 times. Add water to the Water Tank to resume operation.
Insert plug into wall outlet.
Lift water tank to remove from Base.
Remove Water Tank Cap and Fill Water Tank with purified water. Replace Cap.
Make sure Steam Tank Lid is locked in place by turning it clockwise.
Lock Water Tank on Base by firmly pushing down.
Place Blade in Bowl by sliding the Blade on the Driveshaft without turning it.
See blade position detail on page 5.
Always make sure Driveshaft and Driveshaft Gasket are properly inserted and locked
into Bowl before steaming or blending. Use of the machine without the Driveshaft and
Gasket will result in damage to the Bowl and Base.
Add desired ingredients to Bowl, close Bowl Lid securely by turning clockwise.
(See “attaching Lid and Bowl” below.) Make sure safety tab on Bowl Lid is fully inserted
into Base or machine will not start.
43
Steam and Blend - Automatically blend after steaming:
Steam Only:
Reheat & Defrost:
Blend Only:
Clean all parts before first use
1 2 3
How to Use Cooking & Controls
Fill water tank,
turn over and
lock on to
Base
Add ingredients. Select cooking option
with the control panel
and press start.
Press “steam + blend” repeatedly until desired cooking time is selected. Each press
adds 5 minutes to the steam time, up to 30 minutes. Total steam time will be indicated
on LCD screen.
Press “start” button to begin the steam cycle. Once the steam cycle is complete, the
blend cycle will run for 30 seconds and the machine will shut off.
For a smoother consistency, press and hold the “blend” button to blend more.
Use the steam function to reheat and defrost. See Steam Only instructions above.
Attaching Lid and Bowl
Press to steam only.
Press and hold
to blend.
Press to start
chosen function.
Press stop button
any time to stop functions
and clear LCD.
Press to automatically blend after steaming.
Turn lid
clockwise
to lock on to bowl.
Turn bowl clockwise
to lock on to base.
Turn bowl counter-clockwise
to release from base.
Turn lid
counter-clockwise
to release
from bowl.
Unlocked Position
Locked Position
unlock
lock
LCD - indicates function, and time.
If you would like to steam without the automatic blend cycle, press the “steam” button
repeatedly until desired steam time is selected.
Press the “start” button to begin steam cycle. Machine will beep 3 times and shut off
when steam cycle is complete.
Make sure Bowl Lid is locked onto Bowl. Press and hold “blend” button until desired
consistency is achieved. Do not remove lid when blade is moving.
Clear protective film on control panel can be removed if desired
5
Cleaning
Remove driveshaft from bowl before cleaning in
dishwasher. See illustration.
To remove Driveshaft, turn Knob on bottom
of bowl clockwise and pull out. Rinse driveshaft
with water and wipe clean. Do not misplace Drivesh-
aft Gasket while cleaning. To replace the Driveshaft
after cleaning, insert into hole in bottom of bowl and turn
counter-clockwise to lock in place *.
Removing & Replacing the Driveshaft
6
Troubleshooting
Condition Possible Cause Possible Remedy
Machine will
not start.
Machine
stops during
operation
Final puree
consistency
isn’t smooth
Can not remove
Blade from
Driveshaft
Scaling in
Steam Tank
Blade is in dropped position
with driveshaft pins locked
in place.
Raw food isn’t diced finely
enough before steaming.
Low water content of raw
food.
Mineral rich water used
persistently.
Clean Steam Tank by wiping
with a damp scouring pad.
Lock bowl back onto machine.
Pull up on center while twisting
clockwise. Do not touch blades.
Water /Steam Tank is dry.
(Machine will beep rapidly
5 times to indicate that the
Steam Tank is Dry)
Steam Tank is dry.
(Baby Brezza will beep rapidly
5 times to indicate that the
Steam Tank is Dry)
Machine is unplugged. Plug in Machine.
Safety tab on Bowl Lid is
not fully inserted into Base.
Safety tab on Bowl Lid has
been disengaged from Base.
Make sure Bowl Lid is turned
clockwise as far as possible
and safety tab on Bowl Lid is
fully inserted into Base.
Make sure Bowl Lid is turned
clockwise as far as possible
and safety tab on Bowl
Lid is fully inserted into Base.
Add water to Water Tank.
Dice food into smaller pieces,
approximately 1/4”, before
placing in bowl.
Add additional water, formula,
breast milk or other liquid after
steaming and blend longer.
If you can not remedy problems with the machine by using the troubleshooting chart
above, please contact Customer Service at 1-888-396-6552.
Driveshaft
Knob
Always make sure Blade is in the up position when steaming.
12
Important Tips for Use
Up position for steaming.
Place the Blade on the
Driveshaft without turning it.
Down position for blending.
The blade will automatically drop
to the down position when blending.
The blade has two positions:
Up Down
Always unplug the appliance before cleaning.
Clean the appliance before and after use.
Bowl, Blade and Bowl Lid are top shelf dishwasher safe and can also be hand washed.
To clean Water tank, fill with warm soapy water, tighten cap and shake vigorously.
Empty soapy water and rinse thoroughly before next use.
To Clean the Steam Tank, remove Steam tank lid and wipe with a damp scouring pad.
Base should be wiped with damp cloth only.
Never use abrasive pads to clean machine parts. (Except for stainless steel heating plate).
Never put the Driveshaft in the dishwasher. Wipe with damp cloth only.
Cut ingredients to approximately 1/4 to 1/2 inch pieces before placing in bowl.
Smaller pieces of food steam and blend more thoroughly, ensuring proper food texture
for your baby to easily swallow and digest.
*Always make sure Driveshaft & Driveshaft Gasket are
properly inserted and locked into place to prevent damage to bowl and base.

Other Babybrezza Kitchen Appliance manuals

Babybrezza BRZ9043 Quick guide

Babybrezza

Babybrezza BRZ9043 Quick guide

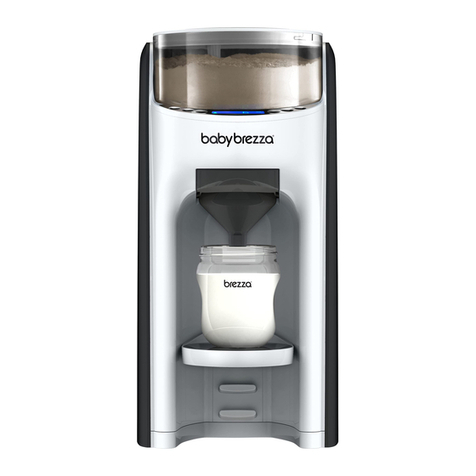
Babybrezza formula pro advanced User manual

Babybrezza

Babybrezza formula pro advanced User manual

Popular Kitchen Appliance manuals by other brands

Climadiff CV48AD use instructions

Climadiff

Climadiff CV48AD use instructions

BOMANN KASEREIBE KR 444 CB instruction manual

BOMANN

BOMANN KASEREIBE KR 444 CB instruction manual

Vollrath Mirage 59300 Operator's manual

Vollrath

Vollrath Mirage 59300 Operator's manual

ARDES AR1K05 Instructions for use

ARDES

ARDES AR1K05 Instructions for use

Sunbeam MU3000 user guide

Sunbeam

Sunbeam MU3000 user guide

TEFAL Infusa BJ800DKR manual

TEFAL

TEFAL Infusa BJ800DKR manual

Royal Catering RCZC-1030-W user manual

Royal Catering

Royal Catering RCZC-1030-W user manual

SEVERIN AS 3915 Instructions for use

SEVERIN

SEVERIN AS 3915 Instructions for use

Schnitzer UM 4 Series manual

Schnitzer

Schnitzer UM 4 Series manual

Conair GS51 user manual

Conair

Conair GS51 user manual

Berkel 330M Instructions for use, installation and maintenance

Berkel

Berkel 330M Instructions for use, installation and maintenance

TEFAL Crep'Party PY558813 manual

TEFAL

TEFAL Crep'Party PY558813 manual

VEVOR ZH-PT-21M user manual

VEVOR

VEVOR ZH-PT-21M user manual

Feincook CIRCU ME SV800 instruction manual

Feincook

Feincook CIRCU ME SV800 instruction manual

Sinbo SCO 5024 manual

Sinbo

Sinbo SCO 5024 manual

Summit SWC182Z owner's manual

Summit

Summit SWC182Z owner's manual

Hendi 271346 user guide

Hendi

Hendi 271346 user guide

Miroco MI-MF001 user manual

Miroco

Miroco MI-MF001 user manual

manuals.online logo
manuals.online logoBrands
  • About & Mission
  • Contact us
  • Privacy Policy
  • Terms and Conditions

Copyright 2025 Manuals.Online. All Rights Reserved.