in respect of the monitor, and all warranes, whether
express, implied or tacit, and any other liability from
whatsoever cause arising, are hereby expressly excluded
and the customer hereby indemnifies and holds harmless
Hisense in respect of such liability.
Note: when turning on the unit, all indicator lights are
turned on in an automated sequence and an audible
signal is heard.
• When turning on the unit, while the baery is low, 10
clicks will sound indicang that the baery needs to
be replaced.
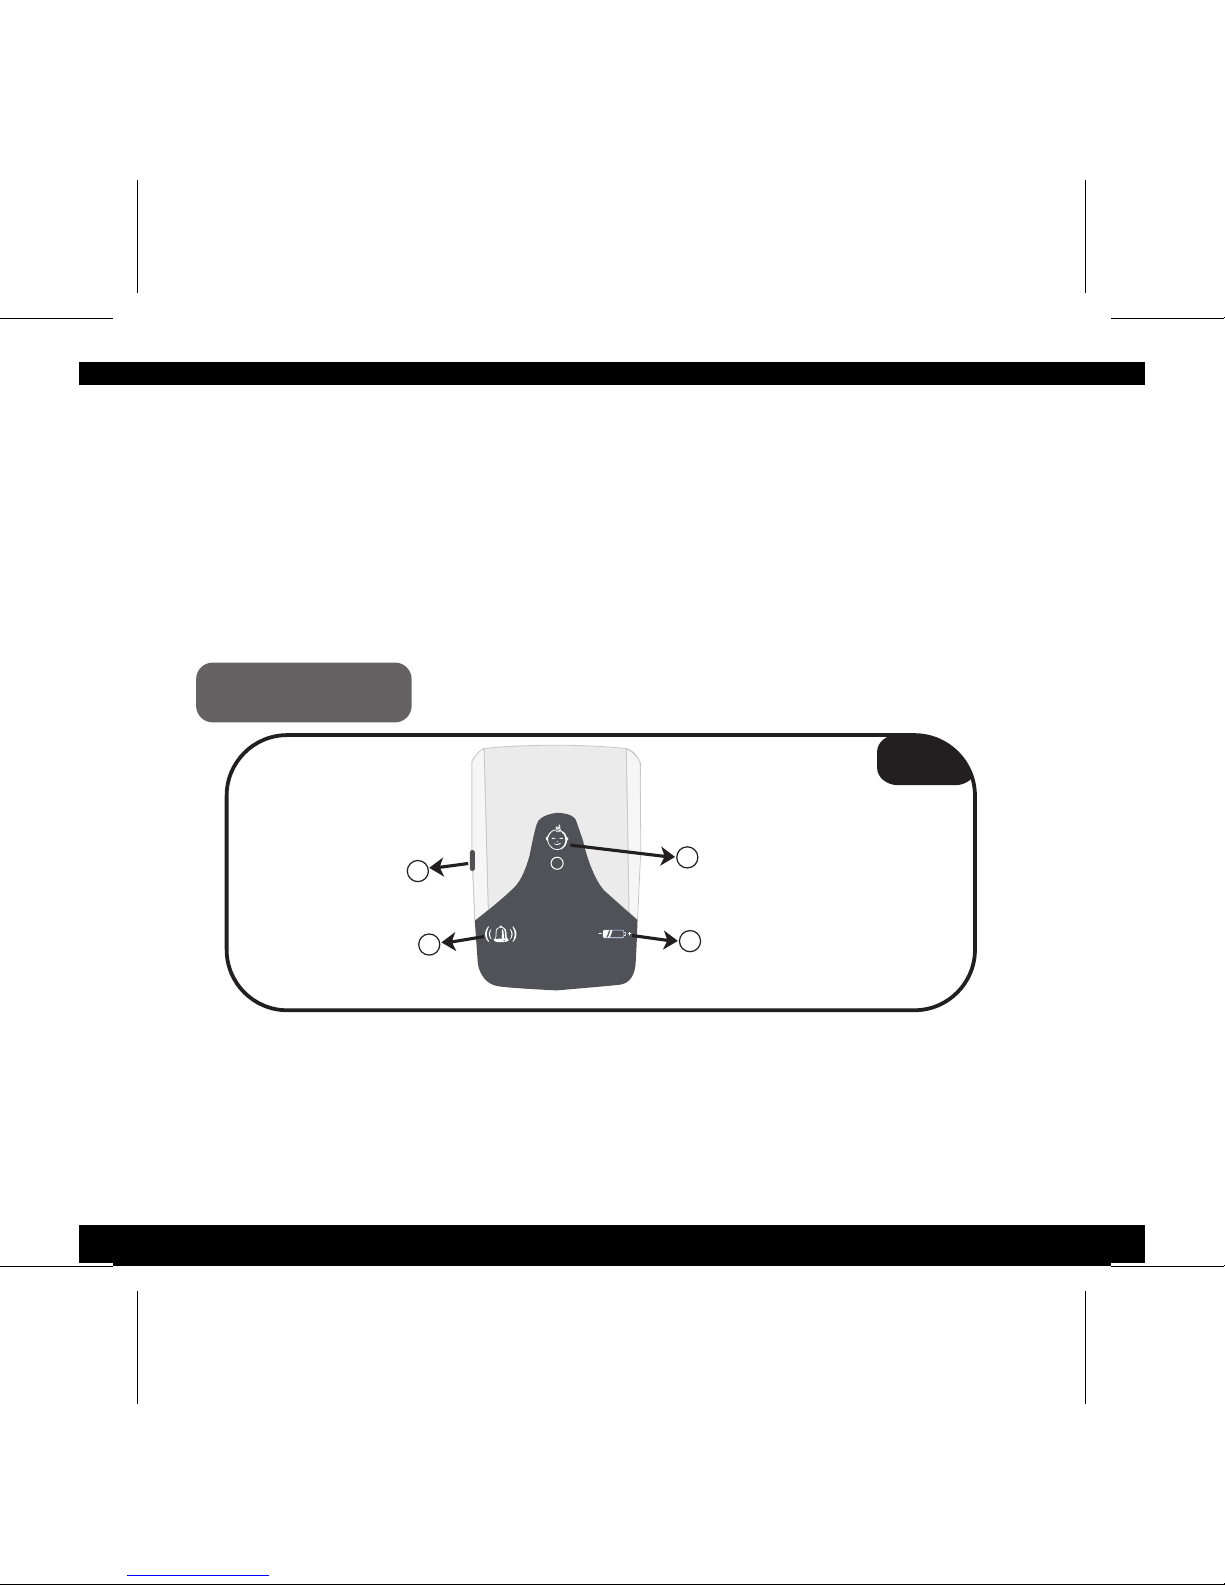
• The Low Baery Indicator (red LED light 3) – flashes
when the baery requires replacement.
• The Alarm Indicator (red LED light, 4) – lights up when
no movement is detected , as described in secon
"Principle of Operaon" on page 6. The visual alarm
indicator is accompanied with an audible alert.
Regular mode
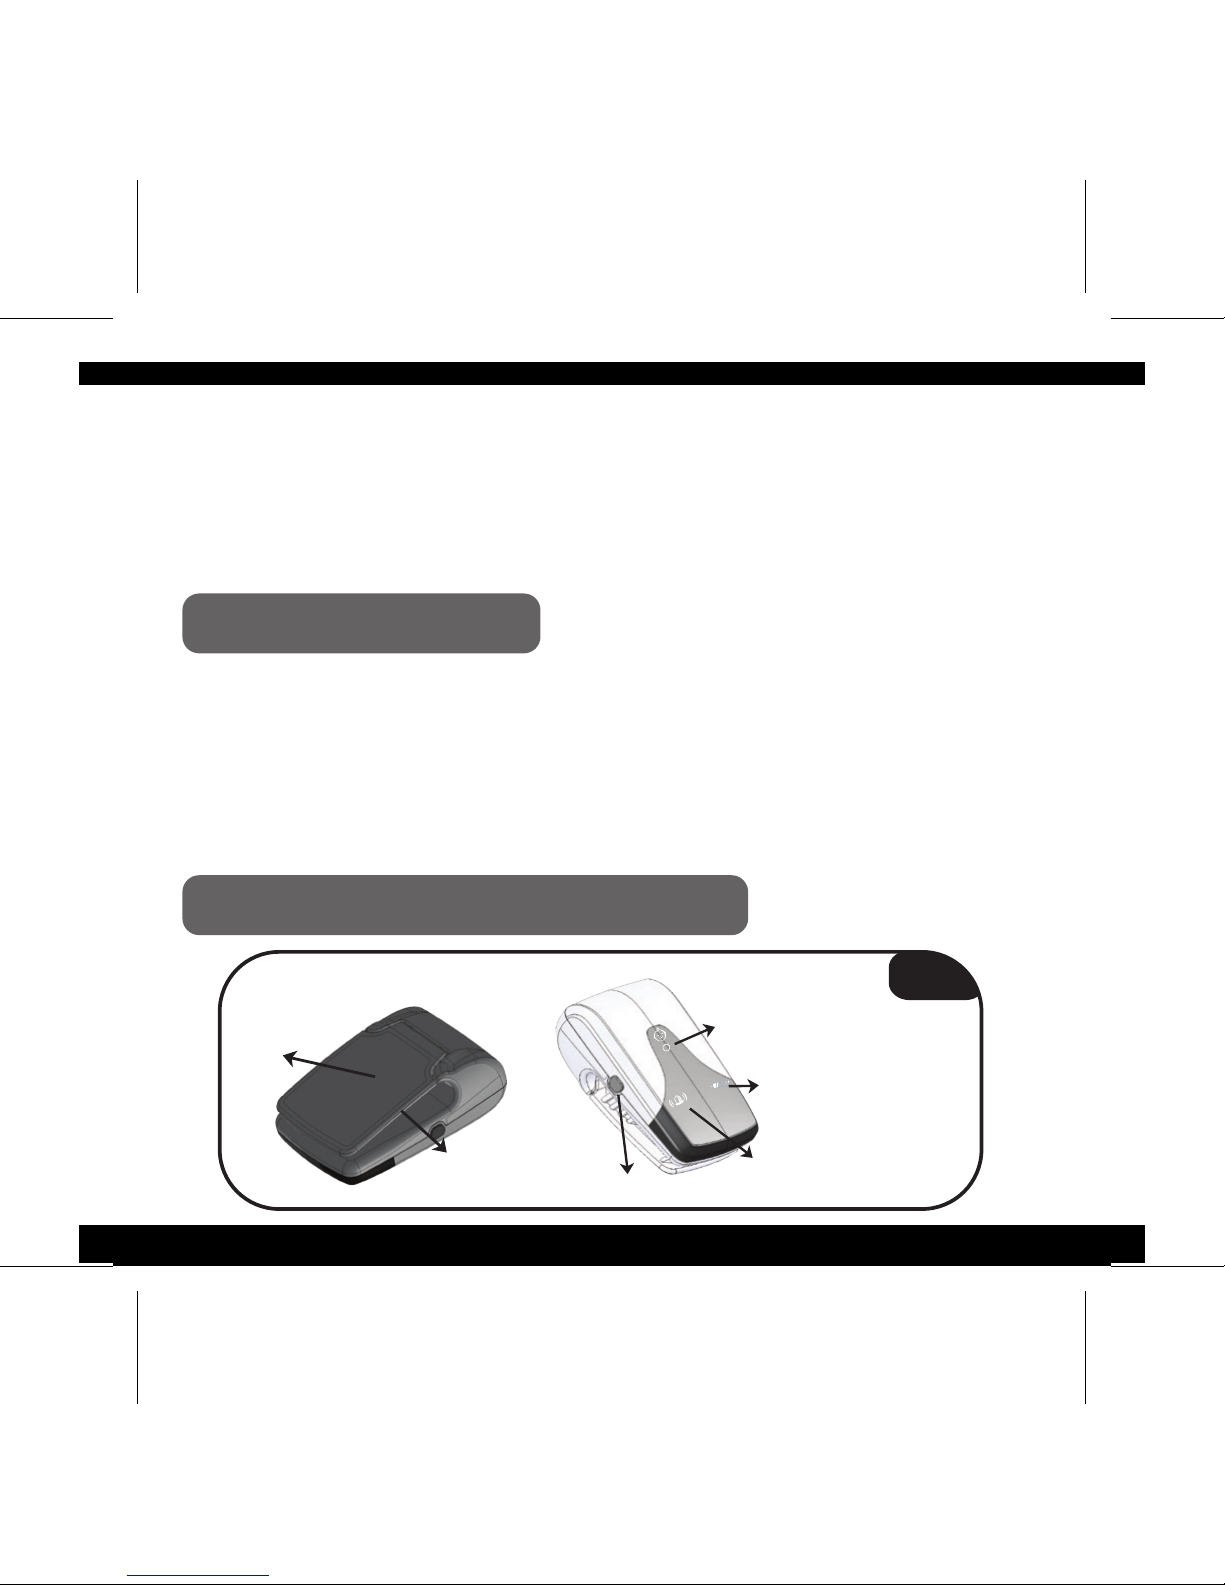
Turn the unit on by briefly pressing the ON / OFF buon
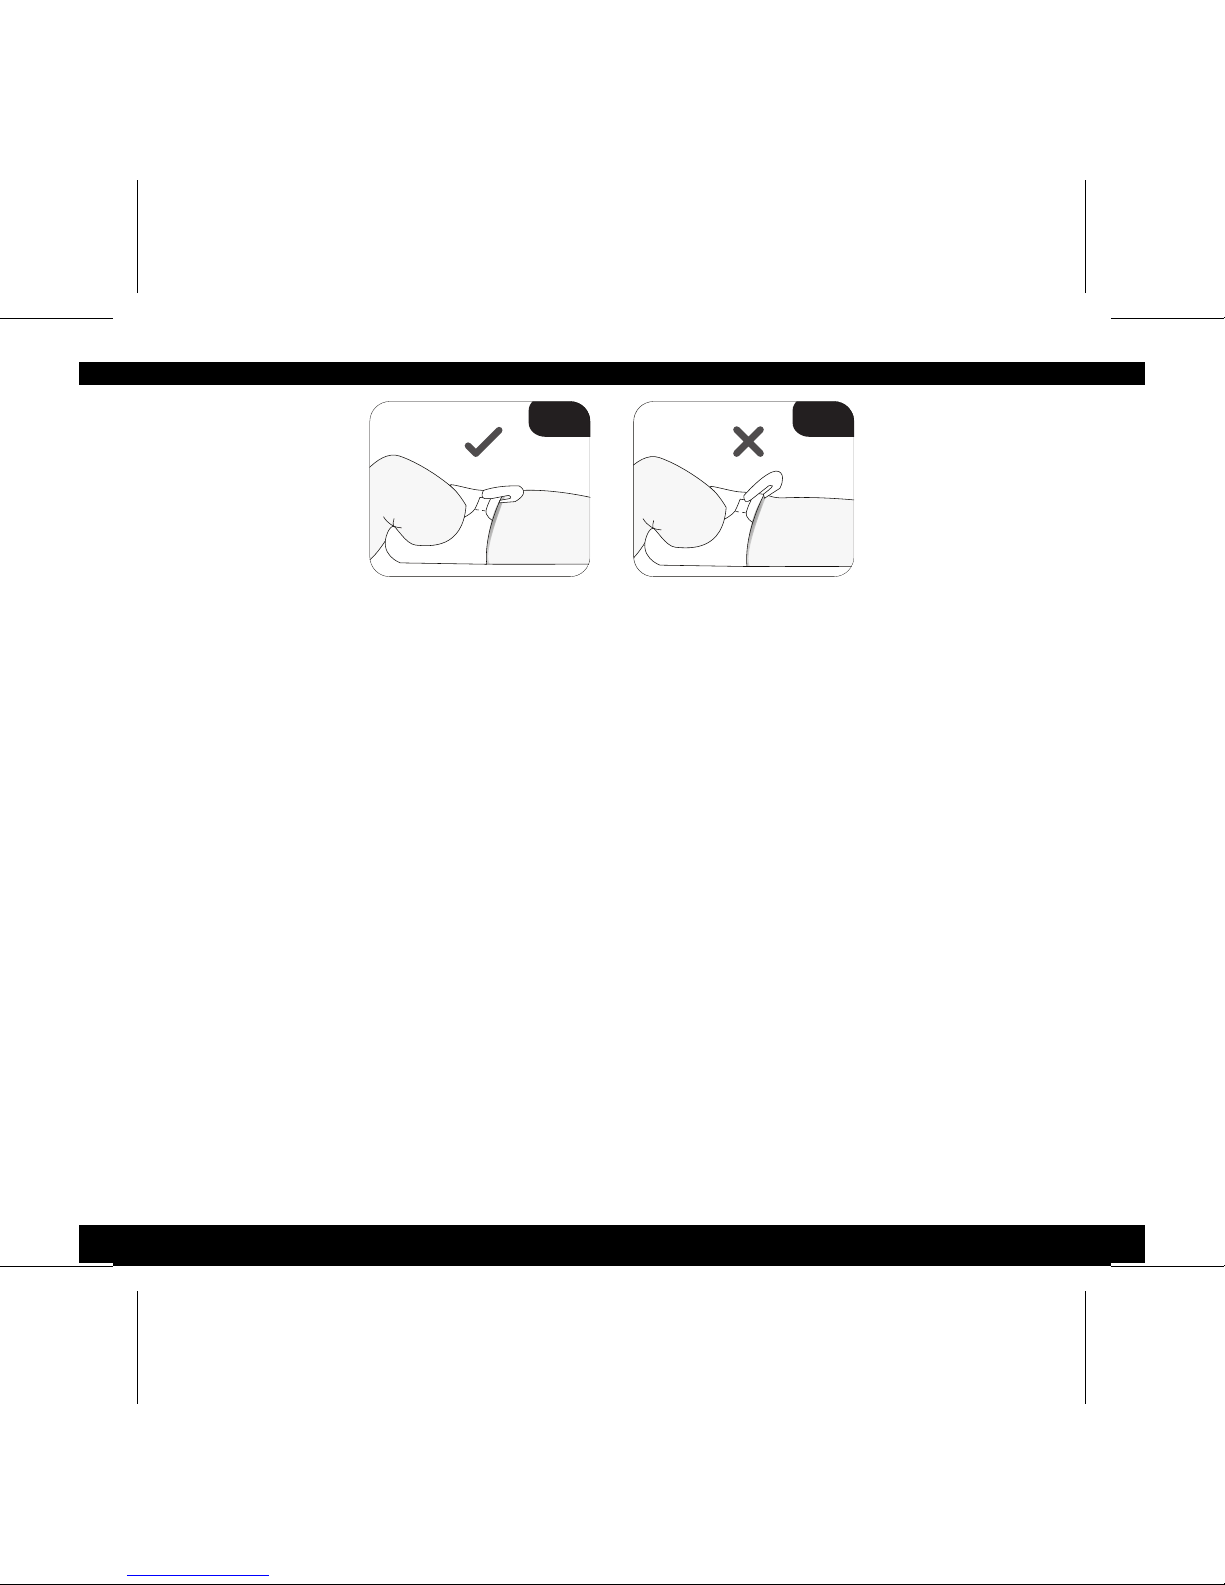
(1), and then fit your monitor properly to a diaper (see
"Fing your monitor" secon). Note: when turning on
the unit, all indicator lights are turned on in an
automated sequence and an audible signal is heard.
Sensive mode
Pressing and holding the ON/OFF buon for 5 (five)
seconds, will set the unit into a sensive mode,
accompanied with an addional unique sound. In this
mode, the sensor is set to pick up even slighter
movements than the regular mode.
10