BackCountry eBikes Storm User manual

Storm Owners Manual

Thank you for purchasing the Storm from BackCountry eBikes (BCEB's). We take pride
in bringing you a quality product that will offer you years of enjoyment.
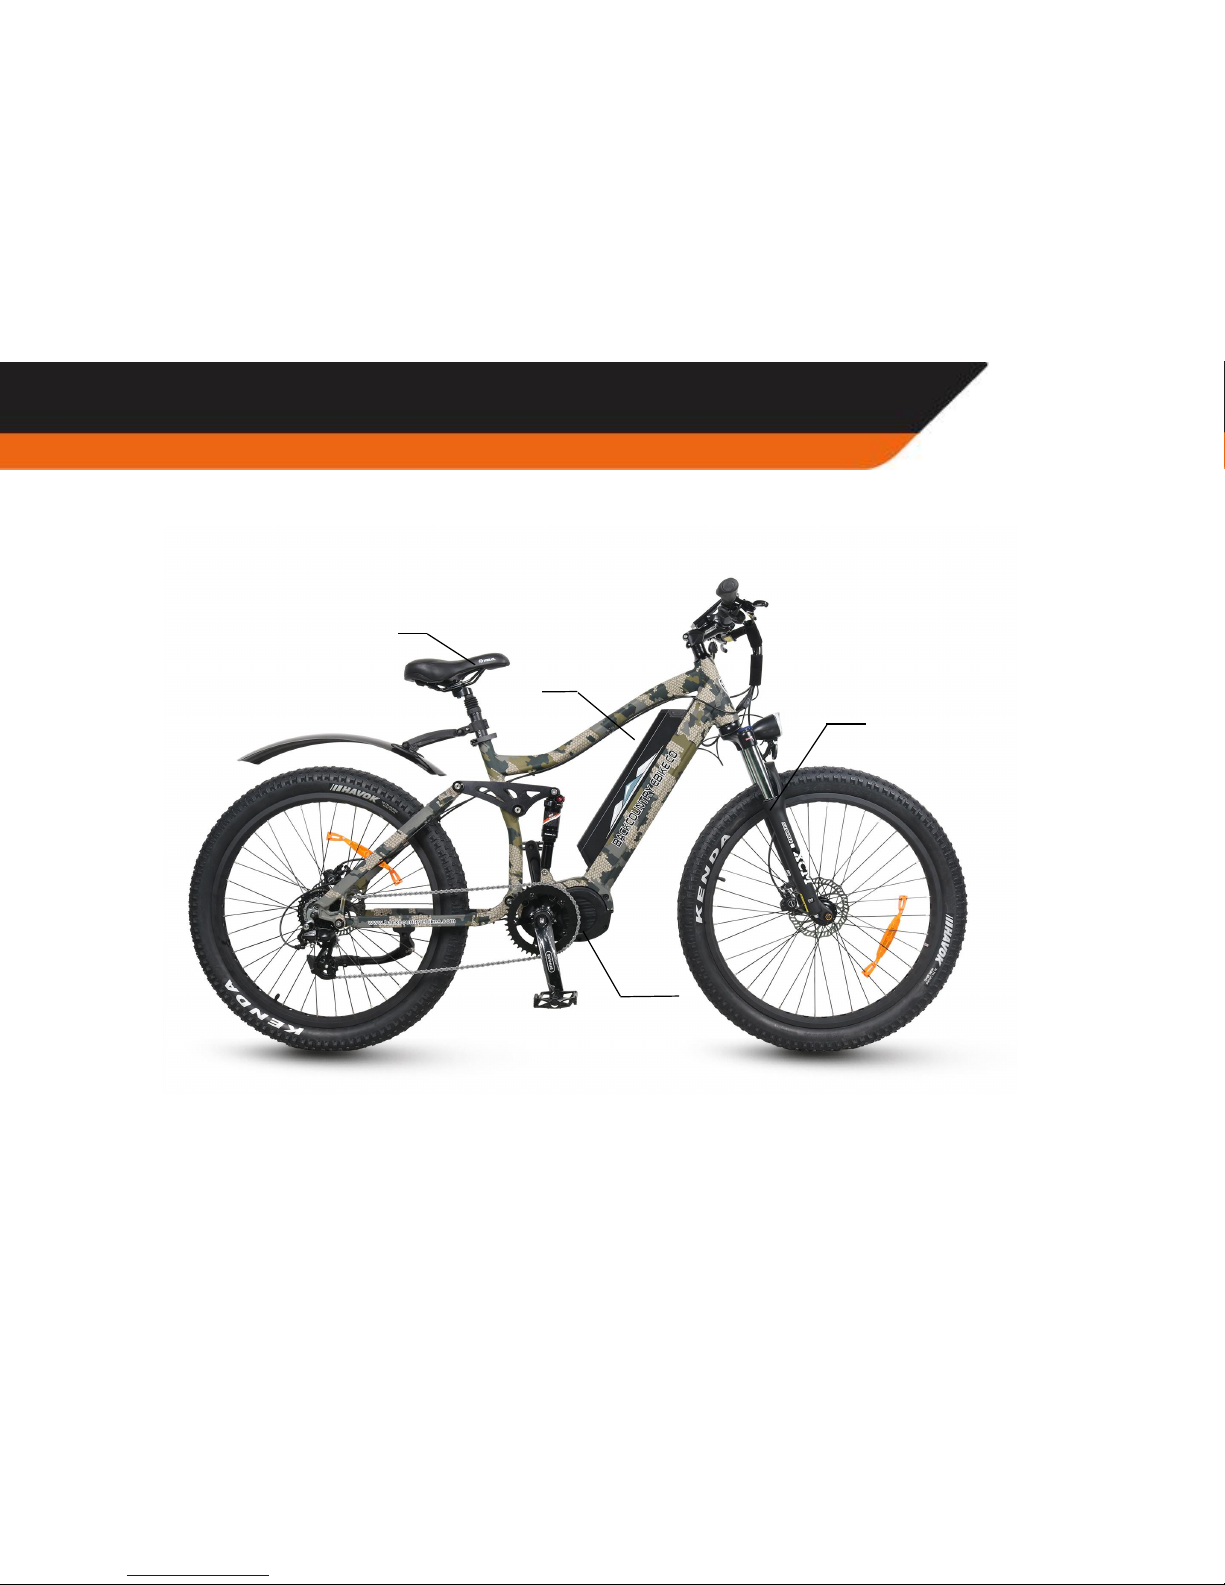
If it’s gnarly, rugged, steep, or technical terrain that you ride, then the full suspension Storm is the right choice
for you. This bike will chew up those rocky climbs and steep descents with ease while still allowing you to pull
that trailer full of gear to and from that tree stand, blind or favorite hunting spot.
This manual contains details of the product, its equipment, and information on its operation and
maintenance. Read it carefully and familiarize yourself with the Storm before using it in order to ensure safe
use and prevent tragic accidents. Be sure to retain this manual as reference to product knowledge and safe
riding.
The manual includes many Warnings and Cautions concerning the safe operation and consequences if safe
operation is not performed in respect to operation and maintenance of this product. All information in the
manual should be carefully studied and if you have any questions, you should contact BCEB's immediately. The
notes/warnings/cautions included within the dotted red boxes as shown to the left should be given special care
when reviewing as they are directly related to hazardous or dangerous situations if not avoided.
Because it is impossible to anticipate every situation or condition which can occur while riding, this manual makes
no representation about the safe use of the Storm under all conditions. There are risks associated with the use of
any bicycle which cannot be predicted or avoided, and which are the sole responsibility of the rider. You should
save this manual, along with any other documents that pertain to your Storm, for future reference. However, all
content in this manual is subject to change or withdrawal without notice. BCEB's makes every effort to ensure the
accuracy of its documentation and assumes no responsibility or liability for any errors or inaccuracies that may
appear herein.
Introduction

Index
Parts description-----------------------------------------------------------------------------------------------------------1
Daily checks-----------------------------------------------------------------------------------------------------------------2
Assembling instructions--------------------------------------------------------------------------------------------------3
Battery charging------------------------------------------------------------------------------------------------------------5
Additional charging Info--------------------------------------------------------------------------------------------------6
About charging--------------------------------------------------------------------------------------------------------------7
Riding--------------------------------------------------------------------------------------------------------------------------8
Riding range----------------------------------------------------------------------------------------------------------------10
Additional safely notes--------------------------------------------------------------------------------------------------11
Basic maintenance-------------------------------------------------------------------------------------------------------13
Troubleshooting-----------------------------------------------------------------------------------------------------------14
Recommended torque values for threaded fasteners-----------------------------------------------------------15
Minimum saddle height and the way to measure----------------------------------------------------------------16
Wiring diagram with LCD display-------------------------------------------------------------------------------------17
Saving battery power and extending your range-----------------------------------------------------------------18
Useful tips------------------------------------------------------------------------------------------------------------------19
General warning-----------------------------------------------------------------------------------------------------------20
A note for parents and guardians------------------------------------------------------------------------------------21
Safety notes before first use-------------------------------------------------------------------------------------------22
Additional safely notes---------------------------------------------------------------------------------------------------23
Introduction

Parts description
Saddle
Battery
Front Fork
1
Motor

To ensure safety, make the following functional checks before riding:
1 - Normal operation of the light, brake and power cut system.
2 - Tire pressure (low pressure, will influence both autonomy and speed).
3 - Wheel axle tightening.
4 - Battery charging level.
5 - Braking system adjustment and free operation.
Daily checks
Front brake lever, Throttle, Display Control Rear brake lever
LCD Display
Selected gear dispaly
2

1. Carefully remove the Storm from its carton;
2. Please tighten the handlebar-stem with the following instruction;
A. Use M5 Allen Key to tighten; B. Press the rubber after tightening;
Assembly instructions
3
Use M5 spanner to tighten
Press the rubber after tightening

Please tighten the handlebar-stem with the following instruction
Assembly instructions
4
Step 1:Tighten with 5mm spanner
Step 2:5mm Allen Key
Step 3:Tighten with 5mm spanner
Keep this thread position in the middle of stem

-The battery pack should be recharged after each use. There is no memory effect so you can charge
the battery after short periods of use without damage.
- The battery can be recharged on or off the bike.
-Remove the battery by turning the key and than pulling forwards and upwards carefully until the pack lifts off.
-The charger will automatically stop once the battery pack is full.
-Always charge in dry conditions and indoors away from direct sunlight.
-Check charger cables, charger, and battery for damage before beginning each charge.
1.When the battery is removed, do not touch the “+”and“-”contacts, especially with wet hands or metallic objects.
2. Do not recharge the battery in the inverted position. If you do, you drastically reduce it’s lifespan.
3. Place the charger in a flat, secure place, and connect the output plug to the socket in the battery box.
4. Then, connect the input plug (110V/220V terminal) to the power outlet, and charging will start.
5. After charging has finished, first, unplug the input plug (terminal 110V/220V), and then the output plug.
Battery charging
Charging tips
With the battery removed
5

1. Switch off the power. The battery can be charged on or off the bike.
2. Plug the output lead of the charger into the socket of the battery case.
3. Plug the AC power input plug into the 110/220 volt household power socket to start charging.
4. After charging unplug from the wall outlet first and then from the bike charger socket.
NOTE:Always charge your battery at temperatures between 50 and 80 Fahrenheit
degrees and make sure battery is not damaged before charging.
1. When the input and output terminal are connected, the red indication light of the charger will be turned on, showing the
power is connected.
2. When the battery is charged for the first time, 8-10 hours should be spent for charging. When the yellow indication light of the
charger is turned on, showing that the battery is full it will switch to trickle charge mode to ensure that over-charging will not
occur, it takes 2-8 hours for normal charging.
3. This charger has a protection device for over-charging. Avoid charging for more than 24 hours as this may affect
the life of the battery.
Additional Charging Info
When the battery is charging on the bike
Duration of charging
6

1-Keep the charger in a safe place, away from children.
2-Do not use the battery when not fully charged. This may decrease its lifespan.
3-Only charge the battery using the original charger.
4-The charger works with 110/220V. Never open the battery.
5-Avoid charger contact with liquids and/or metal objects. Always be sure it is safely stored/placed so that it can not
suffer damage from a fall/impact.
6-When in use, the charger should not be covered, to prevent overheating, damage, or fire.
7-The charger is only for indoor use. Please keep it in dry and ventilated place.
8-If you notice a strange smell from the charger, or it is too hot, stop charging, and contact BCEB's.
About charging
If charging with the battery removed
7

1-In order to reduce consumption, increase autonomy, and extend the motors lifespan, use the pedals during startups
and climbs.
2-Do not press down on the throttle too fast. The Storm should accelerate slowly, reducing consumption and
risk of damage to the electrical system. It’s better to use the pedals to avoid sudden stops and startups.
3-To increase security and reduce power consumption, it's advised to avoid sudden stops and startups.
4-The Storm controller has a charge overload protection. If on overload, energy will be cut automatically and
restored when it returns to normal.
5-While riding, avoid using the throttle as you brake, as it may damage the motor.
6-The maximum load is 225-250lbs. Avoid riding with overload. Do not ride too fast.
1-When pushing the Storm manually, turn off the power, to avoid accidental acceleration and accidents.
2-It is recommended to park indoors. Do not forget to switch off the power and remove the key.
3-In a public place, the Storm must be parked in accordance with local traffic rules. Do not forget to switch off
the power and remove the key.
Important tips while riding
Important tips when parking
Riding
8

Riding
B.
How to start up the Storm
A.
Press the battery ON/OFF button and battery
power LED display to see the power capacity.
-Hold down center button on
button cluster until LCD screen
turns on.
Cheek the LCD display
manual for details.
9

Average distance from one charge: 25-40km(15-40miles) differs with various batteries.
Conditions of testing: wind speed: level 2-3, normal atmosphere temperature: 25
degrees, Load: 90kg, atmospheric pressure: 3.5kg/cm, flat concrete surface; battery: full
Max speed (25-45Kmh) miles of journey Economy speed(10km/s) miles of journey
Power consumption of one time charge: ≤0.5kw.h Rated load: 90kg
Economical speed: 18km/s Dead load: ≤30kg
The load haul is related to flat or hilly roads, road surface, times of start-up, times of braking, wind direction, Atmospheric
temperature, air pressure in the tire and correct way of charging, please note this during riding.
Riding Range
10Km 20Km 30Km 40Km
Driving condition
Rang
Surfa
Wind level:2-3
Normal temperature:25℃
Normal load
Flat
against wind level:2-3
Normal temperature:25℃
normal load
Flat
degree of slope≤2 degree
wind level: 2-3 normal temperature: 25℃
normal load
upslope/downslope
10

Additional Safety Notes
Specific operation explanations
11
SPECIFICATIONS
Core Data
Display Type LCD
Display Color matrix Display
Rated Voltage(DCV) 36/43/48
Support Modes 0-3/0-5/0-9
Operating Temperature -20 - 45℃
Com. Protocol UART
Weight (g) 200
Mounting Parameters
Dimensions (mm) 92*57*81
Holder (mm)Ø 22.2/25.4/31.8
Cable Length(mm), Connector Type 230
M5.2 / 850 M5.2
Control Unit Cable (mm) 300 / 250

Dimension A
92 mm
Dimension B
57 mm
Dimension C
81 mm
Dimension D
Ø22.2/25.4/31.8 mm
Dimension E
68 mm
Dimension F
45 mm
Dimension G
3.2"
Additional Safety Notes
12
The BAFANG HMI with a high-contrast LCD display
delivers all important information at a glance and can
also be read in direct sunlight without difficulty. The HMI
is protected against contact and ingress of water and dirt
and complies with protection class IP 65.

To ensure safe riding conditions you must properly maintain your Storm. You should follow the basic guidelines below and
see your certified local bike shop at least seasonally, to ensure your Storm is safe for riding.
1.Tightening and correct operation of both wheels, frame and front fork.
2.Tire pressure and condition.
3.Gearshift correct operation.
4.Bell and reflectors conditions and correct operation.
5.Braking system correct operation.
6.If you do not use the Storm for long periods of time, charge the battery at least once a month, to avoid reducing its lifespan.
1.Do not wash with high pressure jets to prevent water infiltration into the electrical system.
2.Dirt on painted surfaces should be removed with a neutral product. Then, wipe with a dry cloth.
3.Lubricate the Storm with suitable lubricant, after washing.
4.Do not apply lubricant on the brakes, brake levers, rims, tires, battery and controller.
Basic maintenance
Regular self-checks
Maintenance and cleaning tips
13

For your safety, do regular maintenance and tightening checks. If you find any abnormality, repair immediately.
Troubleshooting
Most common solutions
Possible causes
Symptoms
(1)Charge the battery
(2)Clean the connections
(3)Turn the key into the correct position
(1)Insufficient battery power
(2)Faulty connections
(3)Key in wrong position
It doesn’t work
1
(1)Charge the battery
(2)Weld and adjust
(3)Contact an Authorized Service Center
(1)Insufficient battery power
(2)Loose throttle magneto
(3)Damaged throttle spring
Irregular acceleration and/or
reduced top speed
2
(1)Repair and/or reconnect
(2)Weld and adjust
(3)Contact an Authorized Service Center
(1)Loose wiring
(2)Loose throttle magneto
(3)Loose or damaged motor wiring plugs
When powered on, the
motor doesn’t respond
3
(1)Adjust the tire pressure
(2)Check the connections and/or fully
charge the battery
(3)Help with the pedals
(4)Replace the battery
(5)Make a prolonged battery charge
(1)Low tire pressure
(2)Low or faulty battery charge
(3)Driving with too many hills, braking, depart
-ures, and/or excessive load
(4)Battery discharged for long period of time,
without regular charges, aged or damaged
Reduced range
4
(1)Adjust the connections
(2)Replace the fuse
(3)Reconnect/repair the wiring
(1)Charger not well connected
(2)Battery cases fuse blown
(3)Battery wiring disconnected or with a bad
contact
The battery won’t charge
5
(1)Replace the bearing
(2)Adjust/replace the rim
(1)Charger not well connected
(2)Battery cases fuse blown
Driving wheel makes strange
noises
6
14

Parts Torque required(N.M)
Recommended torque values for threaded fasteners
NO.
Handlebar 18-20
1
Handlebar-stem 18-20
2
Saddle 18-20
3
Seat-pillar 18-20
4
Front wheel 16-25
5
Rear Wheel 25-35
6
B.B Parts 35-55
7
15

To adjust seat height, use quick release lever to set free the seat post and pull upwards or push downwards to reach desired
height.
Minimum saddle height and the way to measure
Minimum insertion
16

Wiring diagram with LCD display
Remark:
1:Except label wire diameter, other=0.30mm2. 2:All connector terminal is electrolytic tinning.
3:All wires are national standard wires.
R=red, B=blue, Bk=black, G=green, Y=yellow, Pr=purple, W=white, Pink=pink, O=orange, Cam blue=Cambridge blue
17
This manual suits for next models
1
Table of contents