
1
www.bainultra.com
Some products, specifications, and services mentioned in this manual are described in pending patent applications or are protected by patents.
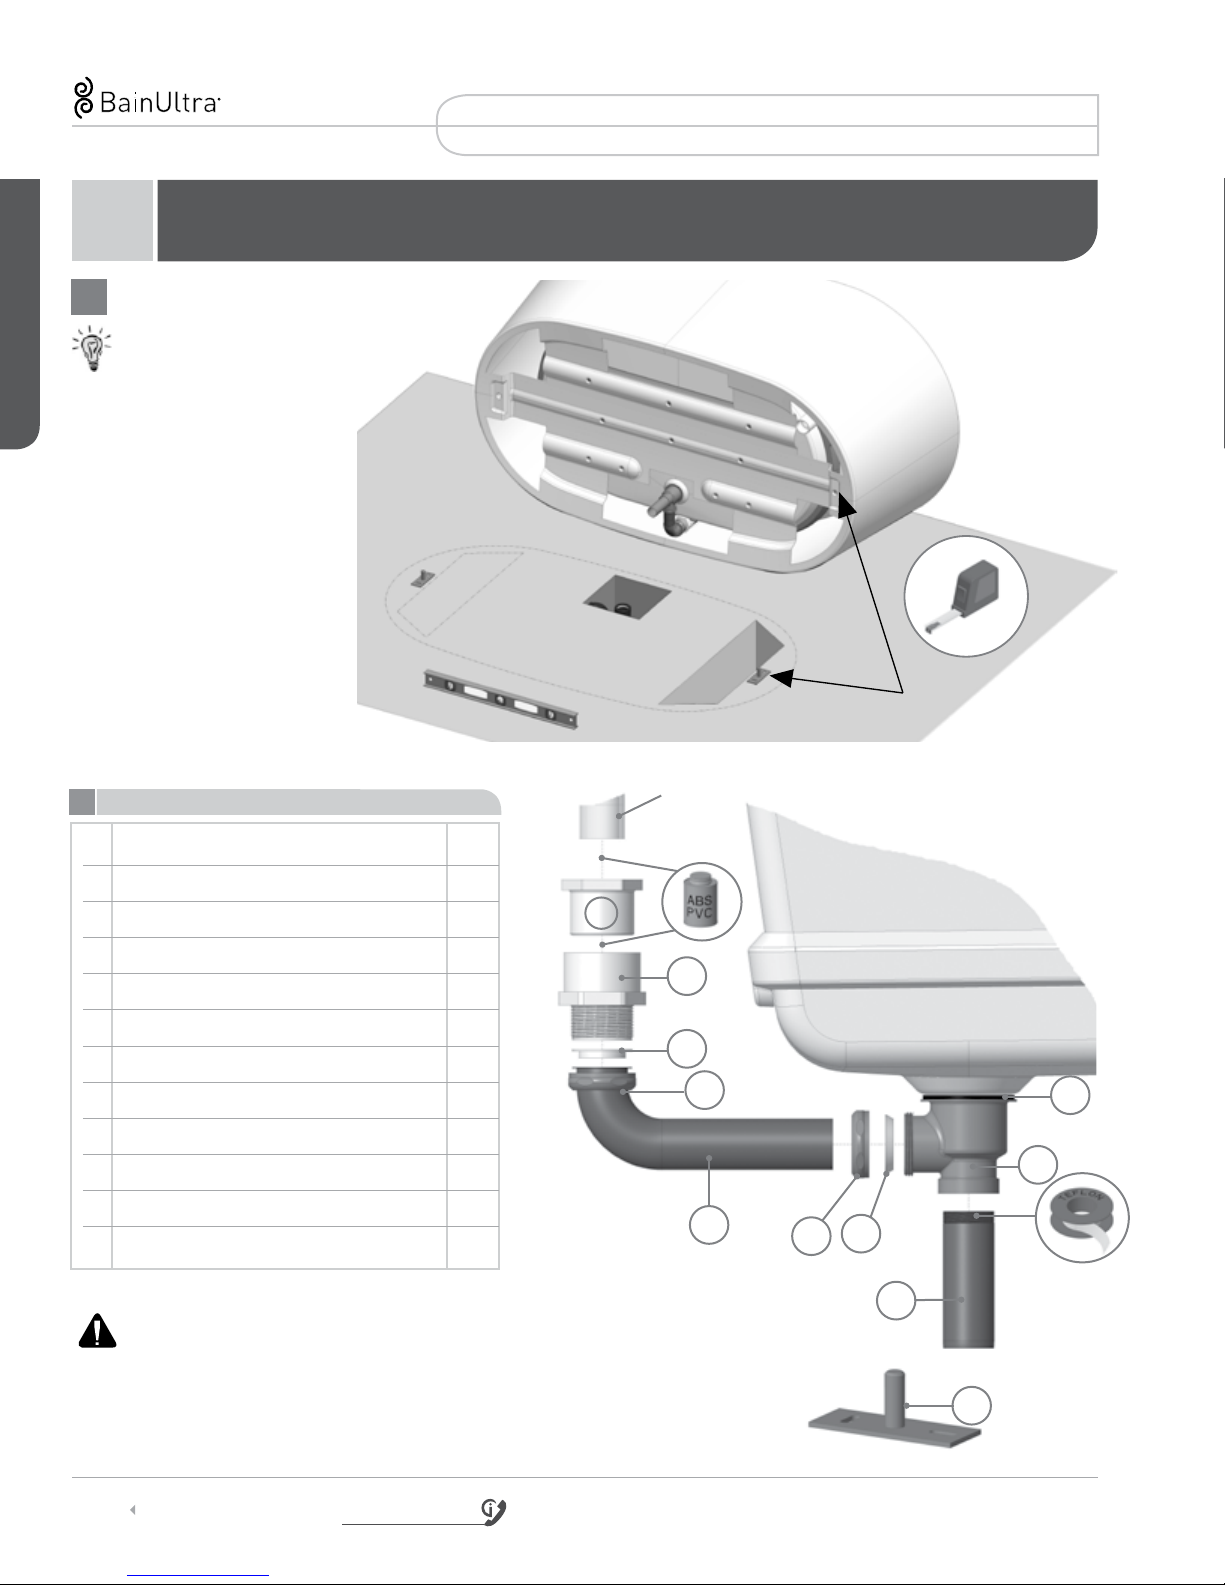
NOKORI - installation
IMPORTANT SAFETY INSTRUCTIONS
PERTAINING TO RISKS OF FIRE, ELECTROCUTION OR PERSONAL INJURY
READ AND FOLLOW ALL INSTRUCTIONS • SAVE THESE INSTRUCTIONS
THIS DOCUMENT SUPERCEDES THE INSTALLATION INSTRUCTION IN THE OWNER’S MANUAL.
WARNINGS
• Risk of hyperthermia; people using medication and/or having an adverse medical history should consult a physician
before using a Hydro-thermo massage®bathtub equipped with a heater.
• Risk of hyperthermia and possible drowning: do not use a Hydro-thermo massage®bathtub equipped with heater
immediately following strenuous exercise.
• Risk of fetal injury; pregnant or possibly pregnant women should consult a physician before using a Hydro-thermo
massage®bathtub equipped with a heater.
• Risk of accidental injury or drowning; do not use drugs or alcohol before or during the use of a Hydro-thermo massage®
bathtub equipped with a heater.
• Use this unit only for its intended purposes or as described in this manual. Use only accessories or devices recommended
by the manufacturer.
• Risk of hyperthermia and possible drowning. Check and adjust water temperature before use. Water temperature
exceeding 100ºF (38ºC) may be injurious to your health.
• To reduce the risk of injury, as with any other conventional bath, do not allow children or physically impaired people
to use this unit unless they are closely supervised at all times.
• To avoid injury, exercise care when entering or exiting the Thermomasseur®.
• The Geysair should always be connected to the hot water intake. If it is not the case, then, the Geysair should be deacti-
vated via the bath control.
RISK OF ELECTRICAL SHOCK
• Disconnect electric power before servicing.
• Do not permit electrical appliances (hair dryer, lamp, telephone, radio, television, etc.) within 5’ (1,5 m) of the Thermomasseur®.
• Before using the Thermomasseur®, its exterior construction (podium or skirting) should be finished so that a bather cannot
accidentally come in contact with electrical components (turbine and power module).
• For indoor use only.
NOKORI® COLLECTION
IMPORTANT SAFETY INSTRUCTIONS


 owner's manual")


