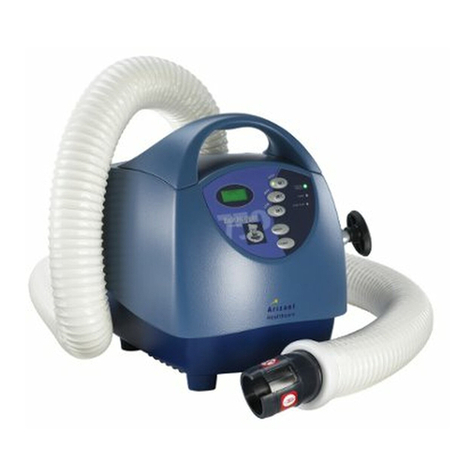
Bair Hugger 500/OR User manual

Model 500/OR Warming Unit
BAIR HUGGER*
SERVICE MANUAL
®
0470
Warning: Electrical Shock Hazard.
There are electrically live parts within
the warming unit when it is connected
to a power source, even when the
switches are in the
OFF
or
STANDBY
position.
Please forward to Biomedical
Engineering Department
Check the Bair Hugger therapy website to ensure you have the most recent version of this document. www.bairhugger.com reorder #201020A

Bair Hugger 500/OR Service Manual
Worldwide Technical Service and Order Placement
United States, Worldwide
Technical Service TEL: 1-952-947-1200
1-800-733-7775
Order Placement TEL: 1-952-947-1200
1-800-733-7775
FAX: 1-952-947-1400
In-Warranty Repair and Exchange
Replacement parts to correct a problem are delivered at no charge. To return a device to Arizant Healthcare
Inc. for service, first obtain a Return Authorization (RA) number from a technical service representative.
Please use this number on all correspondence when returning a device for service. A shipping carton will be
delivered to you at no charge, if needed. We will service and ship your device within five (5) working days
of our receipt. Call your local supplier or sales representative to inquire about loaner devices while your
device is being serviced.
When You Call for Technical Service
We will need to know the serial number of your
Bair Hugger unit when you call us. The serial number
label on the Model 500/OR unit is affixed to the
galvanized pan on the underside of the unit.
Serial number label
on Model 500/OR
SN 12345
Arizant Healthcare
Model 500/OR

Bair Hugger 500/OR Service Manual i
Table of Contents
Introduction . . . . . . . . . . . . . . . . . . . . . . . . . . . . . . . . . . . . . . . . . . . . . . . . . . . 1
Description of the Total Temperature Management* System . . . . . . . . . . . . . . 1
Indications for Use. . . . . . . . . . . . . . . . . . . . . . . . . . . . . . . . . . . . . . . . . . . . . . . 1
Contraindications . . . . . . . . . . . . . . . . . . . . . . . . . . . . . . . . . . . . . . . . . . . . . . . . 1
Warnings . . . . . . . . . . . . . . . . . . . . . . . . . . . . . . . . . . . . . . . . . . . . . . . . . . . . . . 2
Precautions . . . . . . . . . . . . . . . . . . . . . . . . . . . . . . . . . . . . . . . . . . . . . . . . . . . . 3
Important Information. . . . . . . . . . . . . . . . . . . . . . . . . . . . . . . . . . . . . . . . . . . . . 4
Read Before Servicing Equipment . . . . . . . . . . . . . . . . . . . . . . . . . . . . . . . . . . 4
500/OR Warming Units . . . . . . . . . . . . . . . . . . . . . . . . . . . . . . . . . . . . . . . . . . 5
Cabinet Cleaning . . . . . . . . . . . . . . . . . . . . . . . . . . . . . . . . . . . . . . . . . . . . . . . . 6
Hose Replacement . . . . . . . . . . . . . . . . . . . . . . . . . . . . . . . . . . . . . . . . . . . . . . 6
Power Fuse Replacement . . . . . . . . . . . . . . . . . . . . . . . . . . . . . . . . . . . . . . . . . 7
Control Board Fuse Replacement . . . . . . . . . . . . . . . . . . . . . . . . . . . . . . . . . . . 8
Air Filter Replacement . . . . . . . . . . . . . . . . . . . . . . . . . . . . . . . . . . . . . . . . . . . 10
Over Heat Alarm Testing. . . . . . . . . . . . . . . . . . . . . . . . . . . . . . . . . . . . . . . . . 11
Over Heat Alarm Thermostat Adjustment . . . . . . . . . . . . . . . . . . . . . . . . . . . . 14
Normal Operating Temperature Testing . . . . . . . . . . . . . . . . . . . . . . . . . . . . . 16
Normal Operating Temperature Adjustment . . . . . . . . . . . . . . . . . . . . . . . . . . 18
Specifications. . . . . . . . . . . . . . . . . . . . . . . . . . . . . . . . . . . . . . . . . . . . . . . . . . 20
Key to Figure 10 . . . . . . . . . . . . . . . . . . . . . . . . . . . . . . . . . . . . . . . . . . . . . . . 21
Returning Units for Service . . . . . . . . . . . . . . . . . . . . . . . . . . . . . . . . . . . . . . . 23
APPENDIX
Troubleshooting . . . . . . . . . . . . . . . . . . . . . . . . . . . . . . . . . . . . . . . . . . . . . . . . 24
Maintenance Log . . . . . . . . . . . . . . . . . . . . . . . . . . . . . . . . . . . . . . . . . . . . . . . 25
Symbol Definitions. . . . . . . . . . . . . . . . . . . . . . . . . . . . . . . . . . . . . . . . . . . . . . 28

Bair Hugger 500/OR Service Manual
ii
List of Tables
500/OR WARMING UNITS
Table 1 Over Heat Specification. . . . . . . . . . . . . . . . . . . . . . . . . . . . . . . . . . . 13
Table 2 Model 500 Series Operating Temperatures . . . . . . . . . . . . . . . . . . . 17
List of Figures
500/OR WARMING UNITS
Figure 1 Hose Options. . . . . . . . . . . . . . . . . . . . . . . . . . . . . . . . . . . . . . . . . . 6
Figure 2 Location of Power Fuse . . . . . . . . . . . . . . . . . . . . . . . . . . . . . . . . . 7
Figure 3 Location of Control Board Fuse . . . . . . . . . . . . . . . . . . . . . . . . . . . 8
Figure 4 Location of Air Filter . . . . . . . . . . . . . . . . . . . . . . . . . . . . . . . . . . . 10
Figure 5 Location of TP3 & TP4 . . . . . . . . . . . . . . . . . . . . . . . . . . . . . . . . . 12
Figure 6 Model 221 Temperature Test Kit and
Model 22110 Temperature Test Unit . . . . . . . . . . . . . . . . . . . . . . 12
Figure 7 Location of Over Heat Alarm Thermostat . . . . . . . . . . . . . . . . . . . 15
Figure 8 Room Temperature vs. High Temperature Output . . . . . . . . . . . . 17
Figure 9 Location of Operating Temperature Adjustment Potentiometer . . 18
Figure 10 Exploded Drawing . . . . . . . . . . . . . . . . . . . . . . . . . . . . . . . . . . . . . 22
Figure 11 Service Carton. . . . . . . . . . . . . . . . . . . . . . . . . . . . . . . . . . . . . . . . 23

Bair Hugger 500/OR Service Manual 1
Introduction
Description of the Total Temperature
Management* System
The Bair Hugger brand Total Temperature Management
System consists of a Bair Hugger forced-air warming unit and
Bair Hugger disposable components, including forced-air
blankets and the 241* blood/fluid warming set. The system is
intended for use in all clinical settings including the operating
room. The warming unit draws ambient air through a filter
and warms the air to the specified temperature. It then delivers
the warmed air through a hose to the Bair Hugger blanket.
This manual describes how to service the Model 500/OR
warming unit, and includes maintenance instructions and
specifications. For information about using Bair Hugger
blankets or the 241 blood/fluid warming set with Bair Hugger
units, refer to the “Instructions for Use” included with each of
these disposable components.
Indications for Use
The Bair Hugger brand Total Temperature Management
System is intended to prevent and treat hypothermia and to
provide warmth to cold or shivering patients. In addition, the
system should be used whenever conditions exist that could
cause patients to become cold.
Contraindications
Temperature
Do not apply heat to lower extremities during aortic cross-
clamping. Thermal injury may occur if heat is applied to
ischemic limbs.
200 Series Units
Do not use 200 Series warming units in operating rooms.
Thermal injury and airborne contamination may result.

Bair Hugger 500/OR Service Manual
2
Warnings
Bair Hugger Therapy
Do not use Bair Hugger warming units with any forced-air
blanket or cover other than Bair Hugger blankets. Thermal
injury may result.
Do not use any fluid administration device other than the 241
fluid warming set with the Bair Hugger warming unit. Fluid
temperature outside the indicated range may result.
Do not warm patients with the warming unit hose alone.
Thermal injury may result. Always attach the hose to a Bair
Hugger blanket before providing skin surface warming therapy.
Alarm
Do not continue therapy if the Over Heat Warning light
illuminates and the audible alarm sounds. Thermal injury may
result. Turn the warming unit off and contact qualified service
personnel. If using 241 fluid warming, immediately stop fluid
flow and discard the fluid warming set.
Purge Fluid Warming Set
Do not administer fluids if air is in the tubing. Introduction of
air to the patient may result.

Bair Hugger 500/OR Service Manual 3
Precautions
Monitor Temperature
Monitor the patient’s temperature at least every 10-20 minutes,
and monitor patient vital signs regularly. Reduce air
temperature or discontinue therapy when the therapeutic goal
is reached or if vital sign instability occurs. Notify physician
immediately of vital sign instability.
Pediatric Use
To prevent suffocation from misuse, do not leave children or
infants unattended when administering Bair Hugger®therapy.
Sterility
Except for specific blanket models, Bair Hugger blankets are not
sterile and all are intended for single patient use only. Placing a
sheet between the Bair Hugger blanket and the patient does not
prevent contamination of this product.
Patient Safety
Bair Hugger blankets meet the Consumer Product Safety
Commission’s flammable fabric regulation, 16 CFR 1610;
however, follow standard safety protocols when using high
intensity heat sources.
Visual Distortion
The blanket’s clear plastic drape may cause visual distortion.
Lift the plastic drape to view the patient’s head clearly.
Read Instructions
See CONTRAINDICATIONS and WARNINGS before
administering therapy. Read the Operator’s Manual, blanket
instructions, and fluid warming package instructions
before use.

Bair Hugger 500/OR Service Manual
4
Important Information
Explosion Hazard
Do not use warming units in the presence of flammable
anesthetics.
Electrical Shock Hazard
Do not disassemble the warming unit; refer to an authorized
service technician. There are electrically live parts within the
warming unit when it is connected to the power source, even
when the switches are in the OFF or STANDBY position.
Electrical Interference
If radio frequency interference with monitoring equipment
should occur, connect the warming unit to a different power
source.
Read Before Servicing Equipment
The repair, calibration, and servicing of the warming unit
requires the skill of a qualified medical equipment service
technician who is familiar with good practice for medical
device repair. If service is designated as not requiring
manufacturer’s attention, the technical information is provided
in this service manual or will be provided, on request, by
Arizant Healthcare Inc.
Refer to Service Manual
Perform all repairs and maintenance in accordance with the
instructions in this service manual.
Safety Inspection
Perform a safety inspection after making repairs to the
Bair Hugger warming unit and before returning the warming
unit to service. A safety inspection should include a test of the
operating temperatures (described in this service manual), the
Over Heat alarm system, as well as a leakage current test.
Proper Use and Maintenance
Arizant Healthcare Inc. assumes no responsibility for the
reliability, performance, or safety of the equipment if:
• Modifications or repairs are performed by non-authorized
personnel.
•The equipment is used in a manner other than that
described in the Operator’s or Service Manuals.
• The equipment is installed in an environment that does not
meet the relevant grounding requirements.

Bair Hugger 500/OR Service Manual 5
Model 500/OR Series Warming Units
Cabinet Cleaning . . . . . . . . . . . . . . . . . . . . . . . . . . . . . . . . . . . . . . . . . . . . . . . 6
Hose Replacement. . . . . . . . . . . . . . . . . . . . . . . . . . . . . . . . . . . . . . . . . . . . . . 6
Power Fuse Replacement . . . . . . . . . . . . . . . . . . . . . . . . . . . . . . . . . . . . . . . . 7
Control Board Fuse Replacement . . . . . . . . . . . . . . . . . . . . . . . . . . . . . . . . . 8
Air Filter Replacement . . . . . . . . . . . . . . . . . . . . . . . . . . . . . . . . . . . . . . . . . 10
Over Heat Alarm Testing. . . . . . . . . . . . . . . . . . . . . . . . . . . . . . . . . . . . . . . . 11
Over Heat Alarm Thermostat Adjustment. . . . . . . . . . . . . . . . . . . . . . . . . . 14
Normal Operating Temperature Testing . . . . . . . . . . . . . . . . . . . . . . . . . . . 16
Normal Operating Temperature Adjustment. . . . . . . . . . . . . . . . . . . . . . . . 18
Specifications . . . . . . . . . . . . . . . . . . . . . . . . . . . . . . . . . . . . . . . . . . . . . . . . 20
Key to Figure 10. . . . . . . . . . . . . . . . . . . . . . . . . . . . . . . . . . . . . . . . . . . . . . . 21
Returning Units for Service . . . . . . . . . . . . . . . . . . . . . . . . . . . . . . . . . . . . . 23

Bair Hugger 500/OR Service Manual
6
Non-swivel
Swivel
Extended
length
Model 500/OR Warming Units
Cabinet Cleaning
Tools/Equipment
Soft cloth, lightly dampened with water and mild detergent
Method
1. Disconnect the warming unit from the power source.
2. Wipe the exterior of the warming unit clean.
CAUTION: Do not use a dripping wet cloth when cleaning the
warming unit. Moisture may seep into the electrical contacts and
damage the components. Do not use alcohol or other solvents to
clean the cabinet. Solvents may damage the labels and other
plastic parts.
Hose Replacement
Method
1. Grasp the hose at the base and pull it free from the hose
coupling flange.
2. Insert the new hose in the blower outlet flange.
NOTE: There are a number of variations of hoses (Figure 1)
to provide for specific therapeutic needs. These various hose
options are not interchangeable. If the hose were to be
mated improperly, there would be an obvious fit problem. Do
not force a hose into a fitting; use adapters or modify the
hose ends. Use of a wrong hose could result in temperatures
outside of the indicated range.
3. Record the maintenance action taken and hours of
operation (read from the hour meter) in the Maintenance
Log (Appendix).
Figure 1. Hose Options

Bair Hugger 500/OR Service Manual 7
Power entry module
(see detail)
Detail
Spare fuse
Fuse carrier
Power Fuse Replacement
The power fuses are located in the power entry module. NOTE:
A spare fuse is located in the fuse carrier (see Figure 2).
Tools/Equipment
• Phillips-head screwdriver
• Small slotted screwdriver
Method
1. Disconnect the warming unit from the power source.
2. Remove the 2 Phillips-head screws that secure the cord
retainer. Remove the power cord.
3. Locate the fuse carrier in the center of the power entry
module (see Figure 2).
4. Use the small screwdriver to remove the fuse carrier from
the power entry module.
5. Remove the blown fuse(s) from the fuse carrier.
6. Place the new fuse(s) (as marked) into the fuse carrier.
CAUTION: Replace only with the fuse capacity and type that is
indicated on the adjacent label.
7. Replace the fuse carrier into the power entry module.
8. Reattach the power cord.
9. Replace the 2 Phillips-head screws to reattach the cord
retainer.
10. Reconnect the warming unit to the power source.
11. Record the maintenance action taken and the hours of
operation (read from the hour meter) in the Maintenance
Log (Appendix).
Figure 2. Location of
Power Fuse

Bair Hugger 500/OR Service Manual
8
Control Board Fuse Replacement
The 200mA (100mA for 220-240V units) control board fuse is
located on the control board. (See Figure 3.) If the 500mA
fuse requires replacement, please call Technical Service.
The internal fuse on the Model 500/OR is for control board
functions only. The power fuses are located in the power entry
module. Instructions for power fuse replacement can be found
in the Power Fuse Replacement section.
Tools/Equipment
Phillips-head screwdriver
Method
1. Disconnect the warming unit from the power source.
2. Remove the 8 Phillips-head screws around the top cover.
3. A cable is attached to the underside of the cover (see
Figure 3). Carefully lift the cover straight up about
3 inches (7.6 cm).
4. Tilt the cover to access the mounted cable that attaches to
the cover’s display board. Note the direction in which the
cable connector is mounted and detach it from the
display board.
5. The control board fuse is near the main transformer (see
Figure 3).
Figure 3. Location of
Control Board Fuse
Control
board fuse
Control board
(see Detail)
Detail
Cable
Main
transformer

Bair Hugger 500/OR Service Manual 9
Control Board Fuse Replacement
6. Remove the fuse and replace with a new one.
CAUTION: Replace only with the fuse capacity and type that is
indicated on the adjacent label.
7. Reconnect the cable to the display board (ensure that the
mounting direction is correct).
8. Place the top cover back into position.
9. Replace the 8 Phillips-head screws around the cover.
10. Reconnect the warming unit to the power source.
11. Record the maintenance action taken and the hours of
operation (read from the hour meter) in the Maintenance
Log (Appendix).

Bair Hugger 500/OR Service Manual
10
Figure 4.
Location of Air Filter
Air filter
Filter
retainer
Hour meter
Air Filter Replacement
The air filter is mounted inside the rear access panel.
Tools/Equipment
Phillips-head screwdriver
Service Frequency
6-month intervals, or 500 hours of use
Method
1. Disconnect the warming unit from the power source.
2. Loosen the 2 Phillips-head 1/4-turn screws on the rear
access panel. Tilt the panel out and remove it.
3. Loosen the 2 Phillips-head 1/4-turn screws on the filter
retainer, remove the retainer, and pull out the filter.
4. Record the hour meter reading and date on the new air
filter label.
5. Place the new filter into the filter box, as shown below
(“cross-bars” on the filter face OUT).
6. Replace the filter retainer.
7. Tighten the 2 Phillips-head 1/4-turn screws on the filter
retainer.
8. Replace the rear access panel.
9. Tighten the 2 Phillips-head 1/4-turn screws on the rear
access panel.
10. Reconnect the warming unit to the power source.
11. Read the hour meter, located on the lower right-hand
corner in the back of the warming unit (see Figure 4).
Record the hours and maintenance action taken in the
Maintenance Log (Appendix).
Rear access
panel

Bair Hugger 500/OR Service Manual 11
Over Heat Alarm Testing
WARNING: Perform all testing and adjustments of warming unit
temperature with a calibrated Model 221 Temperature Test Kit or a
Model 22110 Temperature Test Unit. Arizant Healthcare Inc.
assumes no responsibility for the reliability, safety, or performance
of the Bair Hugger system if warming unit temperature testing or
adjustments are made in any other manner than that described
here. Improper measurement or adjustment of the warming unit’s
over heat alarm setting could result in patient exposure to
temperatures outside of the indicated range, and may lead to
patient injury.
NOTE: The Model 221 Temperature Test Kit and the Model 22110
Temperature Test Unit are designed to simulate the operating
characteristics of Bair Hugger blankets when used with Bair Hugger
warming units; use of the temperature test device with any other
warming system may result in imprecise readings.
If using the Model 221 test kit, temperature readings are taken from
the test kit itself. If using the Model 22110 test unit, temperature
readings are taken from a calibrated temperature meter.
Service Frequency
6-month intervals, or 500 hours of use
Tools/Equipment
• Model 221 Temperature Test Kit or Model 22110
Temperature Test Unit
• Phillips-head screwdriver
• Short jumper wire with alligator clips
If using the Model 22110 Temperature Test Unit:
• Use a calibrated temperature meter that can accept a male
subminiature connector and read a K style thermocouple
(e.g., a Fluke Model 52 K/J Thermometer).
• If the connector does not fit your meter, you can remove the
provided connector and attach a connector that fits your
meter.
Method
1. Disconnect the warming unit from the power supply.
2. Loosen the 2 Phillips-head screws on the rear access
panel. Lift the access panel to remove it.

Bair Hugger 500/OR Service Manual
12
Over Heat Alarm Testing
3. Two (2) test point leads (TP3 & TP4) protrude in the
exposed area of the board (see Figure 5). Place a jumper
wire between the test points.
4. Insert the open hose end from the warming unit in the
port on the temperature test device (see Figure 6).
NOTE: Do not block the rear air vents on the test device.
Figure 6. Model 221 Temperature Test Kit and Model 22110
Temperature Test Unit
Port
Figure 5. Location of TP3 and TP4
5. Connect the warming unit to the power source and turn
the warming unit power ON.
NOTE: The temperature setting will not affect the over heat
test because the control circuit has been bypassed by the
jumper wire.
6. When the over heat alarm activates both visually and
audibly, note the maximum temperature achieved. Let
the alarm operate for at least 1 minute or until the
temperature read-out is approximately 38°C (100°F),
then, turn the warming unit OFF and then ON; the
alarm should also turn off. The alarm and manual reset
constitutes one cycle.
NOTE: If the alarm does not reset, allow the unit to alarm
for 1 minute before turning the warming unit OFF, then
ON again.
Port
Hose

Bair Hugger 500/OR Service Manual 13
Over Heat Alarm Testing
7. Allow the warming unit to cycle 2 times more, after the
first satisfactory reading. When the alarm activates, note
the alarm temperature read-out. See Table 1 for specified
limits.
NOTE: The first over heat cycle temperature may be slightly
higher when started from a cold start.
8. If the results of the test did not meet specified limits,
adjust the over heat thermostat. See the Over Heat Alarm
Thermostat Adjustment section.
9. If the results of the test did meet specified limits, turn the
warming unit power OFF and disconnect the warming
unit from the power source.
10. Remove the hose end from the port on the temperature
test device.
11. Remove the jumper wire and reinstall the rear access
panel.
12. Record the maintenance action taken and hours of
operation (read from the hour meter) in the Maintenance
Log (Appendix).
Table 1. Over Heat Specification
Model 500 Series High Temperature Thermostat
The thermostat interrupts power to the heater and
activates the alarm at a preset high temperature of 53° ±
3°C (127.4° ± 5.4°F) or less at the end of the hose, as
determined by the Model 221 Temperature Test Kit and
the Model 22110 Temperature Test Unit.

Bair Hugger 500/OR Service Manual
14
Over Heat Alarm Thermostat Adjustment
WARNING: Improper adjustment of the warming unit’s over heat
alarm setpoint could result in patient exposure to temperatures
outside the indicated range, and may lead to patient injury.
• Closely follow instructions for thermostat adjustment.
• Dangerous voltages are present at the terminals of the
thermostat.
• Always use a Model 221 Temperature Test Kit or a Model 22110
Temperature Test Unit to verify output temperatures.
• Recalibrate the temperature test kit at least once a year. The
Model 22110 Temperature Test Unit does not need to be
calibrated. The meter it is connected to must be calibrated.
Follow the calibration instructions in the meter service manual or
follow standard facility calibration schedules.
• When in doubt, contact Technical Service for assistance in
temperature adjustment.
Tools/Equipment
• Model 221 Temperature Test Kit or Model 22110
Temperature Test Unit
• Small slotted screwdriver
• Phillips-head screwdriver
• Short jumper wire with alligator clips
If using a Model 22110 Temperature Test Unit:
• Use a calibrated temperature meter that can accept a male
subminiature connector and read a K style thermocouple
(e.g., a Fluke Model 52 K/J Thermometer).
• If the connector does not fit your meter, you can remove the
provided connector and attach a connector that fits your
meter.
Method
1. Disconnect the warming unit from the power source.
2. Loosen the 2 Phillips-head 1/4-turn screws on the rear
access panel. Lift the access panel to remove it.
3. Two (2) test point leads (TP3 & TP4) protrude in the
exposed area of the board (see Figure 5); place a jumper
wire between the test points.
4. Insert the open hose end from the warming unit in the
port on the temperature test device.
NOTE: Do not block the rear air vents on the test device.
5. Reconnect the warming unit to the power source. Turn
the power ON.
NOTE: The temperature setting will not affect the over heat
test because the control circuit has been bypassed by the
jumper wire.

Bair Hugger 500/OR Service Manual 15
6. Locate the over heat adjustment thermostat (see Figure 7).
NOTE: Adjustment of the over heat alarm thermostat is most
easily done while the temperature read-out is climbing.
Over heat alarm
thermostat
(detail)
Figure 7. Location of Over
Heat Alarm Thermostat
7. Use a small slotted screwdriver to adjust the thermostat.
• If the tested alarm temperature was below the specified
limits, turn the screwdriver CLOCKWISE to increase
the alarm temperature.
• If the tested alarm temperature was above specified
limits, turn the screwdriver COUNTERCLOCKWISE
to lower the alarm temperature.
8. Fine-tune the adjustment until the warming unit alarms
at the specified temperature.
9. When the over heat alarm activates both visually and
audibly, note the maximum temperature achieved. Let the
alarm operate for at least 1 minute, or until the
temperature read-out is approximately 38°C (100°F),
then, turn the warming unit OFF and then ON; the
alarm should also turn off. The alarm and manual reset
constitutes one cycle.
10. Retest the alarm temperature to verify correct adjustment
at least 2 times. Allow the warming unit to cycle before
each test.
11. When the warming unit alarm setting is within the
specified limit, turn the warming unit OFF, and
disconnect it from the power source.
12. Remove the hose end from the port on the temperature
test device.
13. Remove the jumper from between the test points, and
close the rear access panel. Resecure the screws.
14. Record the maintenance action taken and the hours of
operation (read from the hour meter) in the Maintenance
Log (Appendix).

Bair Hugger 500/OR Service Manual
16
Normal Operating Temperature Testing
WARNING: Perform all testing and adjustments of warming unit
temperature with a calibrated Model 221 Temperature Test Kit or a
Model 22110 Temperature Test Unit. Arizant Healthcare Inc.
assumes no responsibility for the reliability, safety, or performance
of the Bair Hugger system if warming unit temperature testing or
adjustments are made in any other manner than that described
here. Improper measurement or adjustment of the warming unit’s
normal operating temperature could result in patient exposure to
temperatures outside of the indicated range, and may lead to
patient injury.
NOTE: The Model 221 Temperature Test Kit and the Model 22110
Temperature Test Unit are designed to simulate the operating
characteristics of Bair Hugger blankets when used with Bair Hugger
warming units; use of the temperature test device with any other
warming system may result in imprecise readings.
Service Frequency
6-month intervals, or 500 hours of use
Tools/Equipment
Model 221 Temperature Test Kit or the Model 22110
Temperature Test Unit
Method
1. Insert the open hose end from the warming unit in the
port on the temperature test device (see Figure 6).
NOTE: Do not block the rear air vents on the test device.
2. Turn the warming unit power ON and select the HIGH
temperature setting. Always begin testing at the HIGH
setting.
3. Note the ambient room temperature.
Table of contents
Other Bair Hugger Medical Equipment manuals
Popular Medical Equipment manuals by other brands

HeartSine
HeartSine samaritan PAD user manual

DermaZoo
DermaZoo OtoPet-USA Earigator Setup and use instructions

Orliman
Orliman Arnetec 1001 INSTRUCTIONS FOR USE AND PRESERVATION

Carestream Helth
Carestream Helth Kodak Point-of-Care CR 120 Service manual

mychway
mychway MS-7206F user manual

Codonics
Codonics Virtua manual