Note: The light/lens assembly may include an integrated ring light or a blank disk if an integrated
ring light is not used. Be careful that the light/lens assembly does not pull out when removing the
Focusing Window. Give a slight tug on the Focusing Window when you think you've unscrewed it far
enough. If the lens assembly moves with the window, continue to rotate the window clockwise until
the lens assembly does not move.
3. Set the Focusing Window aside.Be careful not to get any debris on the window's O-ring.
4. If present, remove the protective covering on the filter.
5. Place the filter into the Filter Cap and press the cap onto the lens.
Note: Avoid getting fingerprints on the filter or lens.If necessary, carefully clean the filter and/or lens
with an appropriate lens cleaner.
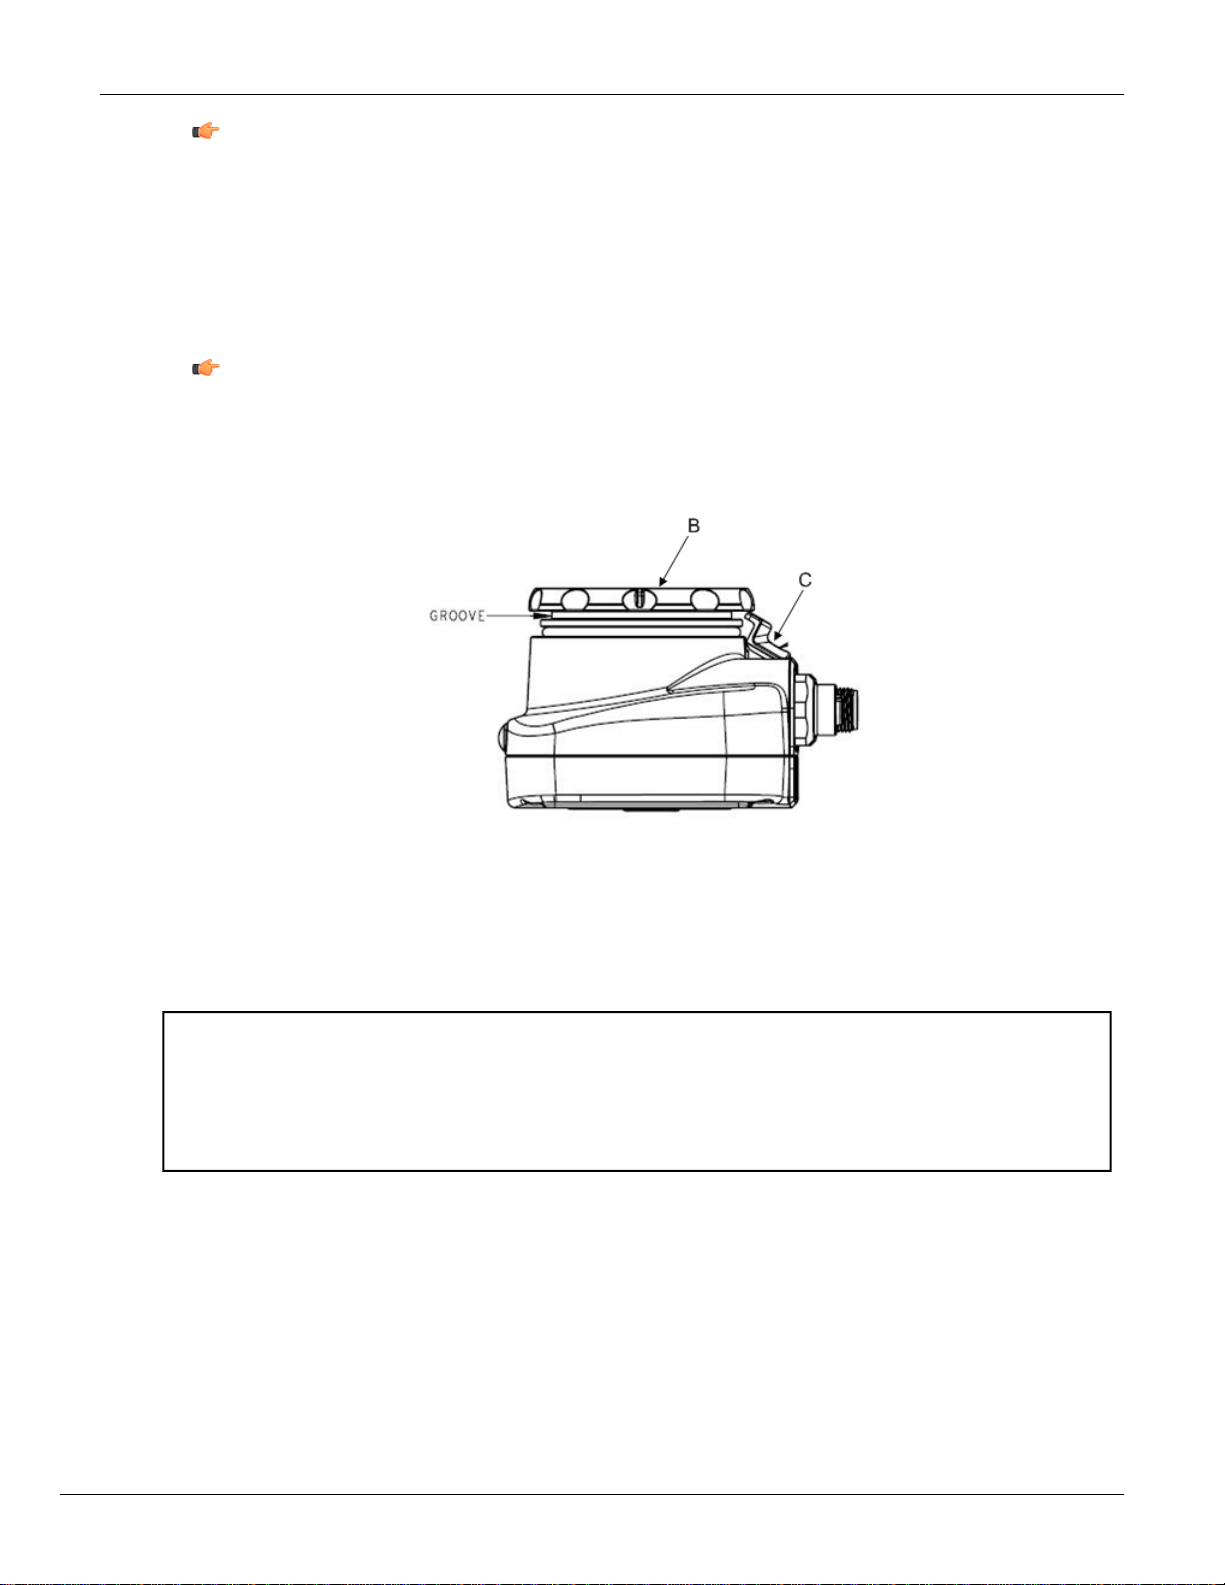
6. Once the filter is installed, place the Focusing Window back into the housing while inserting the Locking
Clip into the groove as shown below.
7. Press the Focusing Window onto the housing to make sure that it seats correctly (that is, there is no gap
between the window and housing.Rotate the window counter-clockwise at least two turns.
8. Replace the locking tab screw but do not tighten until you have set up and focused the sensor again.
CAUTION . . . Electrostatic Discharge
Avoid the damage that electrostatic discharge (ESD) can cause to the
Sensor
Always use a proven method for preventing electrostatic discharge when installing a lens or attaching a cable.
Filter Kits


