barbas ECO 52 User manual

DIRECTIONS FOR USE
INSTALLATION INSTRUCTIONS
ECO
40 / 52 / 55
EN -13240
NAME OUTPUT DESCRIPTION
ECO 40 5.0 kW Stove
ECO 52 7.0 kW Stove
ECO 55 8.0 kW Stove


3
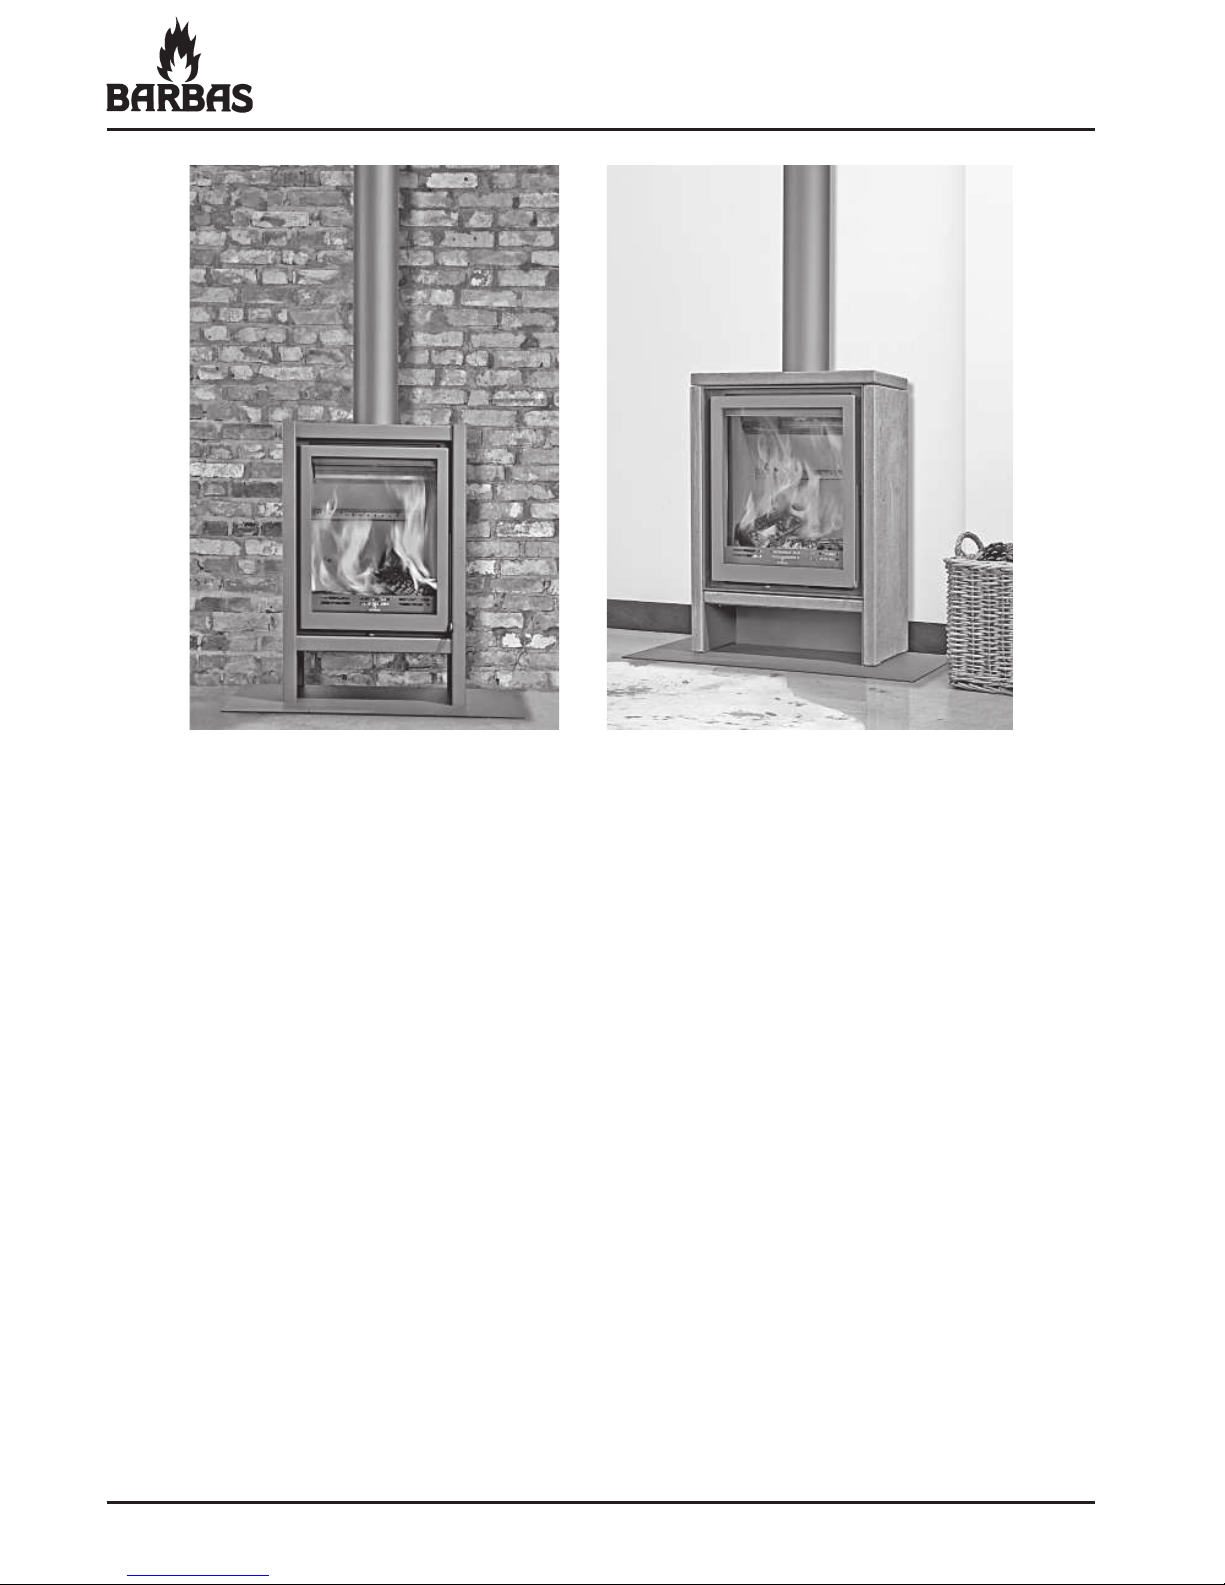
ECO 40 / 52 / 55
ECO 40 Steel
Floor plate and wood rack (high model) are optional !
ECO 52 Steel
ECO 40 Soapstone
ECO 52 Soapstone
4
ECO 40 / 52 / 55
ECO 55 Steel ECO 55 Soapstone

5
ECO 40 / 52 / 55
TABLE OF CONTENTS
Page
1. Introduction
1.1 Preface...............................................................
..
..
...
.
....
....
. 7
1.2 Safety.........................................................
..........
..........
.....
. 7
2. Location........................................................................
.....
......
..
.. 10
3. Installation instructions........................................
......
..
.......
.....
.... 16
4. Operation of the stove.........................
.......
.....................
.........
..
. 30
5. Stoking up for the first time.............................................
.............
31
6. Use
6.1 Ventilation................................................
..................
.
......
... 32
6.2 Getting the fire going..................................................
.
....
..
.
. 32
6.3 While stoking......................................................................
.
33
6.4 Heating economically..................................
..........
..
..
...
.
......
. 35
6.5 Cleaning the window.........
.
........
......
..............
..
.
....
..
.......
..
..
. 35
7. General hints
7.1 Tips....................................................................
...........
....
.
.. 36
7.2 Output...............................................................
.
....
....
....
.....
. 37
8. Fuels.................................................................................
......
..... 39
9. Amount of fuel..........................................
.................
.............
....
. 40
10. Regular maintenance........................................
.......
...................
. 42
11. Replacement parts....................................
.......
.......
..
................
.
.. 43
12. Dimensions.................................................................................. 48
13. Technical data............................................................
.............
..
.. 54
14. Frequently asked questions..............
......
.................
..
..
.............
... 56

6
ECO 40 / 52 / 55

7
ECO 40 / 52 / 55
1. INTRODUCTION
1.1. PREFACE
We would like to congratulate you on your purchase of this modern BARBAS
stove. This quality product will give you years of heating pleasure as you enjoy
the play of the •ames and the cosy glow of the •re.
This manual contains directions for both positioning the appliance and for its
environmentally-friendly use. It also contains technical data for the appliance,
parts information and directions in the event of problems. Study this manual
carefully before using the stove. We recommend you keep this manual in a safe
place for reference purposes.
The Unilux-3 40 is recommended for exemption under Section 21 of the Clean
Air Act 1993 and is therefore allowed to be used in smokeless zones / smoke
control areas.
1.2. SAFETY AND INSTALLATION INSTRUCTIONS
Safety
• Do not place •ammable objects within 80 cm of the appliance. Pay special
attention to furnishings and ornaments around the stove.
• To ensure safe operation, the following minimum distances must be
maintained between the appliance and any existing side or rear wall
(temperature ≤ 80 °C).
ECO 40 : in respect of side wall : Distance ≥10 cm
ECO 40 : in respect of rear wall : Distance ≥10 cm
ECO 52/55 : in respect of side wall : Distance ≥10 cm
ECO 52/55 : in respect of rear wall : Distance ≥20 cm
• If the •oor is •ammable, a non•ammable •oor plate should be used under
the appliance. Use the •oor plate as mentioned in chapter 2.2.
• When you use your stove, the exterior will become hot. Always wear the
glove or use the accessories supplied when •lling etc. Protect yourself
and others (especially children!) from burns. Do not leave children
unattended when the stove is burning.

8
ECO 40 / 52 / 55
• Watch your clothing. Synthetic clothing in particular can easily catch fire and
burn intensely.
• Do not approach the appliance with flammable materials or liquids. Any work
with solvents, adhesives etc. in the space heated by the stove can be very
dangerous.
• Make sure you know what state your chimney is in. Cracks in the chimney
may not only lead to damp, staining of walls and leaking of smoke, they can
also impair the carrying off of smoke. Make sure you get proper advice from
your Barbas dealer or other specialist company.
• Avoid chimney fires!
Have your chimney swept at least once per year - more often if you use your
stove a lot.
Prevent excessive deposits of soot inside the chimney by not burning
freshly-cut wood. Instead, burn clean, dry chopped wood.
• Do not use your stove as a barbecue. This can cause (flammable) fat
deposits to be left in the chimney and hastens the chimney becoming
clogged. Prevent your chimney being soiled from above (birds’ nests etc.) by
fitting a suitable cap to the chimney pot.
• Follow the instructions issued by your local fire brigade.
The stove can be taken in operation if national and local regulations are
satisfied. The required constructive adaptations should be satisfied as well.
Installation Instructions
• Wood and wood bricks can be burned in the stove.
Coals can’t be burned in the stove.
• Never use the stove to burn rubbish.
• Read all instructions/stickers, on and around, the appliance.
• Carefully read the user manual before using your appliance for the first time.
When you first fire up your appliance, there are a number of extra points you
should take into account. See section 5.

9
ECO 40 / 52 / 55
• Never use liquid fuels, such as petrol, lighter !uid etc.
Use of these could cause dangerous situations and damage your appliance.
• In transit, some parts of the appliance may have moved from their original
place. Check that the door opens and closes, the brake plate is "tted
correctly to the brackets at the top of the "re, the internal panels are "xed to
the walls and the stones on the bottom have not moved. Check whether the
grate is lying correctly and there are no foreign objects in the ashtray.
• Avoid over-loading (white burning glow), caused, for example, by lengthy
burning with primary air (combustion air supply slider all the way to “ +”)
or by burning too much wood in one go. The stove can then become over-
heated.
This may damage the grate and the metal !ue gas !ap.
• Consult the current local building regulations before starting the assembly.

10
ECO 40 / 52 / 55
2. LOCATION
2.1. INCLUDED
Set - Warranty
documentation - Manual
- Connection ring (cast iron) + Cord
Smoke - Sealing plate + Cord
connection set (for the top of the stove)
In the (If the appliance - Rosette, Steel
appliance is ordered with a (if soapstone version)
rear-connection) - Coverplate, Steel
(if steel version)
Attributes - Glove (Heat resistant up to max. 95°C)
- Operating hook / Poker
- Top plate with through-feed hole,
Soapstone
- Rosette, Steel (if •ue outlet
rear-connection)
Soapstone - Left side panel, Soapstone
- Right side panel, Soapstone
- Small front panel, Soapstone
- Foot, Steel
Type
- Complete exterior, Steel
Steel - Cover plate, Steel (if •ue outlet
rear-connection)
(Factory assembled)
N.B. If any part is missing, please contact your dealer.
11
ECO 40 / 52 / 55
2.2. ACCESSORIES
The following accessories can be supplied by your dealer:
Thick-walled (2 mm) steel chimney system Ø150 mm:
Description Part no Color
Anthracite
Gray
Duct 1000 mm
310087 l
310094 l
Duct 500 mm
310088 l
310095 l
Duct 1000 mm + valve
310180 l
310186 l
Elbow 90°
310093 l
310100 l
Elbow 45°
310091 l
310098 l
Elbow 30°
310090 l
310097 l
Support sleeve, double-walled 302226
-
-
Rosette
310181 l
310187 l
Accessorie Part no Color
Anthracite
Floor plate E ECO 40 327633 l
Floor plate
F ECO 52/55 327634 l
Wood rack ECO 40 - High model - h = 60 mm 327647 l
Wood rack ECO 52 - High model - h = 60 mm 328059 l
Wood rack ECO 55 - High model - h = 60 mm 327648 l
12
ECO 40 / 52 / 55
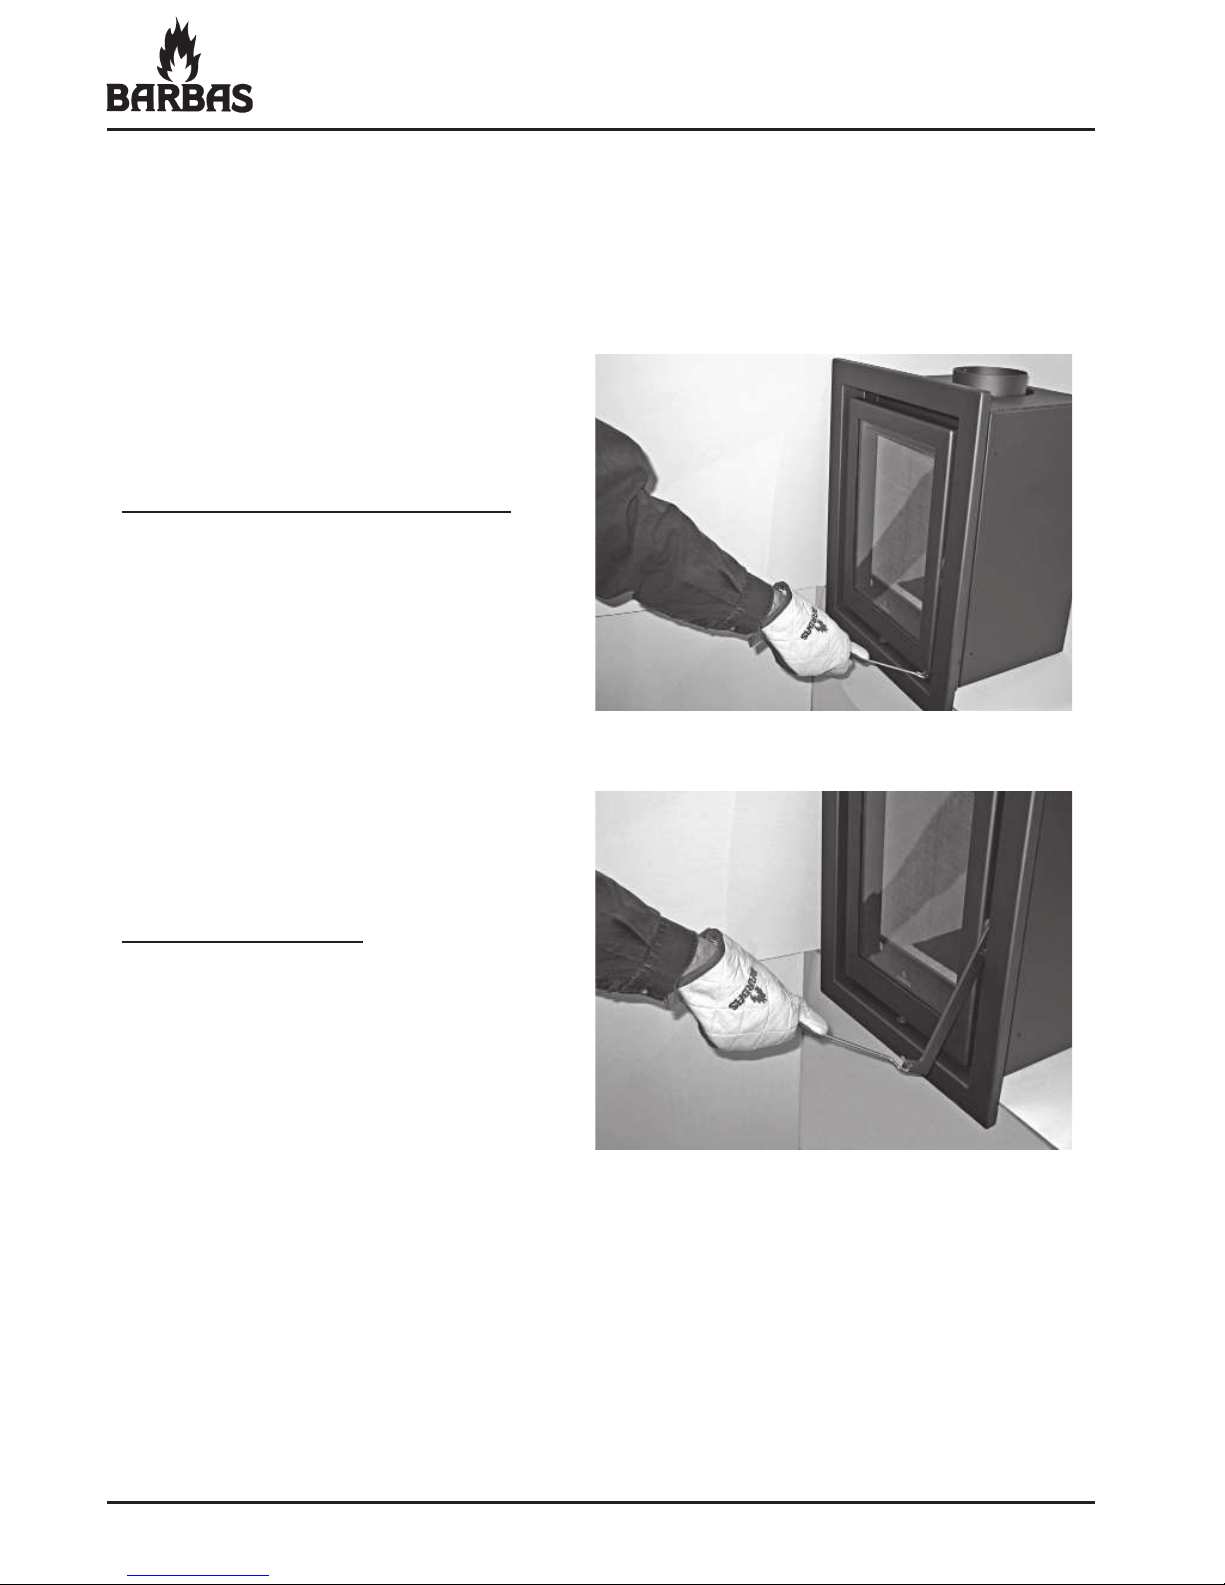
2.3. PREPARATION FOR POSITIONING
Check all functions of the stove before •tting.
• Check the opening and closing operation of the door.
‚
•
Turn the handle all the way down:
Door is locked.
This handle position should be
set when the appliance is not
in use.
Handle 30° forwards:
Door is still fully locked.
This handle position should be
used when the appliance is being
stoked. It allows the door to be
opened and closed easily.

13
ECO 40 / 52 / 55
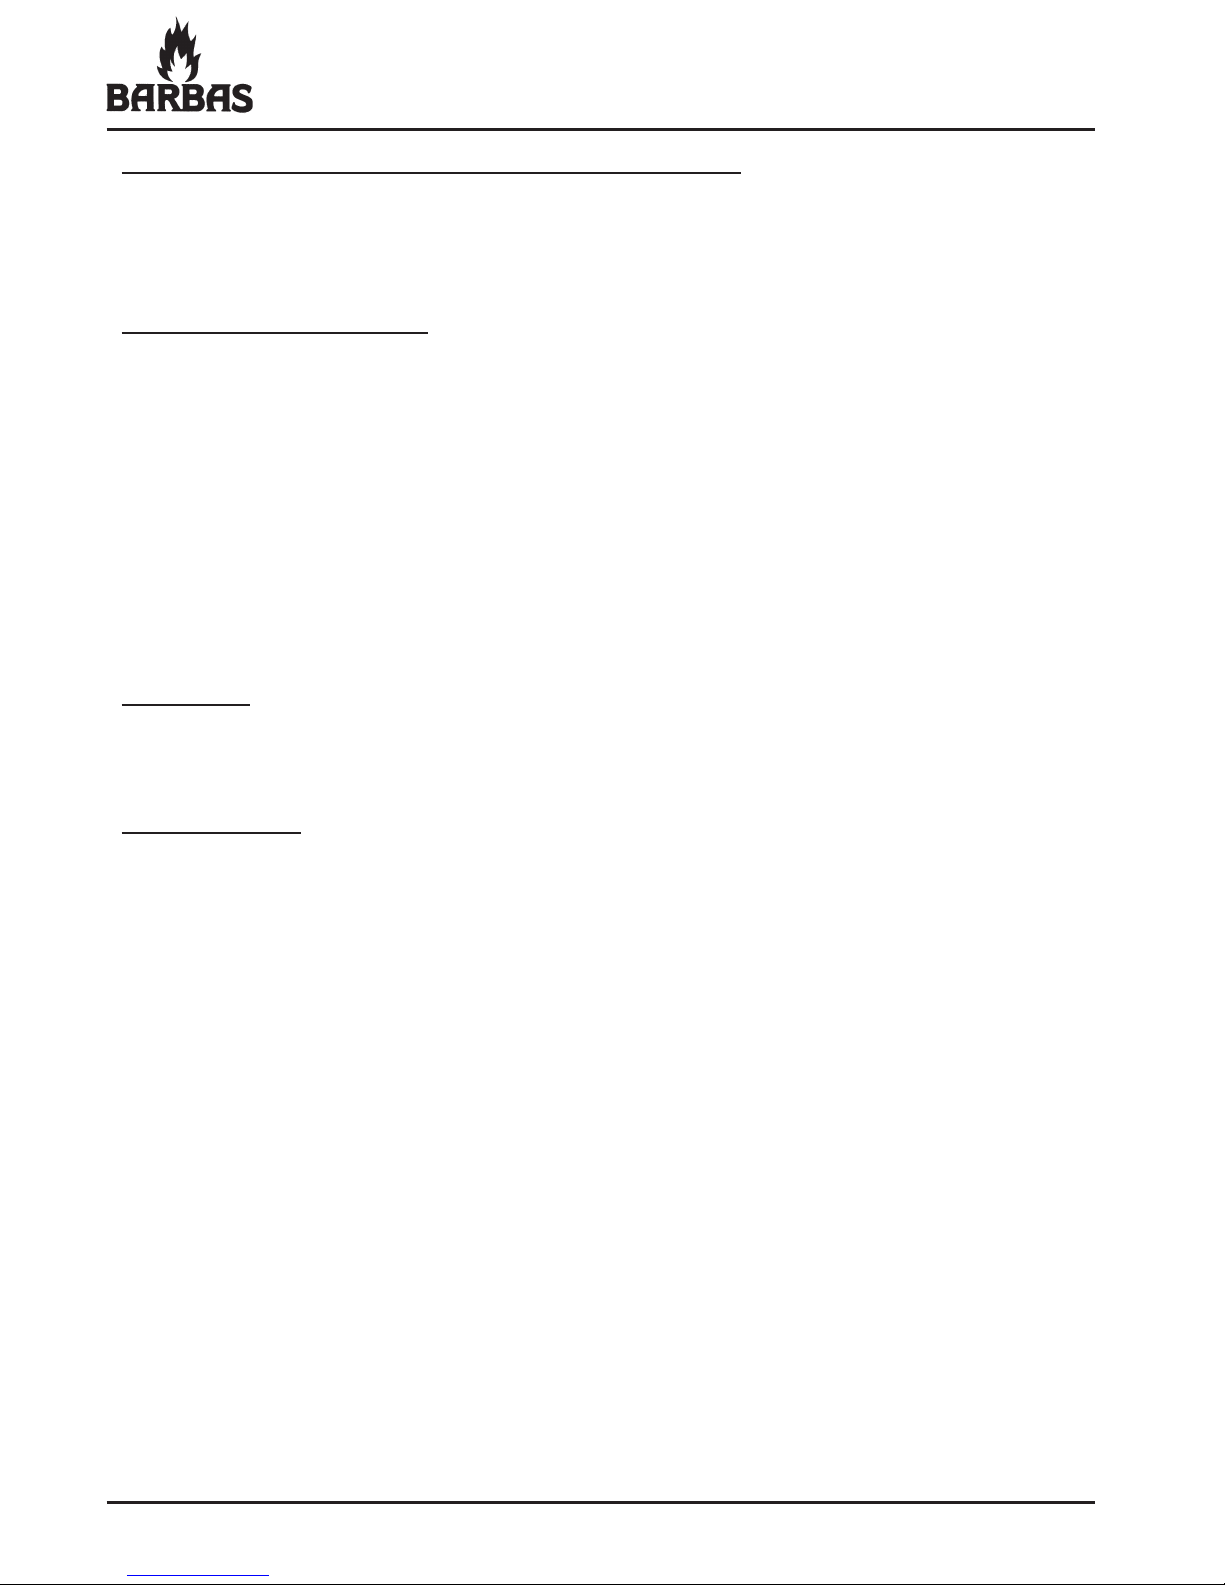
• Check the operation and setting of the •ue gas •ap.
ƒ
Flue gas •ap pin
Flue gas •ap
Door open Pin comes forwards Flue gas •ap open
Door closed Pin is pressed in by the door Flue gas •ap closed
Handle ± 50° forwards:
The door releases from its
lock and be opened forwards.

14
ECO 40 / 52 / 55
• Check whether the ashtray is completely empty.
• Check the operation of the slider for controlling the combustion air.

15
ECO 40 / 52 / 55
• Report any defects immediately to your dealer.
• Remove enclosed documents and components from the stove.
Have the suitability of the area in which the stove is to be placed (and the
chimney) approved by a specialist. The stove must have its own chimney,
constructed in compliance with current legislation.

16
ECO 40 / 52 / 55
3. INSTALLATION INSTRUCTIONS
3.1. FITTING INSTRUCTIONS
When •tting the stove, local and/or national regulations relating to •re safety
must be followed. In case of doubt, consult the •re safety department of the local
•re brigade, particularly if the stove is to be •tted in a home with walls and/or
•oors containing •ammable material.
Position the appliance suf•ciently far away from the wall behind it, according
to the data from chapter 1.2. If the walls are not •re-proof, the distance should
be such that the wall in question cannot become hotter than 80°C, even when
the stove is stoked up to high temperatures. In case of doubt, insert a •re-proof
protection shield.
The •oor on which the appliance is placed must have suf•cient bearing power.
The connection of several appliances to a single •ue/chimney is not allowed.
3.2. CHIMNEY
Be sure that existing chimneys are completely air-tight and in good condition. In
terms of dimensions, the chimney must have a diameter of at least 150 mm for
the entire length (including the chimney pot).
Ensure that the chimney is •tted with an appropriate cap to avoid rain and dirt
getting in (as well as bird’s nests).
The draught •owing through the chimney determines how well your stove will
burn (recommended draught 0.15 mbar: = 15 Pa).
In the event of problems, a solution may be a different chimney cap, if necessary
one with a chimney fan. Contact a specialist if you have any doubts about any of
the above points.
If your chimney is unsuitable, or if your home does not have a chimney,
we recommend the use of double-walled stainless steel chimney sections.
Chimneys must comply with the prevailing building regulations. Make sure the
building is carried out by a specialist. When purchasing such chimneys, be sure
to check if a casing is required.

17
ECO 40 / 52 / 55
Important:
• Chimneys must be free-standing, i.e. they must not rest on the appliance
itself.
• Any pipe connections that are not insulated must also be fully insulated.
• Flammable material must be kept clear (outside the casing/insulation zone)
of all through-feeds in the •oor or wall (remember the roof decking).
• The chimney opening must be at least 5 metres above the top of the door
opening of your appliance.
• The chimney must protrude at least 40 cm above the apex of a sloping roof
and at least 1 metre above a •at roof. In short, the chimney must always end
in an area with a negative air pressure. Contact your local chimney sweep for
the exact dimensions of the chimney opening.
Between the stove and chimney, use thick-walled smoke piping (Steel, ≥2 mm).
See Chapter 2.2.
The !rst pipe connected to the appliance must have a diameter of 150 mm at
both ends. This will prevent any condensation from the chimney running over
the external end of the pipe. Connect the pipes to the existing chimney (ceiling)
using a sliding sleeve (niche pipe). Check all connections for air-tightness.
If there is too much draught running through your chimney (e.g. if the chimney is
long and straight in a tall building), it may be possible to insert a chimney valve
in the pipe near the appliance. Before doing this, be sure to obtain sound advice
from a specialist.
Do not make any horizontal connections. Deposits and soot will accumulate here
(unless it is a short horizontal connection directly behind the stove).
Avoid bends at all costs. The maximum deviation from the perpendicular is 45°.
The chimney calculation, as in Germany, is made according to DIN 4705 parts
1 and 2.
18
ECO 40 / 52 / 55
The mass •ow and exhaust temperature of the stove
The mass •ow and exhaust temperature of the stove are shown in chapter 13;
Technical Data. These values are important to consider when assessing the
dimensions of the •ue to which the stove is to be connected.
Cleaning the chimney/•ue
Make sure your chimney/•ue is cleaned at least once a year by a recognized
chimney sweep.
If the chimney has a chimney valve, the free opening in the chimney valve •ap
must measure at least 12% of the surface.
3.3. AERATION / VENTILATION
A stove generates : - heating air
- combustion air
Heating air (convection air) is devoted to the convection of heat from the
appliance to the room. No other provisions are necessary. The source of heat is
in the room and stays there.
Combustion air is needed to keep the combustion going by drawing in air from
the room due to the natural draught of the chimney.
The intake opening for the air is under the door. When using the appliance,
please ensure there is a suf!cient supply of fresh air: minimum 50 cm2(Ø80
mm) opening in the room where the stove is placed.
Make sure that the ventilation supply is open; this is particularly important with
today’s airtight dwellings.
If the dwelling has mechanical ventilation that creates under pressure in the
room where the appliance is located, it is necessary to !t a •ue gas fan. The
type of •ue gas fan is dependent on the capacity of the mechanical ventilation
system. Always consult your !tter about this.
In dwellings with an operating extractor hood, this should be turned to the lowest
setting or turned off altogether. If the extractor hood remains in use, additional
ventilation must be provided in compensation. This will not only avoid poor
combustion, but will also prevent •ue gases being sucked from the appliance
into the room.
Should creating an extra ventilation opening prove insuf!cient, it is then neces-
sary to !t a •ue gas fan.
19
ECO 40 / 52 / 55
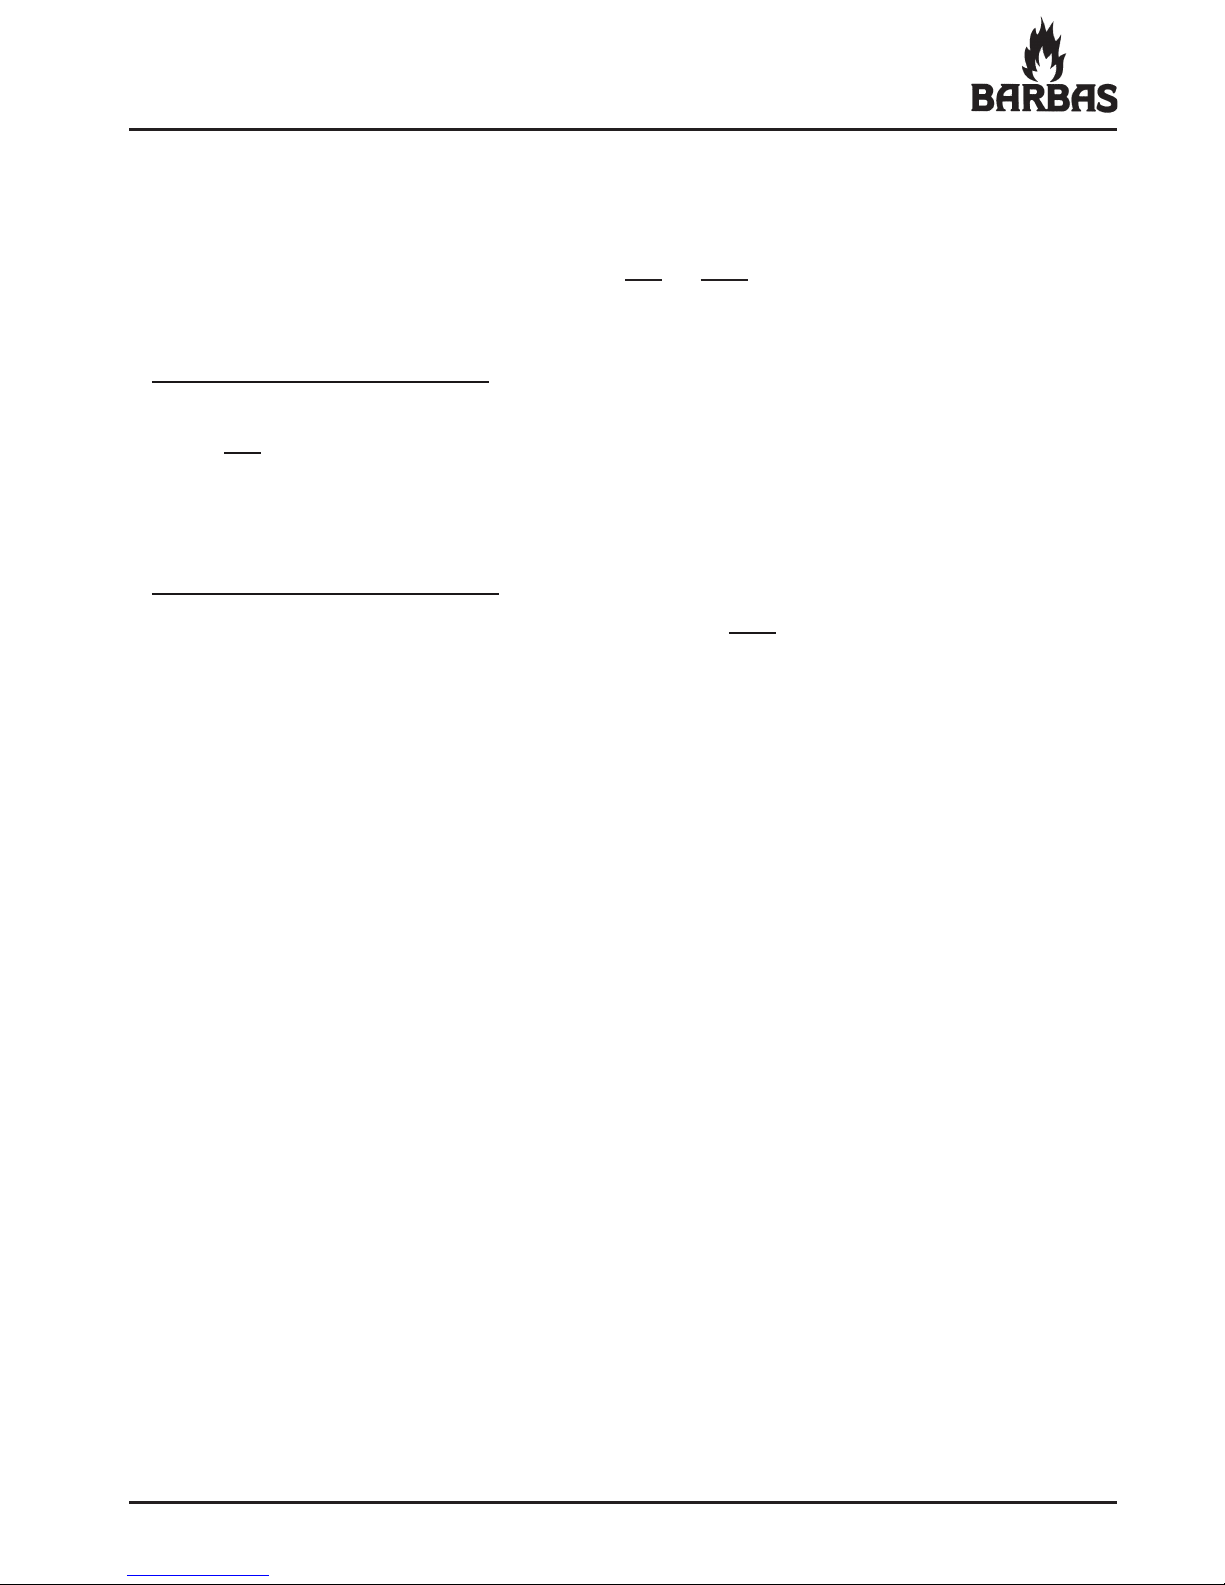
3.4. FITTING THE STOVE
3.4.1. Connecting the smoke outlet
The appliance can make use of either a top or rear connection Ø150 mm
(Ø148 mm external) for the •ue (chimney).
Smoke outlet top-connection
Factory assembled, the appliance is provided with a (detachable) smoke
outlet top-connection. This connection is intended for steel stovepipes, double/
single-skinned stainless steel (insulated) •ues or double/single-skinned •exible
stainless steel •ues.
Smoke outlet rear-connection
In order to be able to assemble the smoke outlet rear-connection, remove the
•ue gas •ap and the brake plate •rst.
See chapter 11 for the disassembly sequence: “Sequence for replacing the
interior of the appliance”.
Fit the sealing plate and the protective plate to the other opening.
Situate the appliance in such a way that the •ue gas outlet is precisely in line
under the chimney connection (niche pipe) in the ceiling (top connection) or with
the chimney connection (niche pipe) in the wall (rear connection).
20
ECO 40 / 52 / 55
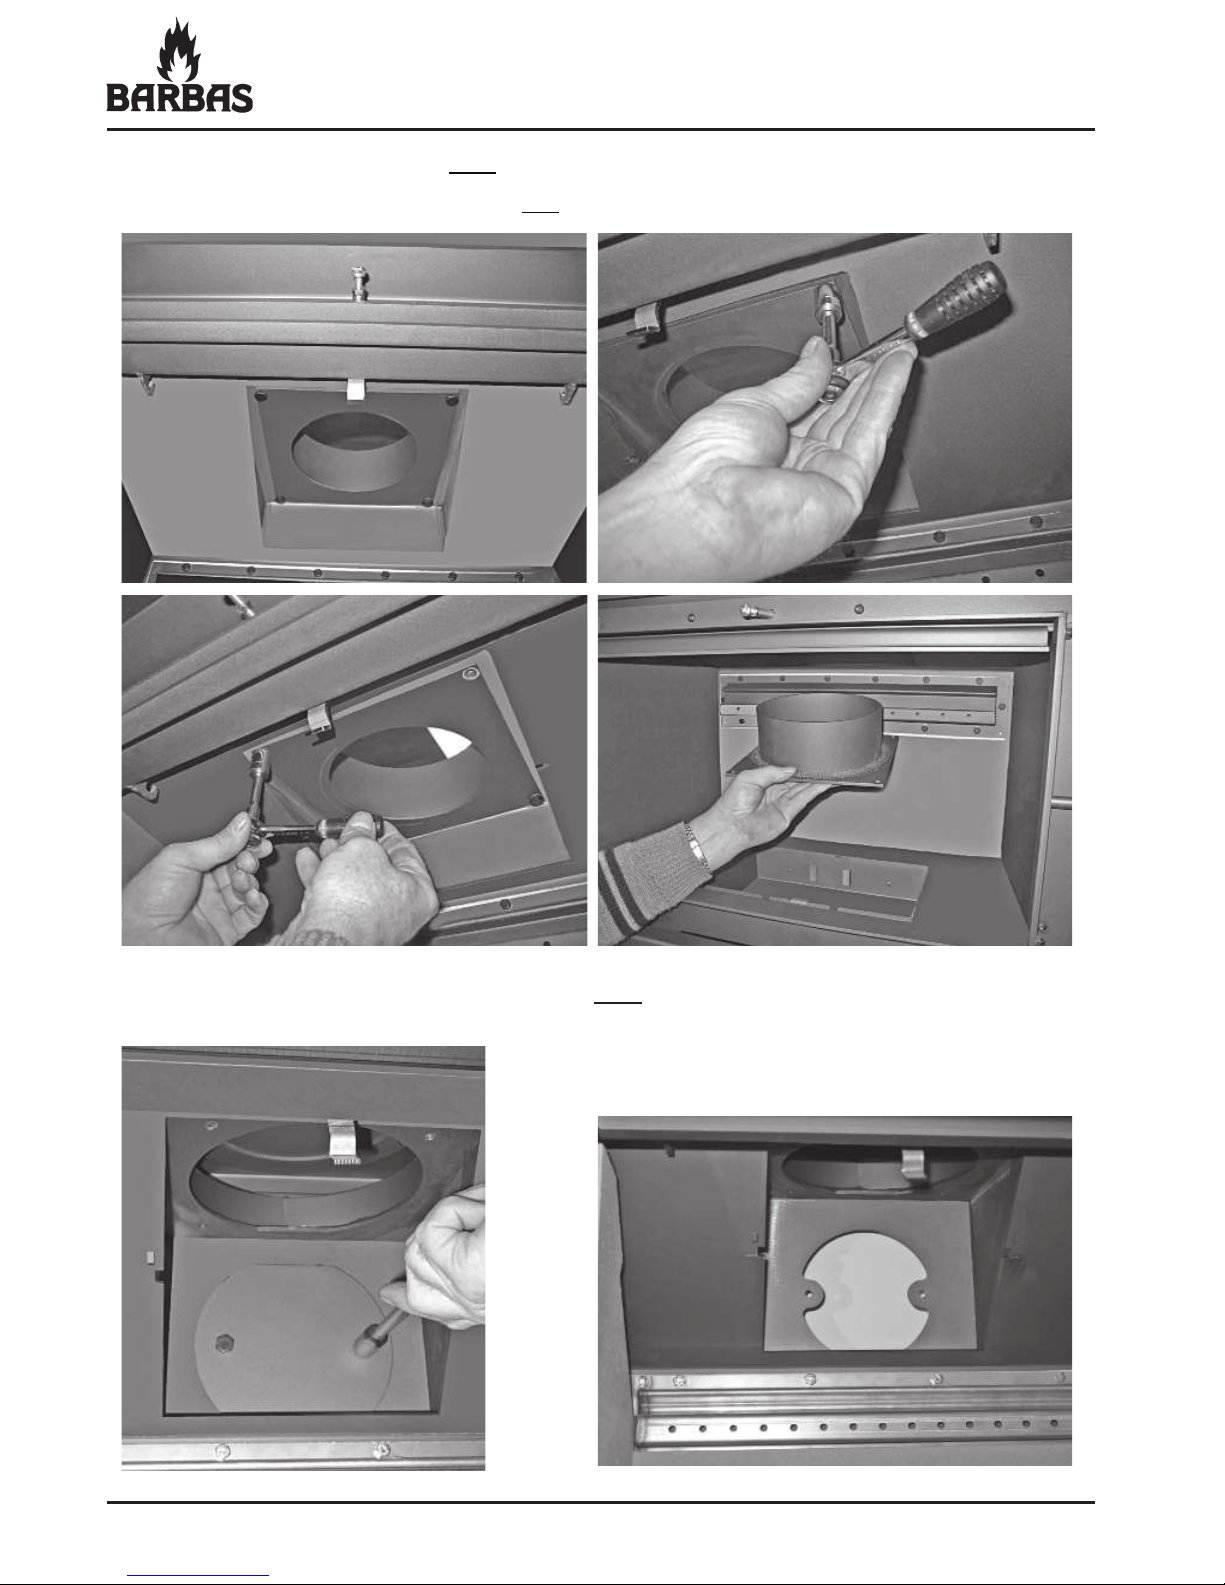
• Disassemble the sealing plate of the rear-connection by way of the inside of
the appliance.
Assemble the smoke outlet rear-connection
• Disassemble the smoke outlet top-connection.
This manual suits for next models
6
Table of contents
Other barbas Stove manuals


Popular Stove manuals by other brands


Italkero
Italkero ECO SC User

STOVES
STOVES Built In Fanned 60cm user guide

J. A. Roby
J. A. Roby JUNIOR 8" Oil1 owner's manual

Lexington Forge
Lexington Forge CONCORDE C28DV operating instructions

THE GALLERY COLLECTION
THE GALLERY COLLECTION Solano Instruction manual and users guide

Jata
Jata JCES2201 Instructions of use

Dovre
Dovre 225MF Installation instructions and operating guide

Defy
Defy KITCHENAIRE DSS693 instruction manual

WERKAPRO
WERKAPRO CA-GB13 operating instructions

Pinguin
Pinguin PYRO Instructions for use

RAIS
RAIS RINA Instructions for installation, use and maintenance

Piazzetta
Piazzetta E902 Installation, use and maintenance instructions