CAUTION
Use the charger indoors only.
2
Important Information
AImportant Information . . . . . . . . . . . . . . . . . . . . . . . . . . . . . . . . . . . . . . . . . . . . . . . . . . . . . . . . . . . . . . . . . . . . .2
BWarnings . . . . . . . . . . . . . . . . . . . . . . . . . . . . . . . . . . . . . . . . . . . . . . . . . . . . . . . . . . . . . . . . . . . . . . . . . . . . . .3
CParts . . . . . . . . . . . . . . . . . . . . . . . . . . . . . . . . . . . . . . . . . . . . . . . . . . . . . . . . . . . . . . . . . . . . . . . . . . . . . . . . .4
DParts Diagram . . . . . . . . . . . . . . . . . . . . . . . . . . . . . . . . . . . . . . . . . . . . . . . . . . . . . . . . . . . . . . . . . . . . . . . . . . .6
EBattery Charging . . . . . . . . . . . . . . . . . . . . . . . . . . . . . . . . . . . . . . . . . . . . . . . . . . . . . . . . . . . . . . . . . . . . . . . . .7
FAssembly . . . . . . . . . . . . . . . . . . . . . . . . . . . . . . . . . . . . . . . . . . . . . . . . . . . . . . . . . . . . . . . . . . . . . . . . . . . . . .9
GLabel Decoration . . . . . . . . . . . . . . . . . . . . . . . . . . . . . . . . . . . . . . . . . . . . . . . . . . . . . . . . . . . . . . . . . . . . . . . .15
HBattery Installation . . . . . . . . . . . . . . . . . . . . . . . . . . . . . . . . . . . . . . . . . . . . . . . . . . . . . . . . . . . . . . . . . . . . . .16
IBattery Care and Disposal . . . . . . . . . . . . . . . . . . . . . . . . . . . . . . . . . . . . . . . . . . . . . . . . . . . . . . . . . . . . . . . .17
JRules for Safe Driving . . . . . . . . . . . . . . . . . . . . . . . . . . . . . . . . . . . . . . . . . . . . . . . . . . . . . . . . . . . . . . . . . . . .18
KHow to Operate Your Vehicle . . . . . . . . . . . . . . . . . . . . . . . . . . . . . . . . . . . . . . . . . . . . . . . . . . . . . . . . . . . . . . .19
LCaring forYour Vehicle . . . . . . . . . . . . . . . . . . . . . . . . . . . . . . . . . . . . . . . . . . . . . . . . . . . . . . . . . . . . . . . . . . .19
MProblems and Solutions Guide . . . . . . . . . . . . . . . . . . . . . . . . . . . . . . . . . . . . . . . . . . . . . . . . . . . . . . . . . . . . .20
NStatement of Limited Warranty . . . . . . . . . . . . . . . . . . . . . . . . . . . . . . . . . . . . . . . . . . . . . . . . . . . . . . . . . . . . .24
OAuthorized Service Centers . . . . . . . . . . . . . . . . . . . . . . . . . . . . . . . . . . . . . . . . . . . . . . . . . . . . . . . . . . . . . . . .24
• Your new vehicle requires adult assembly. Please set
aside at least 30 minutes for assembly.
• You must charge your battery for 18 - 30 hours BEFORE
YOU USE YOUR VEHICLE FOR THE FIRST TIME.We
recommend that you start charging your battery before
beginning assembly. Please see Battery Charging
beginning on page 7 for detailed instructions.
• Read this manual carefully for important safety informa-
tion and operating instructions before using your vehicle.
• This vehicle is designed for use on grass, asphalt and
other hard surfaces by children 11/2- 4 years of age.
• To prevent damaging the motors and gears, do not tow
anything behind the vehicle or overload it. Do not exceed
the maximum weight capacity of 50 lbs (23 kg).
• To prevent damage to the motors and gears, do not use
the handle to push the vehicle if your child is not
pressing the foot pedal.
• If you have any questions about your Power Wheels®
vehicle, please call our toll-free service lines at
1-800-348-0751 from 8 AM to 6 PM (EST) Monday
through Friday. Trained customer service representatives
are available to take your call in English or French. Habla
Español? Si usted tiene alguna pregunta ó
necesita asistencia llame gratis 1-800-348-0755 para los
Estados Unidos.Tenemos representantes que hablan
español para atender su llamada.
A
• For your convenience, Power Wheels®maintains an
Authorized Service Center Network with more than
400 authorized service centers nationwide. Our
authorized service centers will repair or replace parts
under warranty at no extra charge, and can perform
non-warranty repairs for a minimal charge. Please see
the Authorized Service Center list beginning on page 24
to find the authorized service center nearest you, or call
1-800-348-0751.
• Please complete and return the enclosed Registration
Card today, or call 1-800-348-0751 to register your
vehicle by phone.
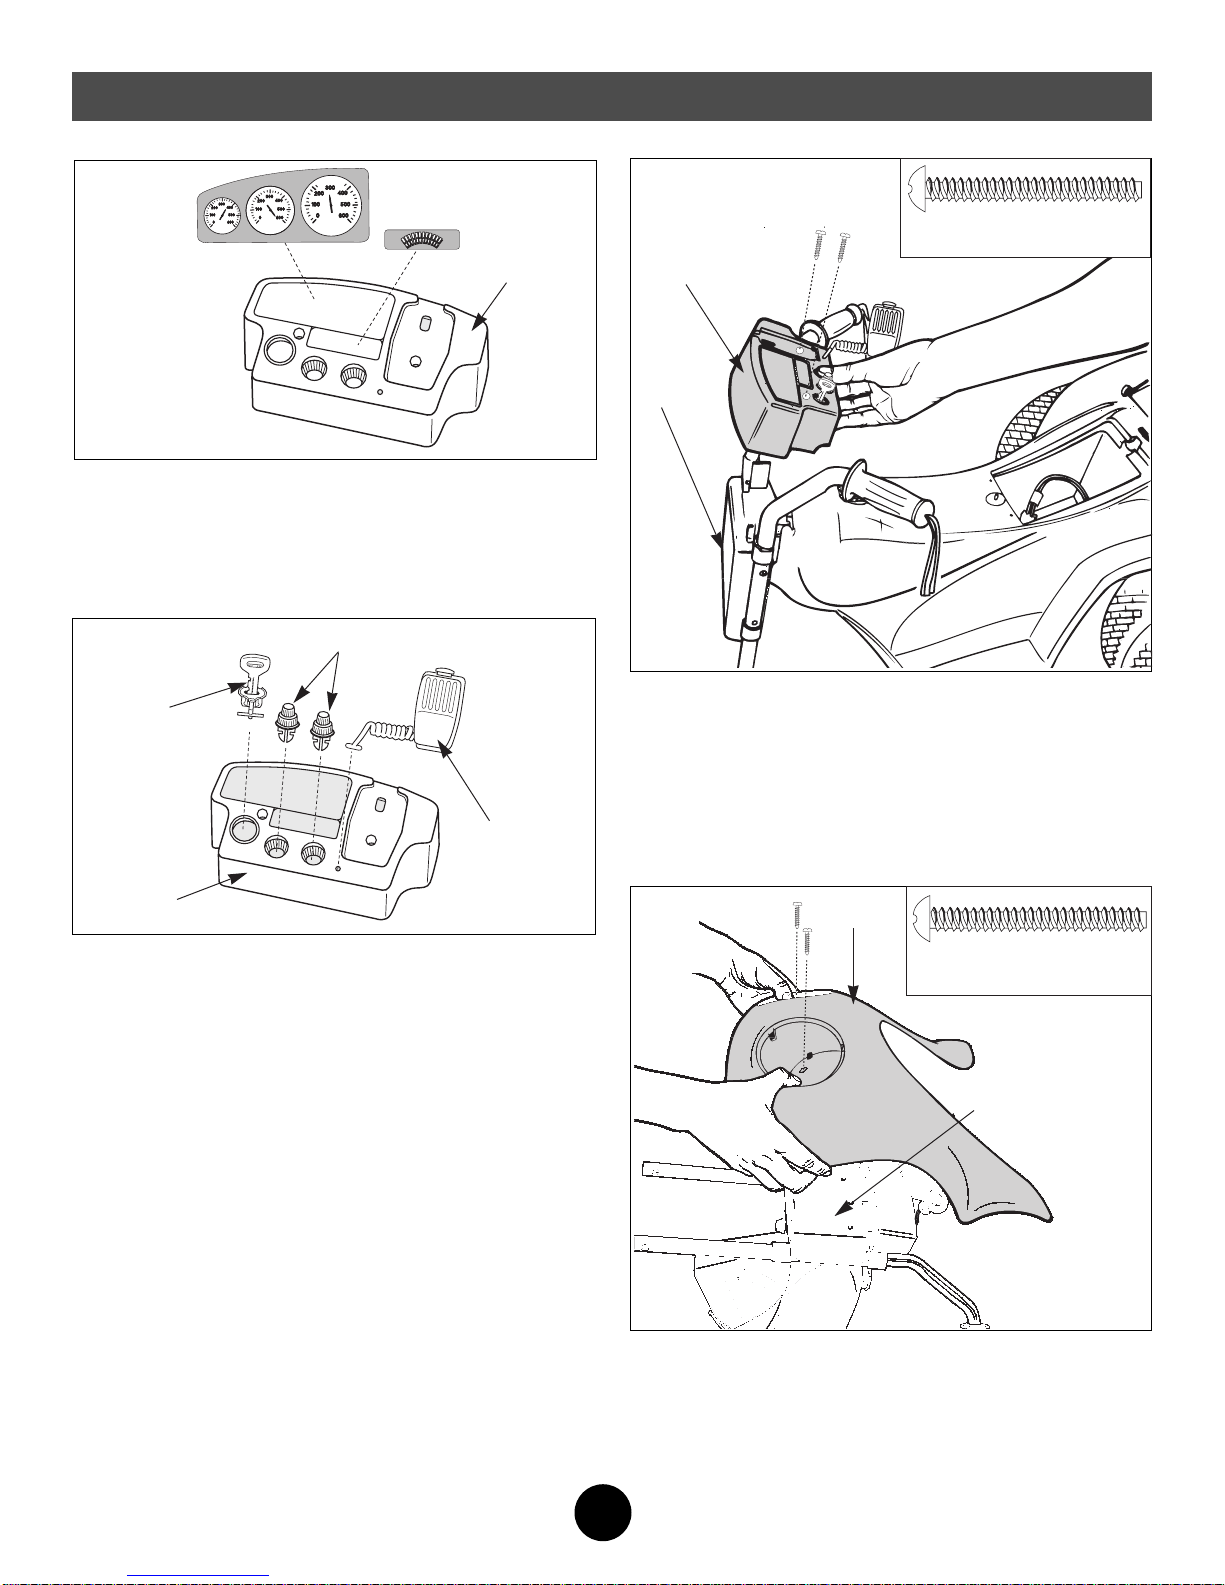
Parts