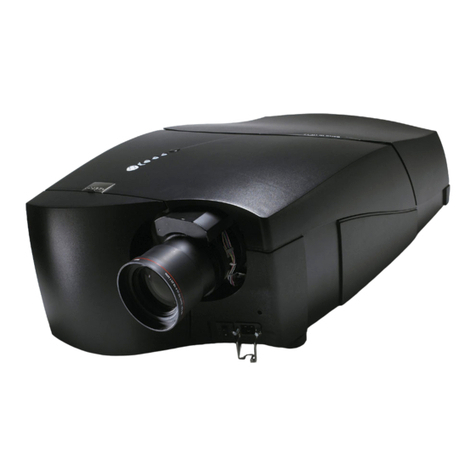
Barco BarcoVision R9000740 User manual

BARCO PROJECTION SYSTEMS
Date:
070597 Art.No.
R5975248
INSTALLATION MANUAL
BARCO PROJECTION SYSTEMS
Date:
070597 Art.No.
R5975248
R9000740
INSTALLATION MANUAL
R9000740
VISION
701 MULTIMEDIA
VISION
701 MULTIMEDIA
Rev. :
01 Rev. :
01

Due to constant research, the information in this manual is subject to
change without notice.
Produced by BARCO NV, May 1997.
All rights reserved.
Trademarks are the rights of their respective owners.
BARCOnv/ProjectionSystems
Noordlaan5
8520Kuurne
Belgium
PrintedinBelgium
Due to constant research, the information in this manual is subject to
change without notice.
Produced by BARCO NV, May 1997.
All rights reserved.
Trademarks are the rights of their respective owners.
BARCOnv/Projection Systems
Noordlaan5
8520Kuurne
Belgium
PrintedinBelgium

5975248 BARCOVISION 701 MULTIMEDIA 070597
TABLE OF CONTENTS
5975248 BARCOVISION 701 MULTIMEDIA 070597
TABLE OF CONTENTS
i-I
TABLE OF CONTENTS
i-I
TABLE OF CONTENTS
WARNINGS .........................................................................................................1-1
SAFETY INSTRUCTIONS ....................................................................................1-1
On safety.......................................................................................................1-4
On installation ............................................................................................... 1-5
On servicing .................................................................................................. 1-6
On cleaning ................................................................................................... 1-6
On repacking ................................................................................................. 1-7
On illumination ..............................................................................................1-7
UNPACKING & DIMENSIONS ............................................................................. 2-1
Unpacking .....................................................................................................2-2
Projector dimensions ..................................................................................... 2-3
INSTALLATION GUIDELINES.............................................................................. 3-1
* Environment................................................................................................ 3-2
* What about ambient light ?.......................................................................... 3-2
* Which screen type?.....................................................................................3-3
* What image size? How big should the image be?....................................... 3-3
* Where to install the projector? ..................................................................... 3-4
*How toinstall theprojector? ......................................................................... 3-6
INSTALLATION SET UP ...................................................................................... 4-1
Access to controls ......................................................................................... 4-2
Scan adaptation ............................................................................................ 4-4
PROJECTOR SET UP ......................................................................................... 5-1
ProjectorSet Up............................................................................................. 5-2
Passwordmode ............................................................................................. 5-3
POWER (MAINS) CONNECTION......................................................................... 6-1
Input power (mains) voltage adaptation. ........................................................6-2
Power (mains) cord connection ..................................................................... 6-2
Fuses ............................................................................................................6-4
Switching on/off ............................................................................................. 6-5
INSTALLATION ADJUSTMENTS ......................................................................... 7-1
Entering the adjustment mode .......................................................................7-2
Overview flow chart installation mode. ........................................................... 7-3
Installation mode start up ..............................................................................7-4
Scheimpfug adjustment ................................................................................. 7-8
Optical lens focusing ................................................................................... 7-10
Electrical focusing ....................................................................................... 7-11
Raster centering .......................................................................................... 7-12
CRT projection angle adjustment ................................................................. 7-14
Alignment of the projector. ........................................................................... 7-18
AppendixA :Ceiling mountkit for700 projectors. ...................................................A-1
AppendixB : G2adjustment ..................................................................................B-1

WARNINGS ......................................................................................................... 1-1
SAFETY INSTRUCTIONS.................................................................................... 1-1
On safety ...................................................................................................... 1-4
On installation ............................................................................................... 1-5
On servicing .................................................................................................. 1-6
On cleaning ................................................................................................... 1-6
On repacking................................................................................................. 1-7
On illumination .............................................................................................. 1-7
UNPACKING & DIMENSIONS ............................................................................. 2-1
Unpacking ..................................................................................................... 2-2
Projector dimensions ..................................................................................... 2-3
INSTALLATION GUIDELINES ............................................................................. 3-1
* Environment ............................................................................................... 3-2
* What about ambient light ?.......................................................................... 3-2
* Which screen type? .................................................................................... 3-3
* What image size? How big should the image be? ...................................... 3-3
* Where to install the projector?..................................................................... 3-4
*How to installthe projector? ......................................................................... 3-6
INSTALLATION SET UP ...................................................................................... 4-1
Access to controls ......................................................................................... 4-2
Scan adaptation ............................................................................................ 4-4
PROJECTOR SET UP ......................................................................................... 5-1
ProjectorSet Up ............................................................................................ 5-2
Passwordmode ............................................................................................. 5-3
POWER (MAINS) CONNECTION ........................................................................ 6-1
Input power (mains) voltage adaptation. ........................................................ 6-2
Power (mains) cord connection ..................................................................... 6-2
Fuses............................................................................................................ 6-4
Switching on/off............................................................................................. 6-5
INSTALLATION ADJUSTMENTS......................................................................... 7-1
Entering the adjustment mode ....................................................................... 7-2
Overview flow chart installation mode............................................................ 7-3
Installation mode start up .............................................................................. 7-4
Scheimpfug adjustment ................................................................................. 7-8
Optical lens focusing ................................................................................... 7-10
Electrical focusing ....................................................................................... 7-11
Raster centering .......................................................................................... 7-12
CRT projection angle adjustment................................................................. 7-14
Alignment of the projector............................................................................ 7-18
Appendix A: Ceiling mountkit for 700 projectors. ...................................................A-1
AppendixB : G2adjustment ..................................................................................B-1

TABLE OF CONTENTS
5975248 BARCOVISION 701 MULTIMEDIA 070597
TABLE OF CONTENTS
5975248 BARCOVISION 701 MULTIMEDIA 070597 i-II
TABLE OF CONTENTS
i-II
TABLE OF CONTENTS

5975248 BARCOVISION 701 MULTIMEDIA 090497
SAFETYINSTRUCTIONS
5975248 BARCOVISION 701 MULTIMEDIA 090497
SAFETYINSTRUCTIONS
SAFETY INSTRUCTIONS
1-1
SAFETY INSTRUCTIONS
1-1
WARNINGS
SAFETY INSTRUCTIONS
on safety
on installation
on servicing
on cleaning
on repacking
on illumination
WARNINGS
SAFETY INSTRUCTIONS
on safety
on installation
on servicing
on cleaning
on repacking
on illumination

5975248 BARCOVISION 701 MULTIMEDIA 090497
SAFETYINSTRUCTIONS
5975248 BARCOVISION 701 MULTIMEDIA 090497
SAFETYINSTRUCTIONS
1-2 1-2
SAFETY INSTRUCTIONS
SAFETY INSTRUCTIONS
Notice on Safety
Thisequipmentisbuiltinaccordancewiththerequirementsoftheinternationalsafety
standardsEN60950,UL1950andCSAC22.2No.950,whicharethesafetystandards
ofinformationtechnologyequipmentincludingelectricalbusinessequipment.
These safety standards impose important requirements on the use of safety critical
components,materialsandisolation,inordertoprotecttheuseroroperatoragainstrisk
of electric shock and energy hazard, and having access to live parts.
Safety standards also impose limits to the internal and external temperature rises,
radiationlevels,mechanicalstabilityandstrength,enclosureconstructionandprotec-
tionagainst the riskof fire.
Simulatedsinglefaultconditiontestingensuresthesafetyoftheequipmenttotheuser
evenwhentheequipment'snormaloperationfails.
Notice on Safety
Thisequipmentisbuiltinaccordancewiththerequirementsoftheinternationalsafety
standardsEN60950,UL1950andCSAC22.2No.950,whicharethesafetystandards
ofinformationtechnologyequipmentincludingelectricalbusinessequipment.
Thesesafety standards imposeimportant requirementson the useof safetycritical
components,materialsandisolation,inordertoprotecttheuseroroperatoragainst
risk of electric shock and energy hazard, and having access to live parts.
Safety standards also impose limits to the internal and external temperature rises,
radiationlevels,mechanicalstabilityandstrength,enclosureconstructionandprotec-
tionagainst the riskof fire.
Simulatedsinglefaultconditiontestingensuresthesafetyoftheequipmenttotheuser
evenwhentheequipment'snormaloperationfails.
INSTALLATION INSTRUCTIONS
Before operating your projector please read this manual thoroughly, and
retain it for future reference.
Installation and preliminary adjustments should be performed by qualified
BARCO personnel or by authorized BARCO service dealers.
OWNER’S RECORD
The part number and serial number are located at the left side of the projector.
Record these numbers in the spaces provided below. Refer to them whenever you
call upon your BARCO dealer regarding this product.
PART NUMBER:
SER. NUMBER:
DEALER:
INSTALLATION INSTRUCTIONS
Before operating your projector please read this manual thoroughly, and
retain it for future reference.
Installation and preliminary adjustments should be performed by qualified
BARCO personnel or by authorized BARCO service dealers.
OWNER’S RECORD
Thepartnumberandserialnumberarelocatedattheleftsideoftheprojector.Record
thesenumbersinthespacesprovidedbelow.Refertothemwheneveryoucallupon
your BARCO dealer regarding this product.
PART NUMBER:
SER. NUMBER:
DEALER:

5975248 BARCOVISION 701 MULTIMEDIA 090497
SAFETYINSTRUCTIONS
5975248 BARCOVISION 701 MULTIMEDIA 090497
SAFETYINSTRUCTIONS
SAFETY INSTRUCTIONS
1-3
SAFETY INSTRUCTIONS
1-3
The lightning flash with an arrowhead within a triangle is
intendedtotelltheuserthatpartsinsidethisproductmaycause
a risk of electrical shock to persons.
The exclamation point within a triangle is intended to tell the
userthat important operating and/orservicing instructions are
included in the technical documentation for this equipment.
WARNING
TO PREVENT FIRE OR ELECTRICAL SHOCK HAZARD, DO
NOT EXPOSE THIS PROJECTOR TO RAIN OR MOISTURE
FEDERAL COMMUNICATION COMMISSION (FCC STATEMENT)
This equipment has been tested and found to comply with the limits of a class A
digital device, pursuant to Part 15 of the FCC Rules. These limits are designed to
provide reasonable protection against harmful interference when the equipment is
operated in a commercial environment. This equipment generates, uses and can
radiateradiofrequency energyand,if not installedand used inaccordance with the
instruction manual, may cause harmful interference to radio communications.
Operation of this equipment in a residential area is likely to cause harmful
interferencein whichcase theuser willbe requiredto correctthe interferenceat his
own expense.
Thelightningflashwithanarrowheadwithinatriangleisintended
totelltheuser thatpartsinsidethis productmaycausea risk of
electrical shock to persons.
Theexclamationpointwithinatriangleisintendedtotelltheuser
that important operating and/or servicing instructions are in-
cludedinthetechnicaldocumentationforthisequipment.
WARNING
TO PREVENT FIRE OR ELECTRICAL SHOCK HAZARD, DO
NOT EXPOSE THIS PROJECTOR TO RAIN OR MOISTURE
FEDERAL COMMUNICATION COMMISSION (FCC STATEMENT)
This equipment has been tested and found to comply with the limits of a class A
digital device, pursuant to Part 15 of the FCC Rules. These limits are designed to
provide reasonable protection against harmful interference when the equipment is
operated in a commercial environment. This equipment generates, uses and can
radiateradiofrequency energyand,if not installedand used inaccordance with the
instruction manual, may cause harmful interference to radio communications.
Operation of this equipment in a residential area is likely to cause harmful
interferencein whichcase theuser willbe requiredto correctthe interferenceat his
own expense.

5975248 BARCOVISION 701 MULTIMEDIA 090497
SAFETYINSTRUCTIONS
5975248 BARCOVISION 701 MULTIMEDIA 090497
SAFETYINSTRUCTIONS
1-4 1-4
SAFETY INSTRUCTIONS
SAFETY INSTRUCTIONS
*Allthe safety andoperatinginstructions shouldberead before usingthisunit.
*Thesafetyandoperatinginstructionsmanualshouldberetainedforfuturereference.
*Allwarningsontheprojectorandinthedocumentationmanualsshouldbeadhered
to.
*Allinstructionsforoperatinganduseofthisequipmentmustbefollowedprecisely.
On safety
1. This product should be operated from an AC power source
Operating AC power voltage of the projector when leaving the factory:
BARCOVISION 701MULTIMEDIA
Art.No.R9000740(230VAC)
The projector leaves the factory for 230 Vac. Consult your dealer to switch over to
120 VAC.
If you are not sure of the type of AC power available, consult your dealer or local
power company.
2. This product is equipped with a 3-wire grounding plug, a plug having a third
(grounding) pin. This plug will only fit into a grounding-type power outlet. This is a
safetyfeature.Ifyouareunabletoinserttheplugintotheoutlet,contactyourelectrician
toreplaceyourobsoleteoutlet.Donotdefeatthepurposeofthegrounding-typeplug.
WARNING FOR THE CUSTOMERS: THIS APPARATUS MUST BE GROUNDED
(EARTHED) via the supplied 3 conductor AC power cable.
(If the supplied power cable is not the correct one, consult your dealer.)
A. Mains lead (AC Power cord) with CEE 7 plug:
The colors of the mains lead are colored in
accordancewiththefollowingcode:
Green-and-yellow: Earth (safety earth)
Blue: Neutral
Brown: Line (Live)
*Allthe safety andoperatinginstructions shouldberead before usingthisunit.
*Thesafetyandoperatinginstructionsmanualshouldberetainedforfuturereference.
*Allwarningsontheprojectorandinthedocumentationmanualsshouldbeadhered
to.
*Allinstructionsforoperatinganduseofthisequipmentmustbefollowedprecisely.
On safety
1. This product should be operated from an AC power source
Operating AC power voltage of the projector when leaving the factory:
BARCOVISION701MULTIMEDIA
Art.No.R9000740(230VAC)
The projector leaves the factory for 230 Vac. Consult your dealer to switch over to
120 VAC.
If you are not sure of the type of AC power available, consult your dealer or local
power company.
2. This product is equipped with a 3-wire grounding plug, a plug having a third
(grounding) pin. This plug will only fit into a grounding-type power outlet. This is a
safetyfeature.Ifyouareunabletoinserttheplugintotheoutlet,contactyourelectrician
toreplaceyourobsoleteoutlet.Donotdefeatthepurposeofthegrounding-typeplug.
WARNING FOR THE CUSTOMERS: THIS APPARATUS MUST BE GROUNDED
(EARTHED) via the supplied 3 conductor AC power cable.
(If the supplied power cable is not the correct one, consult your dealer.)
A. Mains lead (AC Power cord) with CEE 7 plug:
The colors of the mains lead are colored in
accordancewiththefollowingcode:
Green-and-yellow: Earth (safety earth)
Blue: Neutral
Brown: Line (Live)

5975248 BARCOVISION 701 MULTIMEDIA 090497
SAFETYINSTRUCTIONS
5975248 BARCOVISION 701 MULTIMEDIA 090497
SAFETYINSTRUCTIONS
SAFETY INSTRUCTIONS
1-5
SAFETY INSTRUCTIONS
1-5
B. Power cord with ANSI 73.11 plug:
Thewiresofthepowercordarecoloredinaccor-
dancewiththefollowingcode.
Green/yellow: ground
White: neutral
Black: line (live)
3.Donotallowanythingtorestonthe power cord. Donotlocatethisproduct where
persons will walk on the cord.
To disconnect the cord, pull it out by the plug. Never pull the cord itself.
4.Ifanextensioncordisusedwiththisproduct,makesurethatthetotaloftheampere
ratingsontheproductspluggedintotheextensioncorddoesnotexceedtheextension
cordampererating.Alsomakesurethatthetotalofallproductspluggedintothewall
outletdoesnotexceed15amperes.
5.Neverpushobjectsofanykindintothisproductthroughcabinetslotsastheymay
touchdangerousvoltage pointsorshort out partsthatcould resultina riskoffire or
electricalshock.
Neverspillliquidofanykindon the product. Should any liquid or solid object fallinto
thecabinet,unplugthesetandhaveitcheckedbyqualifiedservicepersonnelbefore
resumingoperations.
6.Lightning-Foraddedprotectionforthisvideoproductduringalightningstorm,or
whenitisleftunattendedandunusedforlongperiodsoftime,unplugitfromthewall
outlet. This will prevent damage to the projector due to lightning and AC power-line
surges.
Oninstallation
1. Do not place this equipment on an unstable cart, stand, or table. The equipment
may fall, causing serious damage to it.
2. Do not use this equipment near water.
3. Slots and openings in the cabinet and the back or bottom are provided for
ventilation; to ensure reliable operation of the projector and to protect it from
overheating,these openings must not beblocked orcovered. Theopenings should
neverbeblockedbyplacingtheproductonabed,sofa,rug, orothersimilarsurface.
B. Power cord with ANSI 73.11 plug:
The wires of the power cord are colored in
accordance with the following code.
Green/yellow: ground
White: neutral
Black: line (live)
3.Donotallowanythingtorestonthe power cord. Donotlocatethisproduct where
persons will walk on the cord.
To disconnect the cord, pull it out by the plug. Never pull the cord itself.
4.Ifanextensioncordisusedwiththisproduct,makesurethatthetotaloftheampere
ratingsontheproductspluggedintotheextensioncorddoesnotexceedtheextension
cordampererating.Alsomakesurethatthetotalofallproductspluggedintothewall
outletdoesnotexceed15amperes.
5.Neverpushobjectsofanykindintothisproductthroughcabinetslotsastheymay
touchdangerousvoltage pointsorshort out partsthatcould resultina riskoffire or
electricalshock.
Neverspillliquidofanykindon the product. Should any liquid or solid object fallinto
thecabinet,unplugthesetandhaveitcheckedbyqualifiedservicepersonnelbefore
resumingoperations.
6.Lightning-Foraddedprotectionforthisvideoproductduringalightningstorm,or
whenitisleftunattendedandunusedforlongperiodsoftime,unplugitfromthewall
outlet. This will prevent damage to the projector due to lightning and AC power-line
surges.
Oninstallation
1. Do not place this equipment on an unstable cart, stand, or table. The equipment
may fall, causing serious damage to it.
2. Do not use this equipment near water.
3. Slots and openings in the cabinet and the back or bottom are provided for
ventilation; to ensure reliable operation of the projector and to protect it from
overheating,these openings must not beblocked orcovered. Theopenings should
neverbeblockedbyplacingtheproductonabed,sofa,rug, orothersimilarsurface.

5975248 BARCOVISION 701 MULTIMEDIA 090497
SAFETYINSTRUCTIONS
5975248 BARCOVISION 701 MULTIMEDIA 090497
SAFETYINSTRUCTIONS
1-6 1-6
SAFETY INSTRUCTIONS
SAFETY INSTRUCTIONS
This product should never be placed near or over a radiator or heat register. This
projector should not be placed in a built-in installation or enclosure unless proper
ventillationisprovided.
On servicing
Do not attempt to service this equipment yourself, as opening or removing covers
may expose you to dangerous voltage potentials and risk of electric shock!
Refer all sevicing to qualified service personnel.
Unplugthisproductfromthewalloutletandreferservicingtoqualifiedservice
personnel under the following conditions:
a. When the power cord or plug is damaged or frayed.
b.If liquid hasbeen spilled intothe projector.
c.Ifthe product has been exposedto rain or water.
d. If the product does not operate normally when the operating instructions are
followed. Note:
Adjust only those controls that are covered by the operating instructions since
improperadjustmentoftheothercontrolsmayresultindamageandwilloftenrequire
extensiveworkbyaqualifiedtechniciantorestoretheproducttonormaloperation.
e.If the producthas beendropped orthe cabinet hasbeen damaged.
f.Iftheproductexibitsadistinctchangeinperformance,indicatinganeedforservice.
Replacement parts - When replacement parts are required, be sure the service
technician has used original BARCO replacement parts or authorized replacement
partswhichhavethesamecharacteristicsastheBARCOoriginalpart.Unauthorized
substitutionsmayresultindegradedperformanceandreliability,fire,electricshockor
otherhazards. Unauthorizedsubstitutionsmayvoidwarranty.
Safety check - Upon completion of any service or repairs to this projector, ask the
servicetechniciantoperformsafetycheckstodeterminethattheprojectorisinproper
operatingcondition.
On cleaning
Unplug this product from the wall outlet before cleaning. Do not use liquid
cleaners or aerosol cleaners. Use a damp cloth for cleaning.
- To keep the cabinet looking brand-new, periodically clean it with a soft cloth.
Stubbornstainsmayberemovedwithaclothlightlydampenedwithmilddetergent
solution. Never use strong solvents, such as thinner or benzine, or abrasive
cleaners, since these will damage the cabinet.
This product should never be placed near or over a radiator or heat register. This
projector should not be placed in a built-in installation or enclosure unless proper
ventillation is provided.
Onservicing
Do not attempt to service this equipment yourself, as opening or removing covers
may expose you to dangerous voltage potentials and risk of electric shock!
Refer all sevicing to qualified service personnel.
Unplugthisproductfromthewalloutletandreferservicingtoqualifiedservice
personnel under the following conditions:
a. When the power cord or plug is damaged or frayed.
b.If liquid hasbeen spilled intothe projector.
c.Ifthe product has been exposedto rain or water.
d. If the product does not operate normally when the operating instructions are
followed. Note:
Adjust only those controls that are covered by the operating instructions since
improperadjustmentoftheothercontrolsmayresultindamageandwilloftenrequire
extensiveworkbyaqualifiedtechniciantorestoretheproducttonormaloperation.
e.If the producthas beendropped orthe cabinet hasbeen damaged.
f.Iftheproductexibitsadistinctchangeinperformance,indicatinganeedforservice.
Replacement parts - When replacement parts are required, be sure the service
technician has used original BARCO replacement parts or authorized replacement
partswhichhavethesamecharacteristicsastheBARCOoriginalpart.Unauthorized
substitutionsmayresultindegradedperformanceandreliability,fire,electricshockor
otherhazards. Unauthorizedsubstitutionsmayvoidwarranty.
Safety check - Upon completion of any service or repairs to this projector, ask the
servicetechniciantoperformsafetycheckstodeterminethattheprojectorisinproper
operatingcondition.
On cleaning
Unplug this product from the wall outlet before cleaning. Do not use liquid
cleaners or aerosol cleaners. Use a damp cloth for cleaning.
- To keep the cabinet looking brand-new, periodically clean it with a soft cloth.
Stubbornstainsmayberemovedwithaclothlightlydampenedwithmilddetergent
solution. Never use strong solvents, such as thinner or benzine, or abrasive
cleaners, since these will damage the cabinet.

5975248 BARCOVISION 701 MULTIMEDIA 090497
SAFETYINSTRUCTIONS
5975248 BARCOVISION 701 MULTIMEDIA 090497
SAFETYINSTRUCTIONS
SAFETY INSTRUCTIONS
1-7
SAFETY INSTRUCTIONS
1-7
-Toensurethehighestopticalperformanceandresolution,theprojectionlensesare
speciallytreatedwithananti-reflectivecoating,therefore,avoidtouchingthelens.
Toremovedustonthelens,useasoftdrycloth.Donotuseadampcloth,detergent
solution,orthinner.
Onrepacking
Savetheoriginalshippingcartonandpackingmaterial;theywillcomeinhandyifyou
everhavetoshipyourequipment.Formaximumprotection,repackyoursetasitwas
originally packed at the factory.
On illumination
Inordertoobtainthebestqualityfortheprojectedimage,itisessentialthattheambient
light which is allowed to fall on the screen be kept to an absolute minimum.
When installing the projector and screen, care must be taken to avoid exposure to
ambient light directly on the screen. Avoid adverse illumination on the screen from
directsunlightorflorescentlightingfixtures.
Theuseofcontrolledambientlighting,suchasincandescentspotlightoradimmer,
isrecommendedfor properroom illumination. Where possible,care shouldalso be
taken to ensure that the floors and walls of the room in which the projector is to be
installedarenon-reflecting,darksurfaces. Brightersurfaceswilltendtoreflect and
diffusetheambientlightandhencereducethecontrastoftheprojectedimageonthe
screen.

5975248 BARCOVISION 701 MULTIMEDIA 090497
SAFETYINSTRUCTIONS
5975248 BARCOVISION 701 MULTIMEDIA 090497
SAFETYINSTRUCTIONS
1-8 1-8
SAFETY INSTRUCTIONS
SAFETY INSTRUCTIONS

5975248 BARCOVISION 701 MULTIMEDIA 090797
UNPACKING AND DIMENSIONS
5975248 BARCOVISION 701 MULTIMEDIA 090797
UNPACKING AND DIMENSIONS
2-1
UNPACKING AND DIMENSIONS
2-1
UNPACKING AND DIMENSIONS
UNPACKING
DIMENSIONS
UNPACKING
DIMENSIONS

UNPACKING AND DIMENSIONS
5975248 BARCOVISION 701 MULTIMEDIA 090797
UNPACKING AND DIMENSIONS
5975248 BARCOVISION 701 MULTIMEDIA 090797 2-2
UNPACKING AND DIMENSIONS
2-2
UNPACKING AND DIMENSIONS
Unpacking
To open de banding, pull on the clip as shown in the first drawing.
Take the projector out of its shipping carton and place it on a table.
Savethe original shippingcarton andpacking material, theywill comein handyif you
ever have to ship your projector. For maximum protection, repack your projector as
it was originally packed at the factory.
Contentsof theshipped box:
- 1 BARCOVISION 701 MULTIMEDIA.
- 1 remote control + 9V battery
- 1 power cable with outlet plug type CEE7 or ANSI 73.11.
- 1 owner's manual.
- 1 installation manual.

5975248 BARCOVISION 701 MULTIMEDIA 090797
UNPACKING AND DIMENSIONS
5975248 BARCOVISION 701 MULTIMEDIA 090797
UNPACKING AND DIMENSIONS
2-3
UNPACKING AND DIMENSIONS
2-3
UNPACKING AND DIMENSIONS
Projector dimensionsProjector dimensions

UNPACKING AND DIMENSIONS
5975248 BARCOVISION 701 MULTIMEDIA 090797
UNPACKING AND DIMENSIONS
5975248 BARCOVISION 701 MULTIMEDIA 090797 2-4
UNPACKING AND DIMENSIONS
2-4
UNPACKING AND DIMENSIONS

5975248 BARCOVISION 701 MULTIMEDIA 090797
INSTALLATION GUIDELINES
5975248 BARCOVISION 701 MULTIMEDIA 090797
INSTALLATION GUIDELINES
3-1
INSTALLATION GUIDELINES
3-1
INSTALLATION GUIDELINES
Environment
What about ambient light?
Which screen type?
What image size? How big should the image be?
Where to install the projector?
How to install the projector?
INSTALLATION GUIDELINES
Environment
What about ambient light?
Which screen type?
What image size? How big should the image be?
Where to install the projector?
How to install the projector?

INSTALLATION GUIDELINES
5975248 BARCOVISION 701 MULTIMEDIA 090797
INSTALLATION GUIDELINES
5975248 BARCOVISION 701 MULTIMEDIA 090797 3-2
INSTALLATION GUIDELINES
3-2
INSTALLATION GUIDELINES
Installation guidelines
Carefulconsiderationofthingssuchasimagesize,ambientlightlevel,projectorplacement
and type of screen to use are critical to the optimum use of the projection system.
* Environment
Do not install the projection system in a site near heat sources such as radiators or
air ducts, or in a place subject to direct sunlight, excessive dust or humidity. Be
aware that room heat rises to the ceiling; check that the temperature near the
installation site is not excessive.
* What about ambient light ?
The ambient light level of any room is made up of direct or indirect sunlight and the
light fixtures in the room. The amount of ambient light will determine how bright the
image will appear. So, avoid direct light on the screen.
Windows that face the screen should be covered by opaque drapery while the set is
beingviewed. Itisdesirabletoinstalltheprojectingsysteminaroomwhosewallsand
floor are of non-reflecting material. The use of recessed ceiling lights and a method
of dimming those lights to an acceptable level is also important. Too much ambient
light results in a ‘wash out’ of the projected image. This appears as less contrast
between the darkest and lightest parts of the image. With bigger screens, the ‘wash
out’ becomes more important. As a general rule, darken the room to the point where
there is just sufficient light to read or write comfortably. Spot lighting is desirable for
illuminating small areas so that interference with the screen is minimal.

5975248 BARCOVISION 701 MULTIMEDIA 090797
INSTALLATION GUIDELINES
5975248 BARCOVISION 701 MULTIMEDIA 090797
INSTALLATION GUIDELINES
3-3
INSTALLATION GUIDELINES
3-3
* Which screen type?
Therearetwomajorcategoriesofscreensusedforprojectionequipment. Thoseused
for front projected images and those for rear projection applications.
Screens are rated by how much light they reflect (or transmit in the case of rear
projection systems) given a determined amount of light projected toward them. The
‘GAIN’ of a screen is the term used. Front and rear screens are both rated in terms
of gain. The gain of screens range from a white matte screen with a gain of 1 (x1) to
a brushed aluminized screen with a gain of 10 (x10) or more. The choice between
higher and lower gain screens is largely a matter of personal preference and another
consideration called the Viewing angle.
In considering the type of screen to choose, determine where the viewers will be
located and go for the highest gain screen possible. A high gain screen will provide
a brighter picture but reduce the viewing angle.
For more information about screens, contact your local screen supplier.
Screenwidth
* What image size? How big should the image be?
The BARCOVISION 701 MULTIMEDIA is designed for projecting an image width
from 1.4m (4.6') to 7m (23') with an aspect ratio of 4 to 3. It leaves the BARCO
factory, adjusted as a ceiling front projector for a screen width of 2.4m. Changing
the image size from the factory preset requires a realignment of the projector.

INSTALLATION GUIDELINES
5975248 BARCOVISION 701 MULTIMEDIA 090797
INSTALLATION GUIDELINES
5975248 BARCOVISION 701 MULTIMEDIA 090797 3-4
INSTALLATION GUIDELINES
3-4
INSTALLATION GUIDELINES
* Where to install the projector?
To indicate a correct installation position it is necessary to know the distance :
- projector - ceiling
- projector - screen
To find this correct position for the BARCOVISION 701 MULTIMEDIA, equipped
with HD145 lenses, formulas are given in the next paragraph.
Abbreviations used on drawing and diagrams on next pages
B = Distance between ceiling and top of the screen.
A = Correction Value, extra value to be added to B to obtain the correct
installation position. (In some cases the A value can be negative.)
CD = Total distance between projector and ceiling.
CD = A + B (When the result is negative, enlarge the distance between
ceilingandtopofthescreen,mountscreenlower,untilCDbecomeszero
or positive)
SW = Screen width.
PD = Perpendicular distance between screen and projector.
Formulas for Projector to screen distance and correction value A with regard to the
screen width for HD145 lenses (metric).
Formulas (metric)
PD[m] = 1.21 x SW[m] + 0.213
A[cm] = 12.95 x SW[m] - 22.83
Formulas for Projector to screen distance and correction value A with regard to the
screen width for HD145 lenses (inch).
Formulas (inch)
PD = 1.21 x SW + 8.39
A = 0.1295 x SW - 8.99
Table of contents
Other Barco Projector manuals

Barco
Barco BarcoRLM G5 User manual

Barco
Barco GRAPHICS 1209S User manual

Barco
Barco iQ series User manual

Barco
Barco DP2K-23B User manual

Barco
Barco BarcoiQ GRAPHICS 500 User manual

Barco
Barco MiPIX-20 User manual

Barco
Barco R1306981K(R12) User manual

Barco
Barco R9040014 User manual

Barco
Barco R9004460 User manual

Barco
Barco F85 User manual

Barco
Barco CADWall User manual

Barco
Barco R9001140 User manual

Barco
Barco Galaxy 9 HC+ Owner's manual

Barco
Barco Athena User manual

Barco
Barco R9000972 User manual

Barco
Barco iCon H600 User manual

Barco
Barco iCon H600 User manual

Barco
Barco C-10 User manual

Barco
Barco GALAXY 4 LL+ User manual

Barco
Barco HDQ--2K40 User guide