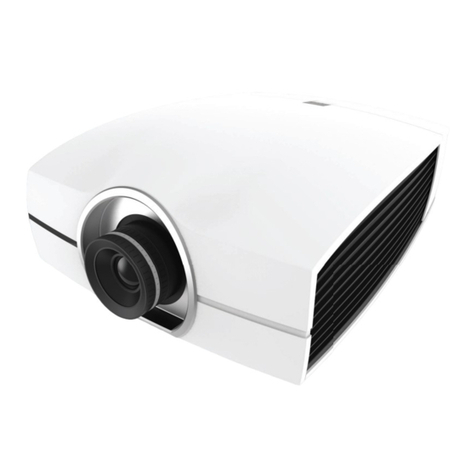
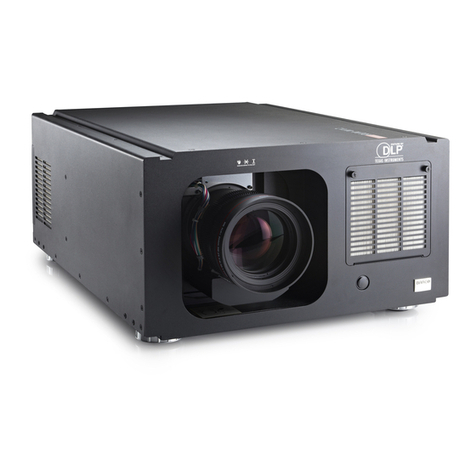
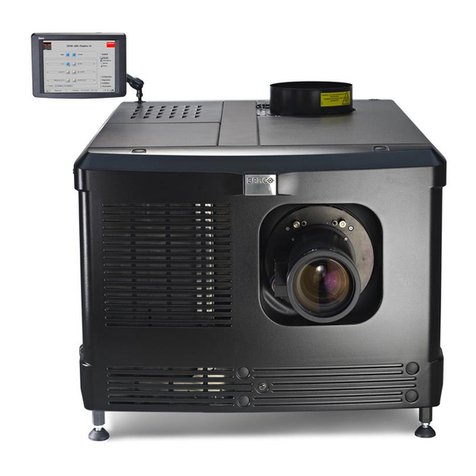
Barco R9002384 User manual

PLEASE READ
This manual is provided as a free service
by Projector.com.
We are in no way responsible for the
contents of the manual. We do not guarantee
its accuracy and we do not make any claim
of copyright. The copyright remains the
property of their respective owners.
ABOUT PROJECTOR.COM
Projector.com (http://www.projector.com) is
your review and buying guide resource for
DLP and LCD video projectors.
Visit the site to read the latest projector
news and reviews, read and comment on
projector specifications, download user
manuals and much more.

Downloaded from Projector.com
BARCO PROJECTION SYSTEMS
Date :
10012001
OWNER'S MANUAL
Rev. :
00
Ciné
7
R9002384
R9002385
Art. No. :
R5976197

Downloaded from Projector.com
Due to constant research, the information in this manual is subject to change without notice.
Produced by BARCO N , January 2001.
All rights reserved.
Trademarks are the rights of their respective owners.
BARCO n.v./Projection Systems
Noordlaan 5
B-8520 Kuurne
Belgium
el : +32/56/368211
Fax : +32/56/351651
E-mail : [email protected]
Visite Barco at the web : http://www.barco.com
Printed in Belgium
R9002384 : Ciné 7
R9002385 : Ciné 7 + LIMO PRO

Downloaded from Projector.com
Table of Contents
i-1
5976066 BARCOCINE 7 10012001
iTABLE OF CONTENTS
TABLE OF CONTENTS ....................................................................................................... I-1
SAFETY INSTRUCTIONS .................................................................................................. 1-1
Safety Instructions......................................................................................................................................... 1-1
Notice on Safety ............................................................................................................................................ 1-1
installation Instructions .................................................................................................................................. 1-1
Owner's record............................................................................................................................................... 1-1
Safety indication on the product .................................................................................................................... 1-1
Safety Warning .............................................................................................................................................. 1-2
Federal Co unication Co ission (FCC STATEMENT) ............................................................................ 1-2
On Safety ...................................................................................................................................................... 1-2
On installation ............................................................................................................................................... 1-3
On servicing ................................................................................................................................................... 1-3
On cleaning ................................................................................................................................................... 1-3
On repacking ................................................................................................................................................. 1-3
On illu ination............................................................................................................................................... 1-3
CONNECTIONS .................................................................................................................. 2-1
Power Connection to Projector ...................................................................................................................... 2-1
AC Power ( ains) cord connection ............................................................................................................... 2-1
Switching on/off ............................................................................................................................................. 2-1
Input Source Connection ............................................................................................................................... 2-1
Input facilities ................................................................................................................................................ 2-1
Which source to which input ......................................................................................................................... 2-2
Connecting a Co posite Video source. ........................................................................................................ 2-2
Connecting a S-Video or Video source to port 2. .......................................................................................... 2-3
Connecting a RGB Analog source with co posite sync. .............................................................................. 2-4
Connecting a RGB Analog source with Tri-level sync. ................................................................................... 2-5
Connecting a Co ponent source. ................................................................................................................. 2-6
Connecting a Co ponent source with Tri-level sync. .................................................................................... 2-7
RS232 Connection......................................................................................................................................... 2-7
RS232 input and RS232 output of the projector. ............................................................................................ 2-7
Co unication port for co unication with peripherals ............................................................................... 2-8
Connecting a RCVDS 05 switcher to the projector. ....................................................................................... 2-8
Connecting a VS05 switcher to the projector. ................................................................................................ 2-8
Connecting an IR Re ote Receiver to the projector....................................................................................... 2-8
GETTING STARTED ........................................................................................................... 3-1
Re ote Control & Local Keypad ................................................................................................................... 3-1
Battery Installation in the RCU ...................................................................................................................... 3-1
How to replace the batteries in the RCU ?..................................................................................................... 3-1
Gaining Access to the Local Keypad ............................................................................................................ 3-2
Overview of Functions .................................................................................................................................... 3-2
Operating the Projector ................................................................................................................................. 3-3
Switching on .................................................................................................................................................. 3-3
Start up in Operational Mode ......................................................................................................................... 3-4
Start up in Stand by Mode ............................................................................................................................. 3-4
Warning ......................................................................................................................................................... 3-4
RCU Co ands to the Projector .................................................................................................................. 3-4
Pointing the RCU to the reflective screen ...................................................................................................... 3-4
Pointing the RCU directly to the IR Sensors.................................................................................................. 3-5
Hardwired Re ote Input ................................................................................................................................ 3-5

Downloaded from Projector.com
Table of Contents
i-2 5976197 BARCOCINE 7 10012001
Projector address .......................................................................................................................................... 3-5
Why a projector address ? ............................................................................................................................ 3-5
Set up an Individual Projector Address .......................................................................................................... 3-5
How to control the projector or projectors ? ................................................................................................... 3-5
Before using the RCU .................................................................................................................................... 3-6
Co on Address .......................................................................................................................................... 3-6
Display the Projector Address on the Screen. ............................................................................................... 3-6
How to progra an address into the RCU? ................................................................................................... 3-6
Controling the Projector ................................................................................................................................. 3-6
Input selection odes ................................................................................................................................... 3-6
When the source is selected ......................................................................................................................... 3-7
Picture controls ............................................................................................................................................. 3-7
The Pause key. ............................................................................................................................................. 3-8
The Freeze key (only with line doubler). ........................................................................................................ 3-8
START UP OF THE ADJUSTMENT MODE....................................................................... 4-1
Adjust ent Mode .......................................................................................................................................... 4-1
Start Up ......................................................................................................................................................... 4-1
Possible Paths .............................................................................................................................................. 4-2
MAIN MENU ........................................................................................................................ 5-1
Main Menu ..................................................................................................................................................... 5-1
Overview Flowchart ........................................................................................................................................ 5-1
I age Control ................................................................................................................................................ 5-2
Starting Up..................................................................................................................................................... 5-2
Line Multiplier (if available) ............................................................................................................................. 5-2
Why Line Multiplying ..................................................................................................................................... 5-2
How to change the Multiplier Setting ............................................................................................................. 5-2
Line Multiplier ON/OFF .................................................................................................................................. 5-2
Multiplier Mode ..............................................................................................................................................5-3
What can be selected within the ultiplier ode ? ....................................................................................... 5-3
How to start up the Multiplier Mode enu ? .................................................................................................. 5-3
How to change the scan rate ?...................................................................................................................... 5-4
Motion Processing......................................................................................................................................... 5-4
Why Motion Processing ? ............................................................................................................................. 5-4
How to activate ? ........................................................................................................................................... 5-4
Video Equalizing............................................................................................................................................5-4
What can be done ? ...................................................................................................................................... 5-4
How to select Video Equalizing ? .................................................................................................................. 5-4
How to adjust the Video Equalizing ? ............................................................................................................ 5-5
Noise Reduction ............................................................................................................................................ 5-5
What can be done ? ...................................................................................................................................... 5-5
How to select and adjust the Noise Reduction ? ........................................................................................... 5-5
Contrast Enhance ent .................................................................................................................................. 5-5
What can be done ? ...................................................................................................................................... 5-5
How to select and adjust the contrast enhance ent ? .................................................................................. 5-5
Color Adjust ................................................................................................................................................... 5-6
What can be done ? ...................................................................................................................................... 5-6
How to select 'Color Adjust' and to select a new color te perature? ............................................................ 5-6
For at Select ................................................................................................................................................ 5-6
What can be done ? ...................................................................................................................................... 5-6
How to select a 'For at' ? ............................................................................................................................. 5-6
How to add a na e to a 'For at' ? ................................................................................................................ 5-7
How to store the settings to a new 'For at' ? ................................................................................................ 5-7
IRIS control .................................................................................................................................................... 5-7
Start Up ......................................................................................................................................................... 5-7
IRIS Touch Up ............................................................................................................................................... 5-7
What can be done ? ...................................................................................................................................... 5-7
How to start up the IRIS Touch Up ? .............................................................................................................. 5-8

Downloaded from Projector.com
Table of Contents
i-3
5976066 BARCOCINE 7 10012001
IRIS Auto Converge ....................................................................................................................................... 5-8
What can be done ? ...................................................................................................................................... 5-8
How to start up the IRIS Auto Converge ? ...................................................................................................... 5-8
IRIS Full Align ent ........................................................................................................................................ 5-8
What can be done ? ...................................................................................................................................... 5-8
How to start up the IRIS Full Align ent ? ...................................................................................................... 5-8
Sound Control ................................................................................................................................................ 5-9
What can be done ? ...................................................................................................................................... 5-9
How to start up and to select the Sound Control ? ........................................................................................ 5-9
Function Keys ............................................................................................................................................... 5-9
What can be done ? ...................................................................................................................................... 5-9
How to get an overview of the progra ed keys ? ........................................................................................ 5-9
Service Menus ............................................................................................................................................... 5-9
What can be done ? ...................................................................................................................................... 5-9
How to enter the Service Menu ? ................................................................................................................. 5-10
ENTERING THE SERVICE MENUS .................................................................................. 6-1
Service enus ............................................................................................................................................... 6-1
What is available in the Service enus ? ...................................................................................................... 6-1
How to enter the Service Menus ? ................................................................................................................. 6-1
Password Protection ..................................................................................................................................... 6-2
Entering the password ................................................................................................................................... 6-2
RANDOM ACCESS ADJUSTMENT MODE....................................................................... 7-1
Rando access adjust ent ode. ............................................................................................................... 7-1
Starting Up ..................................................................................................................................................... 7-1
Overview Flowchart ........................................................................................................................................ 7-1
Selecting Setup Pattern ................................................................................................................................ 7-2
Set up of the Selected Setup Pattern ? ......................................................................................................... 7-2
Internal Cross Hatch Pattern ......................................................................................................................... 7-2
When using the Internal Cross Hatch Pattern ? ............................................................................................ 7-2
Factory Preset Frequencies .......................................................................................................................... 7-2
Rando access adjust ent ode selection enu. ...................................................................................... 7-3
What is possible ?......................................................................................................................................... 7-3
Picture Tuning ............................................................................................................................................... 7-3
Start up the Picture Tuning ............................................................................................................................ 7-3
Color Balance ................................................................................................................................................ 7-3
What can be done ? ...................................................................................................................................... 7-3
How to select the Color Balance ? ................................................................................................................ 7-4
Fixed Color Balance ...................................................................................................................................... 7-4
Custo Color Balance. ................................................................................................................................. 7-4
Sync Fast/Slow Adjust ent (only inputs 3,4,5,6) ......................................................................................... 7-5
What can be done ? ...................................................................................................................................... 7-5
How to setup the sync function ? .................................................................................................................. 7-5
Decoding ....................................................................................................................................................... 7-5
What can be done ? ...................................................................................................................................... 7-5
How to set up ? ............................................................................................................................................. 7-5
Port 2 : Video or S-Video .............................................................................................................................. 7-5
What can be done ? ...................................................................................................................................... 7-5
How to configure port 2 ? ............................................................................................................................... 7-5
Switching Peaking ON/OFF .......................................................................................................................... 7-6
Line Multiplier ................................................................................................................................................ 7-6
What can be done ? ...................................................................................................................................... 7-6
How to select when a line ultiplier is built in ? ............................................................................................ 7-6
Switching the ultiplier ON/OFF ................................................................................................................... 7-6
Motion Processing......................................................................................................................................... 7-7
Why Motion Processing ? ............................................................................................................................. 7-7
How to activate ? ........................................................................................................................................... 7-7
Output Mode ..................................................................................................................................................7-7

Downloaded from Projector.com
Table of Contents
i-4 5976197 BARCOCINE 7 10012001
What can be done ? ...................................................................................................................................... 7-7
How to select a new scan rate ? ................................................................................................................... 7-7
Video Equalizing ............................................................................................................................................7-8
What can be done ? ...................................................................................................................................... 7-8
How to select Video Equalizing ? .................................................................................................................. 7-8
How to adjust the Video Equalizing ? ............................................................................................................ 7-8
Noise Reduction ............................................................................................................................................7-8
What can be done ? ...................................................................................................................................... 7-8
Anwahl und Einstellung der Rauschunterdrückung ........................................................................................ 7-8
Contrast Enhance ent .................................................................................................................................. 7-9
What can be done ? ...................................................................................................................................... 7-9
How to select and adjust the contrast enhance ent ? .................................................................................. 7-9
Split Screen ...................................................................................................................................................7-9
What can be done ? ...................................................................................................................................... 7-9
How to activate the Split Screen function ? ................................................................................................... 7-9
Advanced Settings .........................................................................................................................................7-9
How to select the Advanced Settings ? ......................................................................................................... 7-9
Ti e Base Correction .................................................................................................................................. 7-10
Lu inace Delay ........................................................................................................................................... 7-10
Vertical Sync Reference .............................................................................................................................. 7-11
Cla p Gating .............................................................................................................................................. 7-11
Li o Plus Options ....................................................................................................................................... 7-12
Coring .......................................................................................................................................................... 7-12
LTI ................................................................................................................................................................ 7-12
CTI ............................................................................................................................................................... 7-13
Factory Preset............................................................................................................................................. 7-13
Geo etry Adjust ents ............................................................................................................................... 7-14
What can be done ? .................................................................................................................................... 7-14
Start Up ....................................................................................................................................................... 7-14
I portant ..................................................................................................................................................... 7-14
Horizontal Phase Adjust ent ...................................................................................................................... 7-14
Start Up ....................................................................................................................................................... 7-14
How to adjust ? ........................................................................................................................................... 7-14
Raster Shift Adjust ent .............................................................................................................................. 7-15
What has to be done ? ................................................................................................................................ 7-15
CAUTION ..................................................................................................................................................... 7-15
Start up ........................................................................................................................................................ 7-15
Warning ....................................................................................................................................................... 7-15
Left-Right (east-west) Adjust ents ............................................................................................................. 7-16
What can be adjusted ? .............................................................................................................................. 7-16
Start up ........................................................................................................................................................ 7-16
Which adjust ent can be executed ? ......................................................................................................... 7-16
How to enter an align ent ? ........................................................................................................................ 7-16
Seagull correction ........................................................................................................................................ 7-18
Top-Botto (north-south) Adjust ents ........................................................................................................ 7-18
What can be adjusted ? .............................................................................................................................. 7-18
Start Up ....................................................................................................................................................... 7-18
Which adjust ent can be executed ? ......................................................................................................... 7-18
How to enter an align ent ? ........................................................................................................................ 7-19
Seagull correction ........................................................................................................................................ 7-19
Size Adjust ent .......................................................................................................................................... 7-20
What can be done ? .................................................................................................................................... 7-20
Start up ........................................................................................................................................................ 7-20
Blanking Adjust ents ................................................................................................................................. 7-21
What can be done ? .................................................................................................................................... 7-21
Start Up ....................................................................................................................................................... 7-21
Vertical Linearity Adjust ent ...................................................................................................................... 7-21
What can be done ? .................................................................................................................................... 7-21
Start Up ....................................................................................................................................................... 7-21
How to adjust the Blanking ? ....................................................................................................................... 7-22

Downloaded from Projector.com
Table of Contents
i-5
5976066 BARCOCINE 7 10012001
Convergence Adjust ent ............................................................................................................................. 7-23
What has to be done ? ................................................................................................................................ 7-23
Note ............................................................................................................................................................. 7-23
Adjust ent order ......................................................................................................................................... 7-23
Start up ........................................................................................................................................................ 7-23
How to adjust ? ........................................................................................................................................... 7-23
SERVICE MODE ................................................................................................................. -1
Service ode. ................................................................................................................................................ 8-1
Start Up ......................................................................................................................................................... 8-1
Overview flowchart ......................................................................................................................................... 8-1
Projector Set-up ............................................................................................................................................ 8-2
What can be done ? ...................................................................................................................................... 8-2
Start up the Projector Set-Up ........................................................................................................................ 8-2
Identification .................................................................................................................................................. 8-2
What can be seen ? ...................................................................................................................................... 8-2
How to start up ? ........................................................................................................................................... 8-3
Total Run Ti e ..............................................................................................................................................8-3
What can be displayed ? ............................................................................................................................... 8-3
Note ............................................................................................................................................................... 8-3
How to start up ? ........................................................................................................................................... 8-3
Change password ..........................................................................................................................................8-3
What can be done ? ...................................................................................................................................... 8-3
Note ............................................................................................................................................................... 8-3
How to select ? ............................................................................................................................................. 8-4
How to enter a new password ? ..................................................................................................................... 8-4
Change Language ..........................................................................................................................................8-4
What can be done ? ...................................................................................................................................... 8-4
How to change the language ? ...................................................................................................................... 8-4
Change Projector Address .............................................................................................................................8-4
8-4
What can be done ? ...................................................................................................................................... 8-4
How to change that address ? ....................................................................................................................... 8-5
Change Baudrate ...........................................................................................................................................8-5
What can be set up ? .................................................................................................................................... 8-5
How to set up ? ............................................................................................................................................. 8-5
Power up ode ............................................................................................................................................. 8-5
What can be done ? ...................................................................................................................................... 8-5
How to change the ode ? ............................................................................................................................ 8-6
Co on Address ..........................................................................................................................................8-6
What can be done ? ...................................................................................................................................... 8-6
Why 2 different co on address ? ............................................................................................................... 8-6
How to change the co on address ? ......................................................................................................... 8-6
BARCO logo ..................................................................................................................................................8-6
What can be done ? ...................................................................................................................................... 8-6
WARNING ..................................................................................................................................................... 8-6
How to add the BARCO logo ? ...................................................................................................................... 8-6
8-7
Me ory anage ent .................................................................................................................................... 8-7
What can be done ? ...................................................................................................................................... 8-7
How to select ? ............................................................................................................................................. 8-7
Copy a block ................................................................................................................................................. 8-7
What can be done ? ...................................................................................................................................... 8-7
How to copy ? ............................................................................................................................................... 8-8
Deletion of blocks .......................................................................................................................................... 8-8
What can be done ? ...................................................................................................................................... 8-8
Deleting block by block ................................................................................................................................. 8-8
What can be done ? ...................................................................................................................................... 8-8
How to delete a Block ? ................................................................................................................................ 8-8

Downloaded from Projector.com
Table of Contents
i-6 5976197 BARCOCINE 7 10012001
Deletion of all blocks .....................................................................................................................................8-9
What can be done ? ...................................................................................................................................... 8-9
How to delete all blocks ? ............................................................................................................................. 8-9
All settings to idposition ............................................................................................................................. 8-9
What can be done ? ...................................................................................................................................... 8-9
How to set to idposition ? ........................................................................................................................... 8-9
Undo all settings to idpos ........................................................................................................................... 8-9
What can be done ? ...................................................................................................................................... 8-9
How to cancel 'Set to idposition' ? ............................................................................................................ 8-10
R & B convergence id ............................................................................................................................... 8-10
What can be done ? .................................................................................................................................... 8-10
How to set convergence to idposition : ..................................................................................................... 8-10
Undo R & B convergence id ...................................................................................................................... 8-10
What can be done ? .................................................................................................................................... 8-10
How to Undo ? ............................................................................................................................................. 8-10
Undo green convergence id ...................................................................................................................... 8-11
What can be done ? .................................................................................................................................... 8-11
How to undo ? ............................................................................................................................................. 8-11
Green convergence id ............................................................................................................................... 8-11
What can be done ? .................................................................................................................................... 8-11
How to set Green settings to idposition ? ................................................................................................. 8-11
Co on Settings ........................................................................................................................................ 8-11
What can be done ? .................................................................................................................................... 8-11
How to select ? ........................................................................................................................................... 8-12
G2 Adjust ent ............................................................................................................................................ 8-12
CRT run in cycle .......................................................................................................................................... 8-12
What can be done ? .................................................................................................................................... 8-12
How to select CRT run in cycle ? ................................................................................................................ 8-12
Projector war up ....................................................................................................................................... 8-13
What can be done ? .................................................................................................................................... 8-13
How to select ? ........................................................................................................................................... 8-13
Me ory banks ............................................................................................................................................. 8-13
What can be done ? .................................................................................................................................... 8-13
How to select Me ory Banks ? .................................................................................................................. 8-13
How to create a new e ory bank ? .......................................................................................................... 8-13
How to recall a specific e orybank for the actual source ?...................................................................... 8-14
I2C Diagnostics ........................................................................................................................................... 8-14
What can be seen ? .................................................................................................................................... 8-14
How to select ? ........................................................................................................................................... 8-14
PROGRAMMABLE FUNCTION KEYS .............................................................................. 9-1
Progra able Function Keys ....................................................................................................................... 9-1
What can be done with these keys ............................................................................................................... 9-1
How can a Function Key be progra ed ? ................................................................................................... 9-1
Which functions can be progra ed ? ......................................................................................................... 9-1
Factory predefined functions .......................................................................................................................... 9-2
MESSAGES, WARNINGS AND FAILURES .................................................................... 10-1
ADJUSTMENT BLOCKS AND SOURCE NUMBERS 90 - 99 ......................................... A-1
Adjust ent Blocks ( e ory blocks) ............................................................................................................A-1
What are adjust ent block ? ........................................................................................................................A-1
Built up of block.............................................................................................................................................A-1
Source nu bers 90 - 99 ................................................................................................................................ A-1
Why used ? ...................................................................................................................................................A-1
How to create a second block ? .................................................................................................................... A-1

Downloaded from Projector.com
Safety Instructions
1-1
5976197 BARCOCINE 7 10012001
1SAFETY INSTRUCTIONS
Safety Instructions
Notice on Safety
This equipment is built in a ordan e with the requirements of the international safety standards EN60950, UL 1950 and CSA C22.2
No.950, whi h are the safety standards of information te hnology equipment in luding ele tri al business equipment.
These safety standards impose important requirements on the use of safety riti al omponents, materials and isolation, in order
to prote t the user or operator against risk of ele tri sho k and energy hazard, and having a ess to live parts.
Safety standards also impose limits to the internal and external temperature rises, radiation levels, me hani al stability and strength,
en losure onstru tion and prote tion against the risk of fire.
Simulated single fault ondition testing ensures the safety of the equipment to the user even when the equipment's normal operation
fails.
INSTALLATION INSTRUCTIONS
Before operating this equipment please read this manual thoroughly, and retain it for future referen e.
Installation and preliminary adjustments should be performed by qualified BARCO personnel or by authorized BARCO servi e dealers.
OWNERS RECORD
The part number and serial number are lo ated at the ba k side of the proje tor. Re ord these numbers in the spa es provided below.
Refer to them whenever you all upon your BARCO dealer regarding this produ t.
PART NUMBER :
SER. NUMBER :
DEALER :
Safety indication on the product
The lightning flash with an arrowhead within a triangle is intended to tell the user that parts inside this produ t may
ause a risk of ele tri al sho k to persons.
The ex lamation point within a triangle is intended to tell the user that important operating and/or servi ing instru tions
are in luded in the te hni al do umentation for this equipment.

Downloaded from Projector.com
Safety Instructions
1-2 5976197 BARCOCINE 7 10012001
Safety Warning
TO PREVENT FIRE OR ELECTRICAL SHOCK HAZARD, DO NOT EXPOSE THIS EQUIPMENT TO RAIN OR MOISTURE
FEDERAL CO UNICATION CO ISSION (FCC STATE ENT)
This equipment has been tested and found to omply with the limits of a lass A digital devi e, pursuant to Part 15 of the FCC Rules.
These limits are designed to provide reasonable prote tion against harmful interferen e when the equipment is operated in a
ommer ial environment. This equipment generates, uses and an radiate radio frequen y energy and, if not installed and used in
a ordan e with the instru tion manual, may ause harmful interferen e to radio ommuni ations. Operation of this equipment in
a residential area is likely to ause harmful interferen e in whi h ase the user will be required to orre t the interferen e at his own
expense.
Note :
The use of shielded ables is required to omply within the limits of Part 15 of FCC rules and EN55022.
* All the safety and operating instru tions should be read before using this unit.
* The safety and operating instru tions manual should be retained for future referen e.
* All warnings on the equipment and in the do umentation manuals should be adhered to.
* All instru tions for operating and use of this equipment must be followed pre isely.
On Safety
1. This produ t should be operated from an AC power sour e.
AC power voltage autoranging between 100 and 230V AC
2. This produ t is equipped with a 3-wire grounding plug, a plug having a third (grounding) pin. This plug will only fit into a grounding-
type power outlet. This is a safety feature. If you are unable to insert the plug into the outlet, onta t your ele tri ian to repla e
your obsolete outlet. Do not defeat the purpose of the grounding-type plug.
WARNING FOR THE CUSTOMERS: THIS APPARATUS MUST BE GROUNDED (EARTHED) via the supplied 3 ondu tor AC power
able. (If the supplied power able is not the orre t one, onsult your dealer.)
A. Mains lead Power cord) with CEE 7 plug:
The wires of the mains lead are olored in a ordan e with the following ode.
Green and yellow: earth (safety earth)
Blue: neutral
Brown: line (live)
B. Power cord with ANSI 73.11 plug:
The wires of the power ord are olored in a ordan e with the following ode.
Green/yellow: ground
White: neutral
Bla k: line (live)
3. Do not allow anything to rest on the power ord. Do not lo ate this produ t where persons will walk on the ord.
To dis onne t the ord, pull it out by the plug. Never pull the ord itself.
4. If an extension ord is used with this produ t, make sure that the total of the ampere ratings on the produ ts plugged into the
extension ord does not ex eed the extension ord ampere rating. Also make sure that the total of all produ ts plugged into the
wall outlet does not ex eed 15 amperes.
5. Never push obje ts of any kind into this produ t through abinet slots as they may tou h dangerous voltage points or short out
parts that ould result in a risk of fire or ele tri al sho k.
Never spill liquid of any kind on the produ t. Should any liquid or solid obje t fall into the abinet, unplug the set and have it he ked
by qualified servi e personnel before resuming operations.

Downloaded from Projector.com
Safety Instructions
1-3
5976197 BARCOCINE 7 10012001
6. Lightning - For added prote tion for this video produ t during a lightning storm, or when it is left unattended and unused for long
periods of time, unplug it from the wall outlet. This will prevent damage to the proje tor due to lightning and AC power-line surges.
On installation
1. Do not pla e this equipment on an unstable art, stand, or table. The produ t may fall, ausing serious damage to it.
2. Do not use this equipment near water.
3. Slots and openings in the abinet and the ba k or bottom are provided for ventilation; to ensure reliable operation of the produ t
and to prote t it from overheating, these openings must not be blo ked or overed. The openings should never be blo ked by
pla ing the produ t on a bed, sofa, rug, or other similar surfa e. This produ t should never be pla ed near or over a radiator
or heat register.
The proje tor should not be pla ed in a built-in installation or en losure unless proper ventilation is provided.
4. Do not blo k the proje tor ooling fans or free air movement under and around the proje tor. Loose papers or other obje ts
may not be nearer to the proje tor than 4" on any side.
On servicing
Do not attempt to servi e this produ t yourself, as opening or removing overs may expose you to dangerous voltage potentials
and risk of ele tri sho k!
Refer all servi ing to qualified servi e personnel.
Unplug this product from the wall outlet and refer servicing to qualified service personnel under the following conditions:
a. When the power ord or plug is damaged or frayed.
b. If liquid has been spilled into the equipment.
.If the produ t has been exposed to rain or water.
d. If the produ t does not operate normally when the operating instru tions are followed.
Note : Adjust only those ontrols that are overed by the operating instru tions sin e improper adjustment of the other ontrols
may result in damage and will often require extensive work by a qualified te hni ian to restore the produ t to normal operation.
e. If the produ t has been dropped or the abinet has been damaged.
f. If the produ t exhibits a distin t hange in performan e, indi ating a need for servi e.
Replacement parts - When repla ement parts are required, be sure the servi e te hni ian has used original BARCO repla ement
parts or authorized repla ement parts whi h have the same hara teristi s as the BARCO original part. Unauthorized substitutions
may result in degraded performan e and reliability, fire, ele tri sho k or other hazards. Unauthorized substitutions may void
warranty.
Safety check - Upon ompletion of any servi e or repairs to this proje tor, ask the servi e te hni ian to perform safety he ks to
determine that the produ t is in proper operating ondition.
On cleaning
Unplug this produ t from the wall outlet before leaning. Do not use liquid leaners or aerosol leaners. Use a damp loth for leaning.
-To keep the abinet looking brand-new, periodi ally lean it with a soft loth. Stubborn stains may be removed with a loth lightly
dampened with mild detergent solution. Never use strong solvents, su h as thinner or benzine, or abrasive leaners, sin e these
will damage the abinet.
- To ensure the highest opti al performan e and resolution, the proje tion lenses are spe ially treated with an anti-refle tive oating,
therefore, avoid tou hing the lens. To remove dust on the lens, use a soft dry loth. Do not use a damp loth, detergent solution,
or thinner.
On repacking
Save the original shipping arton and pa king material; they will ome in handy if you ever have to ship your equipment. For maximum
prote tion, repa k your set as it was originally pa ked at the fa tory.
On illumination
In order to obtain the best quality for the proje ted image, it is essential that the ambient light whi h is allowed to fall on the s reen
be kept to an absolute minimum.
When installing the proje tor and s reen, are must be taken to avoid exposure to ambient light dire tly on the s reen. Avoid adverse
illumination on the s reen from dire t sunlight or fluores ent lighting fixtures.
The use of ontrolled ambient lighting, su h as in andes ent spot light or a dimmer, is re ommended for proper room illumination.
Where possible, are should also be taken to ensure that the floors and walls of the room in whi h the proje tor is to be installed
are non-refle ting, dark surfa es. Brighter surfa es will tend to refle t and diffuse the ambient light and hen e redu e the ontrast
of the proje ted image on the s reen.

Downloaded from Projector.com
Safety Instructions
1-4 5976197 BARCOCINE 7 10012001

Downloaded from Projector.com
Connections
2-1
5976197 BARCOCINE 7 10012001
2CONNECTIONS
Power Connection to Projector
AC Power (mains) cord connection
Use the supplied power cord to connect your projector to the wall outlet. Plug the female power connector into the male connector
at the front of the projector.
Leds on the front plate of the projector
Switching on/off
The projector is switched ON and OFF using the power (mains) switch ON/OFF.
Pressed : ON
Not pressed : OFF
The projector can start now in the 'operational mode' (image displayed) or in the 'stand by mode', depending on the software setup.
Stand by indication lamp :
no light up : projector in operational mode
red : projector is in stand by.
Input Source Connection
Input facilities
- Composite Video (*)
- S-Video (*)
- RGBS or RGsB (*)
- RGB3S or RG3sB
- (R-Y)Y(B-Y)S or (R-Y)Ys(B-Y) [component input] (**)
- (R-Y)Y(B-Y)3S or (R-Y)Y3s(B-Y) [component input] (**)
(*) If the line double or line multiplier feature is built in, this feature is available via a software on/off toggle.
(**) If the line double or line multiplier feature is built in, this feature is available for component video signals on standard frequency via software on/off toggle.
OFF ON
Seeinstallation instructions before
connectingto thesupply V NOM 120/230 Volt
I MAX 5/2.5 AMP
FREQ 60/50 Hz
OFF ON
See install ation instruc tions befor e
connectingto thesupply
VN OM 120 /230 Volt
I MAX 5/ 2.5 AMP
FREQ 60/50 Hz
-9V
HOLD DOWN HD
COINC
SF
HOLD DOWN EHT
STANDBY
-CONV
-17V
+17V
+HTHD
+CONV
+9V
+210V
+30V

Downloaded from Projector.com
Connections
2-2 5976197 BARCOCINE 7 10012001
Source No Projector input Press digit button
1 Comp. Video 1
2 S-Video* 2
3 RGBS or RGsB** 3
3 RGB3S or RG3sB*** 4
3 (R-Y)Y(B-Y)S or
(R-Y)Ys(B-Y)**** 5
3 (R-Y)Y(B-Y)3S or
(R-Y)Y3s(B-Y)***** 6
Connecting a Composite Video source.
Composite video signals from a VCR, OFF air signal decoder, etc..
Note :
If a line doubler or line multiplier is built in, the default position of this line doubler (multiplier) soft option is ON (active). The video input
signal will be displayed as a non interlaced image (= improved image stability).
To enable or to disable this function, enter the adjustment mode and change the position of the ON/OFF toggle switch (see chapter
'Random access' adjustment mode).
TVtuner, e.g. MARCOPOLO
VCR
Audio amplifier
Composite
video
COMM PORT
(800peripherals) REMOTE RG(S)B SVIDEO S-VIDEO
R-Y Y(S) B-Y
RS232OUTRS232 IN
COMM PORT
(800 peripherals)
REMOTE RG(S)B
S
VIDEO
S-VIDEO
R-Y Y(S) B-Y
RS232 OUTRS232 IN
Which source to which input
* Input signal Y/C (luma/chroma)
** Input signal : R, G and B with composite sync on G or separate composite sync
*** Input signal : R, G and B with Tri level sync on G or separate Tri level sync.
**** Input signal : R-Y, Y and B-Y with composite sync on Y or separate composite sync
***** Input signal : R-Y, Y and B-Y with Tri level sync on Y or separate Tri level sync.

Downloaded from Projector.com
Connections
2-3
5976197 BARCOCINE 7 10012001
Input selection
a. with the RCU : press digit button 2 or
b. with the local keypad.
(for access to the local keypad, see 'Local keypad' in chapter 'getting Started'.)
1 press ADJUST key, the General access menu is displayed on the screen (menu 1).
2 use the cursor keys to highlight 2.
3 press ENTER to display the source.
GENERAL ACCESS
Select with ,
or
then <ENTER>.
<EXIT> to return
SHARPNESS
TINT
COLOR
BRIGHTNESS
CONTRAST
5 6
3 4
1 2
Enter ADJUST
COMMPORT
(800peripherals) REMOTE SVIDEO S-VIDEO
VCR S-VHS Audio amplifier
Luma/Chroma
RG(S) B
R-Y Y(S) B-Y
RS232OUTRS232IN
Video input selection :
a. with the RCU : press digit button 1 or
b. with the local keypad.
(for access to the local keypad, see 'Local keypad' in chapter 'getting Started'.)
1 press ADJUST key, the General access menu is displayed on the screen (menu 1).
2. use the cursor keys to highlight 1.
3. press ENTER to select the highlighted source.
menu 1
Connecting a S-Video or Video source to port 2.
Separate Y-luma/C-chroma signals for higher quality playback of Super VHS signals.
Note :
If a line doubler or line multiplier is built in, the default position of this line doubler (multiplier) soft option is ON (active). The video input
signal will be displayed as a non interlaced image (= improved image stability).
To enable or to disable this function, enter the adjustment mode and change the position of the ON/OFF toggle switch (see chapter
'Random access' adjustment mode).
GENERAL ACCESS
Select with ,
or
then <ENTER>.
<EXIT> toreturn
SHARPNESS
TINT
COLOR
BRIGHTNESS
CONTRAST
5 6
3 4
1 2
Enter ADJUST
menu 1

Downloaded from Projector.com
Connections
2-4 5976197 BARCOCINE 7 10012001
Connecting a RGB Analog source with composite sync.
RGBanaloginputterminalswithcompositesyncinputorwithsyncongreen. Theprojectordetectsautomaticallywherethesyncsignal
is located.
Note :
If a line doubler or line multiplier is built in, the default position of this line doubler (multiplier) soft option is ON (active). The video input
signal will be displayed as a non interlaced image (= improved image stability).
To enable or to disable this function, enter the adjustment mode and change the position of the ON/OFF toggle switch (see chapter
'Random access' adjustment mode).
Always use an interface when a computer and local monitor have to be connected to the projector.
BARCO's Interface units.
Universal analog interface R9826100
RGB 120 MHz Analog Interface R9826570 (230V)
Multifunctional Analog Interface Kit R9828120 (230V)
(MAGIK) R9828129 (120V)
VGA interface R9828070 (230V)
R9828079 (120V)
MAC interface R9828050 (230V)
R9828059 (120V)
TWIN interface R9828960 (230V)
R9828969 (120V)
Input Priority setting
Depending on the priority setting in the 'Picture Tuning menu', Video or S-Video can be displayed.
If the setting is not correct, handle as follow :
1 Press ADJUST key to start up the adjustment mode. The main menu will be displayed (menu 1).
2 Select 'Service Menus'.
3 Press ENTER to select.
A warning menu, 'risk of incorrect adjustment', will be displayed (menu 2).
4 Press ENTER to continue if you are qualified, or EXIT if not.
When ENTER is pressed, the 'Adjustment main menu' will be displayed (menu 3).
5 Select 'Random Access'.
6 Press ENTER to select.
The 'Choose a setup pattern menu' will be displayed (menu 4).
7 Select 'Selected source'.
8 Press ENTER to display the 'Random Access' menu (menu 5).
9 Select 'Picture Tuning'.
10 Press ENTER to display the picture tuning menu (menu 6).
11 Select 'Port2 : Video'.
12 Press ENTER to toggle between VIDEO or S-VIDEO.
13 Press ADJUST to return to operational mode.
menu 3
menu 1 menu 4
menu 5
menu 2
menu 6
Select with éor ê
then <ENTER>
<EXIT> to return.
Choose a setup pattern
from below :
SELECTED SOURCE
GENLOCKED PATTERN
INTERNAL # PATTERN
Source 01
WARNING
Risk of incorrect
adjustment of the projector
The following
SERVICE menus
are reserved to,
and to be performed only
by qualified personnel !
If qualified, press
<ENTER> to continue, or
if not, <EXIT> to return.
Select with éor ê
then <ENTER>
<EXIT> to return.
ADJUSTMENTMODE
Select a path from below :
GUIDED
RANDOMACCESS
INSTALLATION
SERVICE
Source 01
Select with éor ê
then <ENTER>
<EXIT> to return.
MAIN MENU
Image Control
IRIS Control
Sound Control
Function keys
Service Menus
Select with éor ê
then <ENTER>
<EXIT> to return.
RANDOMACCESS
ADJUSTMENTMODE
PICTURETUNING
GEOMETRY
CONVERGENCE
COLOR SELECT
Select with éor ê
<ENTER> to accept
<EXIT> to return.
PICTURETUNING
COLOR BALANCE
SYNC : FAST
DECODING : EBU
PORT2 : VIDEO
LINE MULITPLIER: ON

Downloaded from Projector.com
Connections
2-5
5976197 BARCOCINE 7 10012001
COMM PORT
(800 peripherals) REMOTE SVIDEO S-VIDEO
RGBS
ANALOG OUT
INPUT
RG(S) B
R-Y Y(S) B-Y
RS232OUTRS232 IN
menu 1
RGBS or RGsB input selection
a. Press digit button 3 on the RCU or
b. With the local keypad :
(to gain access to the local keypad, see 'Local keypad' in chapter 'getting Started'.)
1. Press ADJUST key, the General access menu is displayed on the screen (menu 1).
2. Use the cursor keys to highlight 3.
3. Press ENTER to display the source.
Connecting a RGB Analog source with Tri-level sync.
RGB analog input terminals with Tri level sync input or with Tri-level sync on green. The projector detects automatically where the
sync signal is located.
COMM PORT
(800 peripherals) REMOTE SVIDEO S-VIDEO
VCR HDTV player Audio amplifier
RG(S) B
R-Y Y(S) B-Y
RS232OUTRS232 IN
GENERAL ACCESS
Select with ,
or
then <ENTER>.
<EXIT>to return
SHARPNESS
TINT
COLOR
BRIGHTNESS
CONTRAST
5 6
3 4
1 2
Enter ADJUST

Downloaded from Projector.com
Connections
2-6 5976197 BARCOCINE 7 10012001
COMM P ORT
(8 00 per iph eral s) REMOTE SVIDEO S-VIDEO
Professional VCR Audio amplifier
RG(S) B
R-Y Y(S) B-Y
RS232 OUT
RS232 IN
RGB3S or RG3sB input selection
a. Press digit button 4 on the RCU or
b. With the local keypad :
(to gain access to the local keypad, see 'Local keypad' in chapter 'getting Started'.)
1. Press ADJUST key, the General access menu is displayed on the screen (menu 1).
2. Use the cursor keys to highlight 4.
3. Press ENTER to display the source.
menu 1
GENERAL ACCESS
Select with ,
or
then <ENTER>.
<EXIT>to return
SHARPNESS
TINT
COLOR
BRIGHTNESS
CONTRAST
5 6
3 4
1 2
Enter ADJUST
Connecting a Component source.
(R-Y)Y(B-Y)analoginput terminals with sync inputor with sync on theluminance(Y) input. The projector detectsautomaticallywhere
the sync signal is located.
Line doubling or multipling is possible for component video input sources on standard line frequency.
Note :
If a line doubler or line multiplier is built in, the default position of this line doubler (multiplier) soft option is ON (active). The video input
signal will be displayed as a non interlaced image (= improved image stability).
To enable or to disable this function, enter the adjustment mode and change the position of the ON/OFF toggle switch (see chapter
'Random access' adjustment mode).
(R-Y)Y(B-Y)S or (R-Y)Ys(B-Y) input selection
a. Press digit button 5 on the RCU or
b. With the local keypad :
(to gain access to the local keypad, see 'Local keypad' in chapter 'getting Started'.)
1. Press ADJUST key, the General access menu is displayed on the screen (menu 1).
2. Use the cursor keys to highlight 5.
3. Press ENTER to select the highlighted source.
GENERAL ACCESS
Select with ,
or
then <ENTER>.
<EXIT>to return
SHARPNESS
TINT
COLOR
BRIGHTNESS
CONTRAST
5 6
3 4
1 2
Enter ADJUST

Downloaded from Projector.com
Connections
2-7
5976197 BARCOCINE 7 10012001
COMM PORT
(800 peripherals) REMOTE SVIDEO S-VIDEO
Professional VCR
with Tri-level sync Audio amplifier
RG(S) B
R-Y Y(S) B-Y
RS232OUT
RS2 32 IN
Connecting a Component source with Tri-level sync.
(R-Y)Y(B-Y) analog input terminals with Tri-level sync input or with Tri-level sync on the luminance input.
GENERAL ACCESS
Select with ,
or
then <ENTER>.
<EXIT>to return
SHARPNESS
TINT
COLOR
BRIGHTNESS
CONTRAST
5 6
3 4
1 2
Enter ADJUST
(R-Y)Y(B-Y)3S or (R-Y)Y3s(B-Y) input selection
a. Press digit button 6 on the RCU or
b. With the local keypad :
(to gain access to the local keypad, see 'Local keypad' in chapter 'getting Started'.)
1. Press ADJUST key, the General access menu is displayed on the screen (menu 1).
2. Use the control disk to highlight 6.
3. Press ENTER to select the highlighted source.
menu 1
RS232 Connection
RS232 input and RS232 output of the projector.
The projector is equipped with a RS232 port that allows it to communicate with a computer.
RS232
connection
COMM PORT
(800 pe riph eral s) REMOTE SVIDEO S-VIDEO
RG(S) B
R-Y Y(S) B-Y
RS23 2 OUT
RS232 IN
This manual suits for next models
1
Table of contents
Other Barco Projector manuals

Barco
Barco R9000972 User manual

Barco
Barco NW-12 User manual

Barco
Barco VS05 User manual

Barco
Barco R9002240 User manual

Barco
Barco BarcoReality 909 Split Pack R9040040 User manual

Barco
Barco C-10 User manual

Barco
Barco UDM Series User manual

Barco
Barco G62 User manual

Barco
Barco R9002390 User manual

Barco
Barco PGWX-62L User guide

Barco
Barco FLM R20+ Performer User manual

Barco
Barco CineVERSUM 110 User manual

Barco
Barco R9001450 User manual

Barco
Barco Graphics 9200 User manual

Barco
Barco UDM 4K15 User manual

Barco
Barco R9040380 User manual

Barco
Barco PGXG-61B User guide

Barco
Barco RETRO GRAPHICS 2100 User manual

Barco
Barco 800 Series User manual

Barco
Barco Cine 8 User manual