Basix EZ-FIND User manual


2
PACKAGE CONTENT
•EZ-Finder (transmitter)
•
4 EZ-Find!®
tags
• Key ring loops and adhesive
•T
ag number labels
•User Guide
EZ-FIND!
®
WIRELESS ELECTRONICLOCATOR
www.EZ-Find.com
www.basixinc.com
FCC ID#
Patent: US 7,046,141 B2
Patent: US D499,975 S
©2008 Basix Inc. All rightsreserved.
INTRODUCTION
Welcome to the
EZ-Find!
®system
Congratulations on your purchase of the
EZ-Find!
®wireless
electronic locator.This system will help you locate misplaced items
and will help preventyou from losing them in the firstplace.
The
EZ-Find!
®system includes 4 tags with this starter package. The
system can track up to25 items.Additional tags may be purchased
and are sold in packages of 2.
Please review the enclosed instructions carefully for successful use
of this product.
For customer service inquiries,please visit our websiteat
www.ez-find.com
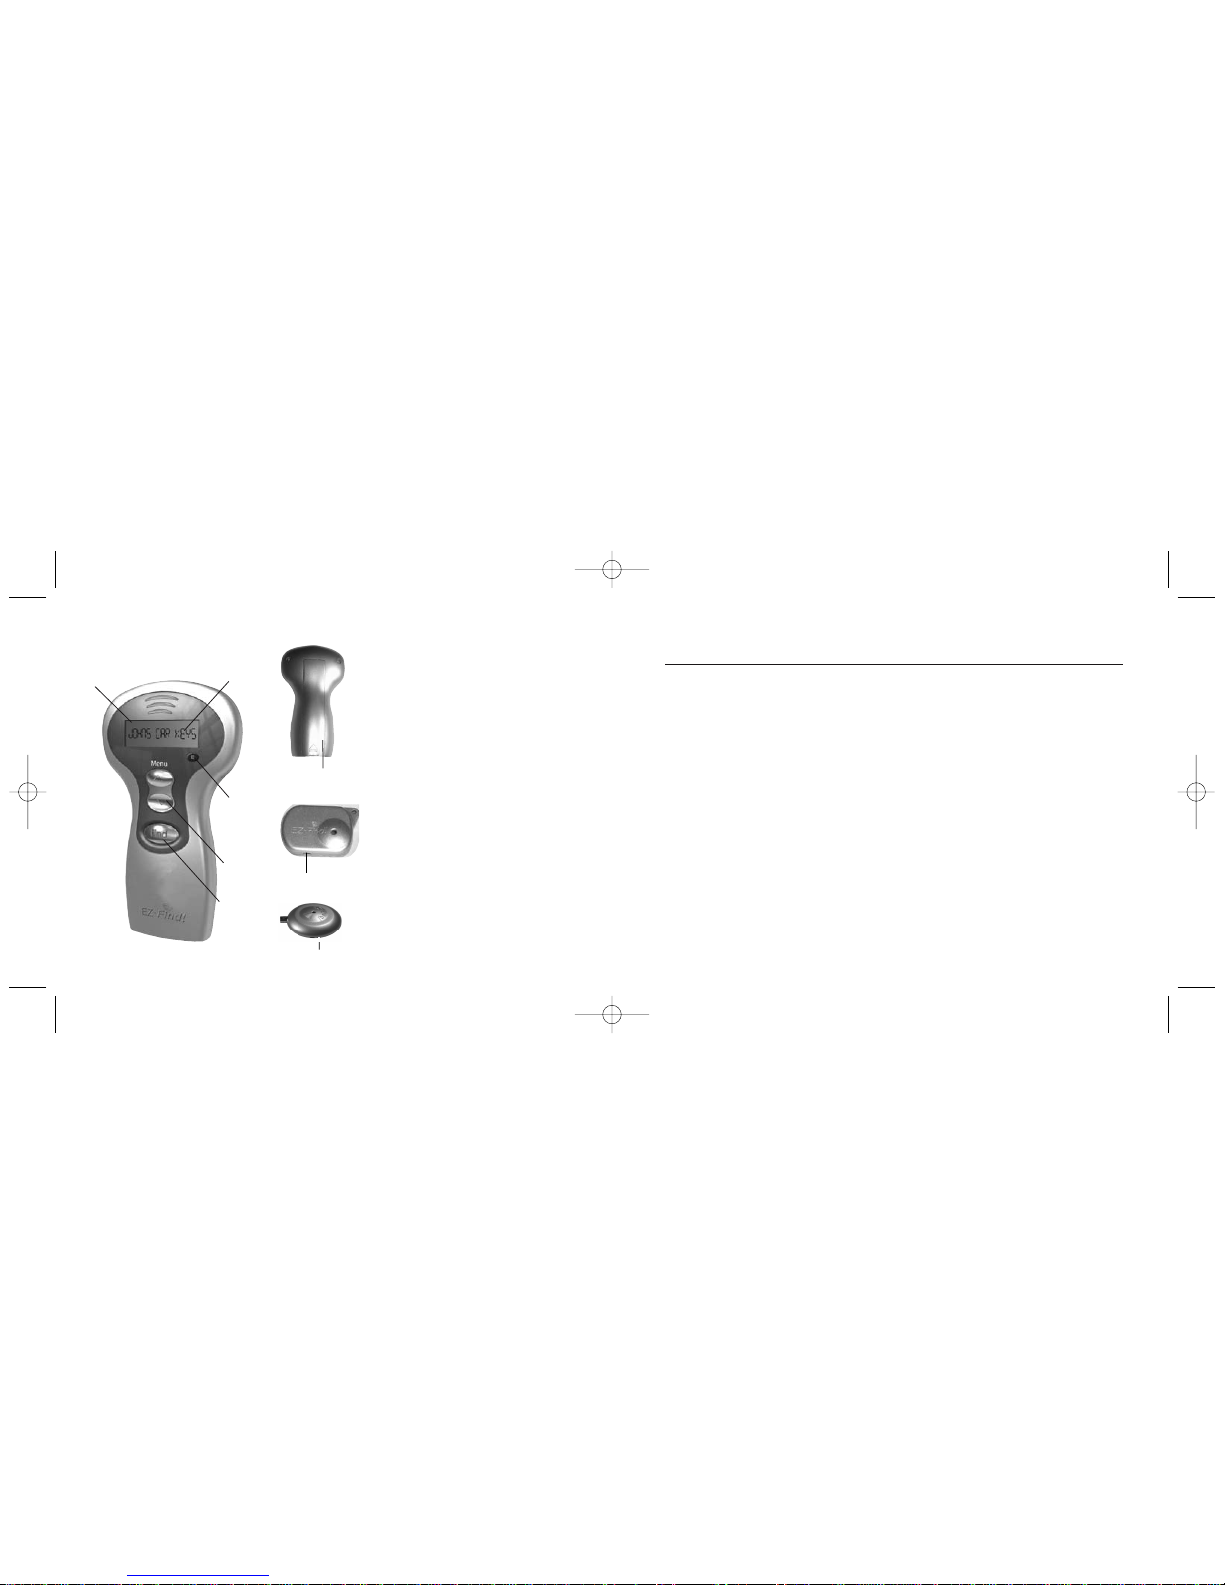
Backlit LCD
Screen
EZ Read
LargeText
Battery
Compartment
EZ Scroll
Feature
Program
Tags
ON/OFF
Button
Press to Find
Lost Item
1
Patent: US 7,064,663 B2
Patent: EU 0001558866-0001
WKKEFD1004
On/Off switch
On/Off switch
,
2
n
o
i
t
p
o
e
e
s
turn the ON/OFF switch to the ON position. The tag will beep once.
steps 1 through 3 above, scroll to the menu item you want to reprogram, then
turn the ON/OFF switch on the tag to OFF and then back to the ON position
, follow
again. The tag will beep once. Continue steps 5 and 6 above.
Note: The EZ-Findercan be manually turned off by pressing and holding the “E” button
until the display turns off.
TAGS.
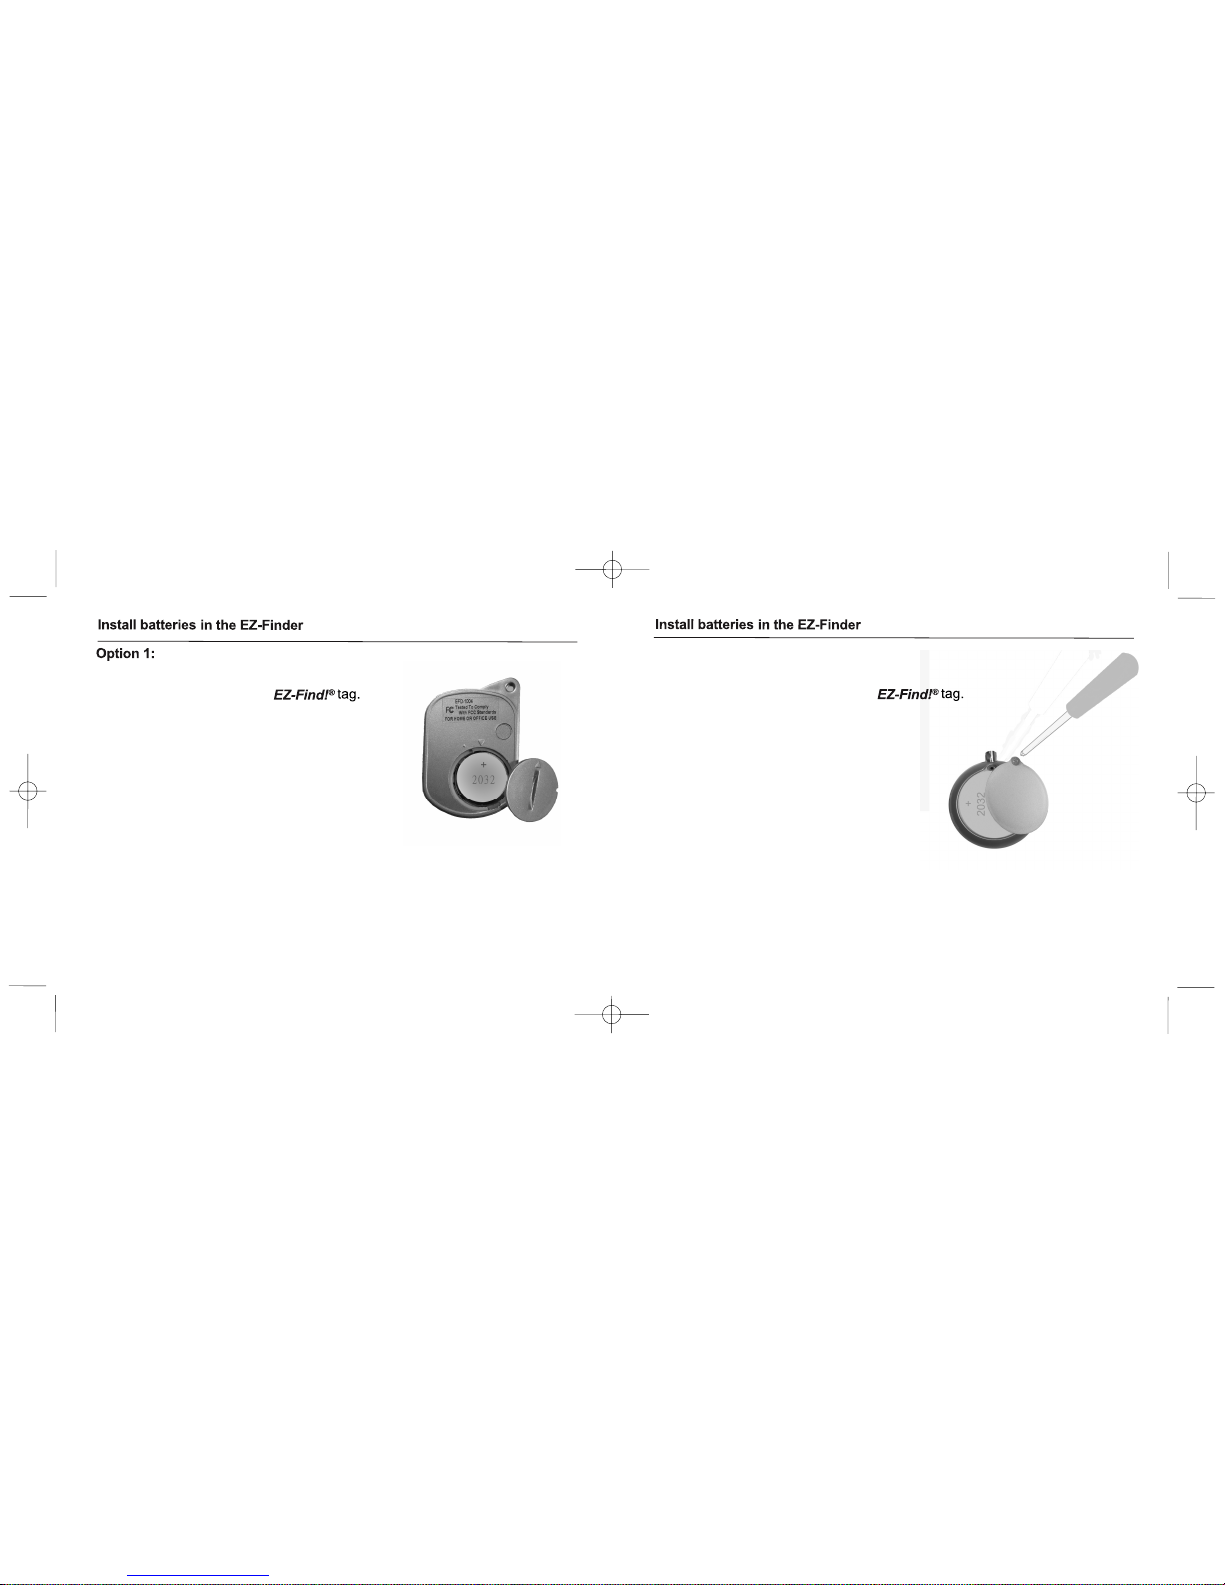
Option 2:
TAGS.
1. To replace the battery use a coin to open the battery
conver on the back of the
2. Insert battery under the battery clip ensuring the
“+” side of the battery is facing up. The tag will
beep once when the new battery is installed.
3. To replace the battery cover,point the arrow of the
battery cover to the dot “.” located on the tag and
turn the cover right to align the two arrows.
4. The tag will have to be reprogrammed (see item 10 on page 8)
into its original menu item after a new battery has been installed.
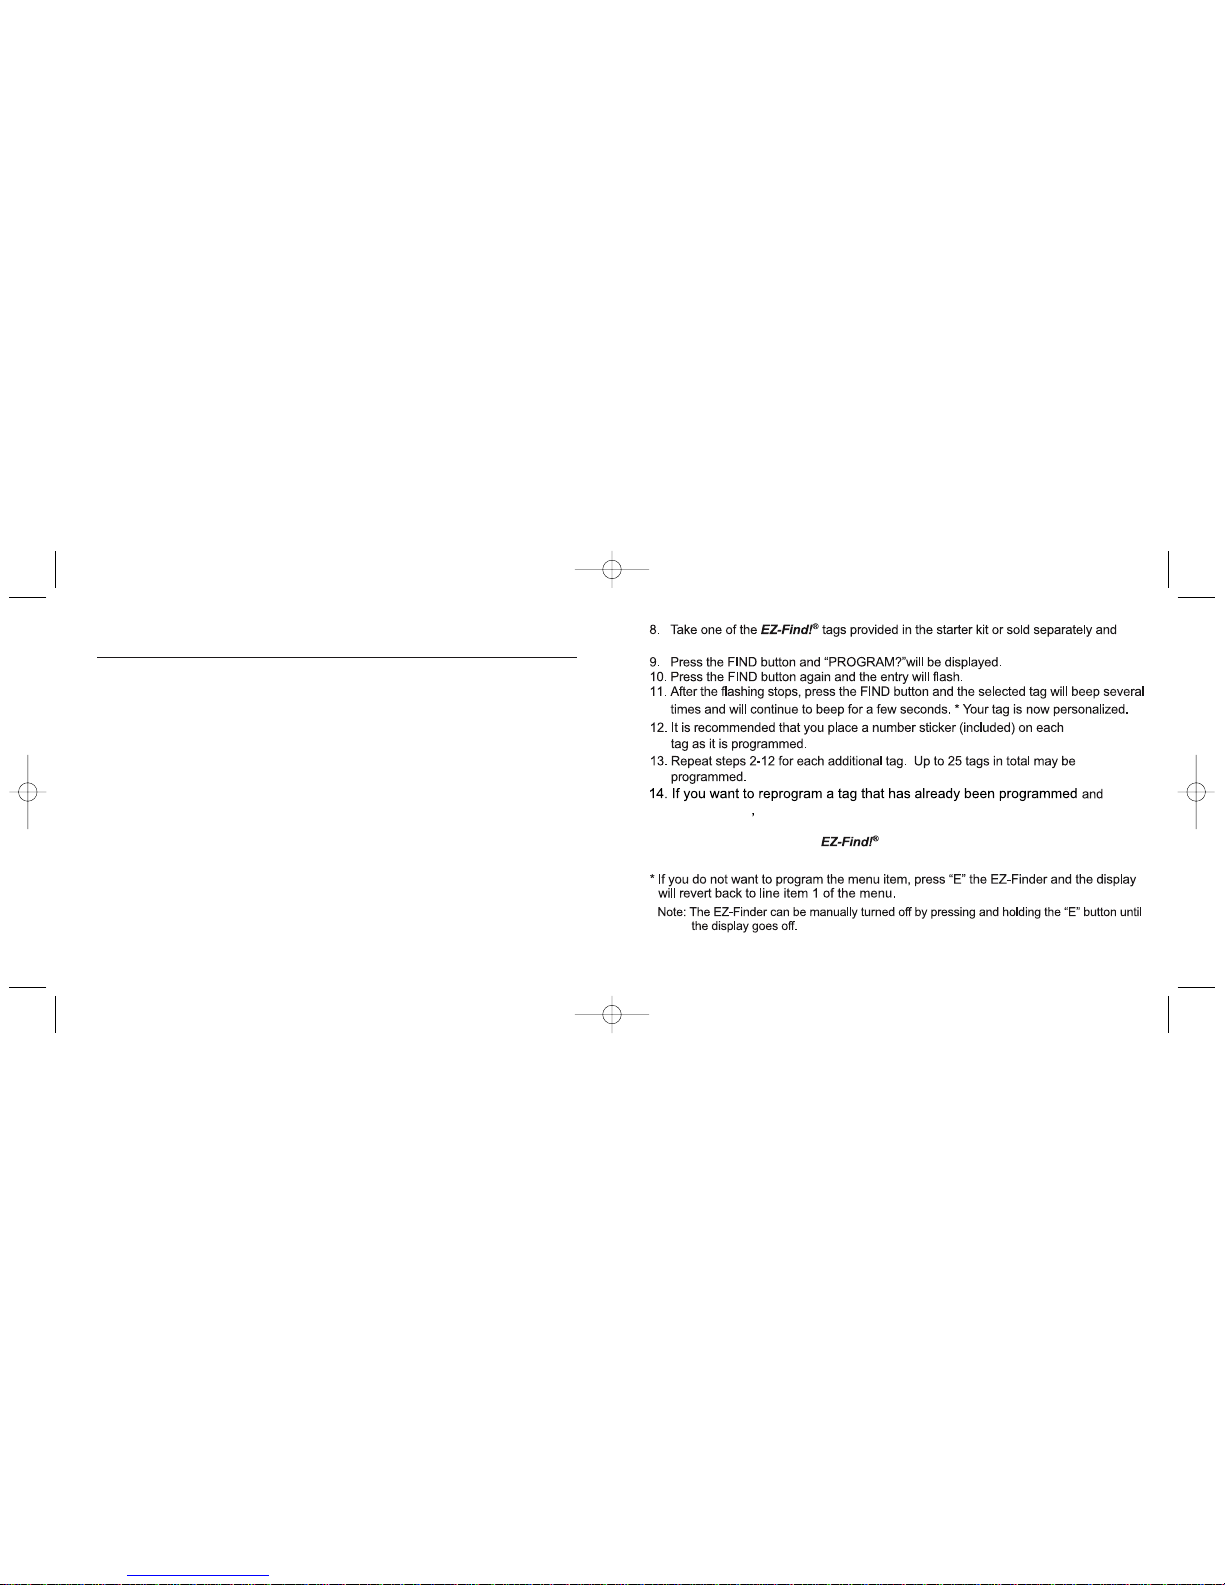
1. To replace the battery use a screwdriver to open the
battery conver on the back of the
2. Insert battery under the battery clip ensuring the
“+” side of the battery is facing up. The tag will
beep once when the new battery is installed.
3. Use a screwdriver to close the battery cover.
into its original menu item after a new battery has been installed.
56
4. The tag will have to be reprogrammed (see item 10 on page 8)
PROGRAMMING YOUREZ-FIND ®TAGS.
Option 2: Programming for Personalization (T
ext Entry)
Thisfeature allows you to personalizeyour EZ-Find!®system byentering
descriptions foreachtagged item stored in the EZ-Finder menu.
T
oadd text or numbers adjacent to the number on the EZ-Finder menu:
1. TurnEZ-Finder ONbypressingandholding the “FIND” button. “EZ-Find!” will be
displayed onthe LED screen.
2. Pressthe blue “E” (Entry)button. (”1” will flash on the LCD display, the EZ-Finder
is now in program mode)
3. Scroll to menu item (number) that you want to personalize.
4. Pressthe FINDbutton again and aflashing?will be displayed.
5. To add/enter alphanumeric text, scroll up or downto the text/number/symbol you
wish to enter. If you want to delete alreadyentered alphanumeric text, pressthe
“E” button for each alphanumeric characteryou want deleted.
6. Pressthe FIND button again to select that alphanumeric text entry.
7. Repeat steps5 and6 for up to 12 characters. (T
osee a table of characters please
refer to T
able 1)
EZ-Find!®
personalized
s
a
h
t
i
g
n
i
t
a
c
i
d
n
i
e
c
i
w
t
p
e
e
b
l
l
i
w
g
a
t
e
h
t
d
n
a
n
o
t
t
u
b
d
n
i
F
e
h
t
received its identify.
turn the ON/OFF switch to the ON position.
follow steps 1 through 7 above, then turn the ON/OFF switch
OFF and then back to the ON position again. The tag will beep once. Press
78

STEP 3:ATTACHING EZ-Find!®T
ags
Adhesive strips and key rings are available to attach EZ-Find!®tags to itemsyou wish
to keep track of. Fouradhesive strips and four key rings areincluded inthis starterkit.
To use the adhesive strips:
1.Adhesive strips are best used ona flat surface. Removepaper coverfrom one side
of one of the double sided adhesive strips. Place sticky side in center of the
recessed cavity of anEZ-Find!®tag. Press firmly.
2. Remove papercover from other side of the adhesive.
3. Press firmly against the itemyou want to track.
4.Let is set for15minutes (ideallyfor 24 hours) before using tracked item.
To use the key ring loops:
1. Attach key ring loop to keys, pet collars, belts, purses, etc. Push the key ring loop
through the hole onthe corner of theEZ-Find!®tag.
T
ag Number labels (Included in thispackage):Y
ou may want to place a number
label on each tag to keep track of the tags that youhave programmed into theEZ-
Finder.
STEP 4:FINDING LOST ITEMS
1. Turn EZ-FinderON bypressing and holding the FIND button. “EZ-Find” will be
displayed on the LED screen.
2.Press FINDbutton again to go to the menu screen.
3. Scroll up or downto item you want to find.
4. Press the FIND button. A series of audible beeps will sound if tagged item is
within range (approximately 60 feet).
5. If nobeep isheard, walk around with the EZ-Finder while continuously
pressing the FIND button until item is located.
6. Y
ou can turn the EZ-Finder off once the item is found by pressing the “E”
buttonfor three seconds or the EZ-Finder will automatically turn itself off after 2
minutes.
7. If the lost item cannot be located it may be due to:
- Lost item is out of range.
- Theincorrect item in the menu was pressed.
-The EZ-Find!®tag has weak batteries.(See page 3)
- TheEZ-Finder has weak batteries.(See page 3)
Note: The EZ-Finder can be manually turned off by pressing and holding the “E” button
until the display turns off.
InstructionManual:Layout 1 6/8/07 7:48 PM Page 9
9 10

CHARACTER ENTRY
Table 1: Alpha/Numeric text display
A, B, C, D, E, F, G, H, I, J, K, L, M, N,
O, P
, Q, R, S, T, U, V, W, X, Y
, Z,
_(SPACE), - (DASH), 0, 1, 2, 3, 4, 5,
6,7, 8, 9
SPECIFICATIONS
feet in free space06
)r
o
o
d
tu
O
/
r
o
o
dn
I
(
e
gna
R
hcni
1
@
b
d29
ssen
du
oL
z
H
M334
y
cneu
qe
rF
)
de
du
l
cn
iton(v5.1AA
A
2
yre
t
ta
) b
re
tti
m
sna
r
T
(re
dni
F-
Z
E
EZ-Find!® T
ag battery (estimated 1 year life depending on usage) CR 2032 3v (included)
LIMITEDWARRANTY
Basix Inc (Basix). warrants to the original purchaser that the product is free from significant
defects inmaterial and workmanship for 90 days effective from the date of purchase as
shown on the original receipt.
If you discover a defect in material orworkmanship during the warranty period, and Basix
agrees that the defect exists, Basix will, at its option, repair or replace the Product at no
charge to you, provided it is returned during the warranty period, with all transportation
charges paid by the consumer. The Product must be properly packaged with the Return
Material Authorization number issued by Basix displayed on the outside of the packaging,
to obtain warranty service.
This warranty does not cover abuse, unreasonable use, mistreatment, or neglect or
damage caused by modification or repair not made or authorized by Basix.
Basix Inc. disclaims any and all implied warranties. In no event shall Basix Inc. be liable for
consequential or incidental damages for breach of any express or implied warranty on this
product.
InstructionManual:Layout 1 6/8/07 7:48 PM Page 11
Note: The changes or modifications not expressly approved by the party responsible
for compliance could void the user’s authority to use the equipment.
To comply with the FCC RF exposure compliance requirements, this device
and its antenna must not be co-located or operating to conjunction with any
other antenna or transmitter.
11 12
Table of contents
Popular Personal Care Product manuals by other brands


Chattanooga
Chattanooga 1410 user manual

PHILIPS Respironics
PHILIPS Respironics DreamStation BiPAP user manual

Create
Create SONIC BEAUTY 3 IN 1 user manual

mind alive
mind alive david delight pro Operator's manual

miseno
miseno MM2436OVLED user guide

NRS Healthcare
NRS Healthcare EASYFIT PLUS MK2 User instructions


