Whole Health Network LiveO2 User manual

Set Up Guide
LiveO2
LiveO2.com /support
970.372.4344
U.S. and Foreign Patents Pending


3
SET UP AND LOCATION
There are 3 main components to a
LiveO2 System: an Air Separator, a
Reservoir and a High Volume Mask
Kit. Choose a location for your LiveO2
System with all three in mind.
Ideally you will want to nd an
indoor area that is clean, dry and
maintained at comfortable room
temperatures. The area should be
free of mold and mildew, and dust
should be a kept to a minimum.
The environment should be one
of “clean air” that is free of odors
or fumes.
The minimum oor space needed
is 6 x 8 ft. or 48 square feet which
will also accommodate exercise
equipment . The area will also need
a vertical space of about 5 x 7 ft. for
hanging the reservoir.
You will need a standard US 120
volt outlet with enough capacity to
power your system.
LIVEO2
SYSTEM ASSEMBLY
LiveO2 Air Separator
The LiveO2 Air Separator is pro-
fessionally modied in our lab.
It will produce 10 liters per min-
ute of oxygen concentrated air
(+O2) at elevations up to 10,000 ft
(3,048m). The LiveO2 Air Separator
also produces oxygen raried air
in excess of 100 liters per minute.
The raried air (-O2) is comprised
of approximately 25% less oxygen
than atmospheric air (at sea level,
room air is comprised of about 21%
oxygen). At dierent elevations the
oxygen concentrations produced
by the Air Separator will
vary due
to changes
in atmo-
spheric pressure,
but the relative ratio
of air qualities cap-
tured by the LiveO2
System (+O2 /-O2)
remains consistent.
LiveO2Adaptive Contrast Set Up Guide
Thank you for your purchase of the LiveO2 Adaptive Contrast
System. This guide is designed to provide instructions for
setting up your LiveO2 Adaptive Contrast System (LiveO2
System) and introduce you to each component of your new
LiveO2 System.
Please do read this set up guide from beginning to end. Should
you have questions about the setup process feel free to contact
our tech support group at the following number: 970-372-4344.

4
LiveO2Adaptive Contrast Set Up Guide
Set the ow rate
Turn the air separator ON, power
switch ( I/O) to“I”. Once the unit is
running and producing air, turn
the knob to the left increasing the
ow rate until the ball in the ow
indicator oats just to the middle of
the 10 LPM mark. Checking the ow
rate occasionally and adjusting it
back to 10 LPM is all that is needed
to assure the proper ow rate of the
Air Separator.
Setting the ow rate above 10 LPM
will overdrive the air separator and
cause lowered oxygen concentra-
tions in the +O2 area of the reser-
voir. For optimal performance of
the LiveO2 System, maintain the
setting at 10 LPM.
WARNING: No smoking while
separator is running or lling.
Keep all sources of open ame 10
feet away from the air separator
at all times.
Note: Humidifying air sources lead-
ing into the reservoir is not advised.
If you have questions or the need
to humidify the breathing air after
it has passed through the reservoir,
call tech support to learn how to do
this safely.
Oxygen is a key component of com-
bustion. It is advised that the LiveO2
System not be exposed to or operated
in the presence of open ames or pos-
sible spark sources. When inated,
the reservoir contains a large volume
of oxygenated air that is under very
little pressure (~ 2 psi). Oxygen con-
centrated air accelerates combustion.
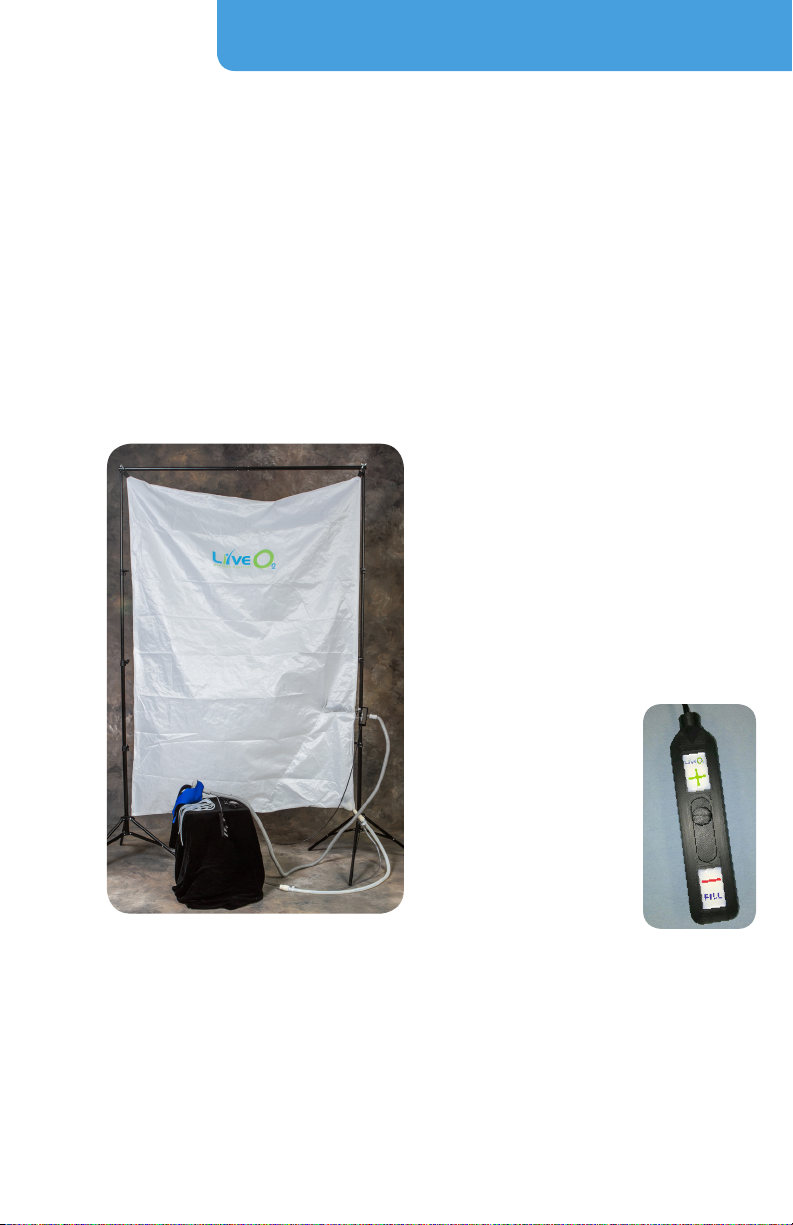
LiveO2 Adaptive
Contrast Reservoir
The LiveO2 reservoirs have semi
permeable areas and vents built in.
The LiveO2 reservoirs cannot be
overlled
or damaged
by leaving
the system
running/ll-
ing.The -O2
section of the
reservoir (bottom corner) is
specially designed to vent excess
-O2 air into the room. By design,
a 2 inch vent in this corner allows
excess -O2 air to escape.
Should the unit be turned o with
a full reservoir, the +O2 air will
hold its concentration for about an
hour.Up to an hour, the air in the
+O2 reservoir can still be used, pro-
vided the system is turned ON prior
to starting the session. Otherwise
we recommend setting the selector
switch to +O2, pressing the air out
of the reservoir and relling the unit
with the selector switch set to -O2.
As an alternative to pressing the
air out of the reservoir the switch
can be set to +O2 (without a mask
attached) and the reservoir will
passively empty overnight.

5
For hanging a LiveO2 Reservoir you
will need a vertical area of about
5 x 7 ft. The reservoir can be hung
in several ways depending upon the
size of the room and planned zone
of use.
• For a large room with high
ceilings – a stand alone frame
is suggested. If you purchased
a frame, hanging instructions
are included with the frame
assembly.
• For hanging on a wall or for
temporary installation, use the
self-adhesive hooks included.
Follow the instructions on the
adhesive hooks for mounting to
get the best results. Place these
LiveO2Adaptive Contrast Set Up Guide
hooks approximately 4 1/2 ft.
apart, and at least 7 1/2 ft. high
on the wall allowing room for
the reservoir to expand without
restriction. When full, the res-
ervoir will press o the wall to
about 2 1/2 ft. in a large wedge
pillow shape.
• For hanging from a ceiling,
beam or rafter, use a xed hook
or strap so that the corners are
approximately 4 1/2 ft. apart
and at least 7 1/2 ft. o the oor.
If the LiveO2 reservoir is being
hung parallel to a wall, the
hooks should be set at least 8”
inches away from the wall. This
will allow the reservoir to hang
at when not in use and when
full it will inate to a rectangu-
lar pillow shape that is about 2
feet(0.6 meters) thick.
Attention: Once the
reservoir is hung the
black cable with + / -
switch must be
uncoiled to allow
full function of the
reservoir valve.

6
LiveO2Adaptive Contrast Set Up Guide
Hose Connections
Your LiveO2 System has three dier-
ent hoses that need to be connect-
ed prior to use.
1. The -O2 Hose (a larger diameter
reinforced silicone hose coming
from the base of the air sep-
arator) connects directly into
the output tube at the bottom
corner of the reservoir. This is
the -O2 hose that lls the
smaller portion of the reservoir
with oxygen depleted air.
2. The +O2 Hose -
A smaller diameter silicone hose
that connects to the output
nozzle on the front of the air
separator. This is the +O2hose
that lls the larger section of the
reservoir with oxygen concen-
trated air.
3. The Breather Hose - A light
weight 8 ft. exible hose that is
attached to the valve output on
the side of
the reservoir.
This is the
breather
hose and
it connects
directly to
the top
port of the
high volume
breather mask.
High Volume Mask Kit
Included with your LiveO2 System
is a deluxe mask kit with both a
silicone and a neoprene strap. You
will only need one of these straps to
secure the mask. We include both
to accommodate and establish a
personal preference.
This mask is intended for use with
LiveO2 System only.

7
Inating Mask Pillow
To inate the mask:
In the Mask Kit there is a syringe
plunger that is used to inate or
deate the air pillow of the mask
to provide the best t. 2/3 full is a
good place to start. The best t will
create a comfortable seal all the way
around the mask that only allows air
to ow in and out from valve ports
in the front of the mask.
To check for a good mask t:
1. Place mask on face (with or
without a strap).
2. Breathe in and out gently.
3. While breathing in, place your
hand over the top port (inow)
of the mask.
4. Your inhalation should stop
quickly and the mask should
create an immediate suction,
pulling the mask onto the face.
5. If you have a gap, the suction
will not be immediate or strong
enough, indicating additional
mask adjustment is needed.
Mask Straps Neoprene
or / Silicone
Using either strap (silicone or
neoprene) nd the comfortable t
that holds the mask snugly in place
without being loose. It should be
just tight enough to keep the mask
on your face while exercising.
Prior to each use of your mask
check the teal septum (xed exi-
ble valve) in each port. These septa
valves provide the correct ow
pattern for the mask. To function
properly, they should be lying at in
the mask port. Occasionally during
washing they can become mis-
aligned, catching in a folded pattern
under the septum support pin. In
this case the septum can be easily
adjusted with a Q-tip until they lay
at and are free to ex in the proper
direction. Do not remove the septa
from the mask.
LiveO2Adaptive Contrast Set Up Guide

8
Mask and Hose
Decontamination
Clean your Mask
It is recommended that each user
have his or her personal mask.
Cleaning the mask after each use is
strongly recommended.
Mask Washing Instructions;
1. Shortly after each use, wash
contaminated masks in warm
water and a mild non-fragrant
liquid soap solution.
2. Move the mask up and down in
the soapy solution to assure the
septa valves are being washed
as well.
3. Lightly scrub all surfaces and
then rinse well with tap water
4. Make a simple decontamination
solution of 1 part white distilled
vinegar and 2 parts water.
5. Move the mask up and down in
the vinegar solution to assure
septa valves are being decon-
taminated as well.
6. Soak mask in the water and
vinegar solution for 30 minutes.
7. Rinse well with tap water and
set out to dry in room air on a
clean paper towel.
LiveO2Adaptive Contrast Set Up Guide
It is also recommended that the
breather hose is washed and
cleaned when contamination is
suspect or at user specied intervals
(e. g., monthly).
Breather Hose Washing Instructions;
1. Wash contaminated hoses in
warm water and a mild non-fra-
grant liquid soap solution.
2. Move the hose up and down in
the soapy solution to assure the
entire length is being washed.
3. Rinse well with tap water.
4. Make a simple decontamination
solution of 1 part white distilled
vinegar and 2 parts water.
5. Move the hose up and down in
the vinegar solution to assure
the entire length is being de-
contaminated.
6. Soak hose (submerged) in the
water and vinegar solution for
30 minutes .
7. Rinse well with tap water and
hang to dry in a warm dry area.

9
Pulse Oximeter
An oxygen pulse oximeter is also
included with your LiveO2 System.
When attached to your nger it
will measure the amount of oxygen
being carried by your blood. It will
also display your pulse. Besides
listening to your body these are
two important
metrics that
help track your
LiveO2 training.
Enclosed with
your Oximeter is
a product spe-
cic instruction
guide.
START-UP
Initial Start Up
Once the LiveO2 System is com-
pletely set up we recommend an
initial run-in period of 5 hours as
a pre-use assur-
ance that the
LiveO2 System
has calibrated
after shipping.
To perform the
System Flush:
1. Turn the air
separator
unit ON (“I”). Set to 10 LPM.
2. When lling the reservoir, make
sure the handle is set to the“Fill”
position.
3. Monitor the system. It should
be lling and the amber light
should not be lit. After approx-
imately one hour slide the con-
trol switch to +(a mask should
not be attached to the breather
hose).
4. After approximately 5 hours,
the reservoir is now ready for
use and completely full.
5. If you are not ready to use the
system, turn o the air separa-
tor and set the control switch
to +so that the unused
oxygenated air can passively
escape the reservoir.
Prior to Each Use
1. Fill the LiveO2 Reservoir
a. Push out any residual air in
the reservoir with the control
switch set to +(a mask
should not be attached).
b. Turn on the air separator to ll
the reservoir with the control
switch set to –.
c. Let the system ll for
approximately 1 hour prior
to use (20 liter system ll time
is 20 minutes).
2. When the LiveO2 AC System is
in use the air separator must
remain ON to produce not only
–air but also additional +.
LiveO2Adaptive Contrast Set Up Guide

10
SEPARATOR
TROUBLESHOOTING
Each LiveO2 Air Separator draws
about 6 amps of power on a 120
volt circuit. If there is insucient
voltage or amperage the air separa-
tor will not run properly. A standard
ungrounded wall plug typically has
sucient power to operate the unit,
provided the circuit is not overload-
ed. Each unit has a built in circuit
breaker to protect it from power
surges. The small round black but-
ton on the front of the air separator
resets the internal surge protec-
tor. Plug the air separator unit in
before turning the unit on .
The amber light on the front of the
air separator serves as a low oxy-
gen indicator. The monitor’s amber
light remains ON until the oxygen
concentration reaches 85% ±3%
(approximately two minutes). If the
amber light stays lit continuous-
ly it is an indication that the air
separator is producing less than
optimal oxygen concentrations.
In this case a troubleshooting
process needs to begin prior to
using the LiveO2 System. Consult
the AirSep manual or call LiveO2
tech support for assistance at (970)
372-2430.
LiveO2Adaptive Contrast Set Up Guide
ROUTINE MAINTENANCE
Check and clean the gross particle
lter (external) weekly.
1. Remove the dirty air intake
gross particle lter from the
back of the AirSep unit.
2. Wash the dirty lter in warm
soapy water, and rinse.
3. Use a soft absorbent towel to
remove excess water.
4. Install the clean, dry lter on the
back side of the AirSep unit.
Check and clean the internal felt
lter every 500 hours (10 Liter
System only).
1. Set the unit’s l/0 power switch
to the “0” position, and discon-
nect the power cord.
2. Remove right side panel by
unscrewing the ¼ turn fastener
and remove the panel.
3. Locate and remove the felt
lter in the unit, and replace
with a new felt lter. New
lters can be purchased from
LiveO2.com/products.
4. Fasten the side panel and re-
connect the power cord.

11
READ BEFORE USE
With exercise there is always some
inherent risk involved. LiveO2
recommends that before starting
any exercise program you check
with a health consultant or qualied
practitioner. It is always a sign of
wisdom to seek a qualied opinion
and proceed with instructions that
are unique to you. If you have ques-
tions about any aspect of LiveO2
training we recommend that you
schedule two 15 minute appoint-
ments with our training group. See
page 13, Training Contact for how
to schedule your training sessions.
We nd this enables new users to
get started and pursue their
training goals.
At LiveO2 we do not advocate any
set protocol, frequency or exercise
regime in general, but we do believe
that participants should nd their
own pace, use benecial tools, and
pursue science based solutions for
their health needs. The only correct
way to proceed with LiveO2 is at
your own pace. Please do not use
the LiveO2 System if you are unwill-
ing to assume the risks and respon-
sibilities of its use.
If you have specic instructions from
a source other than LiveO2, we ask
that you recognize those instructions
as well as any additional equipment,
medications, supplements, dietary
or health guidelines as personalized
LiveO2Adaptive Contrast Set Up Guide
to you from a third party source.
LiveO2 reserves the right to not
support, comment on, or question
these instructions, but to respect
your existing relationship with a
third party. In some cases it will be
necessary for the third party to be
your primary contact when it comes
to specialized instruction
and recommendations.
WARRANTY
LiveO2 warranties the LiveO2 AC
reservoir to be free from defects in
material or workmanship for one
year from the date of purchase,
excluding the mask and pulse
oximeter, which each come with
a 30 day limited warranty. The
air separator, when purchased
new, comes with a three year
limited warranty.
During the warranty period, the
warrantied product will either be
repaired or replaced by LiveO2.
Should any component fail during
the warranty period, the purchas-
er may return the component to
LiveO2 for repair or replacement,
at LiveO2’s discretion. During the
rst ninety (90) days, return ship-
ping will be paid by LiveO2. After
90 days, return shipping to LiveO2
shall be at the purchaser’s expense.
Return of the replacement item
to the purchaser shall be at
LiveO2’s expense.

12
Exception: Due to prohibitive
shipping costs, international
customers will be responsible for
all related shipping costs includ-
ing any duties, taxes or regionally
specic charges. This warranty
does not cover normal wear and
tear, damage due to misuse, abuse,
accidents or non-compliance
with the precautions, improper
maintenance or commercial use.
This warranty does not cover any
damages, losses, costs or expenses,
direct, indirect or incidental, con-
sequential or special, arising out of,
or related to the product or its use.
This warranty does not aect the
purchaser’s statutory rights under
applicable national or state laws, or
the purchaser’s rights against the
dealer arising from their sales/pur-
chase contract. This limited war-
ranty is extended by LiveO2 to the
original purchaser, either directly
from LiveO2 or through one of our
recognized product partners.
DISCLAIMER
The material in this manual is for
informational purposes only. The
product it describes is subject to
change without notice, due to the
manufacturer’s continuous devel-
opment program. LiveO2 makes no
representations or claims about an
individual’s tness for use or appli-
cation either implicitly or
explicitly, with respect to this
manual or the product described
herein. LiveO2 shall not be liable
for any injuries or damages, losses,
costs or expenses, direct, indirect,
incidental, or consequential, arising
out of, or related to the use of this
material or the product described
herein. The product described
herein is not intended to treat,
diagnose, prevent or cure any
disease. The purchaser accepts all
responsibility for its use and the
consequences thereof.
US and Foreign patents pending.
Copyright © 2015, 2016, LiveO2. All rights
reserved. No part of this document may be
used or reproduced in any form or by any
means without prior written permission of
LiveO2.
LiveO2Adaptive Contrast Set Up Guide

13
TECHNICAL SUPPORT
Visit LiveO2.com/support for more
information on the set up
and operation of your LiveO2 AC
system. Contact us by email at
unavailable please call our technical
support sta at (970) 372-2430.
TRAINING CONTACT
Please go to www.liveo2.com/
contact/ to schedule a training
appointment, or call our support
sta at (970) 372-2430 for training
information or to schedule your
free training sessions. You are
eligible for two 15 minute training
sessions for free with the purchase
of your system.
Visit liveO2.com for more
information.
LiveO2Adaptive Contrast Set Up Guide

O
2
L
ve
STANDARD
Don’t forget to visit liveo2.com
to book a training with a LiveO2
representative to get you o to a
great start with your new system.
Other manuals for LiveO2
1
Table of contents
Other Whole Health Network Personal Care Product manuals