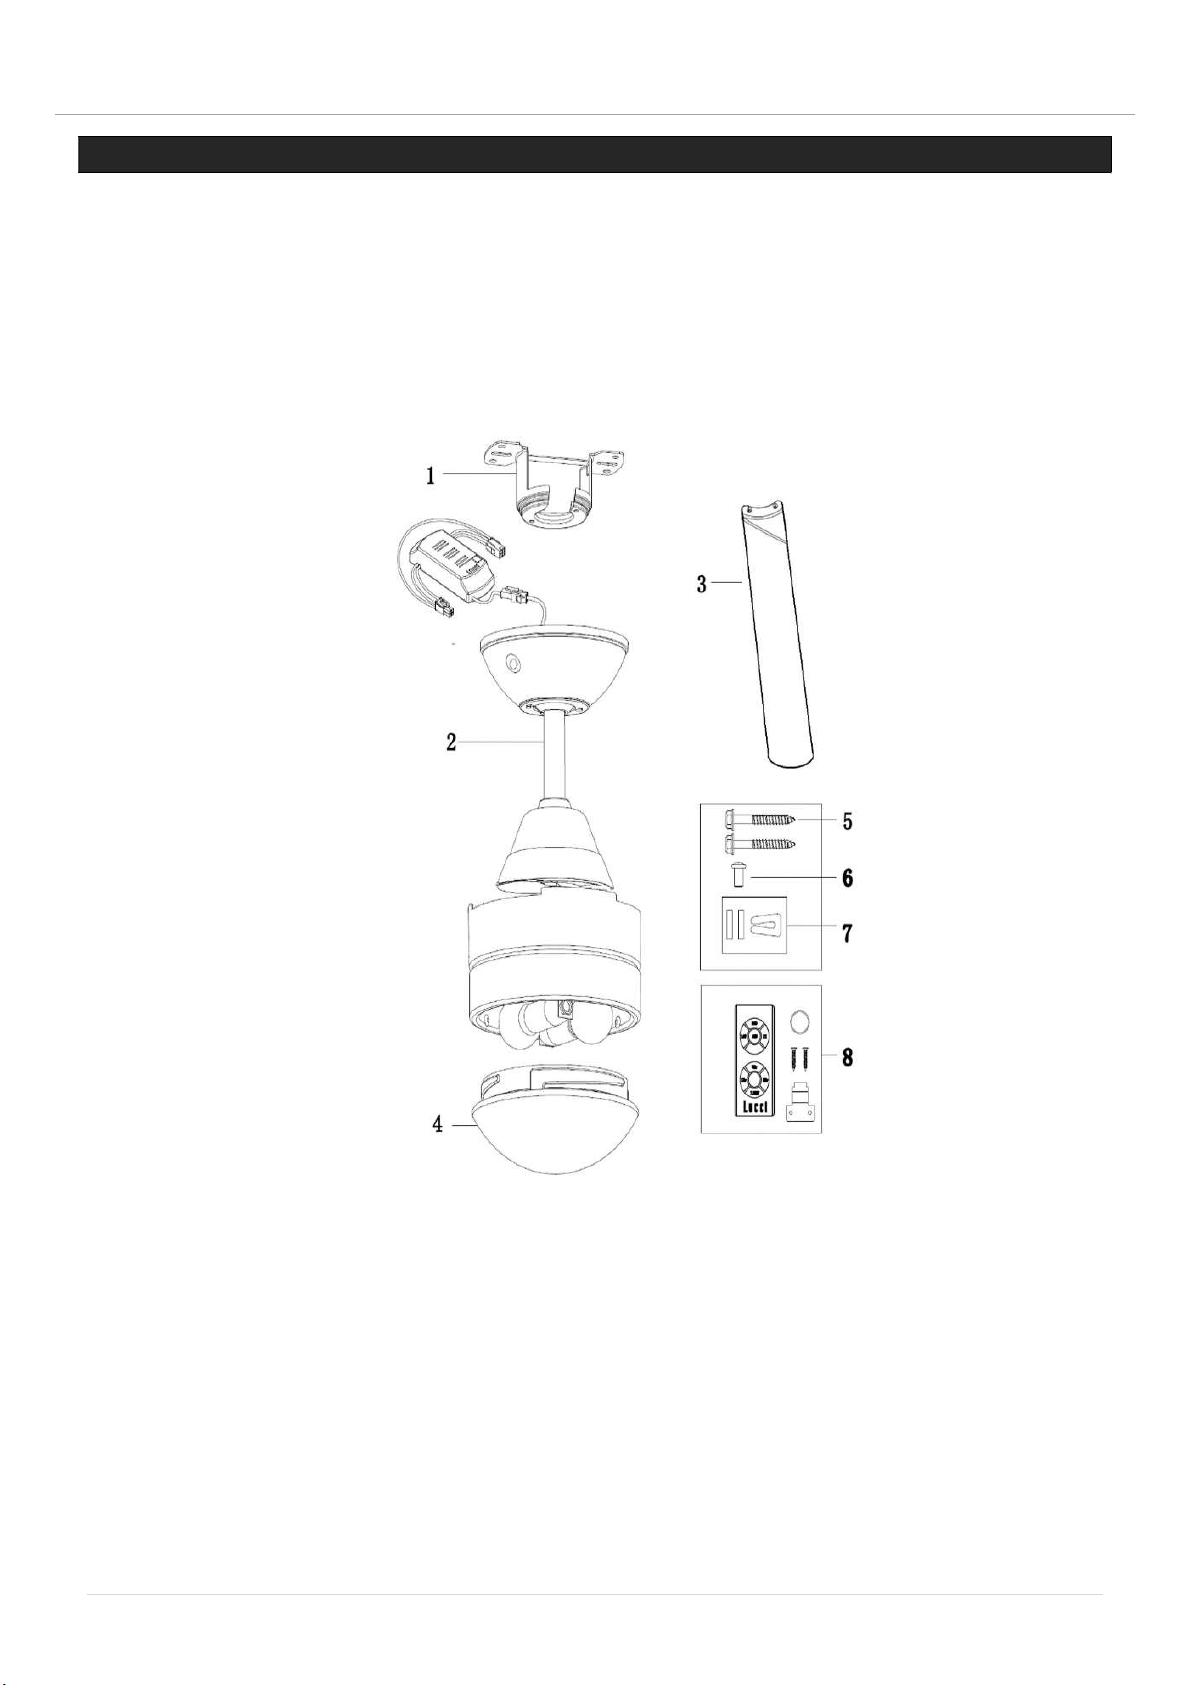
Bayside Megara Fan Installation Instructions
20 | P a g e v 1 . 0 ( 0 3 / 2 0 2 0 )
CUIDADO Y LIMPIEZA
NOTA: Apague siempre el ventilador mediante el interruptor de red antes de llevar a cabo
cualquier tarea de mantenimiento o limpieza.
La limpieza de su ventilador de techo cada 6 meses es el único mantenimiento que se requiere. Utilice
un cepillo blando o un paño que no deje pelusa para no rayar el acabado de pintura. Corte desactive
la corriente de red cuando lo haga.
No moje ni sumerja el ventilador de techo en el agua u otros líquidos. Esto podría dañar el motor o
las aspas y dar pie a posibles descargas eléctricas.
Asegúrese de que el ventilador no entre en contacto con disolventes orgánicos o detergentes.
Para limpiar las aspas del ventilador, pase solo un paño humedecido SIN disolventes orgánicos ni
detergentes.
El motor tiene un rodamiento con lubricación permanente, por lo que no es necesario engrasarlo.
PRECAUCIONES DE SEGURIDAD CON LAS PILAS
- Para evitar el funcionamiento accidental del ventilador de techo al instalar o sustituir las pilas,
desconéctelo del suministro eléctrico.
- Las pilas deberán retirarse del mando a distancia antes de desecharlo.
- Utilice siempre una pila CR2032 con el mando a distancia del ventilador de techo.
- Deseche las pilas agotadas inmediatamente y de forma segura (para que no puedan ser recogidas
por los niños). Las pilas agotadas pueden seguir siendo peligrosas. Póngase en contacto su
ayuntamiento para deshacerse de las pilas de una manera segura.
- Asegúrese de instalar las pilas con la polaridad correcta.
- No utilice pilas recargables con este producto.
- PRECAUCIÓN – No ingerir las pilas - Riesgo de quemaduras químicas.
- ADVERTENCIA – Mantenga las pilas nuevas y usadas fuera del alcance de los niños.
- Examine periódicamente el producto y asegúrese de que la tapa del compartimento de las pilas esté
fijada correctamente. Si el compartimento de las pilas no cerrara bien, deje de usar el producto y
manténgalo alejado de los niños.
- Retire las pilas del producto cuando no lo vaya a utilizar durante un período de tiempo prolongado.
- Si sospecha que alguna pila ha podido ser ingerida o introducida en alguna parte del cuerpo, solicite
atención médica inmediatamente.
- Si sospecha que su hijo/a ha ingerido o se ha introducido una pila de botón, llame al número de
urgencias de su país si está en Europa para que le indiquen cómo proceder rápidamente.
- Fugas de las pilas: Las pilas contienen sustancias químicas y deben ser tratadas como cualquier
otro químico. Tome precauciones cuando manipule las fugas de productos químicos de las pilas. Los
productos químicos de las pilas no deben colocarse cerca de los ojos ni ingerirse. Llame al número
de urgencias de su país si está en Europa para que le indiquen cómo proceder rápidamente.