BBQ 16330 BBQ-PRO User manual

Use and Care Guide
Deluxe Portable Charcoal Grill
Sears Item No. 16330
This Grill Is For
Outdoor Use Only
• Read and follow all Safety, Assembly
and Use and Care Instructions in this
with this grill.
• Failure to follow all intructions in this
Use and Care Guide may cause fire or
explosion, which could result in property
damage, personal injury or death.
08401502 • 42804339 • 07-15-08
• Parts
• Assembly
• Safety Rules
• Use and Care
Assembly Questions?
Call 1-800-241-7548
Kmart Item No. 26682211-3
Tools needed for assembly:
Adjustable Wrench (not provided)
Screwdriver (not provided)
7/16” Combination Wrench (not provided)
Guide before assembling and cooking
WARNING

CAUTION
For residential use only. Do not use for commercial
cooking.
WARNING
CALIFORNIA PROPOSITION 65
1. Combustion by-products produced when using
this product contain chemicals known to the State of
California to cause cancer, birth defects, and other
reproductive harm.
2. This product contains chemicals, including lead
and lead compounds, known to the State of
California to cause cancer, birth defects or other
reproductive harm.
Wash your hands after handling this product.
DANGER
Safety Symbols
The symbols and boxes shown below explain what each heading
means. Read and follow all of the messages found throughout
the manual.
DANGER: Indicates an imminently hazardous situation
which, if not avoided, will result in death or serious injury.
WARNING
WARNING: Indicates an potentially hazardous situation
which, if not avoided, could result in death or serious injury.
CAUTION
CAUTION: Indicates a potentially hazardous situation or
unsafe practice which, if not avoided, may result in minor
or moderate injury.
WARNING
All surfaces can be hot during use. Use protection
as required to prevent burning.
Do not use this unit on or near combustible surfaces
or structures such as wood decks, dry leaves or
grass, vinyl or wood siding, etc.
SEE THIS USE AND CARE GUIDE FOR IMPORTANT
SAFETY INFORMATION.
WARNING
CARBON MONOXIDE HAZARD
Burning charcoal inside can kill you. It gives off
carbon monoxide, which has no odor. NEVER burn
charcoal inside homes, vehicles or tents.
NEVER LEAVE FIRE UNATTENDED!
Do not allow small children near flame. Hot embers
can fly out in breezy conditions. Adequate fire
extinguishing material should be readily available.
Grill Service Center - Call for Help and Parts
• If you need assistance with your product or replacement parts
call 1-800-241-7548. Hours of Service Center Operation are
8:00 A.M. To 6:00 P.M. EST Monday - Friday.
CAUTION
Some parts may contain sharp edges. Wear
protective gloves if necessary.
Read and follow all safety statements, warnings,
assembly instructions and use & care directions
before attempting to assemble and cook.
TABLE OF CONTENTS
GrillServiceCenter...................................2
SafetySymbols......................................2
UseandCare.......................................3
...........................................3
Assembly.........................................5-7
Warranty
Parts List, Hardware List, Exploded View. . . . . . . . . . . . . . . . . . 4
Page 2

USE AND CARE
Grilling
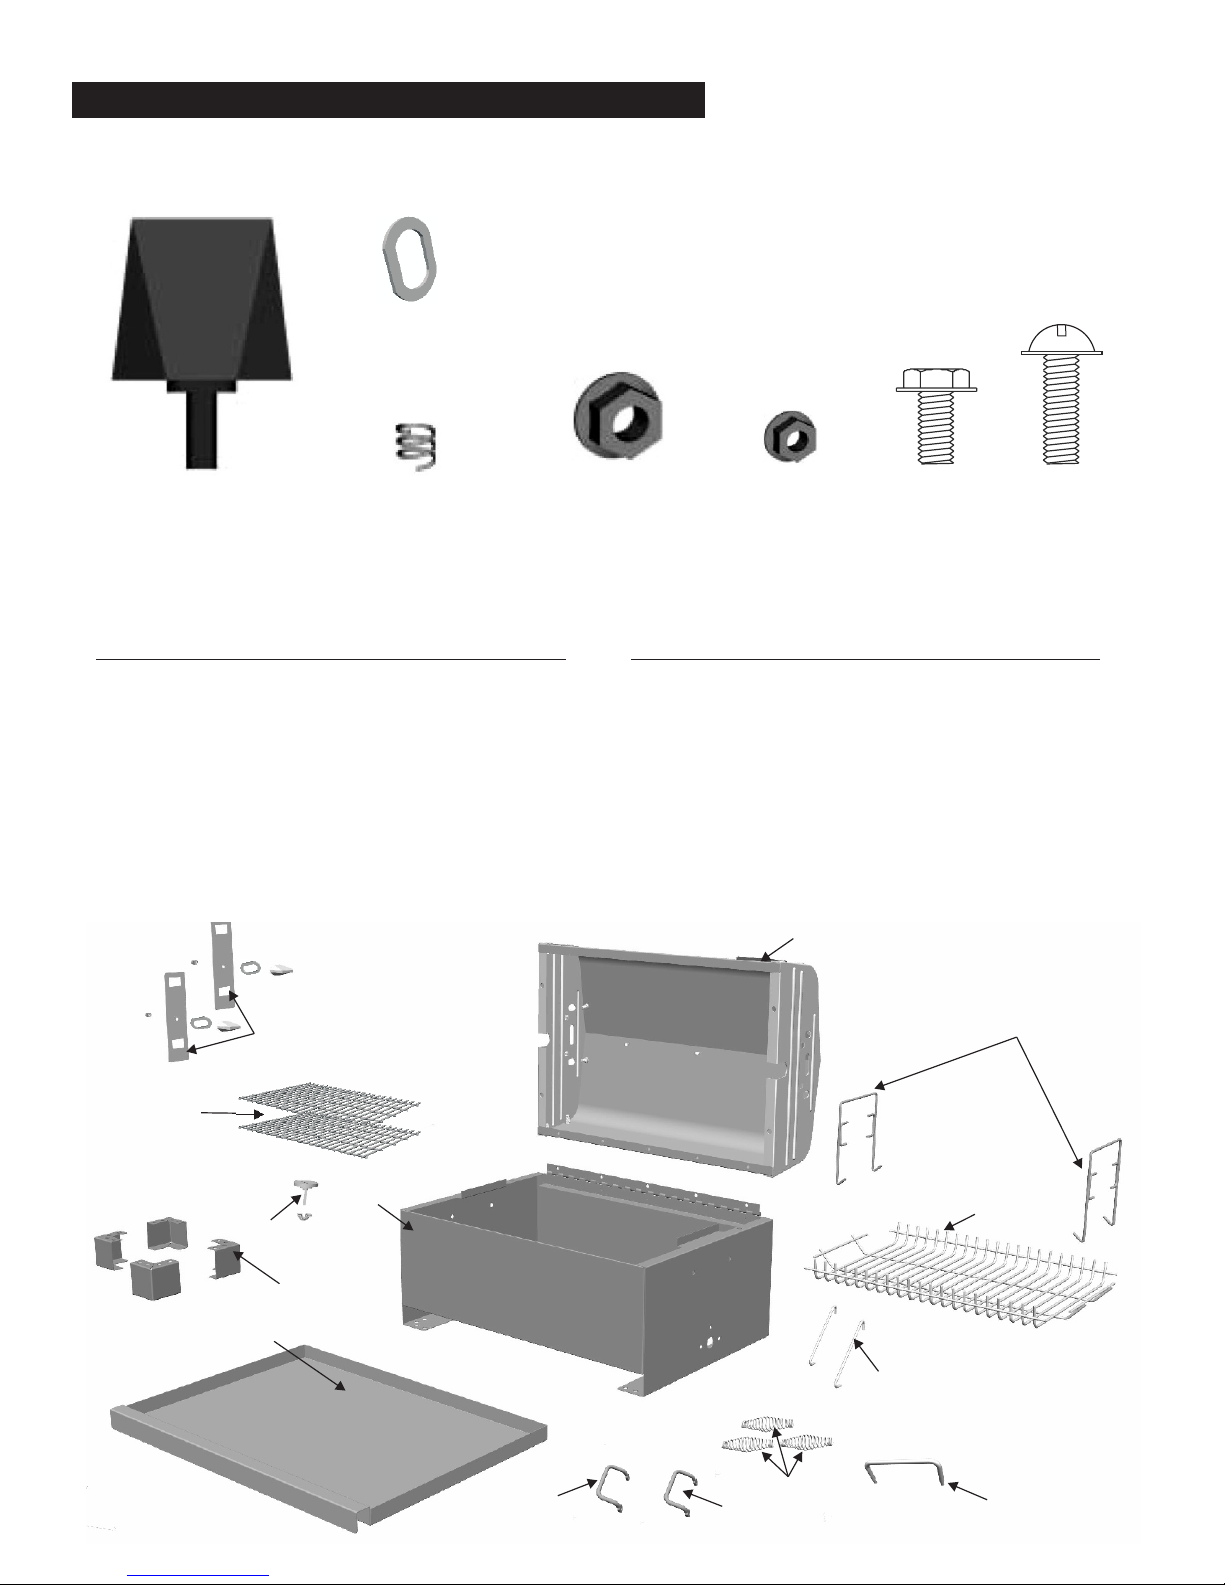
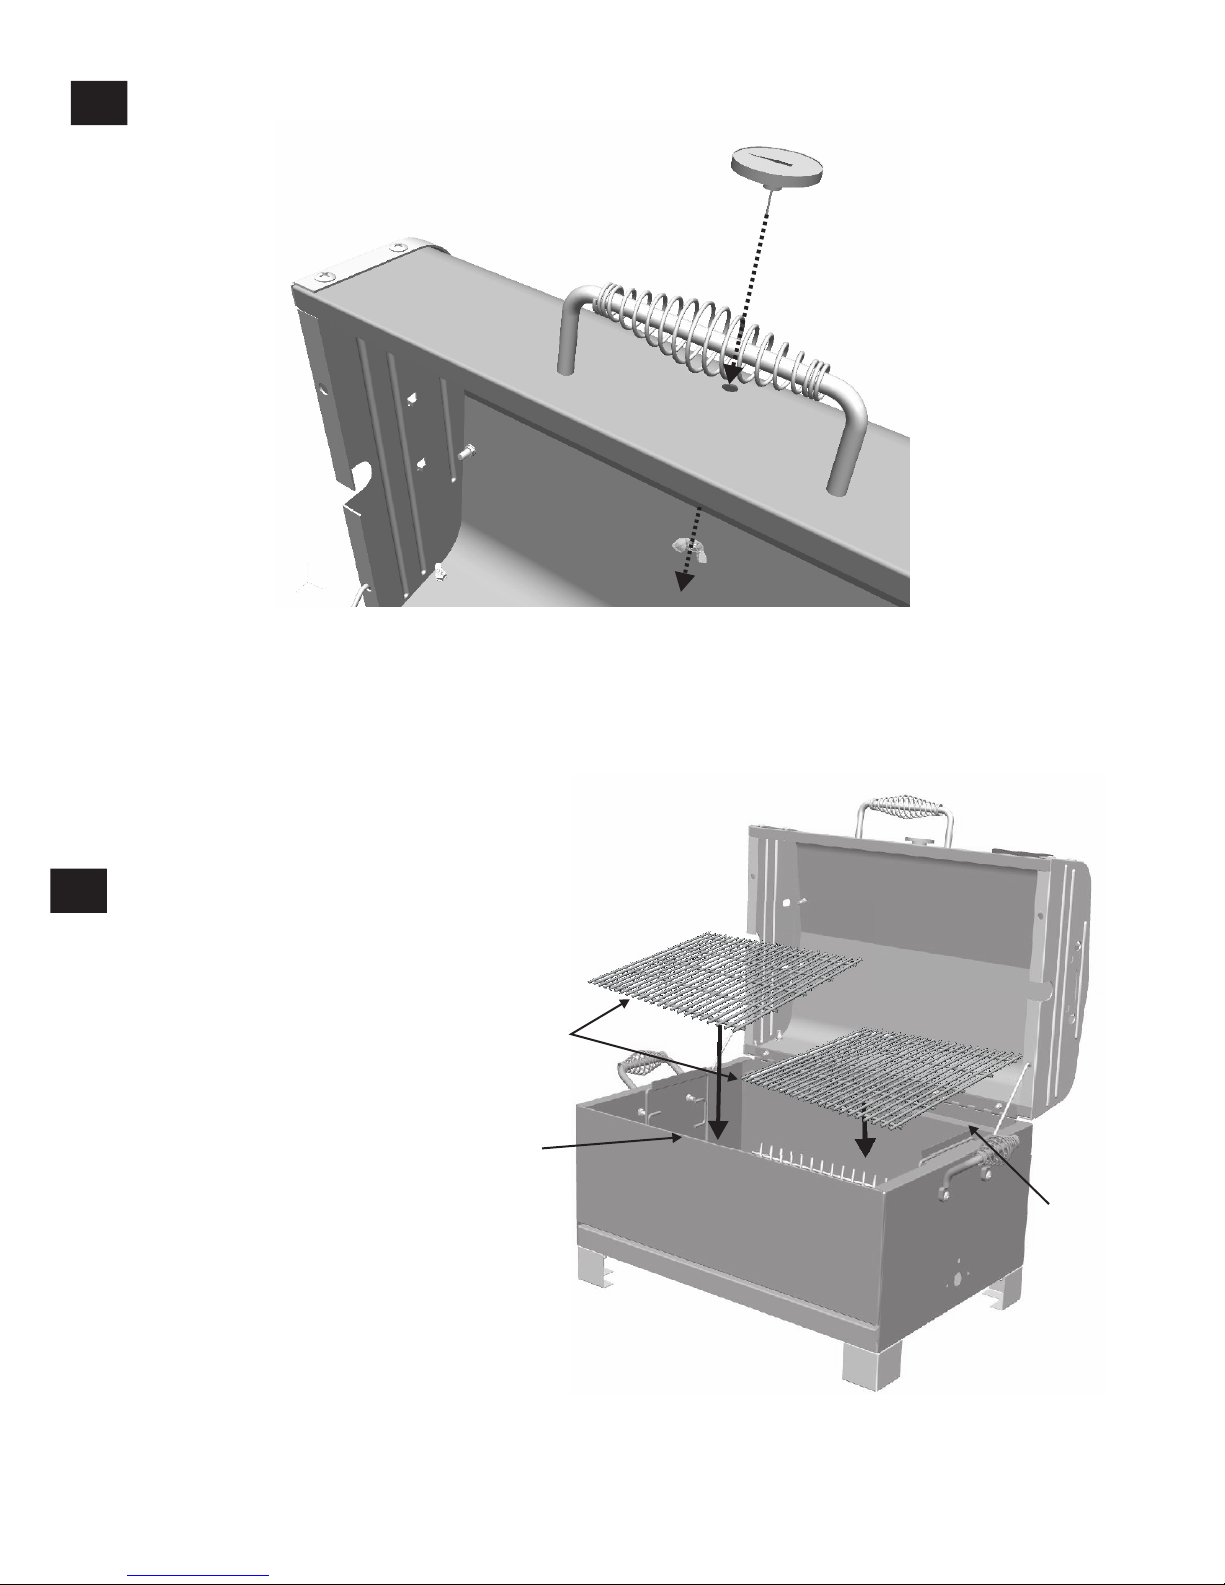
Position the fire grate in the grill in one of three positions from
tab on each side of the grill. Build a fire on top of the fire grate
using either charcoal briquettes, lump charcoal, or wood
chunks. Keep the grill lid open, until the fire has established
itself and is ready for cooking. Spread out coals as required,
insert cooking grates, and start grilling. Remember, grilling is
done over the top of the fire. Use the vents to regulate the fire
and heat. Open the vents to increase temperature; close vents
to decrease temperatures. The fire grate has three positions
that allow you to move the fire closer to the food if desired.
Likewise, if your food is cooking too fast - you can move the fire
grate away from the food by lowering it. The grill lid can remain
open or closed. Refer to recipes for required cooking times and
temperatures.
With any type of live fire cooking, allow enough time to build a
fire and get the grill up to temperature.
Build a fire using either charcoal briquettes, lump charcoal, or
wood chunks. Briquettes offer a very good source of heat, and
are readily available in the marketplace. Most briquettes are
manufactured using a combination of wood charcoal, coal
powder, and a processing binder. Lump charcoal is a premium
form of charcoal because it is made of only wood. Lump
charcoal burns hotter and longer than briquettes, and imparts
no chemical flavors to the food being cooked. For a more robust
smoke flavor using briquettes or lump charcoal, try adding
several wood chunks to the fire. Wood chunks are available in a
variety of natural flavors, and can be used alone or in addition to
charcoal.As a general rule, any hardwood that bears a fruit or
nut is suitable for cooking. However, different woods have very
different tastes.
Prior to cooking on your grill, the following steps should be
taken to season the interior steel. This will seal the inside
surfaces with wood smoke and resin, helping to prevent
corrosion. First, brush all interior surfaces with vegetable oil.
Next, build a small fire on the fire grate inside the firebox, being
sure not to lay coals against the walls.After the fire becomes
established, close the grill lid and position both vents
approximately 1/4 open. Sustain this fire for at least 2 hours.
The unit is now ready for cooking!
Grill Maintenance
When finished cooking, and the unit has adequately cooled,
clean out all remaining ashes.Ashes collect moisture, which
can lead to premature rusting and decay. Periodically coating
the interior surfaces with vegetable oil will aid in the protection
of your unit.Also, occasional touch up of the exterior paint will
be required. Black, high-temperature spray paint is
recommended. Never paint the interior of the unit.
Cooking Surface: If a bristle brush is used to clean any of the
grill cooking surfaces, ensure no loose bristles remain on
cooking surfaces prior to grilling. It is not recommended to clean
cooking surfaces while grill is hot.
WARRANTYWARRANTY
BBQ-PRO GRILL WARRANTY
90 DAY Full Warranty
®
If this BBQ-Pro product fails due to a defect in material or
workmanship within 90 days from the date of purchase, return
it to any Sears or Kmart store or other BBQ-Pro outlet in the
United States with your proof of purchase for free
replacement.
This warranty gives you specific legal rights, and you may
also have other rights which vary from state to state.
Sears, Roebuck and Co., Hoffman Estates, IL 60179
Page 3
THE HEAT OF THE COALS
seconds you can
hold the palm of
your hand 4 inches
above the coals temperature range (Fº) visual cues
HOT COALS 2 400 to 450 barely covered with
gray ash; deep red glow
MODERATELY HOT 375 to 450 thin coating of gray
ash; deep red glow
MODERATELY HOT COALS 4 325 to 375 significant coating of
gray ash; red glow
MODERATELY COOL COALS 5 300 to 325 thick coating of gray
ash; dull red glow
3
TO HOT COALS
USDA Recommended
Internal Cooking Temperatures
Ground Meat
Beef, Pork, Veal, Lamb......................................160°F
Turkey, Chicken.................................................165°F
Fresh Beef, Veal, Lamb
Medium Rare.......................................................145°F
Medium................................................................160°F
Well Done............................................................170°F
Poultry
Chicken & Turkey, whole.....................................165°F
Poultry Parts.......................................................165°F
Duck & Goose....................................................165°F
Fresh Pork
Medium..............................................................160°F
Well Done..........................................................170°F

PARTS LIST
A
B
E
F
I
D
J
G
C
L
M
Key Part No. Description Qty.
A..........29101625......... Lid Assembly................. 1
B..........29101629......... Firebox Assembly.......... 1
C..........29101632......... Ash Pan.........................1
D..........29101517......... Wire Fire Grate..............1
E..........29101633......... Grate, Cooking............. 2
F.......... 29101634......... Leg............................... 4
G..........29101524......... Hanger Grid...................2
H..........50000026......... Vent Plate Kit.................2
I........... 29101265..........Lid Handle.....................1
Key Part No. Description Qty.
J.......... 29101142........ Side Handle...................2
K..........29101331......... Handle Spring................3
L.......... 29000453......... Wire Stop, Lid................2
M..........29101528......... Temperature Gauge...... 1
--- 42030357......... Hardware Pack..............1
— 42804339......... Use and Care Guide......1
J
K
H
1/4-20x1/2”
Hex Screw
Qty.16
1/4-20x3/4”
Machine Screw
Qty.4
Qty: 22 Qty: 2
Qty: 2 1/4-20 Flange Nut #10-24 Flange Nut
Vent Spring
Qty: 2
Vent Knob
PARTS LIST - HARDWARE LIST - EXPLODED VIEW
Qty: 2
Vent Knob Washer
HARDWARE LIST
EXPLODED VIEW
Page 4

First, pick a suitable location to work. Open the carton and slit the corners. This will give a protective surface upon which to
start the assembly. During assembly, refer to the Hardware List.
Install two Side Handles and the Lid Handle. Attach the Side Handles to Fire Box using two 1/4-20x3/4” Machine Screws, and
two 1/4-20 Flange Nuts per side. Attach the Lid Handle by inserting the handle into the lid. Secure the handle with two 1/4-20
flange nuts. Slide Ash Pan into front of Grill Firebox
Side Handle (2 each)
Detail A
1/4-20X1/2”
Hex Head bolts
1/4-20 flange nuts Legs
Open the grill lid and remove all packaged parts from inside the grill. Slide Ash Pan out from front opening to remove packaging.
DO NOT replace the ash pan until step 3 of assembly. Check parts against the parts list. Call 1-800-241-7548 if you are missing
parts.
Attach the legs to the grill at each corner using four 1/4-20x1/2” Hex head bolts and four 1/4-20 Flange Nuts per leg. Tighten nuts
by hand until all nuts and bolts are installed. Once all nut and bolts are installed, use the CLOSED end of a 7/16” combination
wrench (not provided) to tighten nuts firmly.
Lid Handle (1 each)
Ash Pan
1
3
Hex Head bolts
Flange Nuts
ASSEMBLY
Slide Ash Pan into front of Grill Firebox
2
Page 5
7/16” Combination
Wrench
Closed end
(Not Provided)

Attach two Fire Grate Hangers to Fire Grate (hooks point inward toward Grate).
Lower into Fire Box and hang in one of three positions from tab on each side.
Fire Grate
Hanger
Fire Grate
Hanger
Fire Grate
4
Position 3
Position 2
Position 1
Tab
Tab
Page 6
Seat Vent Knob Washer on Vent Knob. Insert Grid Lid and vent plate. Place Vent Knob Spring over
Vent Knob stem. Attach 10-24 flange nut and tighten enough to secure the assembly. Do not over tighten or you will not be
able to adjust the vents. Repeat for the other side of your grill.
Vent Knob through
Vent Spring
Vent Plate
Vent Knob
Flange Nut
5
Vent Knob Washer
Tab

Install the Temperature Gauge by placing the stem through
the large hole in front of the Grill Lid. Attach the wingnut
provided until snug against the Lid.
6
Temperature Gauge
Page 7
7
Cooking Grates
Place Cooking Grates onto front and back Fire Box ledges.
This completes the assembly of your grill.
Front Firebox Ledge
Rear Firebox
Ledge

This manual suits for next models
2
Table of contents
Other BBQ Grill manuals