BBV Tx40X User manual

Installation Guide
Tx40X
Telemetry transmitter
Building Block Video Ltd www.bbvcctv.com
17 Apex Park, Diplocks Way, Hailsham, East Sussex, BN27 3JU, UK
Tel: +44 (0) 1323 842727 Support: +44 (0) 1323 444600


Contents
Important
4
Introduction
5
Unpacking
5
A simple Tx40X up the coax system
5
Tx40X connecting a Breakout box
6
Keypad functions
7
Lens action
7
Auxiliary function switches
8
Receiver self test
8
Iris level program
8
Presets
9
Patrols
10 - 11
Spare outputs
12
Sending # Commands
12
Selecting protocols on the Tx40X
12
Tx40X camera address selection
Self Test on Keypad
13
14
TX400

Tx40X manual V1.06 July 2015 4
IMPORTANT
Please read the following points before servicing or installing.
Pre-installation checks - It is recommended that the unit be bench tested prior to installation on the site.
Safety during installation or servicing - Particular care should be taken to isolate the pan/tilt head in order to prevent
operation while engineering work is being carried out. In addition any ladder or other means of working on the receiver
MUST NOT rest on the pan/tilt head as it is possible for the head to move when not expected.
Safety check - Upon completion of any service or repairs to the unit, safety checks should be performed to ensure that the
unit is in proper operating condition.
Coax grounding - If an outside cable system is connected to the unit, be sure the cable system is grounded.
Adhere to Safety Standards - All normal safety precautions as laid down by British Standards and the Health and Safety at
Work Act should be observed.
WARNING - TO PREVENT DANGER OF FIRE OR SHOCK, DO NOT EXPOSE THE INTERNAL COMPONENTS OF THIS EQUIPMENT
TO RAIN OR MOISTURE.
Damage requiring service - Servicing by qualified personnel should be carried out under the following conditions:
(a) When the power supply cord or plug is damaged;
(b) If liquid has been spilled, or objects have fallen into the unit;
(c) If the unit does not operate normally by following the operating instructions.
(d) If the unit has been dropped or the enclosure is damaged;
Replacement parts - If replacement parts are required, ensure that only replacement parts recommended by the product
manufacturer are used.
Tx40X manual V1.06 July 2015 5
Introduction
The Tx40X is very easy to use keypad for single up the coax controlled camera or single/multiple RS485/422 controlled
camera CCTV systems. It is easily installed into either a new or an existing system simply by connecting a BNC input and
output, or the twisted pair cable and a 12Vdc supply.
The Tx40X is a powerful tool for the field engineer and can control all:
128
addresses of the BBV422
255
addresses of the Pelco D
32
addresses of the Pelco P
Unpacking
Inspect the packaging for signs of damage. If damage has occurred, advise the carriers and/or the suppliers immediately.
Unpack the transmitter carefully and check that all the items are included:
Part
number
Description
Tx40X
12V PSU
Manual
Break Out
Box
Grey Cat5
Cable
Tx40X
Telemetry transmitter P/T/Z with 9 presets, wash, wipe,
lights, Autopan
X
X
X
X
X
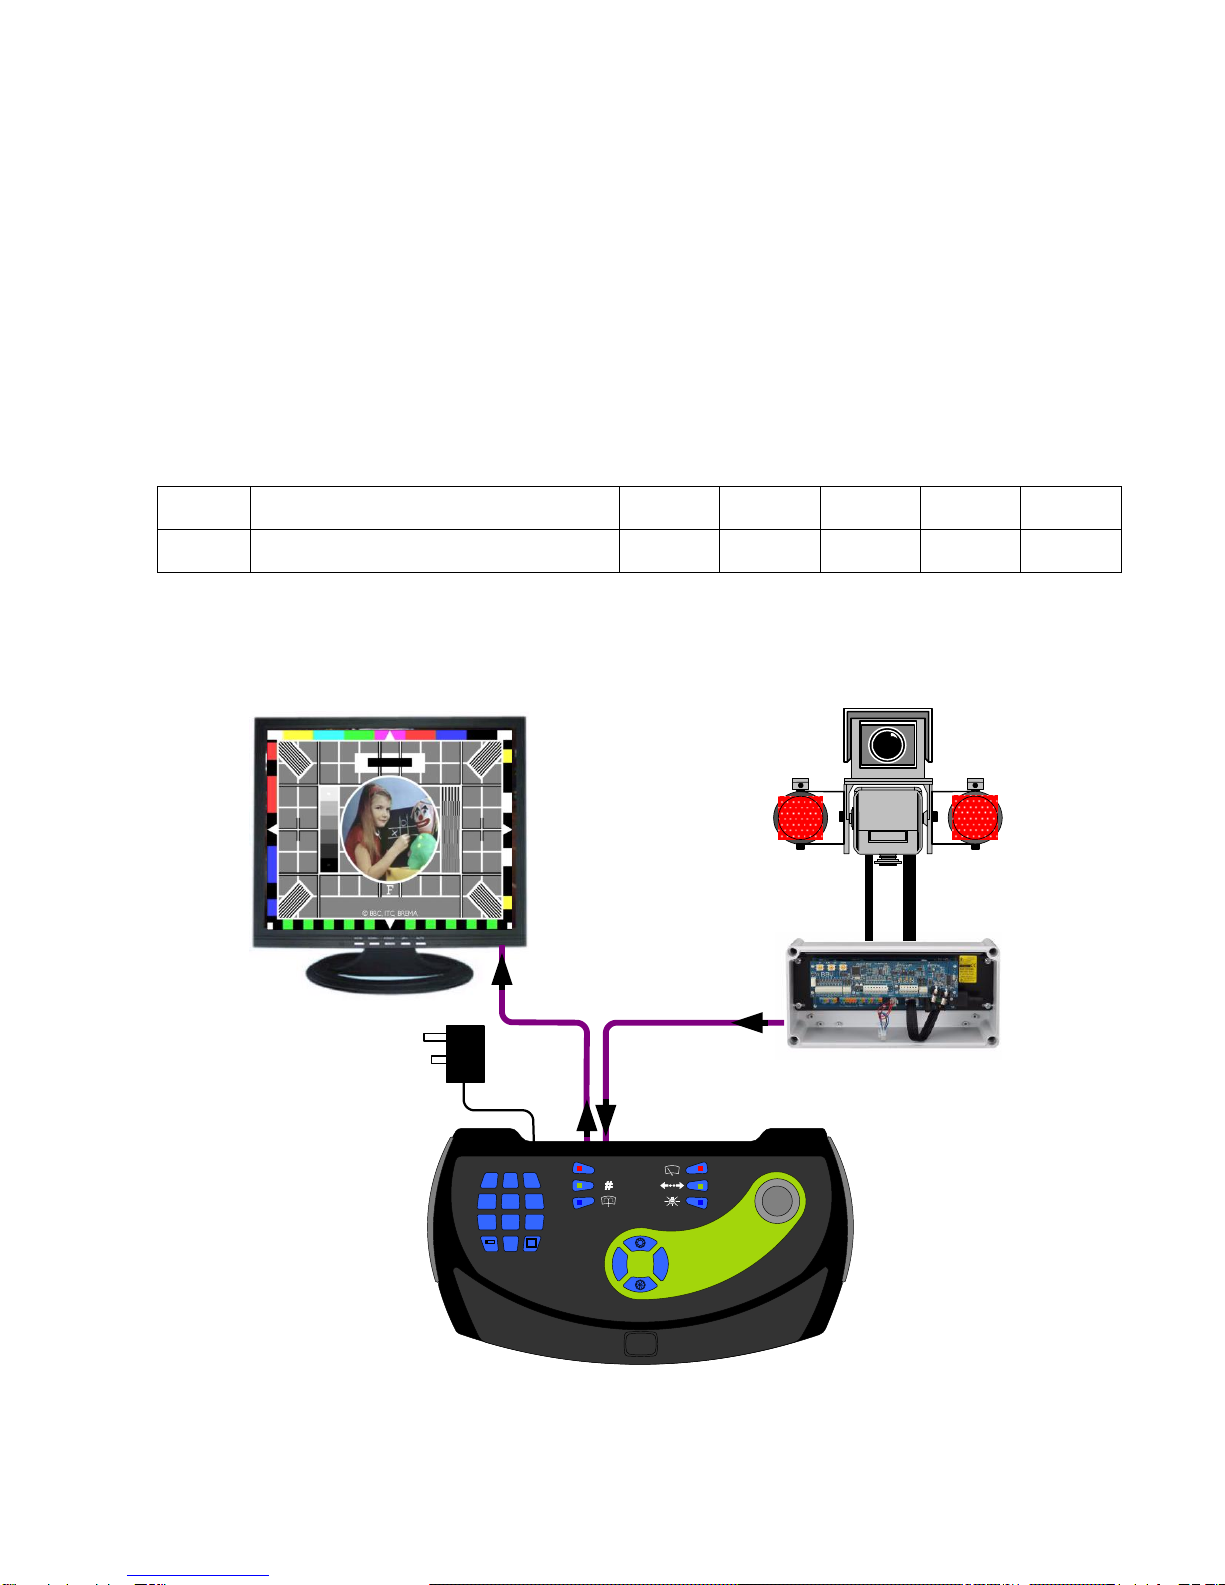
BBV Receiver
RG59 (250m) or
CT125 (500m)
Tx40X
12Vdc
PSU
1 2 3
0
5 64
8 97
PROGRAM
AUTOPAN
FFFN
A simple Tx40X up the coax system
Table of contents
Other BBV Transmitter manuals


Popular Transmitter manuals by other brands


Geo
Geo Web Pack quick start guide

Inovonics
Inovonics EchoStream EN1210W installation instructions

IKONNIK
IKONNIK KA-6 quick start guide

Rohde & Schwarz
Rohde & Schwarz SR8000 Series System manual

Audio Technica
Audio Technica UniPak ATW-T93 Installation and operation

NIVELCO
NIVELCO EasyTREK SCA-300 Series Programming manual


