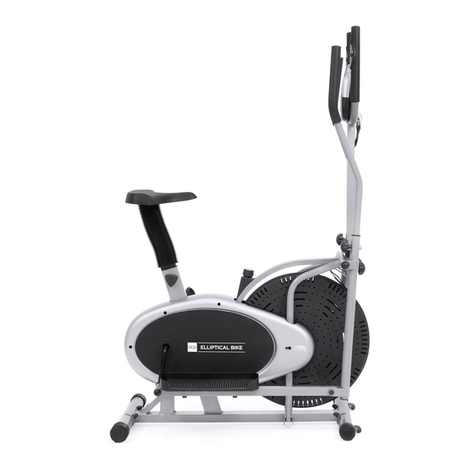
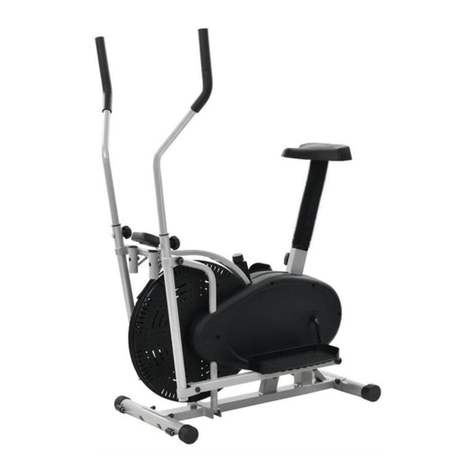
BCP SKY6138 User manual

SKY6138Ver. 3
Elliptical Bike
INSTRUCTION
MANUAL

•Keep children and pets away from this machine at all times.
•Reconfirm that all bolts, screws, and knobs are secure every 90 days. May vary depending on how often
you use this item.
•Position this machine on a clear, level surface.
•Always wear appropriate workout clothing when exercising. Running or aerobic shoes are also required.
•Use the provided tools or suitable tools of your own to assemble the machine or repair any parts of
the machine.
•Use only original spare parts for any necessary repairs.
•Read all instructions before use.
•This machine is intended for home use only, not suitable for therapeutic purposes.
•If any parts are missing, broken, damaged, or worn, stop using this product until repairs are made
and/or factory replacement parts are installed.
•Do not use this item in a way that is inconsistent with the manufacturer’s instructions as this could void
the product warranty.
•This product contains small parts for assembly. Keep small children and pets away during assembly.
•Do not leave unattended children in the same room with the machine.
•Do not use near water or outdoors.
•If the user experiences dizziness, nausea, chest pain, or any other abnormal symptoms, stop the
workout, and consult a physician immediately.
•Do not place any sharp objects around this machine.
•This product contains moving parts, avoid obstructing. Do not touch parts while they are in motion as
this may result in personal injury.
•To avoid physical injury, it is highly recommended that you stretch before and after every
exercise session.
•Handicapped or disabled persons should not use this machine without the presence of a qualified
health professional or physician.
NOTE: This product contains parts and equipment pre-attached to their essential hardware. Please follow
the instructions and remove the hardware as indicated for a safe assembly.
WARNING
Please retain these instructions for future reference.
2|
NOTICE

| 3
HARDWARE
1
4 PCS
M10 X 57mm
BOLT SET
PEDAL HING
BOLT SET (L/R)
2
1 SET
S13 NUT CAP
3
2 PCS
S18 NUT CAP
4
2 PCS
5
1 PC
HANDLEBAR
SHAFT
TRI-KNOB
6
1 PC
S16 NUT CAP
7
6 PCS
M10 X 45mm
HEX BOLT &
NUT SET
8
4 PCS
9
2 PCS
HEIGHT
ADJUSTMENT
KNOB
TOOLS REQUIRED (PROVIDED)
UP TO 60 MIN.
ASSEMBLY
1 PERSON
ASSEMBLY
220 LBS
CAPACITY
LBS
S8 ALLEN WRENCH
S6 ALLEN WRENCH
(2)
SPANNER
MULTITOOL
SCREWDRIVER
MULTITOOL
L R
2 AAA BATTERIES
+AAA -

4|
PARTS
A
1 PC
B
1 PC
C
1 PC
D
1 PC
E
1 PC
MAIN FRAME FRONT
STABILIZER
WITH WHEEL
REAR
STABILIZER
LEFT FRAME
BAR
RIGHT FRAME
BAR
G
1 PC
H
1 PC
I
1 PC
J
1 PC
K
1 PC
L
1 PC
SADDLE POST DECORATIVE
SLEEVE
LEFT HANDLE
BAR
RIGHT PEDAL SEAT
SADDLE
ADJUSTMENT
BAR
F
1 PC
LEFT PEDAL
M
1 PC
RIGHT HANDLE
BAR
N
1 PC
COMPUTER
POST/
HANDLEBAR
O
1 PC
COMPUTER P
1 PC
BOTTLE
HOLDER

PRODUCT ASSEMBLY
2
1
Locate the part 5 handlebar shaft, remove the hardware and set aside.
Slide the handlebar shaft into the part A main frame above the wheel. Place two washers from
the removed hardware set onto the handlebar shaft, one washer per side.
Locate the part B front stabilizer and attach it to the front of the part A main frame with two
part 1 bolt sets. Repeat to attach the part C rear stabilizer.
NOTE: The front stabilizer has a set of wheels for moving your elliptical bike.
C
B
1x4
A
| 5
5
5

D
2LEFT
4x2
E
2RIGHT
PRODUCT ASSEMBLY
3Slide the part D and E frame bars onto the handlebar shaft and secure with the remaining bolt
and washer sets removed in the previous step.
NOTE: Use two allen wrenches to tighten both ends of the handlebar shaft at the same time.
Tighten one side clockwise and the other counterclockwise.
Attach the frame bars to the crank on the part A main frame with two part 2 pedal bolt sets.
Attach two part 4 end caps.
6|
ALLEN
WRENCH
FRONT VIEW
The pedal bolts are labeled L/R for
Left & Right. To tighten turn the left
bolt counterclockwise and the right
bolt clockwise

| 7
PRODUCT ASSEMBLY
4Attach the part F and G pedals with four part 8 bolts and nut sets.
Attach the four part 7 end caps as indicated.
Insert the part L left handlebar into the part D left frame bar. Select a comfortable height and
secure with the adjustment knob.
Repeat to attach the part M right handlebar, then cover each knob with one part 3 nut cap.
3x2
LM
5
G
7x4
F
8
x4

8|
PRODUCT ASSEMBLY
6Connect the wires on the main frame and the part N computer post, then insert the computer
post into the main frame and secure with two part 9 adjustment knobs.
Remove the two screws from the part N computer post, then use the screws to attach the part
P bottle holder to the part N computer post.
N
9x2
P

| 9
PRODUCT ASSEMBLY
7Locate the part O computer and connect the corresponding wires.
Remove four screws from the back of the computer, then use the screws to secure the
computer to the bracket.
Insert (2) AAA batteries into the computer.
O

K
J
I
H
6
10 |
PRODUCT ASSEMBLY
8Remove the adjustment bolt and washer from the part I adjustment bar. Place the washer on
the part J saddle post, then slide the adjustment bar into the saddle post and secure with the
previously removed adjustment bolt.
Locate the part H seat and remove the three nylon nuts and washers on the bottom. Place the
seat onto the adjustment bar and reattach the three nuts and washers.
Slide the part K decorative sleeve over the saddle post and insert the saddle post into the part
A main frame. Set the seat to a comfortable height, then secure with the part 6 tri-knob.

| 11
TENSION ADJUSTMENT
•Before beginning your first workout, adjust the tension to a manageable level.
•When starting your exercise, simply use the tension adjustment knob (found at the top center) to
manipulate the resistance you feel.
•Turn the knob clockwise to increase the tension, turn the knob counter-clockwise to lower the tension.
•MODE: Press this button to select a function to display. Press and hold to reset.
•SET: Press and hold this button to set a distance, pulse, calorie, or workout time goal.
NOTE: You cannot set a goal if you are in scan mode.
•CLEAR (RESET): Press to reset the time, distance, calories, or pulse to a zero value.
•ON/OFF: Turns the display o and on and resets the unit.
DISPLAY RANGES
KEY FUNCTIONS
•TIME: Press the MODE key until the selector reaches TIME to display the total time of your workout
from start to finish.
•SPEED: Press the mode key until the selector reaches SPEED to display your current speed.
•DISTANCE: Press the mode key until the selector reaches DISTANCE to Display the total distance
achieved in each workout.
•CALORIE: Press the mode key until the selector reaches CALORIE to displays the number of calories
burned during a workout.
FUNCTION & OPERATIONS
Time
Speed (SPD)
Distance
Odometer (ODO)
Pulse (PUL)
00:00-99:59
0.0-99.9KM/H (ML/H)
0.00-9999KM (ML)
0.0-9999KM (ML)
Calories 0.0-9999KCAL
0_40~240BPM

All items can be returned for any reason within 60 days of the receipt and will receive a full refund as long
as the item is returned in its original product packaging and all accessories from its original shipment are
included. All returned items will receive a full refund back to the original payment method. All returned
items will not be charged a re-stocking fee.
All returned items require an RA (Return Authorization) number, which can only be provided by a Best
Choice Products Customer Service Representative when the return request is submitted. Items received
without an RA may not be accepted or may increase your return processing time. Once an item has been
received by Best Choice Products, refunds or replacements will be processed within 5 business days.
All returns must be shipped back to the Best Choice Products Return Center at the customer’s expense. If
the reason for return is a result of an error by Best Choice Products then Best Choice Products will provide
a pre-paid shipping label via email. Boxes for return shipping will not be provided by Best Choice Products,
and is the customer’s responsibility to either use the original shipping boxes or purchase new boxes.
Pictures may be required for some returns to ensure an item is not damaged prior to its return. Items
returned are not considered undamaged until they are received by Best Choice Products and verified as
such. All damages to items are the customer’s responsibility until the item has been received by and
acknowledge by Best Choice Products as undamaged.
PRODUCT WARRANTY INFORMATION
Manufacturer and seller expressly disclaim any and all liability for personal injury, property damage or
loss, whether direct, indirect, or incidental, resulting from the incorrect attachment, improper use,
inadequate maintenance, unapproved modification, or neglect of this product.
HELP CENTER
Product Assembly
Product InquiryChat Support Returns & Refunds
Orders FAQ
WARNING
Question about your product? We're here to help. Visit us at:
help.bestchoiceproducts.com
CHAT
US!
Table of contents
Other BCP Elliptical Trainer manuals
Popular Elliptical Trainer manuals by other brands

Smooth Fitness
Smooth Fitness CE-3.0 user manual

Spirit
Spirit XE 700 owner's manual

NordicTrack
NordicTrack E 11.5 Elliptical Manuale d'istruzioni

Skandika Fitness
Skandika Fitness CARDIOCROSS CARBON PRO Series Assembly instructions and user guide

LifeCore Fitness
LifeCore Fitness LC2000 owner's manual

Kayoba
Kayoba 003-151 operating instructions