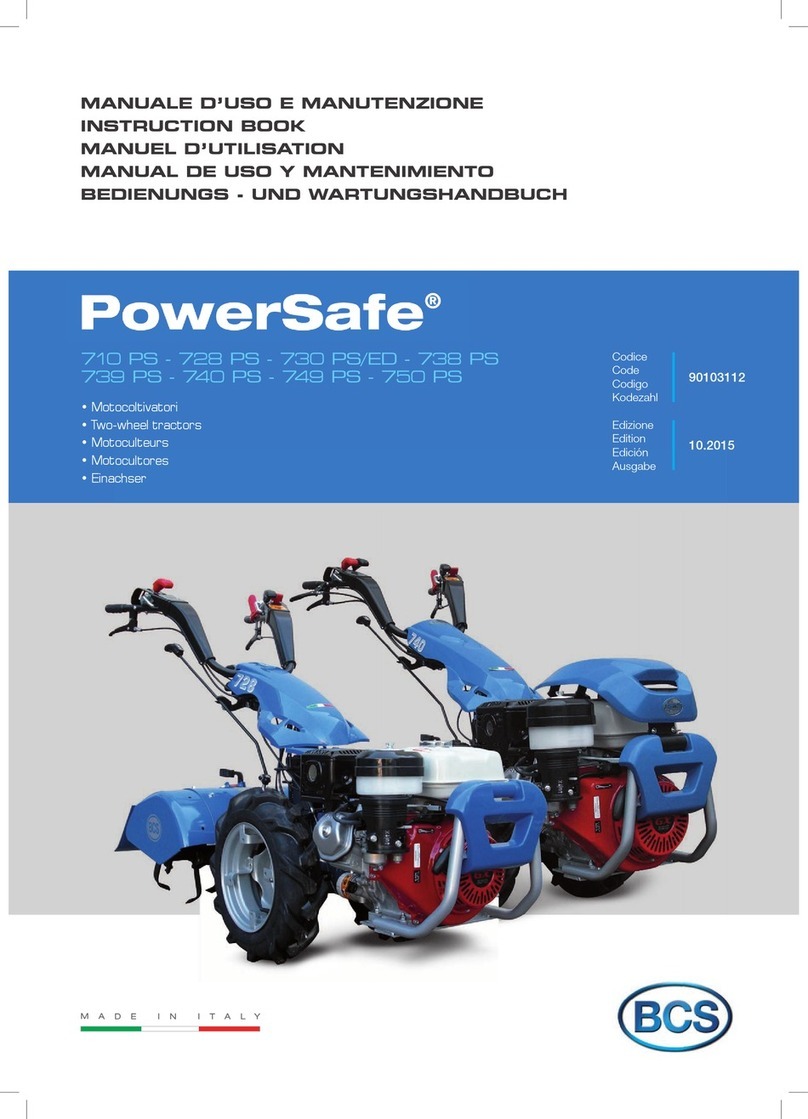
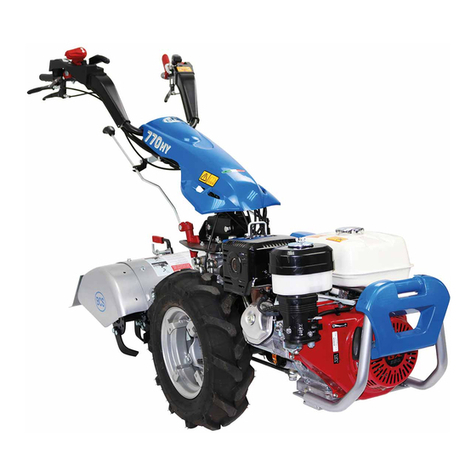
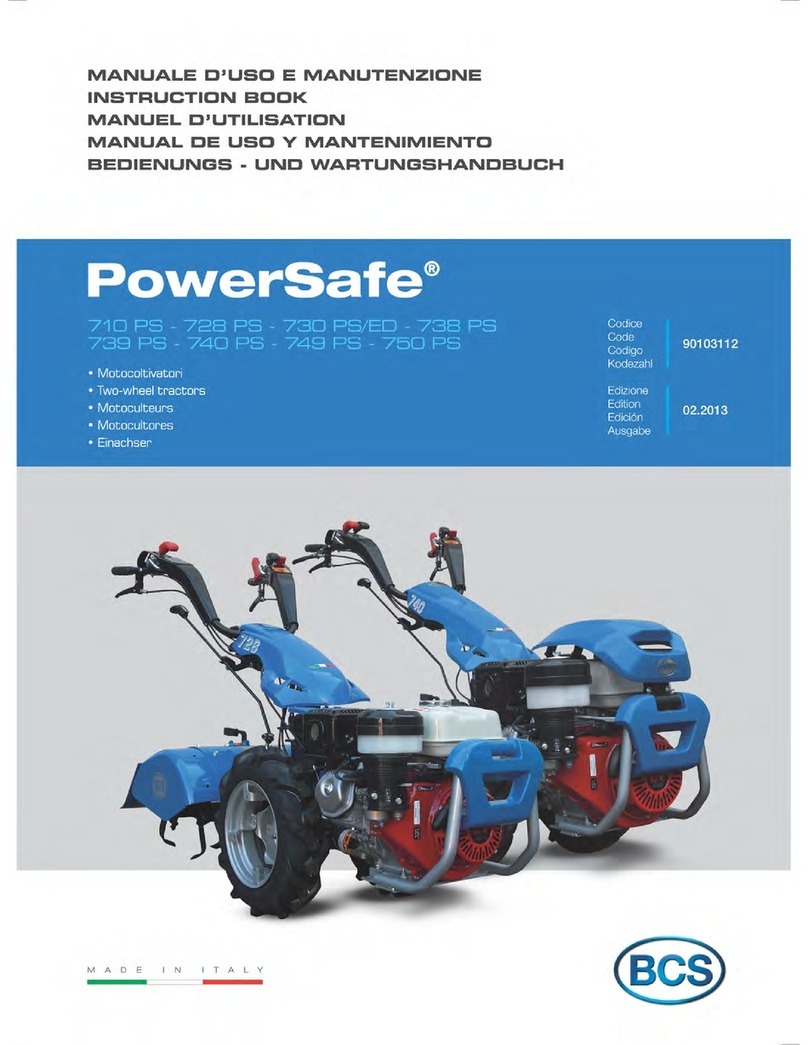
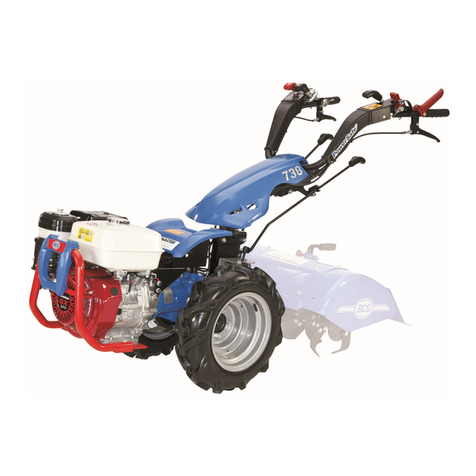
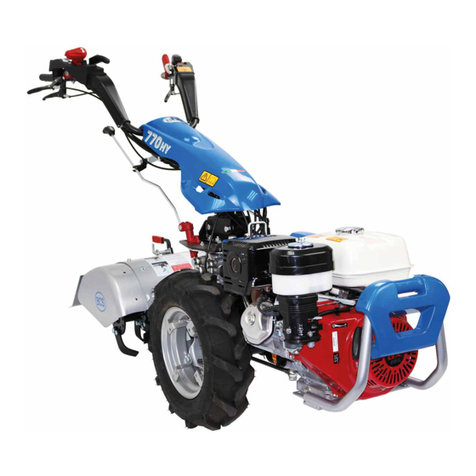
BCS PowerSafe 750 User manual

MANUALE D’USO E MANUTENZIONE Codice Edizione
OWNER’SMANUAL Code Edition
MANUEL D’ENTRETIEN Code 90103112 Edition 01.11
MANUAL DE USO Y MANTENIMIENTO Codigo Edición
WARTUNGSANLEITUNG Kodezahl Ausgabe
BCS
BCSBCS
BCS S.p.A.
S.p.A.S.p.A.
S.p.A. –
––
– V.le Mazzini, 161
V.le Mazzini, 161V.le Mazzini, 161
V.le Mazzini, 161 –
––
– 20081 ABBIATEGRASSO
20081 ABBIATEGRASSO20081 ABBIATEGRASSO
20081 ABBIATEGRASSO –
––
– MI
MIMI
MI –
––
– Italia
ItaliaItalia
Italia
MOTOCOLTIVATORI
•
••
•
MOTOCOLTIVATORI
MOTOCOLTIVATORIMOTOCOLTIVATORI
MOTOCOLTIVATORI
•
••
•
TWO
TWOTWO
TWO-
--
-WHEEL TRACTORS
WHEEL TRACTORSWHEEL TRACTORS
WHEEL TRACTORS
•
••
•
MOTOCULTEURS
MOTOCULTEURSMOTOCULTEURS
MOTOCULTEURS
•
••
•
MOTOCULTORES
MOTOCULTORESMOTOCULTORES
MOTOCULTORES
•
••
•
EINACHSER
EINACHSEREINACHSER
EINACHSER

ADESIVI PER LA SICUREZZA / LABELS WITH SAFETY INSTRUCTIONS / ADHÉSIFS POUR LA SÉCURITÉ
ADHESIVOS PARA LA SEGURIDAD / SICHERHEITSSELBSTKLEBER
ARRESTO / AVVIO DEL MOTORE
ENGINE STOP / START
ARRÊTE / DÉMARRAGE DU MOTEUR
PARADA / ARRANQUE DEL MOTOR
STOP / START DES MOTORS
ARRESTO / AVVIO DELLA MACCHINA
MACHINE STOP / START
ARRÊTE / DÉMARRAGE DE LA MACHINE
PARADA / ARRANQUE DE LA MÁQUINA
STOP / START DER MASCHINE
PERICOLO IN FASE DI RIFORNIMENTO
DANGER DURING REFUELLING
DANGER PENDANT LA PLEIN
PELIGRO DURANTE EL REABASTECIMIENTO
GEFAHR WÄHREND TANKEN
PERICOLO PER ZONA SURRISCALDATA
DANGER FOR OVERHEATED AREA
DANGER POUR ZONE SURCHAUFFÉE
PELIGRO DE ZONA RECALENTADA
GEFAHR FÜR ÜBERGEHITZTES GEBIET
FRENO DI STAZIONAMENTO
PARKING BRAKE
FREIN DE STATIONNEMENT
FRENO DE ESTACIONAMIENTO
STANDBREMSE
INNESTO / DISINNESTO PTO
ENGAGE / DISENGAGE PTO
EMBRAYAGE / DÉBRAYAGE PTO
ACOPLE / DESACOPLE PTO
SCHALTEN / ABSCHALTEN DER PTO
INVERTITORE DI MARCIA
REVERSE SPEED
INVERSEUR DE MARCHES
INVERSOR DE MARCHAS
WENDEGETRIEBE
INNESTO / DISINNESTO DIFFERENZIALE
ENGAGE / DISENGAGE DIFFERENTIAL
EMBRAYAGE / DÉBRAYAGE DIFFÉRENTIEL
ACOPLE / DESACOPLE DIFFERENCIAL
SCHALTEN / ABSCHALTEN DER DIFFERENTIAL
INDICAZIONE COMANDI FRENI E BLOCCAGGIO PIANTONE
BRAKES CONTROLS AND STEERING COLUMN LOCKING
INDICATION COMMANDES FREINS ET BLOCAGE DU PLANTON
INDICACIÓN MANDOS FRENOS Y BLOQUEO DEL MANILLAR
ANLEITUNG BREMSENANTRIEB UND DER LENKSÄULE BLOCKIERUNG

3
I
Le macchine comprese in questo manuale
sono costruite in accordo con la Direttiva
Macchine Europea e sue modificazioni.
Ci complimentiamo con Voi per la scelta di un nostro pro-
dotto garantendoVi il massimo dell'assistenza e della colla-
borazione che da sempre contraddistinguono il nostro mar-
chio.
Questa pubblicazione Vi aiuterà a conoscere meglio la Vo-
stra macchina. Se verrà usata seguendo queste istruzioni
Vi durerà molti anni e Vi sarà di prezioso aiuto per svolgere
i Vostri lavori agricoli.
Vi raccomandiamo pertanto di leggere attentamente que-
ste pagine e di seguirne sempre i consigli.
Buona lettura e buon lavoro!
GB
The machines described in this manual are
built in accordance with the European
Machines Directive and its modifications.
We congratulates with You for Your purchasing a machine
from our range. We will grant the assistance and coope-
ration which have always been a feature of our products.
If use in accordance with the instructions contained in your
owners manual, your machine will last many years and will
prove to be of an invaluable assistance to you.
We therefore recommend that You read the manual care-
fully and follow the advice given.
Happy reading and enjoy!
F
Les machines décrites dans ce manuel sont
construites en accord avec la Directive
Européenne des Machines et ses modifications.
Nous vous en félicitons pour le choix d’un de nos produit
en Vous assurant le maximum de notre assistance et colla-
boration qui ont toujours distingué notre marque. Cette pu-
blication Vous aidera à mieux connaître Votre machine.
Si Vous l'utilisez conformément aux instructions contenues
dans ce manuel, il durera de nombreuses années et sera
pour Vous une aide précieuse pour Vos travaux agricoles.
Nous Vous recommandons, par conséquent, de lire ces
pages avec attention et de suivre scrupuleusement les
conseils.
Bonne lecture et bon travail!
E
Las máquinas incluidas en este manual
están construidas según la Directriz
Europea de las Maquinas y sus enmiendas.
Les felicitamos por haber escogido nuestro producto ga-
rantizándoles la maxima asistencia y collaboración que
siempre han caracterizado nuestra marca.
Este libro le ayudará a conocer mejor su máquina. Si la
usa siguiendo estas instrucciones le durerá muchos años y
la será de gran ayuda para desarrollar sus trabajo agríco-
las.
Le recomendamos pues, leer atentamente estas páginas y
seguir siempre los consejos que ellas encontrarà.
Les deseamos una buena lectura y un bueno trabajo!
D
Die in dem vorliegenden Handbuch
beschriebenen Maschinen sind der Europäische
Richtlinie über Maschinen und ihren
Abänderungen gemäß gebaut worden.
Wir beglückwünschen Sie für Ihre Wahl. Unsere Firma wird
zweifellos Ihnen seine beste Wartung und Zusammenar-
beit bieten, die seit immer Produkte kennzeichnen.
Wenn Sie in diesem Handbuch erteilten Anleitungen be-
herzigen, wird Ihre Maschine über lange Zeit eine wertvolle
Hilfe sein.
Bitte lesen Sie daher vorliegende Bedienungsanleitung
aufmerksam durch und befolgen Sie die erteilten Ratschlä-
ge.
Erfolgreiches Lesen und gute Arbeit!

4
INDICE
I
IDENTIFICAZIONE E MARCATURA
SIMBOLOGIA
AVVERTENZE
INFORMAZIONI PER L'OPERATORE
MOTOCOLTIVATORI
MONTAGGIO DELLA MACCHINA
NORME DI SICUREZZA
DESCRIZIONE DEI COMANDI
APPLICAZIONE ATTREZZI
PRESA DI POTENZA
pag. 6
" 8
" 8
" 10
" 11
" 12
" 13
" 16
" 18
" 20
CONTROLLI DA ESEGUIRE PRIMA DI
AVVIARE LA MACCHINA
AVVIAMENTO DELLA MACCHINA ED INIZIO
LAVORO
LUBRIFICAZIONE E MANUTENZIONE
TABELLA 1 : RUOTE
TABELLA 2 : MOTORI
TABELLA 3 : VELOCITA'
CARATTERISTICHE TECNICHE
PROGRAMMA DI MANUTENZIONE I - IV
ATTREZZI APPLICABILI
ACCESSORI
ATTREZZI SPECIALI
pag. 20
" 22
" 24
" 28
" 28
" 28
" 30
allegato
" 32
" 32
" 33
INDE
X
GB
IDENTIFICATION AND TAGGING
SYMBOLS
WARNING
INFORMATIONS FOR THE USER
TWO-WHEEL TRACTORS
MACHINE ASSEMBLY
GENERAL SAFETY
CONTROL DESCRIPTION
IMPLEMENT ASSEMBLY
P.T.O.
page 6
" 8
" 8
" 10
" 11
" 12
" 13
" 16
" 18
" 20
CHECKS BEFORE STARTING THE
MACHINE
TO START THE MACHINE
LUBRICATION AND MAINTENANCE
TABLE 1 : WHEELS
TABLE 2 : ENGINES
TABLE 3 : SPEEDS
TECHNICAL FEATURES
MAINTENANCE PLAN I - IV
POSSIBLE IMPLEMENTS
ACCESSORIES
SPECIAL IMPLEMENTS
page 20
" 22
" 24
" 28
" 28
" 28
" 30
appendix
" 32
" 32
" 33
CONTENU
F
IDENTIFICATION ET MARQUAGE
SYMBOLES
RECOMMANDATIONS
INFORMATIONS POUR L'OPÉRATEUR
MOTOCULTEURS
MONTAGE DE LA MACHINE
REGLES DE SECURITE GENERALE
DESCRIPTION DES COMMANDES
MONTAGE OUTILS
PRISE DE PUISSANCE
page 6
" 8
" 8
" 10
" 11
" 12
" 13
" 16
" 18
" 20
CONTROLES A EFFECTUER AVANT DE
DEMARRER LA MACHINE
DEMARRAGE DE LA MACHINE ET
COMMENCEMENT DU TRAVAIL
LUBRIFICATION ET ENTRETIEN
TABLEAU 1 : ROUES
TABLEAU 2 : MOTEURS
TABLEAU 3 : VITESSES
CARACTERISTIQUES TECHNIQUES
PROGRAMME D'ENTRETIEN I - IV
OUTILS ADAPTABLES
ACCESSOIRES
OUTILS SPECIAUX
page 20
" 22
" 24
" 28
" 28
" 28
" 30
annexe
" 32
" 32
" 33
INDICE
E
IDENTIFICACIÓN Y MARCAS
SIMBOLOGÍA
ADVERTENCIAS
INFORMACCIONES PARA EL UTILIZADOR
MOTOCULTORES
MONTAJE DE LA MAQUINA
NORMAS DE SEGURIDAD
DESCRIPCION DE LOS MANDOS
APLICACION APEROS
TOMA DE FUERZA
pag. 6
" 8
" 8
" 10
" 11
" 12
" 13
" 16
" 18
" 20
CONTROLES A EFECTUAR ANTES DE
PONER EN MARCHA LA MAQUINA
ARRANQUE DE LA MAQUINA Y INICIO DEL
TRABAJO
LUBRICACION Y MANTENIMIENTO
TABLA 1 : RUEDAS
TABLA 2 : MOTORES
TABLA 3 : VELOCIDADES
CARACTERISTICAS TECNICAS
PROGRAMA DE MANTENIMIENTO I - IV
APEROS APLICABLES
ACCESSORIOS
APEROS ESPECIALES
pag. 20
" 22
" 24
" 28
" 28
" 28
" 30
adjunto
" 32
" 32
" 33
INHALT
D
IDENTIFIZIERUNG UND MARKIERUNG
SYMBOLE
BEMERKUNGEN
INFORMATIONEN FÜR DEN OPERATOR
EINÄCHSER
MASCHINENMONTAGE
SICHERHEITSVORSCHRIFTEN
BESCHREIBUNG DER BEDIENUNGSOR-
GANE
MONTAGE DER ARBEITSGERÄTE
ZAPFWELLE
Seite 6
" 8
" 8
" 10
" 11
" 12
" 13
" 16
" 18
" 20
VOR DEN INBETRIEBNAHME VORZUNEH-
MENDE KONTROLLEN
INBETRIEBNAHME DER MASCHINE UND
BEGINN DER ARBEIT
SCHMIERUNG UND WARTUNG
TAFEL 1 : RÄDER
TAFEL 2 : MOTOREN
TAFEL 3 : GESCHWINDIGKEITEN
TECNISCHE EIGENSCHAFTEN
WARTUNGSPROGRAMM I - IV
MÖGLICHE ARBEITSGERÄTE
ZUBEHÖR
SPEZIELLE ARBEITSGERÄTE
Seite 20
" 22
" 24
" 28
" 28
" 28
" 30
Anhang
" 32
" 32
" 33

5
I
AVVIAMENTO ELETTRICO
ATTREZZI E ACCESSORI
ARATRI
ASSOLCATORE REGISTRABILE
RUOTE PNEUMATICHE
RUOTE METALLICHE A GABBIA
DISTANZIALI PER RUOTE
ZAVORRE PER RUOTE
ZAVORRE PER MACCHINA
RUOTINO SOSTEGNO FRESA
PROTEZIONE ANTERIORE PER BARRA
PROTEZIONI LATERALI PER BARRA
pag. 34
" 36
" 38
" 41
" 42
" 43
" 44
" 44
" 45
" 46
" 47
" 47
ATTACCO RAPIDO ATTREZZI
POSSIBILI INCONVENIENTI E LORO RIMEDI
PERIODI DI LUNGA INATTIVITA'
COME REGISTRARE LA FRIZIONE
Powersafe®
COME REGISTRARE LA LEVA COMANDO
RETROMARCIA
DOTAZIONE
GARANZIA
CERTIFICATI E DICHIARAZIONI
PARTICOLARI DI CONSUMO
MODALITA' DI VENDITA DEI RICAMBI
pag. 48
" 49
" 52
" 53
" 56
" 57
" 57
" 58
" 59
" 60
GB
ELECTRIC STARTER
IMPLEMENTS AND ACCESSORIES
PLOUGHS
ADJUSTABLE RIDGER
PNEUMATIC WHEELS
STEEL CAGE WHEELS
WHEEL SPACERS
BALLASTS FOR WHEELS
MACHINE WEIGHTS
ROTARY HOE WHEEL
CUTTER BAR FRONT PROTECTIONS
CUTTER BAR SIDE PROTECTIONS
page 34
" 36
" 38
" 41
" 42
" 43
" 44
" 44
" 45
" 46
" 47
" 47
QUICK HITCH FOR IMPLEMENTS
TROUBLE SHOOTING
STORAGE
HOW TO ADJUST THE Powersafe® CLUTCH
HOW TO ADJUST THE REVERSE CONTROL
LEVER
TOOL KIT
GUARANTEE
CERTIFICATES AND DECLARATIONS
CONSUMABLES
ORDERING SPARE PARTS
page 48
" 49
" 52
" 53
" 56
" 57
" 57
" 58
" 59
" 60
F
DEMARRAGE ELECTRIQUE
OUTILS ET ACCESSOIRES
CHARRUES
BUTTOIR A AILES REGLABLES
ROUES PNEUMATIQUE
ROUES METALLIQUES
ENTRETOISES POUR ROUES
LESTS POUR ROUES
LESTS POUR MACHINE
ROUE PORTEUSE POUR FRAISE
PROTECTION AVANT POUR BARRE
PROTECTIONS LATERALES POUR BARRE
page 34
" 36
" 38
" 41
" 42
" 43
" 44
" 44
" 45
" 46
" 47
" 47
ENGANCHE RAPIDE OUTILS
DEPANNAGE
REMISAGE
COMMENT REGLER L'EMBRAYAGE
Powersafe®
COMMENT REGLER LE LEVIER COMMAN-
DE MARCHE ARRIÉRE
OUTILLAGE
GARANTIE
CERTIFICATS ET DÉCLERATIONS
SUYET A USURE
MODALITE DE VENTE DES PIECES DE RE-
CHANGE
page 48
" 49
" 52
" 53
" 56
" 57
" 57
" 58
" 59
" 60
E
ARRANQUE ELECTRICO
APEROS Y ACCESORIOS
ARADOS
SURCADOR REGISTRABLE
RUEDAS NEUMATICAS
RUEDAS DE JAULA
DISTANCIALES PARA RUEDAS
LASTRES PARA RUEDAS
LASTRES PARA MAQUINA
RUEDA SOPORTE FRESA
PROTECCION ANTERIOR PARA BARRA
PROTECCIONES LATERALES PARA
BARRA
pag. 34
" 36
" 38
" 41
" 42
" 43
" 44
" 44
" 45
" 46
" 47
" 47
ENGANCHE RAPIDO APEROS
POSIBLES INCONVENIENTES Y SOLUCIO-
NES
PERIODOS DE LARGA INACTIVIDAD
COMO REGISTRAR EL EMBRAGUE
Powersafe®
COMO REGISTRAR LA PALANCA MARCHA
ATRÁS
DOTACIONES
GARANTIA
CERTIFICADOS Y DECLARACIONES
PARTICULARES DE DEGASTE
SOLICITUD DE RECAMBIOS
pag. 48
" 49
" 52
" 53
" 56
" 57
" 57
" 58
" 59
" 60
D
ELEKTROSTARTER
ARBEITSGERÄTE UND ZUBEHÖR
PFLÜGE
VERSTELLBARER FURCHENZIEHER
GUMMI-RÄDER
METALLSTOLLENRÄDER
SPURVERSTELLELEMENTE
BALLASTGEWICHTE FÜR RÄDER
BALLASTGEWICHTE FÜR MASCHINE
LAUFRAUD FÜR FRÄSABSTÜTZUNG
FRONTSCHUTZ FÜR MÄHBALKEN
SEITENSCHUTZ FÜR MÄHBALKEN
Seite 34
" 36
" 38
" 41
" 42
" 43
" 44
" 44
" 45
" 46
" 47
" 47
SCHNELLANSCHLUß FÜR ARBEITSGERÄTE
MÖGLICHE STÖRUNGEN UND DEREN
ABHILFE
LANGERER STILLSTAND DER MASCHINE
Powersafe® KUPPLUNG EINSTELLEN
SCHALTHEBEL DES RÜCKWÄRTSGANGS
EINSTELLEN
STANDARD ZUBEHÖR
GARANTIE
BESCHEINIGUNGEN UND DEKLARATION
VERBRAUCHEN TEILE
VERKAUF DER ERSATZTEILE
Seite 48
" 49
" 52
" 53
" 56
" 57
" 57
" 58
" 59
" 60

6
IDENTIFICAZIONE E MARCATUR
A
I
DATI DI IDENTIFICAZIONE E MARCATURA DEL MOTO-
RE:
Vedere manuale specifico relativo al motore.
MARCATURA DELLA MACCHINA (fig.A)
Nel riquadro 1 vengono stampigliati il nome del costruttore
e il n. di serie; nel riquadro 2 vengono stampigliati even-
tuali dati di omologazione.
IDENTIFICAZIONE MACCHINA
Su ogni macchina viene applicata una targhetta di identifi-
cazione (fig.B).
IDENTIFICATION
A
ND TAGGING
GB
MOTOR IDENTIFICATION AND TAGGING DATA:
See the manual related to motor.
MACHINE TAGGING (fig.A)
In box 1 the name of the manufacturer and the serial num-
ber are printed; in box 2 possible approval data are printed.
MACHINE IDENTIFICATION
On each machine an identification label is stuck (fig.B).
IDENTIFICATION ET MARQUAGE
F
DONNÉE D'IDENTIFICATION ET MARQUAGE MOTEUR:
Voir manuel relatif au moteur.
MARQUAGE DE LA MACHINE (fig.A)
Dans le quadre 1 sont poinçonnés le nom du constructeur
et le numéro de série; dans le quadre 2 sont poinçonnés
d'eventuelles données d' homologation.
IDENTIFICATION DE LA MACHINE
Une plaque d'identification est appliquée sur chaque ma-
chine (fig.B).
IDENTIFIC
A
CION Y MARC
A
S
E
DATOS DE IDENTIFICACION Y MARCA MOTOR:
Ver manual especifico relativo al motor.
MARCA DE LA MAQUINA (fig.A)
En el requadro 1 son escribidos el nombre del constructor
y el número de matrícula; en el requadro 2 son escribidos
otros datos de omologación.
IDENTIFICACIÓN MÁQUINA
Sobre cada máquina se pone una tarjeta de identificación
(fig.B).
IDENTIFIZIERUNG UND MARKIERUNG
D
MOTOR IDENTIFIZIERUNG UND MARKIERUNG DATEN:
Siehe das bezügliche Handbuch des Motors.
MARKIERUNG DER MASCHINE (Abb.A)
Im Feld 1 werden den Namen des Herstellers und die Se-
rienzahl der Maschine gedruckt; im Feld 2 werden mö-
gliche Genehmigungsdaten gedruckt.
IDENTIFIZIERUNG DER MASCHINE
Eine Identifizierung Typenschild wird auf jede Maschine
geklebt (Siehe Abb.B).
1 3 2 4
Year Id. SN
Des. Type
BCS S.p.A. Viale Mazzini 161
20081 Abbiategrasso (MI)
ITALIA
Power kW Mass kg
B
5 7 8 6
1 – marchio 2 – costruttore
brand manufacturer
marque constructeur
marca constructor
Brandmal Hersteller
3 – modello 4 – motore
model motor
modele moteur
modelo motor
Modell Motor
5 – potenza del motore 6 – peso (vedi nota)
motor power weight (see note)
puissance poids (voir note)
potencia del motor peso (ver nota)
Motorsleistung Gewicht (siehe Note)
7 – numero di identificazione dell'anno di produzione
identification number of production year
numéro d'idéntif. de l'année de mise en circulation
numero de identificación de l'año de producción
Identifizierungsnummer der Produktionsjahr
8 – n° di serie
serial n°
n° de serie
n° de matricúla
Serienzahl

7
I
NOTA: Il valore del peso indicato sulla targhetta di identi-
ficazione é riferito alla macchina senza attrezzo.
GB
NOTE: The weight indicated on the identification label
refers to the machine without implement.
F
NOTE: Le poids indiqué sur la plaque d'identification de la
machine est celui de la machine sans outillages.
E
NOTA: El peso indicado en la tarjeta de identificación se
refiere a la máquina sin apero.
D
NOTE: Das Wert des Gewichtes, das auf den Typenschild
geschrieben ist, bezugt sich der Maschine vollständig
ohne Arbeitsgeräte.

8
SIMBOLOGI
A
A
VVERTENZE
Raccomandiamo di utilizzare la macchina esclusivamente
per lo scopo per cui è stata costruita e di attenersi alle indi-
cazioni ed alle spiegazioni riportate sul manuale.
Non inclinare o rovesciare la macchina con la benzi-
na nel serbatoio; la benzina è fortemente infiamma-
bile e potrebbe incendiarsi.
I
- Imparate a riconoscere i simboli che troverete leggendo il
manuale:
- ATTENZIONE ! PERICOLO !
Significa che dovete porre particolare attenzione alla
operazione che dovete effettuare.
- DIVIETO, NON FARE !
Significa che non dovete assolutamente fare le ope-
razioni riportate sotto questo simbolo.
Non è permesso applicare attrezzi diversi da quelli
riportati sul presente manuale, se non autorizzati dai
tecnici del Costruttore o dai suoi Centri di Assisten-
za Autorizzati.
SYMBOLS WARNING
We recommend to use the machine exclusively for the pur-
pose it has been designed, and to follow thoroughly the in-
dications and the explanations given in the manual.
GB
Do not incline or turn the machine upside down
when there is fuel in the tank; fuel is highly flam-
mable and could burn.
- Learn the different symbols that you're going to find within
this manual:
- ATTENTION! DANGER !
It means that the user must pay great attention to the
operation he's performing.
- FORBIDDEN, DON'TS !
This means the operator must not perform the ope-
rations indicated under this symbol.
Do not apply implements different from those indica-
ted on the enclosed manual, if these are not authori-
zed by Manufacturer's engineers or by Authorized
Dealers.
SYMBOLES RECOMMANDATIONS
Nous recommandons d’utiliser la machine exclusivement
dans les fonctions pour lesquelles elle est conçue et de
respecter les indications et les instructions reportées dans
ce manuel.
Ne pas incliner ni renverser la machine lorsque le
réservoir contient de l'essence; l'essence est très in-
flammable et pourrait prendre feu.
F
- Apprenez à reconnaître les symboles que vous trouverez
en lisant le manuel:
- ATTENTION ! DANGER !
Signifie que vous devez être particulièrement attentif
dans l'exécution de l’opération que vous êtes sur le
point d'effectuer.
- INTERDIT, NE RIEN FAIRE !
Signifie que vous ne devez absolument pas faire les
opérations indiquées sous ce symbole.
Ne pas monter des outils qui ne soient pas ceux in-
diqués dans le manuel ci-joint, à moins qu'ils ne
soient autorisés par les techniciens du Constructeur
ou par ses Centres Techniques Autorisés.
SIMBOLOGI
A
A
DVERTENCIAS
Les aconsejamos de utilizar la máquina exclusivamente
por el uso por el cual fue construida, y de atenerse a las
indicaciones y a las explicaciones del manual.
No inclinar o volcar la máquina con gasolina en el
estanque; la gasolina es muy inflamable y puede
incendiarse.
E
- Aprendéis a reconocer los símbolos que se encuentran
en este manual:
- ¡ ATENCIÓN ! PELIGRO !
Poner particular atención a las operacciónes que tie-
nen que ser efectuadas.
- ¡ VEDA, NO HACER !
No efectuar absolutamente las operacciónes indicadas
bajo este símbolo.
No se puede aplicar aperos diferentes de los descri-
bidos en este manual, si no han sido autorizados
por los técnicos del Constructor o por sus Centros
de Asistencia Autorizados.
SYMBOLE BEMERKUNGEN
7
Wir empfehlen den Kunden, die Maschine nur für das Ziel,
dafür man sie herzeugt hat, zu benutzen und die Bemer-
kungen und Erklärung, en die in diesem beschrieben sind,
zu folgen.
Die Benzin-enthaltende Maschine nicht neigen;
Benzin ist leicht entzündlich und könnte verbrennen.
D
- Lernen Sie die Symbole kennen, die Sie beim Lesen des
Handbuchs finden werden:
- ACHTUNG ! GEFAHR !
Daß bedeutet, seien Sie vorsicht im Durchführen der
genannten Operation.
- VERBOTEN , NICHT MACHEN !
Daß bedeutet, sie müssen nicht die Operationen, die
unter diesem Symbol beschrieben sind, durchführen.
Es ist verboten Arbeitsgeräte zu montieren, die ver-
schieden als diese in dem einlegenden Handbuch
beschrieben sind, wenn diese bei Hersteller Techni-
ker oden bei seiner Kundendienstbetrieben nicht au-
torisiert werden.

9
I
Non utilizzare la macchina con il manubrio in posi-
zione coltivatore con montate la barra falciante, il to-
saerba, il decespugliatore, lo spazzaneve o altri at-
trezzi frontali.
Non utilizzate l'attacco rapido o eventuali prolunghe
con la fresa perché portano la fresa stessa più vici-
na ai piedi dell'operatore e quindi non rientra nella
normativa per la sicurezza pr. EN 709, 1992.
La macchina deve essere utilizzata da un solo opera-
tore; allontanare eventuali osservatori.
Non utilizzate la macchina su pendenze superiori al
25%.
Se la macchina e/o le relative attrezzature devono
essere sollevate raccomandiamo di posizionarle so-
pra a pallets (bancali), opportunamente legate e di
sollevarle per mezzo di carrelli elevatori.
GB
Do not use the machine having the handle in tractor
position and the cutter bar, the lawnmower, the bush-
cutter, the snow-thrower or other front implements
mounted.
Do not use the fast connection or other possible ex-
tensions with the rotary hoe since they could ap-
proach the rotary hoe to the operator’s feet and the-
refore not comply the security regulation pr EN 709,
1992.
Just one operator must use the machine; keep away
possible observers.
Do not use the machine on slopes deeper than 25%.
If the machine and/or the related implements have to
be lifted, we advice the user to set them on pallets,
bind them and lift them by means of lift trucks.
F
Ne pas utiliser la machine lorsque la poignée est en
position cultivateur ou lorsque sont montés la barre
faucheuse ou la tondeuse, ou le coupe-buisson ou le
chasse-neige ou tout autre accessoire monté en
position frontale.
Pour garantir la sécurité de l’opérateur ne pas utili-
ser l’attache rapide ou d’autres prolonges car la frai-
se serait alors trop près des pieds de l’opérateur et la
norme pr EN 709, 1992 ne serait plus respectée.
La machine doit être utilisée par un seul opérateur ne
pas laisser les observateurs s’approcher.
Ne pas utiliser la machine sur des pentes supérieu-
res à 25%.
Si la machine ou les accessoires doivent être soule-
vés, il est conseillé de les poser sur des pallets après
les avoir fixés et de les soulever ensuite à l’aide d’un
chariot élévateur.
E
No utilizar la máquina con manillar en posición culti-
vador con barra de corte, cortacéspedes, esquillado-
ra, barra nieve o otros aperos frontales montados.
No utilizar el enganche rápido o prolungas con fre-
sas porqué llevan la fresa misma demasiado cerca
de los pies del obrador, y esto no cumple la directiva
pr EN 709, 1992 para la seguridad.
La máquina tiene que ser utilizada por un solo obra-
dor; alejar eventuales observadores.
No utilizar la máquina sobre suelos con desniveles
superiores a 25%.
Si la máquina y/o los aperos relativos tienen que ser
leantadas, recomandamos de ponerlas sobre unos
pallets, atandoles y empejando un coche elevador.
D
Die Maschine mit dem Handgriff auf Einachser Stel-
le nicht benutzen, wenn die Mähbalken, Rasenmäh-
er, Rodenmaschine, Schneeschleuder oder andere
Vordergeräte montiert sind.
Schnellkupplung oder mögliche Verlängerungen mit
den Fräsen nicht montieren, da diese die Fräse den
Operator nähern und deswegen die Sicherheitsnor-
men pr EN 709, 1992 nicht entsprechen.
Die Maschine muß von einem enzigen Operator be-
nutzt werden; entfernen Sie mögliche Beobachter.
Die Maschine auf Neigengen tiefer als 25% nicht
benutzen.
Wenn die Maschinen und/oder die bezüglichen Gerä-
te gehebt werden müssen, empfehlen wir den Opera-
tor sie gebunden auf Pallets zu setzen, und sie mit-
tels Hubwagen zu heben.

10
INFORMAZIONI PER L’OPERATORE
I
(1) LAeq - PRESSIONE ACUSTICA: valori espressi in dB
(A) equivalenti - (2) LwA - POTENZA ACUSTICA: valori
espressi in dB(A) - (3) m/sec² - VIBRAZIONE: valore qua-
dratico medio ponderato alle stegole secondo UNI EN 709.
ATTENZIONE, PERICOLO: Per l’utilizzo di macchine
che superano gli 85 dB(A) di LAeq, l’operatore deve indos-
sare adeguati mezzi di protezione acustici (cuffie).
Il dispositivo di sicurezza PowerSafe
®
è stato progettato
per rendere più sicura la macchina durante l'uso. Consiste
in una frizione idraulica a comando meccanico per mezzo
di due leve poste tradizionalmente a sinistra del manubrio.
Per poter usufruire del periodo di garanzia è assolutamen-
te necessario attenersi a quanto riportato sulle pagine cen-
trali e registrare gli interventi fatti.
INFORMATIONS FOR THE USER
GB
A = MOTORS
B = GASOLINE
C = DIESEL
D = VALUES
(1) LAeq - ACUSTIC PRESSURE: values expressed in
equivalent dB(A) - (2) LwA - ACUSTIC POWER: values ex-
pressed in dB(A) - (3) m/sec² - VIBRATION: Average squa-
re value calculated at handlebars
according to UNI EN 709.
ATTENTION, DANGER: when using machines emet-
ting a LAeq higher than 85 dB(A), the user must wear fitted
acustic protection means (guard).
The PowerSafe
®
safety device was designed to make the
machine safer during use. It consists of a mechanical con-
trol hydraulic clutch using two levers that are traditionally
positioned to the left of the handlebar.
The information contained in the middle pages must be fol-
lowed and all interventions recorded in order to take ad-
vantage of the warranty period.
INFORMATIONS POUR L’OPÉRATEUR
F
A = MOTEUR
B = ESSENCE
C = DIESEL
D = MESURES
(1) LAeq - PRESSION ACOUSTIQUE: valeurs exprimées
en dB (A) équivalent (2) LwA - PUISSANCE ACOUSTI-
QUE: valeurs exprimées en dB(A) - (3) m/sec² - VIBRA-
TION: valeur quadratique moyenne pondérée aux poi-
gnées suivant UNI EN 709.
ATTENTION, DANGER: lors de l’utilisation de machi-
nes supérieures à 85 dB(A) de LAeq l’opérateur doit porter
un casque de protection acoustique.
Le dispositif de sécurité PowerSafe®a été conçu pour ren-
dre plus sûre la machine durant l'utilisation.
Il consiste en un embrayage hydraulique à commande mé-
canique au moyen de deux leviers, situé par tradition à
gauche du guidon.
Pour pouvoir profiter de la période de garantie, il faut abso-
lument respecter ce qui est reporté sur les pages centrales
et enregistrer les interventions faites.
INFORMACCIONES PARA EL UTILIZADOR
E
A = MOTORES
B = GASOLINA
C = DIESEL
D = VALORES
(1) LAeq PRESION ACÚSTICA: valores exprimidos en dB
(A) equivalentes - (2) LwA POTENCIA ACÚSTICA: valores
exprimidos en dB(A) - (3) m/sec² - VIBRACIÓN: valor cua-
drático medio ponderado a las estevas según UNI EN 709.
ATENCIÓN, PELIGRO! Para utilizar máquinas que
sobrepasan los 85 dB(A) de LAeq, el utilizador debe llevar
medios de protección acústica adecuados (cofias).
El dispositivo de seguridad PowerSafe®se ha ideado para
que la máquina sea más segura durante su uso. Consiste
en un embrague hidráulico de mando mecánico mediante
dos palancas situadas tradicionalmente a la izquierda del
manillar.
Para poder disfrutar del periodo de garantía, es estricta-
mente necesario atenerse a lo indicado en las páginas
centrales y también registrar las intervenciones realizadas.
INFORMATIONEN FÜR DEN OPERATOR
D
A = MOTOREN
B = BENZIN
C = DIESEL
D = WERTE
(1) LAeq - ACUSTISCHES DRUCK: Werte ausgedrückt in
dB(A) Äquivalenten (2) LwA - ACUSTISCHE LEISTUNG:
Werte ausgedrückt in dB(A) - (3) m/sec² - SCHWINGUNG:
Quadratwert berechnet auf die Sterzen nach UNI EN 709.
ACHTUNG, GEFAHR! Um Maschine, die ein Wert
höher als 85 dB(A) von LAeq haben, zu benutzen, muß
den Verbraucher geeignete Mittel für akustische Schutz
trägen (Kopfhörer).
Die PowerSafe®Sicherheitsvorrichtung wurde entwickelt,
um während des Maschinengebrauchs mehr Sicherheit zu
gewährleisten. Sie besteht aus einer mechanisch über
zwei, wie üblich links am Lenker angeordnete Schalthebel
zu betätigenden Hydraulikkupplung.
Um die Garantieleistung in Anspruch nehmen zu können,
sind die Angaben auf den mittleren Seiten zu beachten
und die durchgeführten Arbeiten einzutragen.
MOTORI (A) BENZINA (B) DIESEL (C)
LAeq
(1)
LwA
(2)
m/sec²
(3)
LAeq
(1)
LwA
(2)
m/sec²
(3)
Valori (D)
85,9 101,7 3,1 89,6 105,2 2,1

11
MOTOCOLTIVATORI
I
Il motocoltivatore è studiato per lavori di fresatura (fig.1); la
possibilità di spostare lateralmente e verticalmente il ma-
nubrio per rendere più comoda la posizione dell'operatore,
la larghezza di fresatura che può essere variata, la gamma
di velocità selezionabili e per il lavoro e per il trasferimento,
ed i dispositivi di sicurezza per salvaguardare l'incolumità
dell'operatore, rendono la macchina estremamente versa-
tile e sicura in ogni condizione di lavoro.
Al motocoltivatore oltre alla fresa è possibile applicare ara-
tri, assolcatori, barre falcianti, tosaerba spazzaneve, ecc.
(fig.2).
TWO-WHEEL TRACTORS
GB
The two-wheel tractor has been designed to work with the
rotary hoe (fig.1). The option of moving the handlebars si-
deways and vertically to allow the operator a comfortable
position, the variable milling width, the selectable speed
range and the operator protection safety devices make the
machine extremely versatile and safe in all working condi-
tions.
In addition to the rotary hoe, to the two-wheel tractor can
all be applied ploughs, furrowers, sickle bar mowers, clip-
pers and snow ploughs, etc. (fig.2).
MOTOCULTEURS
F
Le motoculteur est étudié pour travailler avec la fraise (fig.
1). La possibilité de déplacer latéralement et verticalement
le guidon pour rendre plus confortable la position de l'opé-
rateur, la largeur de la fraise qui peut être changée, la pos-
sibilité de changer les vitesses pour le travail et le déplace-
ment, et les dispositifs de sécurité pour sauvegarder l'opé-
rateur rendent la machine extrêmement versatile et sûre
dans toutes conditions de travail.
On peut appliquer au motoculteur, outre la fraise, les char-
rues, les buttoirs, les barres de coupe, les tondeuses à ga-
zon, les chasse-neige etc. (fig.2).
MOTOCULTORES
E
El motocultor està estudiado para fresar (fig.1). La posibili-
dad de mover lateralmente y verticalmente el manillar hace
más cómodo el trabajo del operador, la longitud de fresado
puede variar, la gama de velocidades sleccionables tanto
para el trabajo como para el desplazamiento, y los disposi-
tivos de seguridad para proteger el operador, hacen la má-
quina extremadamente versátil y segura en cada condición
de trabajo.
El motocultor además de la fresa puede trabajar con ara-
dos, surcadores, barras de siega, cortacéspedes, quitanie-
ves, etc. (fig.2).
EINÄCHSER
D
Der Einachser wurde konzipiert, um mit der Fräse zu arbei-
ten (Abb.1). Die Möglichkeit, die Holmen seitlich und senk-
recht zu verstellen, um die Benutzerlage bequemer zu ge-
stalten, die verstellbare Fräsbreite, die Möglichkeit, die Ge-
schwindigkeit für die Arbeit und die Verlegung zu wech-
seln und die Sicherheitsvorrichtungen für den Benützer-
schutz machen die Maschine ausserordentlich verwendbar
und sicher unter jeder Arbeitsbedingung.
Außer der Fräse kann man am Einachser auch Pflüge,
Furchenzieher, Mähbalken, Rasenmäher, Schneeschleu-
der, usw. anbauen (Abb.2).
1
1
/
1
2
no sì 3

12
MONTAGGIO DELLA MACCHIN
A
I
Dopo aver tolto la macchina dalla scatola, aprire il pacchet-
to della dotazione ed estrarre le chiavi per iniziare il mon-
taggio.
Montaggio ruote: fare attenzione che la freccia determi-
nata dal disegno del battistrada dei pneumatici sia rivolta
verso il motore, per i motocoltivatori. La pressione di gon-
fiaggio è di 1.2 / 1.5 bar (vedi tab.1 a pag.28).
Leggere attentamente il libretto di uso e manutenzione
del motore.
ATTENZIONE: se il motore ha il filtro aria a bagno d’olio,
immettere olio nella quantità e qualità indicata.
Controllare che tutte le viti ed i dadi siano ben serrati
in particolare quelli che fissano l’attrezzo alla macchi-
na.
ATTENZIONE: nel montare le rondelle coniche a tazza
(super-ranella) occorre assolutamente rispettare il corretto
orientamento (vedi fig.3 pag.11): se montate capovolte,
peggiorano l'accoppiamento compromettendo il serraggio
di dadi e viti che tenderanno a svitarsi molto più facilmente,
in particolare se gli organi sono sottoposti a vibrazioni.
MACHINE ASSEMBLY
GB
After removing the machine from its box, open the tool kit
and follow the assembly instructions detailed below:
Wheels: make attention that the arrows of tread design is
directed towards the engine, for two-wheel tractors. Infla-
ting pressure is 1.2 / 1.5 bar (see tab.1 page 28).
Carefully read the instructions related to the engine.
A
TTENTION: If the engine is fitted with an oil-bath air filter;
fill to the indicated level with correct quantity and quality.
Check that all screws and nuts are well tightened, in
particular those fixing the implement to the machine.
ATTENTION: when installing the (heavy duty) cupped co-
nical washers, the correct orientation must be observed (as
indicated in fig.3, page 11): if mounted upside down, the
coupling worsens, compromising the tightness of the nuts
and bolts, which tend to become loose very easily, espe-
cially if the organs are subjected to vibration.
MONTAGE DE LA MACHINE
F
Extraire la machine de sa boîte, ouvrir le sachet à outils,
prendre les clefs et procéder au montage comme décrit ci-
dessous.
Montage roues: faire attention à ce que la flèche repré-
sentée par le dessin de la chape des pneus soit tournée
vers le moteur, pour les motoculteurs. La pression de gon-
flage est de 1.2 / 1.5 bar (voir la table 1 à la page 28).
Lire soigneusement le mode d’emploi du moteur.
A
TTENTION: si le moteur avait le filtre à l’aire à bain
d’huile, mettre l’huile dans la quantité et qualité indiquées.
Contrôler que toutes les vis et écroues soient bien blo-
qués, particulièrement ceux qui fixent l’outil à la ma-
chine.
ATTENTION: en montant les rondelles coniques (de fixa-
tion) il faut absolument respecter l’orientation correcte (voir
fig.3 à la page 11): si elles sont montées à l’envers, elles
détériorent l’accouplement en compromettant le serrage
des écrous et des vis qui auront tendance à se dévisser
beaucoup plus facilement, en particulier si les organes
sont soumis à des vibrations.
MONTAJE DE LA MAQUIN
A
E
Después de sacar la máquina de la caja, abrir el paquete
de las dotaciones y extraer la llave para iniciar el montaje
tal y como ahora detallamos:
Montaje ruedas: prestar especial atención en que la
flecha determinada en el dibujo de la huella del neumático
esté correcta: hacia el motor, en los motocultores. La pre-
sión de hinchado es de 1.2 / 1.5 bar (ver tabla 1 pag.28).
Leer atentamente el libro de uso y manutención del
motor.
ATENCIÓN: si el motor tiene el filtro de aire en baño de
aceite, poner aceite en la cantidad y calidad indicada.
Controlar que todos los tornillos y tuercas estén bien
apretados, en particular los que afectan el apero de la
máquina.
ATENCIÓN: al montar las arandelas cónicas de taza (su-
perarandela) hay que respetar la orientación correcta (véa-
se fig.3 pág.11): si se montan invertidas, se empeora el
acoplamiento perjudicando el apriete de tuercas y tornillos
que tenderán a aflojarse mucho más fácilmente, sobre
todo si los órganos se someten a vibraciones.
MASCHINEMONTAGE
D
Die Maschine auspacken, das Zubehörset öffnen und die
Schlüssel herausnehmen, um die Montage gemäß der
nachstehenden Beschreibung auszuführen.
Montage der Räder: Darauf achten, daß das pfeilartige
Reifenprofil für Einächser in Motor gerichtet ist. Aufblas-
druck 1.2 / 1.5 bar (Siehe Tafel 1 Seite 28).
Die Betriebsanleitung des Motors durchlesen.
A
CHTUNG: wenn der Motor einen Ölbadluftfilter hat, Öl in
der vorgeschriebenen Menge und Qualität einfüllen.
Prüfen, daß alle Schrauben und Muttern gut angezo-
gen sind (besonders diejenigen, welche ein Arbeitsge-
rät mit der Maschine verbinden).
ACHTUNG: Bei der Montage der konischen Tassenunter-
legscheiben (Superunterlegscheibe) ist unbedingt auf de-
ren Ausrichtung zu achten (siehe Abb.3 Seite11): Werden
die Unterlegscheiben falsch herum eingebaut, erfolgt keine
ordnungsgemäße Paarung und das Anzugsmoment der
Muttern und Schrauben kann beeinträchtigt werden, da
sich diese leichter losdrehen können; dies gilt vor allem
dann, wenn erhöhte Schwingungsgefahr besteht.

13
NORME DI SICUREZZ
A
I
ATTENZIONE, PERICOLO !
•Imparate a spegnere il motore rapidamente!
•Familiarizzate con i comandi e l’uso corretto della mac-
china.
•Preparatevi al lavoro indossando scarpe resistenti e pan-
taloni lunghi.
•Ispezionate prima la zona da lavorare e togliete le pietre, i
bastoni, i fili metallici ed altri oggetti estranei. Leggete tutte le
decalcomanie di sicurezza applicate sulla macchina e rispet-
tate le norme in esse contenute prima di avviare, azionare,
rifornire od eseguire la manutenzione della macchina.
•Sulle pendenze siate sempre sicuri e stabili. Lavorate tra-
sversalmente, non in salita o in discesa. Fate attenzione
quando cambiate direzione. Non lavorate su pendenze su-
periori al 25%.
•Fermare il motore prima di controllare o riparare la mac-
china; se la macchina comincia a vibrare in modo anor-
male, fermare la macchina e fare un controllo immediato.
•Fermare il motore prima di abbandonare la macchina o di
fare regolazioni sugli attrezzi e prima di rifare il pieno di
carburante.
•Controllare sempre che tutti i dadi e le viti siano ben ser-
rati.
GENERAL SAFETY
GB
ATTENTION, DANGER !
•Learn how to switch off the motor quickly!
•Get acquainted with the commands and the correct use
of the machine.
•Get ready for working wearing resistant shoes and long
trousers.
•Before starting work remove all foreign matter (stones,me-
tal wires, rods, etc) from the area where the equipment is to
be used. Read all labels on security rules applied on the ma-
chine and follow the instructions given before starting, ope-
rating, fill up with fuel or perform any maintenance opera-
tion on the machine.
•Be safe and steady when working. Always work trans-
versally never on slopes or descent. Pay attention when
changing the working direction. Never work on slopes
deeper than 25%.
•Stop the motor before checking or repairing the machine; if
the machine starts vibrating in an abnormal way stop the
machine and perform a complete check on it.
•Stop the engine before leaving the machine or to perform
any adjustment on implements and before filling it up with
fuel.
•Always check that nuts and bolts are securely fixed.
REGLES DE SECURITÉ GENERALE
F
ATTENTION, DANGER !
•Apprenez à arrêter rapidement le moteur!
•Abituez vous aux commandes et à utiliser correctement
la machine.
•Pendant le travail, portez toujours des chaussures rési-
stantes et des pantalons longs.
•Contrôllez toute la zone de travail et enlevez toutes les
pierres, batons, fils métalliques et tout autre objet qui pour-
rait endommager la machine. Lisez toutes les décalcoma-
nies de sécurité appliquées sur la machine et respectez les
règles indiquées avant de mettre en marche, déplacer,
faire le plein ou procéder à l’entretien de la machine.
•Sur les pentes veillez à être toujours dans une position
stable et sûre. Travaillez transversalement, ni en montée,
ni en descente. Faites attention quand vous changez de di-
rection. Ne pas travaillez sur des pentes supérieures à 25%.
•Arrêtez le moteur avant de contrôler ou réparer la ma-
hine, si la machine se met à vibrer de façon anormale,
arrêter la machine et contrôlez là immédiatement.
•Arrêtez le moteur avant de quitter la machine, de mettre
au points les outils, ou avant de refaire le plein.
•Veillez à ce que tous les vis et boulons soient toujours
bien serrés.
NORMAS DE SEGURIDAD
E
ATENCIÓN, PELIGRO !
•Aprendéis a apagar el motor rápidamente.
•Familiarícese con los mandos y el úso correcto de la
máquina.
•Prepárese para el trabajo llevando calzado resistente y
pantalones largos.
•Inspeccionar primero la zona a trabajar y retire las piedras,
bastones, hilos metálicos y otros objectos extraños. Leer to-
dos los adhesivos de seguridad en la máquina y respete las
normas que contienen antes de poner en marcha, accionar,
abastecer o efectuar la manuteción de la máquina.
•Sobre los desniveles, mantenerse seguros y estables
trabajar transversalmente y non en subida o en bajada.Po-
ner atención cuando se cambia dirección. No trabajar so-
bre desniveles superiores al 25%.
•Parar el motor antés de controlar y reparar la máquina; si
la máquina empieza vibrando en manera anormal, parar la
máquina y hacer un controle inmediato.
•Parar el motor antés de dejar la máquina o de hacer
unas regulacciones sobre los aperos y antés de abaste-
cerse con gasolina.
•Controlar siempre que todos los tornillos y las contra-
tuercas sean bien apretados.
SICHERHEITSVORSCHRIFTEN
D
ACHTUNG, GEFAHR !
•Sie müssen sofort wissen, wie der Motor schnell abzu-
stellen.
•Lernen wie die Schaltkontrollen zu bedienen sind.
•Ziehen Sie vor dem Gebrauch starke Schuhe und lange
Hose an.
•Vor dem Gebrauch sollen Fremdkörper (Steine, Stöcke,
usw) enfernt werden. Alle Sicherheitskleber und den darin
enthaltenen Anweisungen vor Inbetriebnahme, Tanken oder
Wartung lesen.
•Seien Sie immer sicher und stabil auf Neigungen. Ar-
beiten Sie quer, nicht bergan oder bergab. Seien Sie auf-
merksam, wenn Sie die Arbeitsrichtung wechseln. Nie auf
Neigungen tiefer als 25% arbeiten.
•Halten Sie den Motor vor die Maschine zu kontrollieren
oder reparieren; wenn die Maschine ungewöhnlich schwingt,
Halten Sie den Maschine durchführen Sie sofort eine Kon-
trolle.
•Stellen Sie den Motor ab vor die Maschine zu lassen
oder Einstellungen auf die Gehöre durchzuführen und vor
der Versorgung.
•Kontrollieren Sie immer, daß alle Schrauben und Mutter
gut verschraubt sind.

14
I
•Tenere la macchina sempre ben pulita da erba o grasso
per evitare pericolo d’incendio.
LA BENZINA E’ FORTEMENTE INFIAMMABILE:
•Conservate il carburante in recipienti destinati particolar-
mente a quel uso.
•Fate il pieno sempre all’aperto; non fumate durante que-
sta operazione.
•Lasciar raffreddare e aggiungere il carburante a motore
spento.
•Sostituite il tubo di scarico se è in cattivo stato.
•Disinnestate tutte le leve di comando prima d’avviare il
motore.
•Tenere i piedi lontani degli attrezzi della macchina.
•Usate la macchina sempre alla luce del giorno o con una
buona illuminazione. Camminate, non correte.
DIVIETO, NON FARE !
•Evitare di usare la macchina vicino a persone, special-
mente bambini, o animali domestici. Tenete presente che
l’utilizzatore della macchina è responsabile dei danni o le-
sioni provocate ad altre persone o ai loro beni.
GB
•Always keep the machine free from grass or grease in
order to avoid any risk of fire.
FUEL IS HIGHLY FLAMMABLE:
•Stock the fuel in tanks dedicated to that purpose.
•Always fill up the tank in open space; do not smoke du-
ring this operation.
•Wait until motor is cold, then add the fuel with the motor
off.
•Replace the exhaust pipe when worn out.
•Disengage all command levers before starting the motor.
•Keep your feet far from the implement of the machine.
•Always use the machine at day-light or with a strong light.
Walk, never run.
FORBIDDEN, DON’T DO IT !
•Avoid using the machine when people, especially chil-
dren, or pets are nearly. Remember that the operator is re-
sponsible for accidents to people or their properties.
F
•Ayez soin d’enlever l’herbe sur la machine ainsi que
toute trace de graisse afin d’éviter le risque d’incendie.
L’ESSENCE EST TRÈS INFLAMMABLE:
•Conservez l’essence dans des récipients réservés à cet
usage.
•Faites toujours le plein en plein air, ne fumez pas pen-
dant cette opération.
•Laisser refroidir le moteur et ajouter l’essence quand le
moteur est à l’arrêt.
•Changez le tuyau d’échappement s’il est usé.
•Débrancher tous le leviers de commande avant la mise
en route du moteur.
•Tenez les pieds éloignés des outils de la machine.
•Utilisez la machine à la lumière du jour ou avec une
bonne illumination artificielle. Marchez, ne courrez pas.
INTERDIT, NE PAS FAIRE !
•Evitez d’utiliser la machine en présence de personnes,
en particulier d’enfants, ou d’animaux domestiques. Rap-
pelez vous que l’opérateur de la machine est responsable
des dégâts ou lésions provoquées à des tiers ou a leurs
biens.
E
•Tener la máquina siempre limpia de hierba o aceite para
evitar el peligro de incendios.
LA GASOLINA ES MUY INFLAMABLE:
•Conservar el carburante en unos recibíente especificos
para este úso.
•Abastecerse siempre al aire abierto: no fumar durante
esta operación.
•Dejar que el motor se enfria y añadir el carburante con
motor apagado.
•Substituir el tubo de descarga si es en mal estado.
•Desenchufar todas las barras de mando antés de en-
cender el motor.
•Dejar los píes lejanos de los aperos de la máquina.
•Utilizar siempre la máquina con la luz del día o con una
buena iluminación. Marchar, no correr.
¡ VEDA ! NO HACER !
•No utilizar la máquina cerca de personas, y particúlar-
mente niños o animales domésticos. Tener presente que
el utilizador de la máquina es responsable por los daños y
las lesiones causados a otras personas y objetos.
D
•Die Maschine muß immer frei vom Gras oder Fett sein,
um Verbrennungen zu vermeiden.
BENZIN IST LEICHT ENTZÜNDLICH:
•Bewahren Sie das Benzin in Gefässer, die genau für das
Gebrauch herstellt werden.
•Immer im Freien erfüllen; rauchen Sie nicht während
dieser Operation.
•Den Motor Kalte werden, Immer beim abgeschalteten
Motor, Benzin erfüllen.
•Ersatzen Sie das Auspuffrohr, wenn es abgenutzen ist.
•Alle Führungshebel vor dem Anschalten entkuppeln.
•Füße weit entfernt von den Maschinengehöre halten.
•Brauchen Sie die Maschine immer am Sonnenlicht oder
bei einer guten Beleuchtung. Gehen Sie, laufen Sie nicht!
VERBOTEN, NICHT MACHEN!
•Kinder, Personen oder Haustiere dürfen bei der Maschine
nicht stehen. Vergessen Sie nicht, daß der Benutzer der
Maschine für Schaden oder Verletzungen an Personen oder
ihrer Habe verantwortlich ist.

15
I
•Non permettete a bambini o a persone non esperte di
utilizzare la vostra macchina.
•Non lavorate mai a piedi nudi o con sandali.
•Non utilizzate la macchina con le protezioni o i dispositivi
di sicurezza difettosi.
•Non mettete mani o piedi vicino agli organi di lavoro della
macchina.
•Non sollevate o portate la macchina col motore in moto.
•Non riponete la macchina in ambienti chiusi con benzina
nel serbatoio. I vapori potrebbero diventare pericolosi.
•Non modificare la taratura del regolatore di giri del moto-
re. Far funzionare un motore a velocità eccessiva aumenta
i rischi di incidenti.
•Non togliete il tappo del serbatoio né aggiungete benzina
se il motore è acceso o è ancora caldo.
•Se avete versato all’esterno della benzina, non avviate il
motore ma spostate la macchina dalla zona dove c’è la
benzina.
•Non fate funzionare il motore in locale chiuso. I gas di
scarico contengono monossido di carbonio: possono ucci-
dere!
GB
•Never permit children or not skilled person to use the
machine.
•Do not operate the machine barefoot or in open-toe san-
dals.
•Never use the machine if guards or security devices are
defective.
•Never approach feet or hands to the moving implements
of the machine.
•Never rise or carry the machine when the motor is on.
•Do not store the machine in closed environments when
there is fuel in the tank. The vapours exhaled could be
dangerous.
•Do not modify the calibration of the motor revolutions re-
gulator. If you make the motor turn at an excessive speed,
the risk of accidents increases.
•Do not remove the tank plug not add fuel if the motor is
on or still hot.
•If some fuel is splitted outside the machine, do not start
the motor but move the machine away from this area.
•Do not start the engine in a closed environment. The
exhaust gas contains lethal carbon monoxide!
F
•Ne laissez pas les enfants ou autres personnes non ex-
pertes utiliser votre machine.
•Ne travaillez jamais pieds nus ou en sandales.
•Ne pas utilisez la machine lorsque les protections ou les
dispositifs de sécurité sont endommagés ou en panne.
•Ne mettez jamais les mains ou les pieds près des pièces
de la machine.
•Ne soulevez ni déplacez la machine avec le moteur en
route.
•Ne remisez pas la machine dans des locaux fermés avec
le réservoir plein. Les vapeurs d’essence pourraient être
dangereuses.
•Ne modifiez pas la tare du réglage des tours du moteur.
Faire travailler le moteur à une trop grande vitesse aug-
mente les risques d’accidents.
•Ne pas ôter le bouchon du réservoir ou ajouter l’essence
lorsque le moteur est en marche ou encore chaud.
•Si vous avez renversé de l’essence ne pas mettre en
route le moteur mais déplacer la machine loin de l’endroit
souillé par celle-ci.
•Ne pas mettre le moteur en marche dans un local fermé.
Les gaz d’échappement contiennent du monoxyde de car-
bone qui est mortel !
E
•No permitir a los niños o a personas no práticas de
utilizar la máquina.
•No trabajar nunca con los pies descalzos o llevando
sandalias.
•No utilizar la máquina con protecciones o dispositivos de
seguridad defectuosos.
•No poner nunca manos y pies cerca los órganos de
trabajo de la máquina.
•No levantar o transportar la máquina con motor en movi-
miento.
•No conservar la máquina en ambientes cerrados, de-
jando gasolina en el motor. Los vapores pueden ser peli-
grosos.
•No modificar la regulación de los giros del motor. Hacer
funcionar el motor a una velocidad demasiado elevada
aumenta la posibilidad de incidentes.
•No sacar el tapón del estanque y no añadir gasolina si el
motor está en marcha o ya está caliente.
•Si la gasolina a sido demarrada al exterior, no encender
el motor, sino desplazar la máquina en otro sitio donde no
hay gasolina.
•No hacer marchar el motor en cámaras cerradas. Los
gases de descarga contienen monóxido de carbono: pue-
den matar!
D
•Erlauben Sie niemandem (besonders Kindern), der nicht
genau Bescheid weiß, die Maschine zu bedienen.
•Niemals mit bloßen Füssen oder mit Sandalen arbeiten.
•Benutzen Sie die Maschine nicht mit fehlerhaften Schut-
zen oder Sicherheitsvorrichtungen.
•Hände oder Füßen den Arbeitsvorrichtungen der Maschi-
ne nicht annähern.
•Die Maschine mit laufendem Motor nie heben.
•Die Maschine nie in geschlossene Räume mit Benzin im
Tank nie legen. Die Dämpfer könnten gefährlich sein.
•Die Eichung des Motor Motordrehenabstellers nicht
wächseln. Die Gefähr nach Unfälle steigt, wenn der Motor
bei höherer Geschwindigkeit dreht.
•Weder der Tankpropfen wegnehmen, noch Benzin erfül-
len, beim angeschalteten oder heißen Motor.
•Wenn Sie Benzin aus dem Tank gegossen haben, star-
ten Sie den Motor nicht sondern stellen Sie die Maschine
weit entfernt von Gebiete, wo Benzin ist.
•Starten Sie nicht den Motor im geschlossenen Raum. Die
Auspuffgase enthalten Kohlenmonoxyd und können töten !

16
DESCRIZIONE DEI COMANDI
I
Vedi figure 1, 2, 3.
Aleva STOP: di colore rosso, se rilasciata, arresta ogni movi-
mento della macchina.
B leva arresto motore. Cleva comando frizione.
Dleva comando marce. Le posizioni delle diverse velocità so-
no indicate sul selettore.
E leva innesto presa di forza; un dispositivo di sicurezza S ne
impedisce l'inserimento contemporaneamente alla retromar-
cia.
F comando gas.
Gleva regolazione altezza manubrio.
Hleva sbloccaggio piantone; permette varie posizioni o la
rotazione completa.
L leva comando invertitore; prima di azionarla, tirare sempre la
leva frizione. Per registrazioni vedere pag.58.
Mleva bloccaggio differenziale.
N leva freno di stazionamento.
Oleva freno direzionale destro.
P leva freno direzionale sinistro.
R pomolo blocco / sblocco attacco rapido
S dispositivo di sicurezza.
CONTROL DESCRIPTION
GB
See figures 1, 2, 3.
ASTOP lever: it is red and stops the machine when released.
Bengine stop lever.
Cclutch control lever.
Dspeed control lever. The location of different speeds are
shown on the selector.
EP.T.O. lever; a safety device S prevents simultaneous enga-
gement with reverse speed.
Fthrottle control lever.
Ghandlebar height adjustment lever.
Hsteering column unlocking lever; it enables different posi-
tions or the complete rotation.
Lreverse unit control lever. Before engaging the lever, always
engage the clutch. For adjustments see page 58.
M differential locking lever.
N parking brake lever.
Oright brake lever.
Pleft brake lever.
R quick attachment lock/unlock knob
S safety device.
DESCRIPTION DES COMMANDES
F
Voir les figures 1, 2, 3.
Alevier STOP: couleur rouge; en relâchant ce levier, la machi-
ne s'arrête complètement.
Blevier d'arrêt moteur.
Clevier commande d'embrayage.
Dlevier commande des vitesses. Les positions des vitesses
sont indiquées sur le sélecteur.
Elevier embrayage prise de force. Un dispositif de sécurité S
empêche l'engagement en même temps que la marche arriè-
re.
Fcommande d'accélération.
Glevier réglage hauteur du mancheron.
Hlevier de déblocage du planton; il permet d'avoir différen-tes
positions ou la rotation complète.
Llevier commande de l'inverseur; avant de le mettre en mar-
che, tirer toujours le levier d'embrayage. Pour les réglages voir
la pag.58.
Mlevier de blocage différentiel.
N levier frein de stationnement.
Olevier frein de direction droit.
Plevier frein de direction gauche.
R bouton blocage / déblocage attache rapide
S dispositif de sécurité.
DESCRIPCION DE LOS MANDOS
E
Ver las figuras 1, 2, 3.
Apalanca STOP: de color rojo, si se suelta, detiene cualquier
movimiento de la máquina.
Bpalanca arresto motor.
Cpalanca mando embrague.
Dpalanca mando marchas. Las posiciones de las velocidades
estan indicadas en el selector.
Epalanca acople toma de fuerza; un dispositivo S de segu-
ridad impide meterla al mismo tempo que la marcha atrás.
Fmando gas.
Gpalanca regulación altura manillar.
Hpalanca desblocaje columna; permite distintas posiciones o
la rotación completa.
Lpalanca mando inversor; antés de accionarla, tirar siempre
de la palanca embrague. Para las regulacciones ver la pag.58.
M palanca blocaje diferencial.
N palanca freno de estacionamiento.
Opalanca freno direccional derecho.
Ppalanca freno direccional izquierdo.
R pomo bloqueo/desbloqueo unión rápida
S dispositivo de seguridad.
BESCHREIBUNG DER BEDIENUNGSORGANE
D
Siehe der Abbildungen 1, 2, 3.
ASTOP-Schalthebel: in roter Farbe; wird dieser losgelassen,
hält jede Bewegung der Maschine an.
BSchalthebel Motor-Stop.
CSchalthebel der Kupplung.
DSchalthebel der Gänge; die Positionen der Geschwindigkei-
ten sind am Wähler angegeben.
ESchalthebel der Zapfwelle; eine Sicherheitsvorrichtung ver-
hindert das gleichzeitige Einlegen des Ruckwärtsganges.
FGasschaltung
GHebel zur Einstellung der Lenkerhohe.
HFreischaltung der Lenksäule; ermöglich verschiedene Stel-
lungen oder eine komplette Umdrehung.
L Hebel des Umsteuerung; vor Betätigung dieses Hebels stets
den Schalthebel der Kupplung betätigen. Für die Einstellungen
siehe Seite 58.
M Differentialhebel.
N Standbremse.
O Rechte Richtungsbremse.
P Linke Richtungsbremse.
R Knopf spannen / lösen Schnellanschluss
S Sicherheitsvorrichtung.

17
B
N
C
P
L
O
1
A
F
H
M
DE
G 2
3
E
S
R

18
APPLICAZIONE ATTREZZI
I
Gli attrezzi si applicano direttamente al codolo A (fig.12
pag.19). Tutti gli attrezzi sono montabili interponendo la
bussola C (fig.13); in questo modo si ottiene la flangiatura
standard a tre prigionieri come in fig.17/1.
L'attacco e lo stacco dell'attrezzo si ottiene azionando il
pomolo R(fig.13); girando il pomolo in senso orario l'at-
trezzo è bloccato, girando in senso antiorario l'attrezzo è li-
bero di essere sfilato.
E’ necessario che i dadi D (fig.13) che fissano l’attrezzo e
la bussola siano ben serrati.
Per applicare ai motocoltivatori la barra falciante, il tosa-
erba, lo spazzaneve, ecc. è necessario ruotare il manubrio
di 180° e utilizzare la bussola per attacco rapido.
Prima di fare questo, vanno sganciate le aste di comando
marce D (fig.2 pag.17) e la presa di forza E dai supporti;
tirare la leva di posizionamento piantone manubrio H (fig.1
pag.17) e girare il manubrio in senso antiorario.
Rilasciare la leva H una volta scelta la posizione ideale del
manubrio. Girato il manubrio le aste vanno reinserite nei
supporti.
IMPLEMENT ASSEMBLY
GB
Implements are applied directly to shank A (fig.12 page
19). All implements are mounted through the interposition
of bushing C (fig.13), allowing us to obtain the standard
three-bolt flange shown in fig.17/1.
The attachment and detachment of the device are obtained
by enabling knob R (fig.13). The device is locked by tur-
ning the knob clockwise. The device is free to be detached
by turning the knob anti-clockwise.
It is necessary that nuts D (fig.13) which fasten the imple-
ment and the bushing are well tightened.
To mount to the two-wheel tractors the cutter bar, the lawn-
mower, the snow thrower, etc. it is necessary to turn the
handlebar of 180° and use the bushing for rapid adjust-
ment.
Before making that, you must release the speed D (fig.2
page 17) and P.T.O. control rods E from supports; pull le-
ver for handlebar steering column position H (fig.1 page
17) and turn the handlebar in counter-clockwise direction.
Release the lever H after choosing the ideal position of the
handlebar. After turning the handlebar, rods must be inser-
ted again into the supports.
MONTAGE OUTILS
F
Les équipements s’appliquent directement à la tige
A
(fig.
12 page 19). Tous les équipements peuvent être montés
en interposant la douille C (fig.13); de cette façon, on ob-
tient le bridage standard à trois goujons, comme dans la
fig.17/1.
L’accrochage et le décrochage de l’attelage s’obtiennent
en actionnant le bouton R (fig.13): en tournant le bouton
dans le sens horaire, l’attelage est bloqué; en tournant
dans le sens antihoraire, l’attelage peut être enlevé.
Les écrous D (fig.13) qui fixent l’outil et la douille doivent
être bien serrés.
Pour appliquer aux motoculteurs la barre de coupe, la ton-
deuse, le chasse-neige, etc. il est nécessaire de tourner le
mancheron de 180° et d'utiliser la douille pour une attache
rapide.
Avant de faire cela, on doit décrocher les tiges de com-
mande des marches D (fig.2 page 17) et la prise de force
Edes supports; tirer le levier pour la mise en position du
guidon H (fig.1 page 17) et tourner le mancheron dans le
sens inverse de celui des aiguilles d'une montre.
Relâcher le levier H après avoir choisi la position idéale du
mancheron. Après avoir tourné le mancheron, les tiges
doivent être réinsérées dans les supports.
APLICACION APEROS
E
Las herramientas se colocan directamente en el mango
A
(fig.12 pág.19). Todas las herramientas se pueden montar
interponiendo el buje C (fig.13); de esta manera se obtiene
el rebordeado estándar de tres prisioneros, como en la fig.
17/1.
La unión y la separación de la herramienta se obtienen ac-
cionando el pomo R (fig.13); girando el pomo en sentido
horario la herramienta se bloquea y girándolo en sentido
antihorario, la herramienta queda libre y puede sacarse.
Es necesario que las tuercas D(fig.13) que fijan el apero y
el buje están bien apretadas.
Para acoplar al motocultor la barra de siega, el cortacé-
sped, el quitanieves, etc. es necesario girar el manillar
180° y utilizar el buje para unión rápida.
Antes de hacer esto, desenganchar el asta del mando
marchas D (fig.2 pág.17) y la toma de fuerza E del sopor-
te; tirar de la palanca de posición de la columna del manil-
lar H(fig.1 pág.17) y girar el manillar hacia la izquierda.
Soltar la palanca una vez encontrada la posición ideal del
manillar. Girando el manillar las astas deben ser reinserite
en los soportes.
MONTAGE DER ARBEITSGERÄTE
D
Die Geräte werden direkt am Schaft
A
(Abb.12 Seite 19)
angebracht. Die Geräte werden durch Zwischenlegen der
Buchse C (Abb.13) montiert. Dadurch wird eine Standard-
flanschung mit drei Stehbolzen, siehe Abb.17/1 sicherge-
stellt.
Das Gerät lässt sich durch Betätigen des Knopfes R (Abb.
13) spannen bzw. lösen; den Knopf im Uhrzeigersinn dre-
hen um das Gerät zu spannen, gegen den Uhrzeigersinn
drehen, um es herauszuziehen.
Die Muttern D (Abb.13) welche das Arbeitsgerät und die
Buchse befestigen, müssen gut angezogen werden.
Um an den Einachsern den Mahbalken, Schneeschleuder,
Rasenmaher, etc. ist es notig, den Holm um 180° zu dre-
hen und die Buchse für den Schnellanschluss verwenden.
Vor dieser Arbeit muß man Geschwindigkeits D(Abb.2
Seite 17) und Zapfwellenstange E von den Lagern auskup-
peln; Hebel für die Holmen-Einstellung H (Abb.1 Seite 17)
ziehen und gegen die Lenker den Uhrzeigersinn drehen.
Nachdem Sie den gewunschte Holmenstellung gewählt ha-
ben, loslassen Sie den Hebel. Nach Drehen des Holmens
müssen die Stangen wieder in ihre Lager geschaltet wer-
den.

19
ROTAZIONE: DESTRA - ROTATION: RIGHT - ROTATION: DROITE - ROTACIÓN: DERECHA - DREHUNG: RECHT
GIRI DELLA PRESA DI FORZA - PTO's RPM - TOURS DE LA PRISE DE FORCE - GIROS DE LA TOMA DE FUERZA
DREHUNGEN DER ZAPFWELLE: 990 @ 3600/1'
GIRI DELLA PRESA DI FORZA - PTO's RPM - TOURS DE LA PRISE DE FORCE - GIROS DE LA TOMA DE FUERZA
DREHUNGEN DER ZAPFWELLE: 825 @ 3000/1'
17/1
12
A
13
D
C
± ²
R
Table of contents
Other BCS Tractor manuals

BCS
BCS 92193040 User manual

BCS
BCS PowerSafe 710 PS User manual

BCS
BCS 710 Gardener User manual

BCS
BCS PowerSafe 730 PS/ED User manual

BCS
BCS PowerSafe 710 User manual

BCS
BCS PowerSafe 770HY User manual

BCS
BCS PowerSafe 770HY User manual

BCS
BCS VALIANT 400 Operating instructions

BCS
BCS 718 Harvester User manual