BeeSecure Lynx User manual

PA G E |1
B e e S ec u r e |LORA (HE L I U M )TR A C K E R GE T T I N G ST A R T E D
Contents
Unboxing your Lynx ............................................................................... 2
Part A: Account Activation..................................................................... 2
Part B: Device Activation ...................................................................... 2
Step 1: Log in to the App ...................................................................................................2
Step 2: Create an Asset to Track ...................................................................................... 2
Step 3: Pair your BeeSecure Hardware with your Asset.................................................. 4
Part C: Turn on your Tracker................................................................. 5
Step 1: Fully Charge your Tracker..................................................................................... 5
Step 2: Press Button to Turn On ....................................................................................... 5
Step 3: First Time Connecting........................................................................................... 5
Help..................................................................................................................................... 5
Part D: Device Operation ...................................................................... 6
Part E: Track Your Assets...................................................................... 6
Track your BeeSecure-Guarded Assets ............................................................................6
Part F: Pet Collar and Bike Attachments.............................................. 8
Pet Collar Attachment........................................................................................................8
Bike Seat Attachment........................................................................................................ 9

PA G E |2
B e e S ec u r e |LORA (HE L I U M )TR A C K E R GE T T I N G ST A R T E D
Unboxing your Lynx
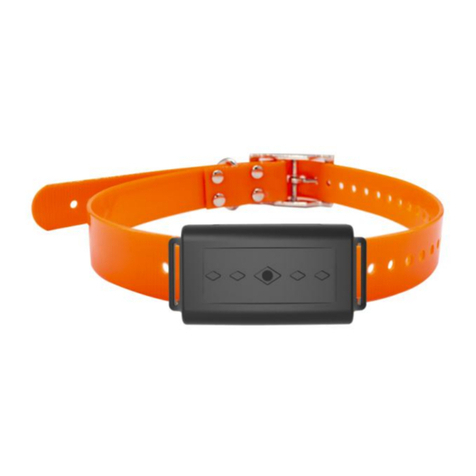
Your new Lynx box includes:
1 Lynx GPS Tracker
1 Rubber USB Plug
1 Micro-USB charging cable
2 Elastic pet collar attachments (one is extra)
2 Zip ties
1 BeeSecure sticker
Note: The USB plug is only to help keep dirt
out of the USB port for very dirty
environments. The Lynx is water resistant
without the USB plug and generally it is not
required. Please keep this piece safe as it
could be a choking hazard for kids and pets.
Part A: Account Activation
Please see the BeeSecure Setup Guide at https://beesecure.ca/getting-started/ to setup
your account on app.beesecure.ca or by using the iOS or Android mobile app.
Part B: Device Activation
Step 1: Log in to the App
i) Open the BeeSecure app or go to app.beesecure.ca on your computer, and sign in
Step 2: Create an Asset to Track
Here we will create an asset that you are going to track. For example, this could be a bike,
pet, vehicle, toolbox, etc.
i) Click the user icon in the top-right corner of the screen and navigate to ‘ASSETS’
→‘LISTING’
ii) Click the (+) icon at the top-right next to ‘Asset’ to create an asset

PA G E |3
B e e S ec u r e |LORA (HE L I U M )TR A C K E R GE T T I N G ST A R T E D
iii) Give your asset a Name; optionally, add a description and photo.
iv) When you’re done, click ‘CREATE ASSET’

PA G E |4
B e e S ec u r e |LORA (HE L I U M )TR A C K E R GE T T I N G ST A R T E D
Step 3: Pair your BeeSecure Hardware with your Asset
i) Navigate back to ‘ASSETS’ →‘LISTING’ by opening the side bar using the top-right
icon
ii) Click the hardware icon ( ) to the right of the
asset’s name:
iii) Enter the device ID of your tracker. The device ID is the DEVEUI found on the label
on the bottom of your tracker.
iv) Once entered, click ‘PAIR HARDWARE’ to activate your device.
Under ‘ASSETS’ →‘LISTING’, the black-box icon from before should now be green.
TIP: The QR code on the label contains the DEVEUI. If setting up using a phone, you can scan
the QR code and copy the results, then paste it into the Device ID field. If setting up with a
computer, you can scan the code using a 2D Barcode Scanner.
Device ID
DEVEUI = 0123456789ABCEF

PA G E |5
B e e S ec u r e |LORA (HE L I U M )TR A C K E R GE T T I N G ST A R T E D
Part C: Turn on your Tracker
Step 1: Fully Charge your Tracker
We recommend fully charging your tracker before you start using it. Plug it in using the
provided micro-USB cable. While it is charging, the light on the front will be red. When
charging is complete, the light will be green. Note that sometimes the light will turn off
instead of turning green. This is perfectly fine and also means it is finished charging.
Step 2: Press Button to Turn On
The Lynx arrives in “Shipping Mode”. Press the button to turn the tracker on to “Active
Mode”. After pressing the button for the first time, the blue light will flash, then the Lynx will
attempt joining your LoRa (or Helium) network.
Step 3: First Time Connecting
Make sure the Lynx is within Helium coverage, or coverage from your private LoRa network.
The Lynx will attempt to join the network every 10 seconds, and the blue light will flash one
with every join attempt. When the Lynx joins the network, the blue light will rapidly flash for a
few seconds.
If the Lynx cannot join the network, then it will attempt to join again the next time it tries
transmitting, either from movement or from regular check-ins.
Help
If the tracker can’t get LoRa coverage and isn’t sending your location to the BeeSecure app,
make sure the tracker is within range of a LoRa (Helium) gateway and has clear view of the
sky. If metal or concrete is between the tracker and gateway, the signal range will be
reduced.
You can check your Helium coverage at https://explorer.helium.com/.

PA G E |6
B e e S ec u r e |LORA (HE L I U M )TR A C K E R GE T T I N G ST A R T E D
Part D: Device Operation
i) When stationary, the tracker will report its GPS coordinates and battery status once
every 24 hours. This is remotely configurable.
If the tracker is in a location with poor GPS reception such as indoors, the location
may be inaccurate, and you may experience reduced battery life.
ii) When the tracker is bumped or starts to move, it will send its location information to
the app once every 2 minutes. This is remotely configurable. Please contact
BeeSecure.
iii) Button Function:
a. Short press: This forces the Lynx to send a transmission immediately. Useful
for testing if the tracker currently has coverage or not.
b. 3 Second press: Push and hold the button for at least 3 seconds but less than
10 seconds. The LED will start slowly blinking after 3 seconds, then release
the button. This resets the tracker, and it will re-join the network. Useful if the
tracker is behaving unexpectedly or you need to join a new network.
c. 10 Second press: Push and hold the button for 10 seconds. The LED will stop
flashing and stay on solid. Then you can release the button. This resets the
factory default settings and resets the tracker back into shipping mode. This
functionality can be disabled. Please contact BeeSecure for details.
iv) A low battery alert will appear in the BeeSecure app if the battery is low. Note that
extreme cold temperatures could set off this alert prematurely.
Part E: Track Your Assets
Track your BeeSecure-Guarded Assets
i) You can customize the notifications you receive from your asset trackers via the
‘ASSETS’ →‘LISTING’ screen –click the settings icon ( ) next to your asset
ii) Under ‘Notifications’ you can:
a. Enable/disable all notifications
b. Set geofences
c. Set low and high temperature alerts
d. Adjust the notification interval for when you will be notified that your asset has
started moving.

PA G E |7
B e e S ec u r e |LORA (HE L I U M )TR A C K E R GE T T I N G ST A R T E D
For example, if set to 1 hour, you will be notified that your asset started
moving only once it has been stationary for 1 hour. This helps prevent false
alarms and limits the number of text messages sent.
Don’t worry, your asset will still be tracked regardless of if you receive a
notification or not.
i) In your account settings ‘Account’ →‘Settings’ you can specify certain times of day
that you do or do not want to receive movement alerts.

PA G E |8
B e e S ec u r e |LORA (HE L I U M )TR A C K E R GE T T I N G ST A R T E D
Part F: Pet Collar and Bike Attachments
The Lynx comes with two zip ties for bike seat mounting and an elastic band for attaching to
a pet collar.
Pet Collar Attachment
1. Loop the elastic through the slot.
2. Slide the end of the collar through the outside
loop.
3. Pull the elastic tight and slide it through
the other slot to make a new loop.
4. Put the end of the collar through the new loop.
Done! Your pet is ready for tracking.

PA G E |9
B e e S ec u r e |LORA (HE L I U M )TR A C K E R GE T T I N G ST A R T E D
Bike Seat Attachment
Two zip ties are included for mounting under a bike seat. All bike seats are a bit different,
but the Lynx is small enough to fit between the saddle rails in the back side of the seat.
Use the zip ties to attach the flanges of the Lynx to the Saddle rails to hold it firmly in place,
and with the logo side of the Lynx facing up towards the sky.
Lynx Here
Attach zip ties here
This manual suits for next models
1
Table of contents

