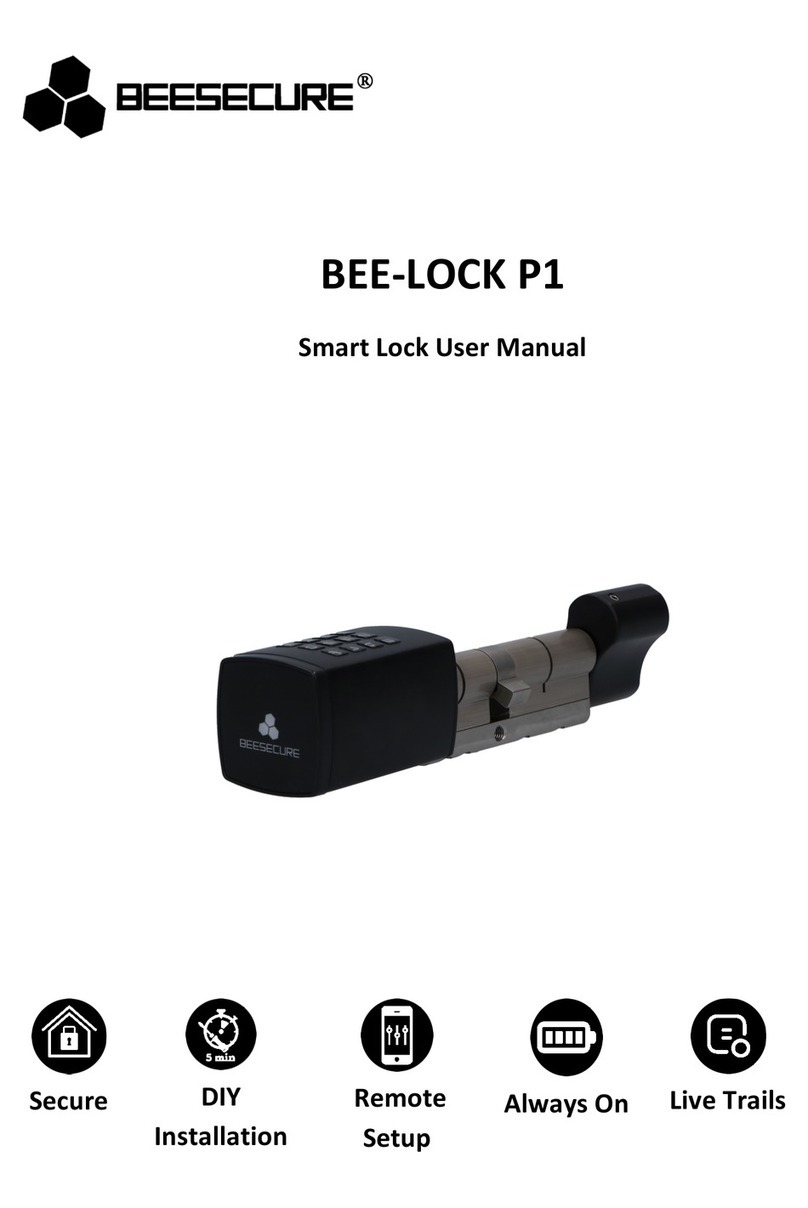
BeeSecure BEE-LOCK P1 User manual

V1.0
English
BEE-LOCK P1
Smart Lock User Manual
Secure
DIY
Installation
Remote
Setup
Always On
Live Trails
www.beesecure.eu

V1.0
English
Thank you for choosing BeeSecure BEE-LOCK P1.
BEE-LOCK P1 is a passcode enabled electronic smart lock. It can be used both in standalone
mode or through the App Control together with the BEE-HUB (purchased separately). With
BEE-LOCK P1, you can create up to 200 users and can always control who can access your
properties. BEE-LOCK P1 is a DIY Lock which can be installed in approximately 5 minutes
without the need of external tools.
From now on, say goodbye to your keys and have control of your Bee Lock P1 by checking
the live status on your smart phone at any time, from anywhere!
Ideal for private houses, Airbnb and offices.
Please ensure you read the user manual before using the BEE-LOCK P1. To read the full
version of user manual online to set up your smart lock from the app, scan the QR code
below.
Download
BeeSecure App
Read
Full User Manual
1Introduction
1.1 Product Description
Exterior View
Breakdown View

V1.0
English
1.2 Specifications
Dimensions
External Knob: 42mm(W) x 42mm(H) x 68mm (D);
Internal Knob: 48mm (W) x 27mm(H) x 37mm(D);
Passcode Length
6-10 digits
Number of Users
up to 200
Working Temperature
-25 ° C to + 55 ° C
Working Humidity
<90%
Battery
4 x AAA 1.5 Volt
Battery Life
Lasts approximately 1 year (when lock is used 10 times a day)
Warranty
2 Year
The product should not be modified in any way except in accordance with those
modifications described in the instructions
1.3 What Is in the Box?
Part
Quantity
Picture
P1 Lock
1
Allen key(2mm)
1
Allen key(1.5 mm)
1
Screw driver(3mm)
1
Cylinder Cover(5 mm)
2
Cylinder Cover(2.5 mm)
2
Cross recessed countersunk M5
screw (80mm)
1
Privacy Cap
1
Battery
4

V1.0
English
1.4 Product Features
BEE-LOCK P1 can be used both in standalone mode and through the App Control mode. To
operate the product to its full potential, we suggest you use the BEE-LOCK P1 in
combination with BEE-HUB. With the BEE-HUB you can configure and view your device’s
status remotely via the APP.
Refer to the table below for a detailed explanation on the differences of using BEE-LOCK P1
in standalone and APP control mode (with BEE-HUB):
Feature
Standalone Mode
APP Control (via BEE-HUB)
Initialize the Lock
✓
Add Your Own Passcode
✓
✓
Add Passcode for Other Users
✓
Change Own Passcode
✓
Add/Delete User
✓
✓
Activate Open Mode
✓
Deactivate Open Mode
✓
✓
Create Time-Limit/Agenda User
✓
Delete Time-Limit/Agenda User
✓
Create One-Time-Code (OTC)
✓
Delete One-Time-Code (OTC)
✓
✓
Share OTC via SMS/Email/WhatsApp…
✓
Unlimited Live Audit Trails
✓
Security Alert at mobile
✓
1.5 User Level Definition
There are 4 user administration layers supported by BEE-LOCK P1 with different
authorizations and functionalities:
1. Master user: initialize the default code, add own passcode, change own passcode,
add and delete users, switch opening mode ON/OFF, connect and disconnect the lock to
the hub and reset the device.
2. Secondary user: add own passcode, change own passcode, Add and delete users,
switch opening mode ON/OFF.
3. Regular user
-Regular with permanent access: add and change own passcode
-Regular with Time limit access & Regular with Agenda access: multiple entries
at a specified period/date and time
4. OTC: single entry opening.
For security reasons, only ONE master user can be set. The master user can invite other users to
co-manage the smart lock from BeeSecure App . Master user cannot be deleted from BEE-LOCK
P1. In total, BEE-LOCK P1 can store up to 200 users with mixed user types.

V1.0
English
1.6 Steps to Follow
•Step 1: Install Batteries
•Step 2: Initiate BEE-LOCK P1 and set up Master User Passcode
•Step 3*: Download BeeSecure App and Register
•Step 4*: Add BEE-HUB to Wi-Fi from the App
•Step 5*: Pair BEE-LOCK P1 with BEE-HUB from the App
•Step 6: Install BEE-LOCK P1 on your door
•Step 7: Set up the lock
2Getting Started
2.1 Battery Installation
1
2
3
4
5
6
7
Step 3 - 5 are optional, and only needed if you use your BEE-LOCK in combination with BEE-HUB. In
this case, we suggest you follow the steps above and install the lock on your door after pairing BEE-
LOCK P1 with BEE-HUB.

V1.0
English
2.2 Initiate BEE-LOCK P1 and set up Master User Passcode
Before you use the lock, you need to initiate the lock with the factory default code and set
up the master user passcode.
The factory default code is : 0123456
Follow the steps below to initiate your lock
Step
Operation
Key
Keyboard
Light
Signal
Sound
1
Press # for 3 times
###
Green flash x2
2
Enter Default code 0123456 and
press # to confirm
0123456#
Green flash x2
Do-re-mi
3
Enter Master User passcode, e.g.
135790 and press # to confirm
135790#
Green flash x2
Beep-beep
4
Repeat Master User passcode and
press # to confirm
135790#
Green flash x2
Do-re-mi
During the process, if you hear long beep, it indicates you that the operation failed. Please
try again from step 1.
Example: Input factory default code 0123456 and set up master code 135790:
###0123456# 135790# 135790#
Open the Lock
Step
Operation
Key
Keyboard
Light
Signal Sound
1
Enter your Passcode ,e.g. 135790,
followed by #
135790#
Green flash x2
Do-re-mi
2
Rotate the external knob in
clockwise direction. Rotate within 6
seconds before the lock auto locks
itself.
Important Notice: When you choose a passcode, avoid obvious combinations such as the
numbers of your date of birth or part of your telephone number or zip code. Remember to keep
your passcode confidential. If you would like to write down the code, please keep it stored in a
safe place.
Furthermore, the access code must consist of a minimum of 6 and a maximum of 10 digits. Make
sure you choose a strong access code. If you create a new code, the lock will check whether it is
not a consecutive series of numbers. The lock will also give an error message if you use a code
that has already been selected by another user.

V1.0
English
Re-Lock the lock
You can always add extra re-lock to double secure the safety of the lock. Follow the steps
below:
a) From Outside: Enter correct passcode and rotate the external knob in anti-clockwise
direction within 6 seconds. Six seconds later, the lock automatically switches to sleep
mode and can’t be opened.
b) From Inside: rotate the internal knob in anti-clockwise direction without inputting
code or time limitation
2.3 Installation
To install BEE-LOCK P1, all the tools needed are included in the package. No need of drills or
wires to install it.
There are 4 steps to install the BEE-LOCK P1
You can adjust the position of the knob to adjust to your door if necessary. The external
cylinder can be extended by 5mm per gap to a maximum of 15mm. The internal cylinder can
also extend to 15mm.
1. Remove the current cylinder from your door
1
2
3
2. Push the external knob into the mounting plate and extend the external length or use
one of the supplied cylinder covers (2,5mm and 5.0mm) if necessary and secure the
cylinder.
If the cylinder is too short you can extend the length by loosening the screw at the side of
the cylinder then pull the cylinder to the correct length.

V1.0
English
If the cylinder is too long, you can insert the cylinder cover in between the external knob
and the security panel.
3. Fix the lock screw from the middle.
4. Push the internal knob into the fitting and use one of the supplied cylinder covers
(2,5mm and 5mm) if necessary and secure the cylinder with an Allen Key.
Safety Note: Due to safety reasons, please
ensure the excess part of cylinder from the
panel is no more than 3mm

V1.0
English
If the cylinder is too long, you can insert the cylinder cover in between the internal knob and the
security panel
Safety Notice: Place the privacy cap (included in the package) to avoid leakage and theft of
passcodes.
2.4 Set up the lock locally
2.4.1 Add User
Both Master User /Secondary User can add a new user.
You can add a Secondary User or Regular User with Permanent Access on the BEE-LOCK P1.
To add a temporary user or One-Time-Code (OTC) user from BeeSecure App
Safety Note: Please screw in M5 screw
all the way to the end to ensure the
distance between the edges of M5 and
cylinder is at least 5mm

V1.0
English
Step
Operation
Key
Keyboard
Light
Signal
Sound
1
Press # for 3 times
###
Green flash X2
2
Enter Master User /Secondary User
Passcode , e.g. 135790, followed by #
135790#
Green flash X2
Do-re-mi
3
Press 3
3
Green light
Beep-beep
4
Press 1to add a secondary user, or
press 2to add regular user with
permanent access
1 or 2
Green light
Beep-beep
5
Enter 6-10 digits New passcode for the
user, , e.g. 147369 followed by #
147369#
Green light
Beep-beep
6
Repeat the passcode for the user
followed by #
147369#
Green light
Do-re-mi
During the process, if you hear long beep, it indicates you that the operation failed. Please
try again from step 1.
Example: Add new secondary user with passcode 147369:
###135790# 3 1 147369#147369#
2.4.2 Delete User
Both Master User /Secondary User can delete an existing user.
By inputting any passcode of the user you wish to delete, the user and all his/her passcode
will be deleted from BEE-LOCK P1 permanently.
Step
Operation
Key
Keyboard Light
Signal
Sound
1
Press # for 3 times
###
Green flash x2
2
Enter Master User /Secondary User
Passcode, e.g. 135790, followed by #
135790#
Green flash x2
Do-re-mi
3
Press 4
4
Green light
Beep-beep
4
Enter any of the user’s passcodes, e.g.
147369, followed by #
146739#
Green light
Do-re-mi
During the process, if you hear a long beep, it indicates that the operation failed. Please try
again from step 1.
Example: Delete user with passcode 147369
###135790# 4 147369#
2.4.3 Add Your Own Passcode
As Master User, Secondary User or Regular User with Permanent Access, you can add up to
5 passcodes to your own account. You can use any of your passcodes to unlock the BEE-
LOCK P1.
Step
Operation
Key
Keyboard Light
Signal
Sound
1
Press # for 3 times
###
Green flash x2
2
Enter your Passcode, e.g. 135790, followed
by # to confirm
135790#
Green flash x2
Do-re-mi

V1.0
English
3
Press 1
1
Green light
Beep-beep
4
Enter a 6-10 digits New passcode for the
user , e.g. 258369, followed by # to confirm
258369#
Green light
Beep-beep
5
Repeat the passcode for the user followed
by # to confirm
258369#
Green light
Do-re-mi
During the process, if you hear a long beep, it indicates that the operation failed. Please try
again from step 1.
Example: Add new passcode 258369 for the Master user with passcode 135790:
###135790# 1 258369# 258369#
2.4.4 Change Your Own Passcode
As Master User, Secondary User or Regular User with Permanent Access, you change any of
your passcodes.
Step
Operation
Key
Keyboard Light
Signal
Sound
1
Press # for 3 times
###
Green flash x2
2
Enter the passcode you want to change, e.g.
135790, followed by #
135790#
Green flash x2
Do-re-mi
3
Press 2
2
Green light
Beep-beep
4
Enter 6-10 digits New passcode, e.g.
789654, followed by #
789654#
Green light
Beep-beep
5
Repeat the passcode, followed by #
789654#
Green light
Do-re-mi
During the process, if you hear a long beep, it indicates that the operation failed. Please try
again from step 1.
Example: Change the existing passcode 135790 to 789654 for Master user:
###135790# 2 789654# 789654#
2.4.5 Open Mode
For offices and houses, you can activate Open Mode. It allows continuous entry for “non-
restricted” traffic. It means your guests/families/employees do not need to input a passcode
to enter. It is ideal for offices during regular open hours. By activating Open mode, it can
save the battery usage of the lock.
Both Master user and secondary users can activate open mode from the BEE-LOCK P1. To
activate Open Mode, BEE-LOCK P1 will ask you to re- enter your passcode to ensure that
you are aware of your operation and put extra security to verify your authorization.
Step
Operation
Key
Keyboard Light
Signal
Sound
1
Press # for 3 times
###
Green flash x2
2
Enter Master/secondary user passcode, e.g.
135790, followed by #
135790#
Green flash x2
Do-re-mi
3
Press 5
5
Green light
Beep-beep
4
Repeat the passcode followed by #
135790#
Green light
Do-re-mi
During the process, if you hear a long beep, it indicates that the operation failed. Please try
again from step 1.

V1.0
English
Example: activate open mode as Master user:
###135790# 5 135790#
2.4.6 Deactivate Open Mode
Both Master user and secondary users can deactivate open mode. After deactivation of the
Open Mode, a passcode will be requested to enter
Step
Operation
Key
Keyboard Light
Signal
Sound
1
Press # 3 times
###
Green flash x2
2
Enter your passcode , e.g. 135790, followed
by #
135790#
Green flash x2
Do-re-mi
3
Press 6
6
Green light
Beep-beep
During the process, if you hear a long beep, it indicates that the operation failed. Please try
again from step 1.
Example: Deactivate open mode as Master user:
###135790# 6
2.4.7 Reset The Lock
As Master user, you can reset the lock to manufacture settings. After reset, all data
including user information and settings will be removed. You can only operate resetting as
Master user from the lock locally for security reason.
Step
Operation
Key
Keyboard
Light
Signal
Sound
1
Press # for 3 times
###
Green flash x2
2
Enter your passcode, e.g. 135790, followed
by #
135790#
Green flash x2
Do-re-mi
3
Press 0
0
Green flash x2
Beep-beep
4
Repeat your passcode followed by #
135790#
Green light
Long beep
Example: Reset the lock as Master user
###135790# 0 135790#
2.4.8 Summary
You can refer the summary table below as a quick manual to set up your BEE-LOCK P1 as
standalone mode:
BEE-LOCK P1 Setup Table
For security reasons, you can only activate open mode locally on the BEE-LOCK P1 to ensure
someone is in your property. However, you can deactivate Open Mode both locally and from the
App.

V1.0
English
3. Security Features
3.1 Auto-lock
BEE-LOCK P1 has an auto-lock function. After inputting a valid passcode, you need to rotate
the external knob in clockwise direction within 6 seconds to unlock. After 6 seconds, the
lock will automatically enter sleeping mode, you will have to enter the passcode again to
unlock.
Step 1 Authorization for
setup:
Press ###; Enter your personal 6-10-digit passcode; Press # to confirm
Step 2 Set up:
Follow the instructions from the table below
Function
Operation
User Type
Reset the lock
Press 0 on the main menu;
Enter Master passcode;
Press # to confirm
-Master User
Add own Passcode
Press 1on the main menu;
Enter your new 6-10 digit passcode and press # to
confirm
Re-enter new passcode and press # to confirm
- Master User
- Secondary User
- Regular User (with
permanent access)
Change own Passcode
Press 2on the main menu;
Enter your current passcode; Press # to confirm
Enter a new 6-10-digit passcode and press #to
confirm
Re-enter new passcode and press # to confirm
- Master User
- Secondary User
-Regular User (with
permanent access)
Add User
Press 3on the main menu;
Press 1 for adding secondary User
Press 2for adding regular user
Enter new 6-10-digit passcode for the user;
Press # to confirm
Re-enter new passcode and press #to confirm
-Master User
-Secondary User
Delete User
Press 4on the main menu
Enter any passcode of the user you want to
delete;
Press # to confirm
-Master User
-Secondary User
Activate Open Mode
Press 5on the main menu
Enter your passcode
Press #to confirm
-Master User
-Secondary User
Deactivate Open Mode
Press 6 on the main menu
-Master User
-Secondary User
Connection of the Lock to
the Hub
Press the button on the hub
Press 7on the main menu
-Master User
Disconnect the lock from
the hub
Press 8 on the main menu
-Master User

V1.0
English
3.2 Auto-Lockout
For security reasons, if a wrong passcode is entered 6 consecutive times, the lock will be
blocked for 3 minutes. At the same time, you will receive push notifications to your mobile.
3.3 Low Battery Reminder
If you are using BEE-LOCK P1 in App Control Mode, you can view the status of the lock’s
battery. Whenever the battery level is below 20%, you will receive an alarm on your mobile.
Replace the battery as soon as possible
3.4 Emergency Battery Replacement
In case you are using BEE-LOCK P1 in standalone mode, and miss the opportunity to replace
the batteries on time, don’t panic! You can easily replace the batteries from the external
knob following the same process when you installed the batteries.
After replacing the batteries, all user data including history message, lock settings will remain
unchanged. You will not lose any data.

V1.0
Deustch
BEE-LOCK P1
Smart Lock Bedienungsanleitung
Sicher
DIY-Einbau
App-
Steuerung
Immer
aktiv
Live Status

V1.0
Deustch
Danke, dass sie sich für das BeeSecure BEE-LOCK P1 entschieden haben.
Das BEE-LOCK P1 ist ein Zugangscode-gesichertes elektronisches Schloss mit Sensorfunktion. Das
Schloss kann entweder eigenständig im Stand-alone Modus oder durch die BeeSecure App, in
Kombination mit dem BEE-HUB (separat erhältlich), verwendet werden. Mit dem BEE-LOCK P1,
können sie bis zu 200 Benutzer einrichten und jederzeit kontrollieren, wer Zugang zu Ihrem
Eigentum hat. Das BEE-LOCK P1 ist ein DIY („Do-It-Yourself”) Schloss, welches in ca. 5 Minuten ohne
Werkzeuge installiert werden kann.
Ab jetzt können sie sich von ihren Schlüsseln verabschieden. Kontrollieren sie Ihr BEE-LOCK P1 mit
Live-Meldungen von ihrem Smartphone. Von überall, zu jederzeit.
Ideal für private Immobilien, AirBNBs und Bürogebäude.
Bitte stellen sie sicher, dass sie die Bedienungsanleitung durchlesen, bevor sie den BEE-LOCK P1 in
Betrieb nehmen. Lesen sie die vollständige Bedienungsanleitung online, um den BEE-LOCK P1
hinzuzufügen und einzurichten. Scannen sie hierfür den untenstehenden QR Code.
Laden sie die
BeeSecure App
Lasen sie die vollständige
Bedienungsanleitung
1. Einleitung
1.1 Produktbeschreibung
Außenansicht
Detail Ansicht

V1.0
Deustch
1.2 Spezifikationen
Abmessungen
Handgriff Außen: 42mm(W) x 42mm(H) x 68mm(D);
Handgriff Innen: 48mm(W) x 27mm(H) x 37mm(D);
Passwortlänge
6-10 Ziffern
Anzahl von Benutzern
Bis zu 200
Betriebstemperatur
-25 ° C bis + 55 ° C
Luftfeuchtigkeit
<90%
Batterien
4 x AAA 1.5 Volt
Batterielebensdauer
Hält ca. 1 Jahr (wenn das Schloss 10 mal pro Tag benutzt wird)
Garantie
2 Jahre
Dieses Produkt darf in keiner Weise modifiziert werden, außer in Übereinstimmung mit den
hier beschriebenen Anweisungen.
1.3 Paketinhalt
Bauteil
Anzahl
Abbildung
BEE-LOCK P1
1
Inbuss Schlüssel (2mm)
1
Inbuss Schlüssel (1.5 mm)
1
Schraubendreher (3mm)
1
Zylinderabdeckung (5 mm)
2
Zylinderabdeckung (2.5 mm)
2
Senkschraube mit Kreuzschlitz
M5 (80mm)
1
Sichtschutzabdeckung
1

V1.0
Deustch
Batterie
4
1.4 Produkteigenschaften
Das BEE-LOCK P1 kann im Stand-alone Modus und durch die BeeSecure App bedient werden. Wir
empfehlen das BEE-LOCK P1 in Kombination mit dem BEE-HUB zu verwenden, um alle Funktionen
vollständig nutzen zu können. Mit dem BEE-HUB können sie durch die App den Status ihres Gerätes
einsehen und konfigurieren.
In der untenstehenden Tabelle finden sie eine detaillierte Erläuterung der Unterschiede zwischen
dem BEE-LOCK P1 im Stand-alone Modus und der BeeSecure App (in Kombination mit dem BEE-
HUB):
Eigenschaft
Stand-
alone
Modus
BeeSecure APP (mit BEE-HUB)
Passwort auf Werkseinstellungen setzen
✓
Eigenes Passwort einrichten
✓
✓
Passwörter für weitere Benutzer hinzufügen
✓
Eigenes Passwort ändern
✓
Benutzer hinzufügen oder entfernen
✓
✓
Offen Modus aktivieren
✓
Offen Modus deaktivieren
✓
✓
Erstellen eines Zeitschemas für Benutzer
✓
Entfernen eines Zeitschemas für Benutzer
✓
Erstellen eines einmaligen Passworts (One-
Time-Code, OTC)
✓
Entfernen eines einmaligen Passworts (One-
Time-Code, OTC)
✓
✓
OTC per SMS/Email/WhatsApp… teilen
✓
Unbegrenzte Anzahl von Live-Meldungen
✓
Warnmeldungen auf das Mobiltelefon erhalten
✓
1.5 Ebenen der Benutzerverwaltung
Die Benutzerverwaltung des BEE-LOCK P1 hat 4 verschiedene Ebenen.
1. Master:Initialisieren des Standardcodes, eigenes Passwort einrichten, eigenes Passwort
ändern, Benutzer hinzufügen und entfernen, Offen Modus ein- und ausschalten, das BEE-
LOCK P1 mit dem BEE-HUB verbinden oder trennen und das Gerät zurücksetzen.
2. Manager: Eigenes Passwort hinzufügen, eigenes Passwort ändern, Benutzer hinzufügen oder
entfernen, Offen Modus aktivieren oder deaktivieren.
3. Normaler Benutzer:
-Dauerhafter Zugang: Eigenes Passwort hinzufügen oder ändern.
-Zeitlich befristeter Zugang/Zugang mit Zeitschema: Schloss mehrfach öffnen während
einer festgelegten Zeitspanne/eines festgelegten Datums und Uhrzeit.
4. Einmaliger Benutzer, OTC: Einmaliges Öffnen des Schlosses.

V1.0
Deustch
* Aus Sicherheitsgründen, only ONE user can be set. Der Hauptbenutzer kann andere Benutzer einladen, das
Smart Lock über die BeeSecure App gemeinsam zu verwalten. Der Master Benutzer kann nicht vom BEE-LOCK P1
gelöscht werden. Das BEE-LOCK P1 kann bis zu 200 Benutzer mit unterschiedlichen Benutzertypen speichern.
1.6 Kurzübersicht
•Schritt 1: Batterien einsetzen
•Schritt 2: BEE-LOCK P1 auf Werkseinstellungen setzen und ein Masterpasswort eingeben
•Schritt 3*: Laden sie die Bee-Secure App herunter und registrieren sie sich
•Schritt 4*: Fügen sie den BEE-HUB zu ihrem WLAN hinzu aus der App
•Schritt 5*: Verbinden sie das BEE-LOCK P1 mit dem BEE-HUB aus der App
•Schritt 6: Bauen sie das BEE-LOCK P1 in ihre Tür ein
•Schritt 7: Schloss einricht
*Schritt 3-5 sind optional und werden nur benötigt, wenn sie BEE-HUB und BEE-LOCK P1
gemeinsam verwenden. In diesem Fall empfehlen wir, dass sie die obenstehende Schritte befolgen
und das Schloss erst an der Tür anbringen, wenn sie beide Geräte gekoppelt haben.
2. Erste Schritte
2.1 Batterien einsetzen
1
2
3
4
5
6

V1.0
V1.0
Deustch
7
2.2 BEE-LOCK P1 auf Werkseinstellung setzen und Master Passwort einrichten
Bevor sie das Schloss verwenden können, müssen sie das Schloss mit dem Standardcode
initialisieren und ein Passwort für den Master festlegen.
Der Standardcode lautet: 0123456
Folgen sie den untenstehenden Schritten um Ihr Schloss in Betrieb zu nehmen:
Schritt
Vorgang
Tasten
Lichtsignal
Tastatur
Tonsignal
1
Drücken Sie # 3x
###
Blinkt 2 x grün
2
Geben sie das
Werkseinstellungspasswort 0123456 ein
und drücken sie # um zu bestätigen
0123456#
Blinkt 2 x grün
Do-re-mi
3
Geben sie das Master Passwort ein, z.B.
135790 und drücken sie #um zu
bestätigen
135790#
Blinkt 2 x grün
Piep-Piep
4
Wiederholen sie das Master Passwort
und drücken sie #um zu bestätigen
135790#
Blinkt 2 x grün
Do-re-mi
Wenn sie während dieses Vorgangs einen langgezogenen Piepton hören, weist dies darauf hin, dass
der Vorgang fehlgeschlagen ist. Beginnen sie in diesem Fall noch einmal mit Schritt 1.
Beispiel: Eingabe Werkseinstellungspasswort 0123456 und Einrichtung des Master Passworts
135790:
###0123456# 135790# 135790#
Wichtiger Hinweis: Bevor sie das Schloss benutzen können, müssen sie es auf die
Werkseinstellung setzen und ein Master Passwort einrichten. Wenn sie sich für ein Passwort
entscheiden, vermeiden sie bitte offensichtliche Kombinationen wie ihren Geburtstag, ihre
Telefonnummer oder ihre Postleitzahl. Halten sie ihr Passwort immer geheim. Wenn sie das
Passwort niederschreiben möchten, bewahren sie es an einem sicheren Ort auf.
Außerdem muss das Passwort aus mindestens 6 und maximal 10 Ziffern bestehen. Wenn sie ein
neues Passwort aussuchen, wird das Schloss überprüfen, ob es sich um eine fortlaufende Serie
von Ziffern handelt. Das Schloss wird sie mit einer Fehlermeldung darauf hinweisen, falls das
Passwort bereits von einem anderen Benutzer verwendet wird.
Other manuals for BEE-LOCK P1
1
Table of contents
Languages:
Other BeeSecure Lock manuals
Popular Lock manuals by other brands
Masco
Masco LaGard LG BASIC instructions
Dormakaba
Dormakaba LA GARD ComboGard Pro 39E Setup instructions

Out-Front
Out-Front OF-3RLOCKPL Installation and user guide
Allen-Bradley
Allen-Bradley 140M-C-KN1 Installation instruction
LockMaster
LockMaster LKM700 installation instructions
Fortune
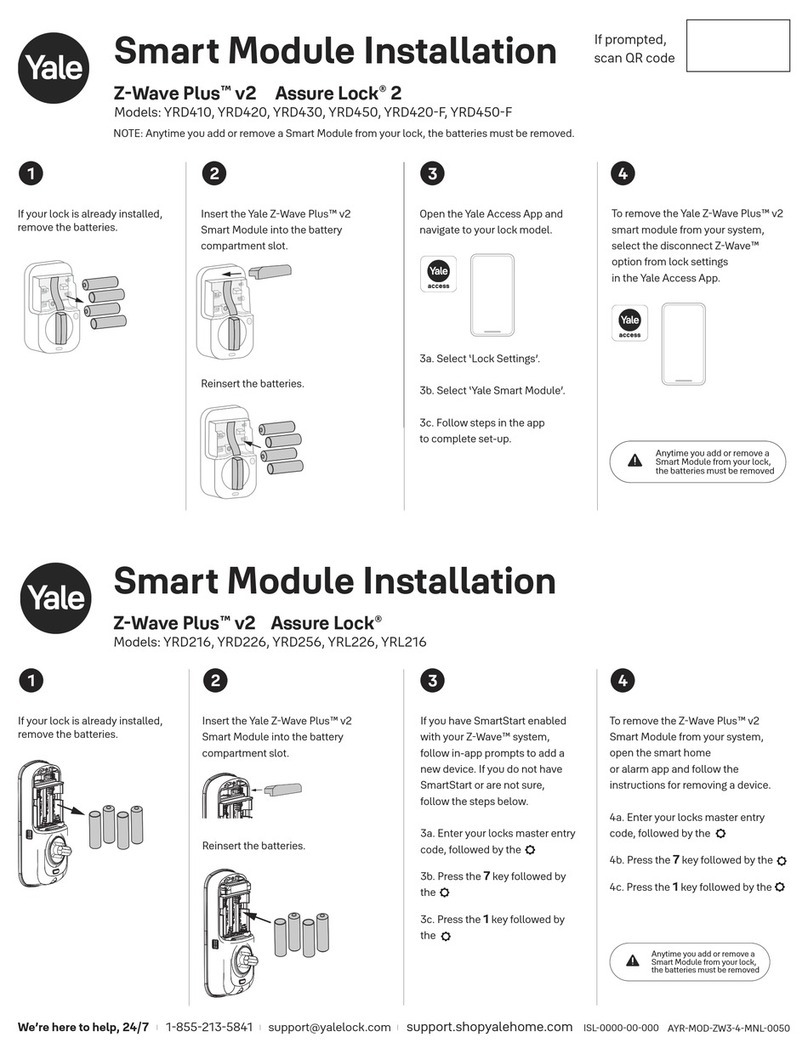
Fortune Z-Wave Plus v2 installation instructions
