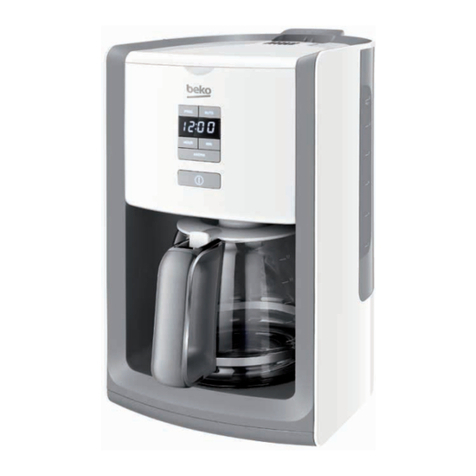
Beko CFD6151W User manual

CFD6151W
Coee Maker
User Manual
EN EE LT

Please read ths user manual frst!
Dear Customers,
Thank you for selectng an Beko product. We hope that you get the best results from
your product whch has been manufactured wth hgh qualty and state-of-the-art
technology. Therefore, please read ths entre user manual and all other accompanyng
documents carefully before usng the product and keep t as a reference for future
use. If you handover the product to someone else, gve the user manual as well. Follow
all warnngs and nformaton n the user manual.
Meanngs of the symbols
Followng symbols are used n the varous secton of ths manual:
C
Important information and useful
hints about usage.
A
WARNING: Warnings for dangerous
situations concerning the safety of
life and property.
Materials are intended to be in
contact with food.
Ths product has been produced n envronmentally-frendly, state-of-the-art facltes.
Comples wth the WEEE Drectve. It does not contan PCB.
Made n P.R.C.

3 / 32 EN
Coffee Maker / User Manual
This section contains safety
instructions that will help protect
from risk of personal injury or
property damage.
Failure to follow these instructions
invalidates the granted warranty.
1.1 General safety
• This appliance complies with the
international safety standards.
• This appliance can be used by
children aged from 8 years and
above and persons with reduced
physical, sensory or mental
capabilities or lack of experience
and knowledge if they have been
given supervision or instruction
concerning use of the appliance
in a safe way and understand the
hazards involved.
• Children shall not play with the
appliance. Cleaning and user
maintenance shall not be made by
children unless they are older than
8 and supervised.
• Do not use it if the power cable or
the appliance itself is damaged.
Contact an authorised service.
• This appliance is intended to be
used in household only. It is not
designed for professional use in:
-staff kitchen areas in shops,
offices and other working
environments;
-farm houses;
-by clients in hotels, motels,
and other residential type
environment
-bed and breakfast type
environment.
• Your mains power supply should
comply with the information
supplied on the rating plate of the
appliance.
• For additional protection, this
appliance should be connected
to a household faulty current
protection switch with no more
than 30 mA.
• Use the appliance with a grounded
outlet only.
• Do not use the appliance with an
extension cord.
• Do not squeeze or bend the power
cord and do not rub it on sharp
edges in order to prevent any
damage.
1Important nstructons for safety and
envronment

4 / 32 EN Coffee Maker / User Manual
• Do not touch the appliance or
its plug with wet or damp hands
when the appliance is plugged in.
• Do not pull the power cable when
unplugging the appliance.
• This appliance is intended for
private domestic use only and
is not suitable for professional-
catering purposes.
• Never fill the appliance above the
maximum level indicator, boiling
water may splash out.
• Do not fill the kettle below the
minimum level indicator.
• Do not open the lid while the
water is boiling.
• Position the lid so that the hot
steam is directed away from you.
• Hold the appliance by the handle
only.
• If water does not drip from the
filter basket during operation,
unplug the appliance and leave it
to cool for 10 minutes, then open
the filter cover and check it.
• Never operate the appliance
without any water inside it.
• Do not fill the kettle when it is
fitted on its base.
• Operate the appliance with its
original base.
• Always use the appliance on a
stable and flat surface.
• Do not attempt to dismantle the
appliance.
• Only use the original parts or
parts recommended by the
manufacturer.
• Unplug the appliance before
cleaning. After cleaning, dry the
appliance and all parts before
connecting it to mains supply.
• Do not immerse the appliance, or
power plug in water or any other
liquids.
• Never use the appliance in or near
to combustible or inflammable
places and materials.
• If you keep the packaging
materials, store them out of the
reach of children.
1Important nstructons for safety and
envronment

5 / 32 EN
Coffee Maker / User Manual
1Important nstructons for safety and
envronment
1.2 Compliance with the WEEE
Directive and Disposing of the
Waste Product:
This product complies with EU WEEE Directive
(2012/19/EU). This product bears a classification
symbol for waste electrical and electronic
equipment (WEEE).
This product has been manufactured
with high quality parts and materials
which can be reused and are suitable
for recycling. Do not dispose of the
waste product with normal domestic
and other wastes at the end of its service life. Take
it to the collection center for the recycling of
electrical and electronic equipment. Please
consult your local authorities to learn about these
collection centers.
1.3 Compliance with RoHS
Directive
The product you have purchased complies with EU
RoHS Directive (2011/65/EU). It does not contain
harmful and prohibited materials specified in the
Directive.
1.4 Package information
Packaging materials of the product are
manufactured from recyclable
materials in accordance with our
National Environment Regulations. Do
not dispose of the packaging materials together
with the domestic or other wastes. Take them to
the packaging material collection points
designated by the local authorities.

6 / 32 EN Coffee Maker / User Manual
2 Coffee Maker
2.1 Overview
The values whch are declared n the markngs axed on your applance or the other prnted documents suppled wth t represent the values
whch were obtaned n the laboratores pursuant to the pertnent standards. These values may vary accordng to the usage of the applance and
ambent condtons.
1
2
3
4
5
6
7
8
9
10
11
12
13
14
15
16

7 / 32 EN
Coffee Maker / User Manual
2 Coffee Maker
1. Water tank cover
2. Filter basket cover
3. Filter basket
4. Ventilation slots
5. Water level indicator
6. Water tank
7. Drip-stop
8. Glass jug
9. Warming plate
10. Program button
11. Auto on button
12. Display
13. Setting button for minutes
14. Setting button for hours
15. Aroma button
16. On/Off button
Accessories
Coffee measuring spoon
2.2 Technical data
Power supply: 220-240 V~, 50/60Hz
Power: 840 - 1000 W
Max. water volume: 1.8 L
Technical and design modifications reserved.

8 / 32 EN Coffee Maker / User Manual
3 Operation
3.1 Preparation
A
WARNING: First time use: Run the
appliance at least 4 times without
adding coffee.
A
WARNING: Please follow the steps
1 - 2 and 7 - 12 in the “Brewing
Coffee” section.
1. Remove all packaging and stickers and
dispose of them according to applicable legal
regulations.
2. Before using the appliance for the first time,
clean all parts which come into contact with
water carefully. Please see full details in the
“Cleaning and Care” section.
3. Make sure that the appliance is placed in an
upright position and on a stable, flat, clean, dry,
and non-slip surface.
3.2 Brewing Coffee
1. Pull off and fill the water tank (6) with the
required amount of water, but do not fill past
the “10” mark. The brewed amount of coffee
will be 10% less than the filled water, because
it is absorbed by the coffee grounds and the
filter. For the good coffee taste it is suggested
to operate the appliance with at least 4 cups
coffee serving.
C
Use only clean, cold, and fresh
drinking water.
C
There is a drip hole on the back
of the water reservoir to prevent
exceeding the capacity of the coffee
maker. If you add too much water,
it will drip out from the back of the
appliance.
2. Close the water tank cover (1) and open the
filter basket cover (2).
3. Pull out the filter basket (3).
4. Take a suitable paper filter (1 x 4) and insert the
paper filter into the filter basket (3).
C
Use only one paper filter at each
time. Make sure that the paper filter
does not bend or fold.
5. Fill the filter with the desired amount of ground
coffee. To do this, you may use the supplied
measuring spoon.
6. Insert the filter basket (3) back into the housing.
7. Place the glass jug (8) on the warming plate (9).
A
WARNING: If the filter basket (3)
is not closed or the glass jug
(8) is
not placed accurately, the drip-stop
function will not work properly. It
could cause hot water or work hot
coffee to overflow.
8. Connect the plug to the wall socket.
9. Turn the appliance on by pushing the On/Off
button (16).
– The On/Off button (16) illuminates and the
brewing process begins.
C
The brewing process can be stopped
at any time by pushing the On/Off
button (16) again.
C
Ventilation slots allow the steam
output. Do not block these during
use.
C
The coffee machine has a stay-
warm function and can keep the
brewed coffee warm for up to
30 minutes when the machine is
switched on. In accordance with eco
design guidelines, the machine will
automatically switch itself off after
this time.

9 / 32 EN
Coffee Maker / User Manual
3 Operaton
C
The appliance is equipped with a
drip-stop (7) located underneath
the filter basket (3) and enables
you to briefly remove the glass jug
(8) to pour coffee before the water
has finished running through the
machine.
A
WARNING: Make sure to place
the glass jug (8) on the warming
plate (9) quickly (max. 30 seconds).
Otherwise the brewed coffee from
the filter could overflow. If you want
to use the glass jug for more than 30
seconds switch off the appliance.
A
WARNING: Never pull out the
filter basket (3) during the brewing
process even if no water is draining
from the filter. Extremely hot water
or coffee can spill out from the filter
basket and cause injury.
A
WARNING: If water/coffee is not
draining from the filter basket (3)
after several seconds with the
glass jug (8) properly in place (9)
immediately unplug the appliance
and wait 10 minutes before opening
and checking the filter basket (3).
A
WARNING: When the brewing
process ends and the water level
indicator (5) is empty, there will still
be hot liquid in the filter basket (3).
Wait a few minutes for the rest of
the liquid to drip into the glass jug
(8).
10.Remove the glass jug (8) from the
warmng plate (9) as soon as the brewng
process has fnshed and the glass
jug (8) s flled. The coffee s ready.
11. To turn the applance off, push the On/Off
button (16).
12.Dsconnect the applance from the wall socket.
C
If you want to continue the brewing
process, repeat the procedure from
1 to 12. Let the appliance cool down
at least 15 minutes between each
brewing process.
C
For a better aroma, use aroma
button (15) which activates a unique
brewing process that enhances the
flavour and aroma of your coffee.
To reach this rich flavour, the coffee
maker advances through several
continuous cycles. This special time-
release process saturates grounds
gradually to extract the best flavour
and aroma.
Hints and Tips
•Use softened or filtered water to prevent lime
build-up.
•Store unused coffee in a cool, dry place. After
opening a package of coffee reseal it tightly to
maintain its freshness.
•Do not reuse the coffee sediment in the filter
since this will reduce the flavour.
•Reheating coffee is not recommended as coffee
is at its peak flavour immediately after brewing.
3.3 Automatic brewing
C
In order to use the auto brew
function you must first set the clock.
10 / 32 EN Coffee Maker / User Manual
3 Operaton
3.4 Setting the clock
1. Press the settings button for hours (14) to set
the current hour.
– Press and hold the button to advance the
numbers quickly.
2. Press the settings button for minutes (13) to
set the current minute.
– Press and hold the button to advance the
numbers quickly.
3.5 Setting the auto brew
function
1. Follow the steps 1 - 8 in the “Brewing Coffee”
section.
2. Press the Program button (10) to set the desired
auto brew time.
– Program button illuminates.
3. Set the time you want the appliance to begin
brewing by using the Settings button for hours
(14) and the Settings button for minutes (13).
C
To check your auto brew start time,
simply press the Program button
(10). The set time will be displayed
for a few seconds on the display (12)
It will automatically return to current
time.
4. Press the Auto on button (11).
– The Auto on button (11) will illuminate.
5. The coffee maker will automatically begin
brewing at the preset time.
C
When the brew cycle begins, the
Auto on button (11) will turn off
and the On/Off button (16) will
illuminate to indicate the coffee
maker is in operation.
C
To shut the auto brew function off,
simply press the Auto on button (11)
again. The light will turn off.
6. Remove the glass jug (8) from the warming
plate (9), as soon as the brewing process has
finished and the glass jug (8) is filled. The
coffee is ready.
7. To turn the appliance of, push the On/Off
button (16).

11 / 32 EN
Coffee Maker / User Manual
4 Informaton
4.1 Cleaning and care
A
WARNING: Never use petrol
solvents, abrasive cleaners, metal
objects or hard brushes to clean the
appliance.
A
WARNING: Never put the appliance
or power cord in water or any other
liquid.
1. Turn the appliance off and disconnect it from
the wall socket.
2. Allow the appliance to cool down.
3. Remove the glass jug (8).
4. Open the filter basket cover (2).
5. Pull out the filter basket (3). Remove the paper
filter and dispose of it with the coffee sediment.
6. Clean the filter basket (3) by placing under
running water and using a small amount of mild
cleanser. The filter basket (3) can be cleaned
in the upper shelf of the dishwasher or under
running water.
7. Use a damp soft cloth and some mild cleanser to
clean the exterior of the appliance.
8. Insert the filter basket (3) back into the housing
and close the filter basket cover (2).
9. Place the glass jug (8) onto support for warming
plate
(9).
C
Before using the appliance after
cleaning, dry all parts carefully with
a soft cloth or paper towel.
4.2 Descaling the appliance
Descaling extends the life of your appliance.
Descale your coffee maker at least 4 times per
year. The period depends on the water hardness
in your area. The harder the water is, the more
often the appliance has to be descaled.
1. Purchase a suitable descaler from a speciality
store. Please ask naming the appliance.
2. Prior to commencing the descaling process
thoroughly read the manufacturer’s
package insert for the descaler. Should the
manufacturer’s instructions differ from
the ones listed below, then follow the
manufacturer’s instructions.
C
You can also use white vinegar
and lemon juice instead of a
commercially available descaler.
3. Fill the water tank to the 12 marking and add
descaler.
Mixing ratio: 4 parts water to 1 part descaler.
4. Turn the appliance on and allow approximately
one large coffee cup to run through the
appliance.
5. Turn the appliance off.
6. Let the mixture soak for about 15 minutes.
7. Repeat steps 4 – 6.
8. Now turn the appliance on and let the entire
mixture run through.
9. Fll the water tank wth cold, fresh drnkng
water and run all the water through.
10.Repeat step 9 four tmes.
11. Now you may brew coffee agan.

12 / 32 EN Coffee Maker / User Manual
4 Informaton
4.3 Storage
•If you do not plan to use the appliance for a long
period of time, please store it carefully. Make
sure the appliance is unplugged and completely
dry.
•Store the appliance in a cool, dry place. Make
sure the appliance is kept out of the reach of
children.
4.4 Handling and
transportation
•During handling and transportation, carry
the appliance in its original packaging. The
packaging of the appliance protects it against
physical damages.
•Do not place heavy loads on the appliance or the
packaging. The appliance may be damaged.
•Dropping the appliance will render it non-
operational or cause permanent damage.

Coffee Maker / Kasutusjuhend 13 / 32 EE
Enne antud toote kasutamist
palume see kasutusjuhend
tähelepanelikult läbi lugeda. Järgige
kõiki ohutusjuhiseid, et vältida toote
valest kasutamisest põhjustatud
kahjusid.
Kasutusjuhend tuleb alles hoida
hilisema kasutamise eesmärgil. Selle
seade edastamisel teisele kasutajale
tuleb üle anda ka kasutusjuhend.
1.1 Üldsed
ohutusjuhsed
• Antud seade on mõeldud
kasutamiseks üksnes
kodumajapidamises. See ei ole
mõeldud professionaalseks
otstarbeks.
• Seade on mõeldud üksnes isiklikuks
kasutamiseks. See ei ole mõeldud
äriotstarbeliseks:
- kauplusepersonali köökides,
kontorites või muudes
töökohtades;
-põllumajandusettevõtetes;
-hotellide, motellide või muude
majutuskohtade klientide poolt;
„Bed and Breakfast” tüüpi
majutuskohtades kasutamiseks.
• Ärge kasutage seadet vannitoas.
• Kontrollige, kas andmesildile
märgitud pinge vastab Teie koduse
võrgu pingele. Selle seade ainsaks
toitevõrgust väljavõtmise viisiks on
selle eemaldamine seinakontaktist.
• Täiendava kaitse tagab
seadme ühendamine
rikkevoolukaitselülitiga mitte
suurema rakendusvooluga kui 30
mA. Kasutage elektriku abi.
• Seadet, toitejuhet ja pistikut ei tohi
kasta vette ega muusse vedelikku.
Ärge peske seda voolava vee all
ja ärge peske mistahes seadme
osa nõudepesumasinas. Ainult
filtrihoidjat võib pesta turvaliselt
nõudepesumasina ülemisel restil
või vee ja nõudepesuvahendiga.
• Pärast seadme kasutamist, enne
selle puhastamist, toast lahkumist
võiavariikorral eemaldagetoitejuhe
seinakontaktist. Ärge eemaldage
pistikut kontaktist toitejuhtmest
tõmmates.
• Toitejuhtme vigastuste vältimiseks
tuleb takistada selle pigistamist,
väänamist või teravate servade
vastu hõõrdumist.
• Hoidke toitejuhe eemal kuumadest
pindadest ja lahtistest leekidest.
1Tähtsad ohutus- ja keskkonnakatse
juhsed

Coffee Maker / Kasutusjuhend
14 / 32 EE
• Ärge kasutage antud seadmega
pikendusjuhtmeid.
• Seadet ei tohi kasutada, kui
toitejuhe või seade on kahjustada
saanud.
• Firma BEKO kodumasinad
täidavad kehtivaid ohutusalaseid
standardeid, seega kui seade või
toitejuhe on kahjustada saanud,
tuleb nad ohuriskide vältimiseks
parandada või välja vahetada
volitatud teeninduses. Vale või
ebaprofessionaalne parandus
võib olla ohtlik ja tekitada seadme
kasutajatele ohuriske.
• Mitte mingil juhul ei tohi seadet
lahti võtta. Seadmele antud garantii
ei hõlma valest kasutamisest
põhjustatud kahjustusi.
• Seadet tuleb kaitsta laste eest.
• Seda seadet võivad kasutada
8-aastased ja vanemad lapsed ja
piiratud füüsiliste, sensoorsete
või vaimsete võimetega isikud
või vastavate kogemuste ja
teadmisteta isikud juhul, kui nad
tegutsevad järelvalve all või neid
on juhendatud seadme ohutu
kasutamise osas ja nad saavad aru
sellega kaasnevatest ohtudest.
1Tähtsad ohutus- ja keskkonnakatse
juhsed
Lapsed ei tohi selle seadmega
mängida. 8-aastased ja vanemad
lapsed ei tohi seadet puhastada ja
hooldada ilma vastava järelevalveta.
• Lapsed ei tohi seadet puhastada ja
hooldada ilma vastava järelevalveta.
• Enne antud seadme
esmakasutamist tuleb puhastada
hoolikalt kõiki seadme osi, mis
puutuvad kokku vee või kohviga.
Üksikasjad leiate punktist
„Puhastamine ja hooldus”.
• Enne kohvimasina ühendamist
toitevõrku ja kõikide osade
paigaldamist tuleb seda ja kõiki
tarvikuid kuivatada.
• Ärge kasutage seadet ega asetage
seda kuumadele pindadele, nn
gaasipõletitele, keeduplaatidele
või kuumale ahjule ega nende
lähedusse.
• Ärge kasutage seadet
mitteotstarbekohaselt.
Filterkohvimasin on mõeldud
kohvi keetmiseks. Ärge kasutage
seda mistahes muude vedelike või
konservides, purkides ja pudelites
toiduainete soojendamiseks.
• Ärge kasutage seadet kergesti
süttivate või põlevate esemete või
materjalide läheduses.

Coffee Maker / Kasutusjuhend 15 / 32 EE
• Kohvimasinaga võib kasutada
üksnes sellega kompektis tarnitud
osi.
• Ärge kasutage seadet märgade või
niiskete kätega.
• Seadet tuleb alati kasutada
stabiilsel, ühetasasel, puhtal ja
libisemiskindlal pinnal.
• Hoolitsege selle eest, et
seadme kasutamisel ajal ei
juhtuks toitejuhtme juhuslikku
väljatõmbamist või sellele
komistamist.
• Seade tuleb paigutada nii, et
võimaldada sellele juurdepääsu.
• Põletuste vältimiseks tuleb vältida
kokkupuudet kuumade pindadega,
hoides termokannu sangast.
Iga kasutamise ajal termokann
kuumeneb.
• Ärge liigutage seadet, kui thermo
kannus on veel kuum vedelik või ku
seade on veel kuum.
• Kui vesi ei välju filtriga korvist, võtke
seade toitevõrgust välja ja jätke 10
minutiks jahtuma, seejärel avage
filtri kaas ja kontrollige.
• Kohvi tegemise ajal ärge avage
kaant ega filtriga korvi.
• Keedukannu ei tohi täita üle
maksimaalse taseme näidu. Juhul,
kuitäidate kannu üle maksimaalse
taseme, voolab vesi välja
turvaväljavooluava kaudu.
• Ärge kasutage seadet, kui kohvi
tegemine või soojendamine ei ole
vajalik.
• Masin tuleb täita üksnes jaheda ja
värske veega.
• Seadet ei tohi kasutada
välise aegreleega või eraldi
kaugjuhtimissüsteemiga.
• Kasutage termokannu üksnes
kohvimasinaga.
• Ärge kasutage kohvimasinat ilma
veeta.
• Ärge kasutage pragunenud või
lõdvenenud või vigastatud sangaga
termokannu.
1Tähtsad ohutus- ja keskkonnakatse
juhsed

Coffee Maker / Kasutusjuhend
16 / 32 EE
1.2 Vastavus WEEE
drektvle ja
kasutatud seadmete
kõrvaldamne
Seadeei sisaldakahjulikkeegakeelatud
materjale, mida on mainitud
keskkonna- ja linnaplaneemise
ministeeriumi poolt välja antud
Määruses kasutatud elektri- ja
elektroonikaseadmete järelevalve kohta.
Toode on vastavuses WEEE direktiiviga. Seade
on valmistatud kvaliteetsetest osadest ja
materjalidest, mida on võimalik ringlusse võtta ja
kasutada teiseste materjalidena. Seoses sellega
ei tohi seadet pärast kasutamise lõpetamist
ära visata koos olmeprügiga. Seade tuleb anda
üle taaskasutamiseks kogutavate elektri- ja
elektroonikaseadmete kogumispunkti. Teavet
vastavate kogumispunktide kohta saab kohalikelt
omavalitsustelt. Teiseste toorainete saamine
kasutatud toodetest aitab kaitsta keskkonda.
1.3 Teave pakend
kohta
Seadme pakend on valmistatud
taaskasutatavatest materjalidest.
Pakend tuleb kõrvaldada vastavalt
kohalikele asjakohastele
keskkonnakaitse eeskirjadele nii, et kõik materjalid
võetaks uuesti ringlusse.
1Tähtsad ohutus- ja keskkonnakatse
juhsed

Coffee Maker / Kasutusjuhend 17 / 32 EE
2 Coffee Maker
2.1 Üldine kirjeldus
Antud seadmele võ sellega koos tarntud trüktud materjaldele märgtud väärtused on saadud labortngmustes ja kooskõlas kehtvate standar-
dtega. Väärtused võvad erneda sõltuvalt seadme kasutamsest ja selle ümbruses valtsevatest tngmustest.
1
2
3
4
5
6
7
8
9
10
11
12
13
14
15
16

Coffee Maker / Kasutusjuhenda
18 / 32 EE
1. Veemahuti kaas
2. Filtrihoidja kaas
3. Filtrihoidja
4. Ventilatsiooniavad
5. Veetaseme näidik
6. Veemahuti
7. Tilgalukk
8. Klaaskann
9. Soojendusplaat
10. Seadistusnupp
11. Automaatse käivitumiase Auto on nup
12. Displei
13. Minutite seadistamise nupp
14. Tundide seadistamise nupp
15. Nupp Aroma
16. Toitelüliti
Tarvikud
Mõõte-kohvilusikas
Tehnilised andmed
Seade on vastavuses järgmiste EL direktiividega:
2004/108/EÜ, 2006/95/EÜ,
2009/125/EÜ ja 2011/65/EL.
Pinge: 220-240 V~, 50 /60Hz
Võimsus: 840 - 1000 W
Max veekogus: 1,8 l
Tootja jätab endale õiguse konstruktsiooni ja
tehniliste andmete muutmiseks.
2 Coffee Maker

Coffee Maker / Kasutusjuhend 19 / 32 EE
3 Kasutaminene
3.1 Ettevalmistamine
A
HOIATUS: Esmakasutamine:
Käivitage seade vähemalt 4 korda
ilma kohvi lisamata.
A
HOIATUS: Toimige vastavalt
sammudele 1 - 2 ja 7 - 12 punktist
„Kohvi valmistamine”.
1. Eemaldage pakend ja kleebised ning visake
need ära vastavalt kehtivatele õigusaktidele.
2. Enne antud seadme esmakasutamist tuleb
puhastada hoolikalt kõiki seadme osi, mis
puutuvad kokku veega. Üksikasjad leiate
punktist „Puhastamine ja hooldus“.
3. Kontrollige, kas seade seiab püstiasendis
stabiilsel, ühetasasel, puhtal ja libisemiskindlal
pinnal.
3.2 Kohvi valmistamine
1. Võtke välja veemahuti (6) ja täitke see piisavas
koguses veega, ületamata siiski sümbolit „12”.
Valmistatud kohvi kogus on 10% väiksem,
kui sissevalatud vee hulk, kuna see imendub
jahvatatud kohvisse ja filtrisse. Kannu skaala
vastab kohvitassidele, nt 4 = 4 tassi. Parima
kohvisaate,kuivalmistateühekorragavähemalt
4 portsjonit.
C
Kasutage ainult puhast, jahedat ja
värsket joogivett.
C
Veemahuti taga paikneb
väljavooluava, mis aitab vältida
kohvimasina mahu ületamist. Kui
valate mahutisse liiga palju vett,
voolab see välja seadme tagant.
2. Sulgege veemahuti kaas (1) ja avage filtrihoidja
kaas (2).
3. Tõmmake välja filtrihoidja (3).
4. Pange sobiv paberfilter (1 x 4) filtrihoidjasse (3).
C
Pange ühekorraga hoidjasse ainult
üks filter. Veenduge, et filter ei oleks
kortsunud või kokku
5. Täitke filter vajalikus koguses jahvatatud
kohviga. Selleks võite kasutada masinaga
komplektis tarnitud mõõtelusikat.
6. Paigaldage filtriga filtrihoidja (3) korpusesse
tagasi ja sulgege kaas (2).
7. Asetage klaaskann (8) soojendusplaadile (9).
A
HOIATUS: Tilgaluku funktsioon ei
toimi õigesti, kui (3) filtrihoidja ei
ole suletud või kui klaaskann (8) ei
ole õigesti paigaldatud. See võib
põhjustada kuuma vee või kohvi
väljavalgumist.
1. Pange pistik seinakontakti.
2. Käivitage kohvimasin, vajutades toitenupule (16).
– Süttib toitelüliti märgutuli (16) ja algab kohvi
valmistamine.
C
Kohvi valmistamise võib lõpetada
suvalisel hetkel, vajutades
toitenupule (16).
C
Ventilatsiooniavad võimaldavad auru
väljapääsu. Kohvimasina kasutamisel
ärge katke ventilatsiooniavasid kinni
mistahes esemega.
C
Sellel kohvimasinal on “stay-warm” -
temperatuurisäilitamisefunktsioon,
mis võimadalb valmistatud kohvi
temperatuuri hoidmist kuni 30
minutit, kui kohvimasin on sisse
lülitatud. Lähtuvalt ökodisaini
põhimõtetest kohvimasin lülitub
välja automaatselt pärast selle aja
möödumist.

20 / 32 EN Coffee Maker / User Manual
3 Kasutaminene
C
Kohvimasin on varustatud tilgaluku
funktsiooniga, (7) mis paikneb
filtrihoidja all (3), mis võimaldab
kannu (8) kiiret välja võtmist, et
valada kohvi välja enne, kui vesi
seadmes lõpetab voolamise.
A
HOIATUS: Kann (8) tuleb kiiresti
tagasi panna alusele (9) (max 30
sekundi pärast). Vastasel korral
võib valmistatav kohvi filtrist välja
voolata. Kui kann on seadmest
eemal kauem kui 30 sekundit, võib
seade välja lülituda.
A
HOIATUS: Kohvi valmistamise
ajal ärge avage filtrihoidjat (3),
isegi kui filtrist ei tilgu enam vett.
Filtrihoidjast võib välja voolata väga
kuuma vett või kohvi ja tekitada
põletusi.
A
HOIATUS: Kui pärast paari sekundit
ei tilgu filtrihoidjast (3) vesi/
kohvi, kui kann (8) on oma kohal,
(9) võtke toitejuhtme pistik kohe
seinakontaktist välja ja oodake
10 sekundit, enne kui avate ja
kontrollite filtrihoidjat (3).
A
HOIATUS: Pärast kohvi valmistamist
ja juhul, kui näidikuga 12 ava (5) on
tühi, on filtrihoidjas edasi kuum
vedelik (3). Oodake, kuni kogu
vedelik on voolanud klaaskannu (8).
3. Võtke klaaskann (8) soojendusplaadlt (9),
ku kohv valmstamne lõppeb ja kann (8) on
tätunud. Kohv on valms.
4. Kohvmasna välja lültamseks vajutage ssse/
välja lül. nupule (16).
5. Võtke totepstk senakontaktst.
C
Kui tahate keetmist jätkata,
korrake samme alates 1 kuni 12.
Keetmiskordade vahepeal laske
kohvimasinal vähemalt 15 minutit
jahtuda
C
Lõhna lisamiseks kasutage aroma
nuppu (15), mis käivitab unikaalse
maitset ja lõhna tugevdava
valmistamisprotsessi. Rikkama
maitse saavutamiseks läbib
kohvimasin mitu erinevat tsüklit. See
spetsiaalne aeglase vabastamise
protsess immutab pikkamööda
jahvatatud kohvi, tuues esile selle
parima maitse ja lõhna.i aromat.
Praktilised nõuanded ja juhised
•Katlakivi sadestumise vältimiseks kasutage
töödeldud või filtreeritud vett.
•Hoiustage kohvi tagavara jahedas ja kuivas
kohas. Pärast kohvipaki avamist sulgege see
tihedalt, et vältida kohvi kokkupuudet õhuga.
•Kasutage kohvi ainult üks kord, sest see kaotab
hiljem oma maitse.
•Kohvi ülessoojendamine ei ole soovitatav, kuna
see maitseb paremini kohe pärast tõmbamist.
3.3 Automaatne valmistamine
C
Selleks, et kasutada automaatse
kohvi valmistamise funktsiooni,
tuleb kõigepealt seadistada kell.
3.4 Kella seadistamine
1. Jooksva tunni seadistamiseks vajutage tunni
seadistamise nupule (14).
– Seadistamise kiirendamiseks vajutage
nupule ja hoidke seda all.
2. Jooksvate minutite seadistamiseks vajutage
minutite seadistamise nupule (13).
– Seadistamise kiirendamiseks vajutage
nupule ja hoidke seda all.
Other manuals for CFD6151W
2
Table of contents
Languages:
Other Beko Coffee Maker manuals

Beko
Beko CEP5152B User manual

Beko
Beko 01M-8839933200-4520-06 User manual

Beko
Beko CEG5331X User manual

Beko
Beko 01M-8818611200-5320-01 User manual

Beko
Beko BKK 3008 KM User manual

Beko
Beko CFM6350I User manual

Beko
Beko CFM6151W User manual

Beko
Beko CEG5311X User manual

Beko
Beko BKK 2700 User manual

Beko
Beko BKK 2300 User manual