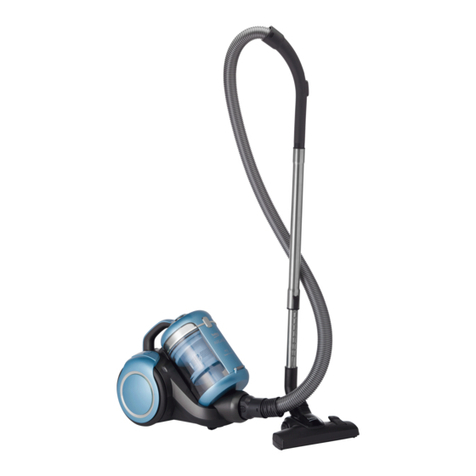
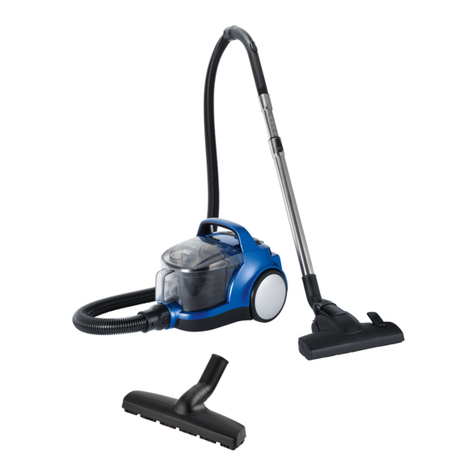
Beko BKS 9220 T User manual

BKS 9220 T
Vacuum Cleaner
User Manual
EN HR BG BS
MK SQ SR RO
01M-8933733200-0817-03

Please read this user manual first!
Dear Customer,
Thank you for prefering a Beko product. We hope that you get the best results from
your product which has been manufactured with high quality and state-of-the-art
technology. Therefore, please read this entire user manual and all other accompanying
documents carefully before using the product and keep it as a reference for future use.
If you handover the product to someone else, give the user manual as well. Follow all
warnings and information in the user manual.
Explanation of symbols
Throughout this user manual the following symbols are used:
C
Important information or useful hints
about usage.
A
Warning for hazardous situations with
regard to life and property.
Protection class for electric shock.
This product has been produced in environmentally friendly, modern facilities.
Does not contain PCB.
Made in P.R.C.

Vacuum cleaner / User manual 3 / 81 EN
CONTENTS
1 Important safety and
envronmental nstructons 4-6
1.1 General safety . . . . . . . . . . . . . . . . . . . . . . . . . . . . . . 4
1.2 Complance wth the WEEE Drectve and
Dsposng of the Waste Product . . . . . . . . . . . . . . . 6
1.3 Complance wth RoHS Drectve . . . . . . . . . . . 6
1.4 Package nformaton . . . . . . . . . . . . . . . . . . . . . . . 6
2 Your vacuum cleaner 7
2.1 Overvew . . . . . . . . . . . . . . . . . . . . . . . . . . . . . . . . . . . .7
2.2 Techncal data. . . . . . . . . . . . . . . . . . . . . . . . . . . . . . .7
3 Operatng your applance 8-10
3.1 Usng the extenson ppe. . . . . . . . . . . . . . . . . . . 9
3.2 Usng the parquetry and carpet brush . . . . . 9
3.3 Usng the Turbo Brush . . . . . . . . . . . . . . . . . . . . 10
3.3.1 Turnng off and storng the
vacuum cleaner . . . . . . . . . . . . . . . . . . . . . . . . . . . . . . . 10
4Cleanng and mantenance 11
4.1 Emptyng and cleanng the
water contaner. . . . . . . . . . . . . . . . . . . . . . . . . . . . . . . 11
4.2 Storage. . . . . . . . . . . . . . . . . . . . . . . . . . . . . . . . . . . . 11

4 / 81 EN Vacuum cleaner / User manual
This section contains safety
instructions that will help
protect from risk of personal
injury or property damage.
Failure to follow these
instructions invalidates the
granted warranty.
1.1 General safety
•You may only use your
vacuum cleaner f the voltage
ndcated on the label under
your vacuum cleaner comples
wth the supply voltage.
Otherwse, the motor may be
damaged.
•Never leave your vacuum
cleaner plugged n. Unplug
your applance when not
n use or when servce s
requred.
•Do not use your vacuum
cleaner on wet floors and
outdoors.
•Ths applance can be used by
chldren aged from 8 years
and above and persons wth
reduced physcal, sensory
or mental capabltes or
lack of experence and
knowledge f they have
been gven supervson or
nstructon concernng use
of the applance n a safe
way and understand the
hazards nvolved. Chldren
shall not play wth the
applance. Cleanng and user
mantenance shall not be
made by chldren wthout
supervson.
•If the supply cable or plug s
damaged, or f your applance
doesnotworkduetodroppng,
damage, exposng to outer
condtons or wettng, refer to
the authorzed servces.
•Do not pull the applance
from the supply cable. Keep
the supply cable away from
sharp edges, hot surfaces and
pay attenton not to pnch t
between door frames.
1Important safety and envronmental nstructons

Vacuum cleaner / User manual 5 / 81 EN
•Do not unplug by pullng the
cable. Always hold the plug to
take t out from the socket.
•Do not touch the plug or the
applance wth wet hands.
•Do not dropanythng on to the
exposed parts of your vacuum
cleaner. Pay attenton that
the ar ducts and openngs are
always open.
•Keep your hands, har and
clothesawayfromtherunnng
parts of the applance.
•Do not use your vacuum
cleaner to clean combustble
substances such as lt
cgarettes, matches or hot
ash.
•Always turn off all control
buttons on your vacuum
cleaner pror to unpluggng t.
•Do not absorb combustble
and explosve lquds wth
your vacuum cleaner. Do not
use your vacuum cleaner
at areas where such lquds
exst.
•Always unplug the applance
pror to attachng or replacng
the suppled accessores.
•Do not operate your vacuum
cleaner n a vertcal poston
to the floor.
•Do not use your vacuum
cleaner when ts flters are
not attached and wthout
puttng water n t.
•Thngs to be done for energy
savng.
•If your vacuum cleaner s
featured wth absorpton
power adjustment, you can
have the applance draw less
energy.
•Cleanng your product’s flters
frequently or replacng the
same wll both ncrease your
product’s performance and
also decrease cleanng tme
whch wll provde energy
savng.
1Important safety and envronmental nstructons

6 / 81 EN Vacuum cleaner / User manual
1Important safety and envronmental nstructons
1.2 Complance wth the WEEE
Drectve and Dsposng of the
Waste Product
This product complies with EU WEEE Directive
(2012/19/EU). This product bears a classification
symbol for waste electrical and electronic
equipment (WEEE).
This product has been manufactured
with high quality parts and materials
which can be reused and are suitable
for recycling. Do not dispose of the
waste product with normal domestic
and other wastes at the end of its service life. Take
it to the collection center for the recycling of
electricalandelectronicequipment.Please consult
your local authorities to learn about these
collection centers.
1.3 Complance wth RoHS
Drectve
The product you have purchased complies with EU
RoHS Directive (2011/65/EU). It does not contain
harmful and prohibited materials specified in the
Directive.
1.4 Package nformaton
Packaging materials of the product are
manufactured from recyclable materials
in accordance with our National
Environment Regulations. Do not
dispose of the packaging materials together with
the domestic or other wastes. Take them to the
packaging material collection points designated by
the local authorities.

Vacuum cleaner / User manual 7 / 81 EN
The values whch are declared n the markngs affxed on your product or the other prnted documents suppled wth t represent the values whch
were obtaned n the laboratores pursuant to the pertnent standards. These values may vary accordng to the usage of the applance and ambent
condtons.
2Your vacuum cleaner
1. Plug and supply cable
2. Carpet brush holder
3. Cable rewnd swtch
4. On/Off button
5. Absorpton power adjustment button
6. Carrage handle
7. Water contaner remove button
8. Water contaner carrage handle
9. Water contaner
10. Water contaner flter assembly
11. Applance sucton nozzle
12. Flter assembly openng buttons
13. Rear Wheel
14. Hose cap
15. Flexble hose
16. Handle
17. Mechancal adjustment slde
18. Telescopc extenson ppe
19. Telescopc adjustment latch
20. Carpet brush parkng hook
21. Carpet brush adjustment latch
22. Parquetry carpet brush
23. Wde-mouth lead
24. Narrow-mouth lead
2.2 Techncal data
Power supply :
220-240 V~, 50 Hz
Power max :
2000 W
Net weight :
5,7 kg
Rghts to make techncal and desgn changes are
reserved.
13 9 24 23
20 22
21
1918
1716
15
11
10
12
14847653
21
2.1 Overvew

8 / 81 EN Vacuum cleaner / User manual
3Operatng your applance
Intended use
The applance was desgned to be used n houses,
and s not ft for ndustral use.
Press lock button to pull out the water contaner
(Fgure 1) from the applance by holdng from
handle.
Press lock button Handle
Fgure 1
Remove the flter unt beng held horzontally by
means of two snap-on buttons from the water
contaner (Fgure 2).
Snap-on lock button
MAX
SU SEVIYESI
Fgure 2
Fll the water contaner wth normal tap water up
to the MAX level mark as shown n Fgure 2.
Requred water amount s 600 ml. Install the flter
unt back on the water contaner payng attenton
to algnng t properly. Install the water contaner
on the applance agan.
Pull out the plug and cable at the back of the
product and plug t nto the socket. Stop pullng
when the yellow mark on the supply cable comes
out, a red mark wll come after the yellow mark;
never pull further than the red mark. Otherwse,
you may damage your product’s cable wnder.
Attach the hose assembly suppled wth your
product on to your vacuum cleaner. To start the
vacuum cleaner, frst press the On/Off button.
(Fgure 3).
Fgure 3
Torewnd the cableafter vacuumcleanngprocess
s completed press the cable wndng button on
your applance. (Fgure 4) Do not step on the cable
wndng button. Mechansm may be damaged f t
s pressed forcefully by foot.
Fgure 4
You may adjust the sucton power of your product
whle carryng out vacuum cleanng process by
means of the sucton adjustment button located
on the body. (Fgure 5).
Fgure 5

Vacuum cleaner / User manual 9 / 81 EN
3Operatng your applance
You can attach the hose adaptor to your vacuum
cleaner by pushng fast the tabs on the hose
adaptor n the drecton of the arrow wthout
forcng as shown n Pcture 6.
Figure 6
Fgure 6
Your product’s hose s featured to rotate 360°.
Thus, t provdes an ergonomc usage durng
cleanng. (Fgure 7)
fiekil 7
Fgure 7
Make sure that the tabs on the hose adaptor n
Pcture 7 are securely ftted n ther places.
To remove the hose from the vacuum cleaner,
press on the tabs on the hose adaptor and pull t
backwards.
You can carry your product by usng the carrage
handle on top of t. (Fgure 8).
Figure 8
Fgure 8
3.1 Usng the extenson ppe
Your product’s extenson ppe has a telescopc
characterstc. To extend the ppe, press the latch
shown n the drecton of the arrow and pull from
the ppe end. You can adjust the length as you
wsh. (Fgure 9).
Latch
Figure 9
Fgure 9
Figure 10
Narrow-mouth lead
It can be used for unreachable
narrow openngs on armchars and
furnture. (Fgure 10).
Figure 11
Wide-mouth lead
It is used to clean floors, steps, in-
side of cars, sofas, armchairs, etc..
(Figure 11)
3.2 Usng the parquetry and
carpet brush
There s an adjustment mechansm at the sde of
the parquet and carpet brush. The brush s algned
to the surface to be cleaned by means of the
adjustment mechansm. (Fgure 13)
Figure 13

10 / 81 EN Vacuum cleaner / User manual
a)
Use your brush n normal poston (brush har n
hdden poston) for carpets and rugs
b)
Whle cleanng hard floors such as parquets,
marley floors, lnoleum and flat surfaces such
as walls wthout scratchng them, change the
poston of the adjustment mechansm to clean
them wth brstle brushes.
3.3 Usng the Turbo Brush
It s partcularly effcent n collectng the pet
hars. It cleans the carpets n depth. When vacuum
cleanng the frnges of the carpet, use the brush
by pullng t backwards n the drecton of the
arrow.
Clean threads and har entangled on the brush by
cuttng them wth a par of scssors.
3Operatng your applance
3.3.1 Turnng off and storng the
vacuum cleaner
Press the On/Off button on the body to stop
operaton of the vacuum cleaner. Do not
unplug the applance at once to stop the
product operaton; frst press the On/Off
button and stop the operaton of the applance.
(Fgure 3)
Moreover, you can store your applance
horzontally by attachng the parkng part
on the back of your product’s brush to the
parkng slot at the back of the product.
(Fgure 14)
Figure 14

Vacuum cleaner / User manual 11 / 81 EN
Swtch off and unplug the applance ,before
cleanng t.
AWARNING:
Never use gasolne,
solvent, abrasve cleanng agents,
metal objects or hard brushes to
clean the applance.
4.1 Emptyng and cleanng the
water contaner
Turn off your applance by the on/off button and
unplug t. Remove the water contaner by holdng
from the handle (Fgure 2). Remove the flter unt
and turn t upsde down so that the opened part
ponts downwards, and empty t (Fgure 15).
Fgure 15
Flter unt may be detached from the contaner
(Fgure 16) and washed n the water.
Snap-on lock button
Fgure 16
4Cleanng and mantenance
HEPA flter and sponge flters may be removed
from the applance and washed (Fgure 17 and
Fgure 18).
Fgure 17
Fgure 18
Furthermore,theexhaustspongemustbewashed
clean every 6 months by openng the exhaust
flter cover at the rear sde of the applance.
If you wsh to carry on vacuum cleanng, fll wth
water up to the relevant level and wat untl the
flter unt and the HEPA flter get dry before
replacng them back on the applance. Place the
related parts nto the flter cage and re-attach the
flter unt n the applance.
Now, the applance s ready to be stored.
C
Water n the contaner does not
damage the applance; however,
t s recommended that you empty
the applance before storng t. One
of the greatest advantages of ths
applance s that, contrary to the
vacuum cleaners that have to be
stored wth the dust n ther bags, t
can be stored as cleaned.
4.2 Storage
•If you do not ntend to use the applance for a
long tme, store t carefully.
•Pull the applance’s plug out.
•Keep the applance out of the reach of chldren.

Najprije pročitajte ovaj korisnički priručnik!
Poštovani kupci,
hvala što ste odabrali proizvod tvrtke Beko. Nadamo se da ćete dobiti najbolje rezultate
od vašeg proizvoda koji je proizveden s pomoću kvalitetne i moderne tehnologije. Zbog
toga prije uporabe proizvoda pažljivo pročitajte korisnički priručnik i druge popratne
dokumente i čuvajte ih kao referencu za buduću uporabu. Ako predajete proizvod
nekome drugome, proslijedite toj osobi i korisnički priručnik. Slijedite sva upozorenja i
informacije u korisničkom priručniku.
Značenje simbola
Sljedeći se simboli upotrebljavaju u raznim dijelovima ovog priručnika:
C
Važne nformacje korsn savjet o
uporab.
A
Upozorenja o opasnm stuacjama
vezanm za sgurnost žvota movne.
Vrsta zaštite za strujnog udara.
Ovaj je prozvod prozveden u najmodernjm postrojenjma na ekološk neškodljv načn.
Ne sadrž PCB.
Zemlja porjekla: P.R.C.

Usisavač / Ručno 13 / 81 HR
SADRŽAJ
1 Važne upute o sgurnost
zaštt okolša 14-16
1.1 Općenta sgurnost . . . . . . . . . . . . . . . . . . . . . . . . 14
1.2 Usklađenost s Drektvom o elektrčnom
elektrončkom opremom (WEEE) zbrnjavanju
otpada . . . . . . . . . . . . . . . . . . . . . . . . . . . . . . . . . . . . . . . . 16
1.3 Usklađenost s Drektvom o zabran
uporabe određenh opasnh tvar u elektrčnoj
elektrončkoj oprem (RoHS) . . . . . . . . . . . . . . . . . . 16
1.4 Informacje o pakranju . . . . . . . . . . . . . . . . . . . 16
2 Vaš ussvač 17
2.1 Pregled . . . . . . . . . . . . . . . . . . . . . . . . . . . . . . . . . . . . 17
2.2 Tehnčk podac. . . . . . . . . . . . . . . . . . . . . . . . . . . . 17
3 Rad s uređajem 18-20
3.1 Uporaba produžne cjev. . . . . . . . . . . . . . . . . . . 19
3.2 Uporaba četke za parkete tephe . . . . . . . . 19
3.3 Uporaba turbo četke . . . . . . . . . . . . . . . . . . . . . . 20
3.3.1 Isključvanje spremanje ussavača. . . . . . 20
4Održavanje čšćenje 21
4.1 Pražnjenje čšćenje spremnka za vodu . . 21

14 / 81 HR Usisavač / Ručno
Ovaj do sadrž upute o sgurnost
koje će vam pomoć u zaštt od
tjelesnh ozljeda l materjalne
štete.
Nepoštvanje ovh uputa
ponštava odobreno jamstvo.
1.1 Općenta
sgurnost
•Ovaj uređaj u skladu je s
međunarodnm sgurnosnm
standardma.
•Smjete korstt ussavač
samo ako napon označen
na naljepnc spod vašeg
ussavača odgovara naponu
napajanja. Inače se motor
može oštett.
•Nkada ne ostavljate ussavač
uključen. Isključte uređaj kad
se ne korst l kad je potreban
servs.
•Ne korstte ussavač na
mokrm podovma van.
•Ovaj uređaj smju korstt
djeca starja od 8 godna
osobe smanjenh fzčkh,
osjetlnh l mentalnh
sposobnost te osobe bez
skustva znanja, ako su pod
nadzorom l su m pružene
upute za sgurno rukovanje
uređajem te razumju
uključene rzke. Djeca se
ne smju grat s uređajem.
Čšćenje održavanje ne smju
provodt djeca bez nadzora..
•Ako su kabel napajanja l
utkač oštećen, l ako Vaš
uređaj ne rad zbog pada,
oštećenja, zlaganja vanjskm
uvjetma l je navlažen,
obratte se ovlaštenm
servsma.
•Ne povlačte uređaj za kabel
napajanja. Držte kabel
napajanja podalje od oštrh
rubova, toplh površna
pazte da ne zahvatte kabel
zmeđu okvra vrata.
1Važne upute o sgurnost zaštt okolša

Usisavač / Ručno 15 / 81 HR
•Nemojte sključvat tako da
povlačte za kabel. Uvjek
držte za utkač da ga zvadte
z utčnce.
•Ne dodrujte utkač l uređaj
mokrm rukama.
•Pazte da Vam nšta ne
padne na zložene djelove
vašeg ussavača. Pazte da su
rešetke otvor za zrak uvjek
otvoren.
•Držte ruke, kosu odjeću
podalje od pomčnh djelova
uređaja.
•Ne korstte ussavač za
čšćenje zapaljvh predmeta
kao što su cgarete, šbce l
vruć pepeo.
•Uvjek sključujte sve
kontrolne tpke na ussavaču
prje nego ga sključte s
napajanja.
•Nemojte ussavat zapaljve
eksplozvne tekućne
ussavačem. Ne korstte
ussavač na mjestma gdje
postoje takve tekućne.
•Uvjek sključte uređaj
prje stavljanja l zamjene
dostavljenh dodataka.
•Ne uključujte ussavač kad
stoj vertkalno prema podu.
•Ne korstte ussavač kad fltr
nsu spojen ako ne stavte
vodu u njega.
•Što treba uradt za uštedu
energje.
•Ako je vaš ussavač opremljen
mogućnošću podešavanja
snage ussavanja, ussavač
može trošt manje energje.
•Redovtm čšćenje fltara
vašeg prozvoda l njhovom
zamjenom ćete povećat
učnkovtost vašeg uređaja
smanjt vrjeme čšćenja, što
će omogućt uštedu energje.
1Važne upute o sgurnost zaštt okolša

16 / 81 HR Usisavač / Ručno
1.2 Usklađenost s Drektvom
o elektrčnom elektrončkom
opremom (WEEE)
zbrnjavanju otpada
Ovaj proizvod usklađen je s EU Direktivom WEEE
(2012/19/EU). Ovaj proizvod nosi klasifikacijsku
oznaku za električni i elektronski otpad (WEEE).
Ovaj je proizvod proizveden s
visokokvalitetnim dijelovima i
materijalima koji se mogu ponovno
upotrijebiti i prikladni su za reciklažu. Ne
odlažite otpadne uređaje s normalnim
otpadom iz kućanstva i drugim otpadom na kraju
servisnog vijeka. Odnesite ga u sabirni centar za
recikliranje električne i elektroničke opreme.
Obratite se lokalnim vlastima da biste saznali više
informacija o sabirnim centrima.
1.3 Usklađenost s Drektvom
o zabran uporabe određenh
opasnh tvar u elektrčnoj
elektrončkoj oprem (RoHS)
Proizvod koji ste kupili usklađen je s EU Direktivom
RoHs (2011/65/EU). Ne sadrži štetne i zabranjene
materijale navedene u Direktivi.
1.4 Informacje o pakranju
Ambalaža proizvoda izrađena je od
materijala koji se mogu reciklirati u
skladu s nacionalnim zakonodavstvom.
Nemojte odlagati ambalažu zajedno s
kućanskim ili ostalim otpadom. Odnesite ih na
odlagališta za ambalažu koja je odredilo lokalno
zakonodavstvo.
1Važne upute o sgurnost zaštt okolša

Usisavač / Ručno 17 / 81 HR
Vrjednost skazane na oznakama prčvršćenm na uređaju l drugm spsanm dokumentma sporučenm s uređajem predstavljaju vrjednost
dobvene u laboratorjma u skladu s postojećm standardma. Te se vrjednost mogu razlkovat s obzrom na uporabu prozvoda uvjete okolne.
2Vaš ussvač
1. Utkač kabela napajanja
2. Držač četke za tephe
3. Sklopka za namatanje kabela
4. Tpka za uključvanje/sključvanje
5. Tpka za podešavanje apsorpcje
6. Ručka za nošenje
7. Tpka za uklanjanje spremnka za vodu
8. Ručka za nošenje spremnka za vodu
9. Spremnk za vodu
10. Sklop fltra spremnka za vodu
11. Mlaznca za ussavanje uređaja
12. Tpke za otvaranje sklopa fltra
13. Stražnj kotač
14. Čep crjeva
15. Fleksblno crjevo
16. Ručka
17. Klzna tpka za mehančko podešavanje
18. Teleskopska produžna cjev
19. Poluga za teleskopsko podešavanje
20. Kuka za parkranje četke za teph
21. Polugca za podešavanje četke za teph
22. Četka za teph parket
23. Vodlca sa šrokm otvorom
24. Vodlca s uskm otvorom
2.2 Tehnčk podac
Power supply :
220-240 V~, 50 Hz
Maksimalna snaga :
2000 W
Neto masa :
5,7 kg
Prdržavamo pravo na tehnčke promjene
promjene dzajna.
13 9 24 23
20 22
21
1918
1716
15
11
10
12
14847653
21
2.1 Pregled

18 / 81 HR Usisavač / Ručno
3Rad s uređajem
Prtsnte tpku za zaključavanje da zvadte
spremnk za vodu (Slka 1) z uređaja tako da ga
držte za ručku.
Press lock button Handle
Slika 1
Izvadte z spremnka za vodu fltar koj se drž
horzontalno pomoću dvje prčvrsne tpke (Slka
2).
Snap-on lock button
MAX
SU SEVIYESI
Slika 2
Ispunte spremnk za vodu občnom vodom z ppe
do oznake MAX kako je prkazano na Slc 2.
Potrebna kolčna vode je 600 ml. Montrajte
jedncu fltra nazad na spremnk za vodu, pazeć
da ga pravlno postavte. Ponovno montrajte
spremnk za vodu na uređaj.
Izvadte utkač kabel na stražnjoj stran prozvoda
uključte ga u utčncu. Prestante povlačt kad
zađe žuta oznaka na kabelu napajanja, crvena
oznaka će zać nakon žute oznake; nkada ne
vucte dalje od crvene oznake. Inače možete
oštett uređaj za namatanje kabela na aparatu.
Prkačte sklop crjeva dostavljen s vašm
prozvodom na ussavač. Da bste uključl ussavač,
prvo prtsnte tpku za uključvanje/sključvanje.
(Slka 3).
Slika 3
Da bste namotal kabel kad završte sa čšćenjem,
prtsnte tpku za namatanje kabela na vašem
uređaju. (Slka 4) Nemojte stajat na tpku uređaja
za namotavanje kabela. Ako ga snažno prtsnete
nogom, mehanzam se može oštett.
Slika 4
Možete prlagodt snagu ussavanja vašeg
prozvoda za vrjeme čšćenja pomoću tpke za
podešavanje koja se nalaz na tjelu. (Slka 5).
Slika 5

Usisavač / Ručno 19 / 81 HR
Možete prkačt adapter crjeva na ussavač tako
da čvrsto prtsnete pločce na adapteru crjeva u
smjeru strelce bez prmjene sle, kako je prkazano
na Slc 6.
Figure 6
Slika 6
Crjevo vašeg uređaja je opremljeno tako da
se može rotrat za 360°. Na taj načn, pruža
ergonomsku uporabu tjekom čšćenja. (Slka 7).
fiekil 7
Pazte da su pločce na adapteru crjeva na Slc 7
čvrsto postavljene na svoja mjesta.
Za uklanjanje crjeva s ussavača, prtsnte pločce
na adapteru crjeva povucte h prema nazad.
Možete nost uređaj pomoću ručke za nošenje na
njegovoj gornjoj stran. (Slka 8).
Figure 8
Slika 8
3.1 Uporaba produžne cijevi
Produžna cjev vašeg uređaja je teleskopska. Da
bste produžl cjev, prtsnte prkazanu polugu
u smjeru strelce povucte s kraja cjev. Duljnu
možete prlagodt kako želte. (Slka 9).
Latch
Figure 9
Slika 9
Figure 10
Vodilica s uskim otvorom
Može se korstt za nedostupne uske
otvore na naslonjačma namještaju.
(Slka 10).
Figure 11
Vodilica sa širokim
otvorom
Korst se za čšćenje podova,
stepenca,unutrašnjostautomobla,
kauča, fotelja, td. (Slka 11).
3.2 Uporaba četke za parkete i
tepihe
Na bočnoj stran četke za parkete tephe
se nalaz mehanzam za podešavanje.
Četka je poravnata s površnom koja se
čst pomoću mehanzma za podešavanje.
(Slka 13).
Figure 13
Slika 13
3Rad s uređajem

20 / 81 HR Usisavač / Ručno
a)
Korstte svoju četku u normalnom položaju
(ščetkajte dlake na sakrvenm mjestma) za
tephe sagove.
b)
Kod čšćenja tvrdh podova kap što je parket,
kamen, lnoleum ravne površne kao što su
zdov a da h ne ogrebete, promjente položaj
mehanzma za podešavanje da h očstte pomoću
čeknjasth četk.
3.3 Uporaba turbo četke
Posebno je učinkovita u sakupljanju dlaka od
kućnih ljubimaca. Dubinski čisti sagove. Kod
usisavanja resa tepiha, koristite četku tako da je
povučete nazad u smjeru strelice.
Očistite konac i dlake zapetljane u četki pomoću
škara.
3.3.1 Isključvanje spremanje
ussavača
Prtsnte tpku za uključvanje/sključvanje na
kućštu da bste zaustavl rad ussavača. Ne
sključujte uređaj s napajanja odjednom da bste
zaustavl rad; prvo prtsnte tpku za uključvanje/
sključvanje zaustavte rad uređaja. (Slka 3).
Nadalje, možete čuvat svoj uređaj horzontalno
tako da dodate do za parkranje na stražnjoj stran
četke vašeg prozvoda na otvor za parkranje na
stražnjoj stran vašeg prozvoda. (Slka 14).
Figure 14
Slika 14
3Rad s uređajem
Other manuals for BKS 9220 T
1
Table of contents
Languages:
Other Beko Vacuum Cleaner manuals

Beko
Beko RS 8034 HM User manual

Beko
Beko VCO 42701 AB User manual

Beko
Beko VCO 62602 AB User manual

Beko
Beko VRT 82821 BV User manual

Beko
Beko VRT 82821 BV User manual

Beko
Beko VCC 6426 O User manual

Beko
Beko VRT 7524 User manual

Beko
Beko VRX 221 DR User manual

Beko
Beko VRT 82821 BV User manual

Beko
Beko VCO 6325 FD User manual

Beko
Beko BKS 9218 User manual

Beko
Beko VCC 50701 AW User manual
Beko
Beko 01M-8811553200-4520-07 User manual

Beko
Beko VRR 60314 VW User manual
Beko
Beko VCC 6480 User manual

Beko
Beko VRT 82821 BV User manual

Beko
Beko 01M-8911833200-1722-08 User manual

Beko
Beko BKS 1510 User manual

Beko
Beko VCO 6325 AB User manual

Beko
Beko VRT 61814 VB User manual