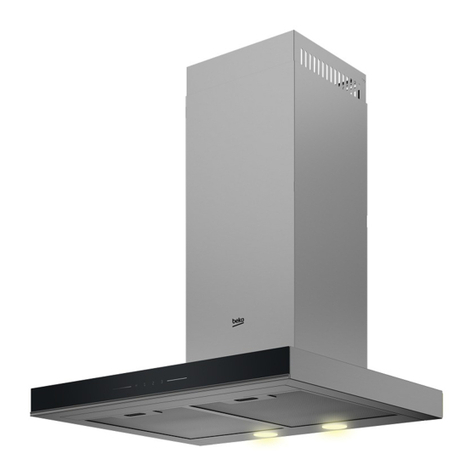
Beko HCA 62321 B User manual

www.beko.com
Cooker Hood
Instructions Booklet
HCA 62321 B
01M-8896743200-3120-07
EN PL CS ET LT
LV RO SK UA FR

Please read this user manual first!
Dear Valued Customer,
Thank you for preferring this Beko appliance. We hope that you get the best results
from your appliance which has been manufactured with high quality and state-
of-the-art technology. For this reason, please read this entire user manual and all
other accompanying documents carefully before using the appliance and keep it as a
reference for future use. If you handover the appliance to someone else, give the user
manual as well. Follow the instructions by paying attention to all the information and
warnings in the user manual.
Remember that this user manual may also apply to other models. Differences between
models are explicitly described in the manual.
Meanings of the Symbols
Following symbols are used in various sections of this user manual:
C
Important information and useful
hints about usage.
A
WARNING
:
Warnings against dange-
rous situations concerning the secu-
rity of life and property.
Warning for danger of fire.
B
Warning for electric shock
.
Protection class against electric
shock
.
Complies with the WEEE regulation. It does not contain PCB.
This appliance has been manufactured in environmentally friendly modern plants
without giving any harm to the nature.

Cooker Hood / Instructions Booklet
3 / EN
CONTENTS
ENGLISH 04-15
POLSKI 16-29
ČESKY 30-42
EESTI 43-55
LIETUVIŲ K 56-68
LATVIJAS 69-81
ROMÂNĂ 82-96
SLOVENSKÝ 97-109
УКРАЇНСЬКИЙ 110-123
FRANÇAIS 124-139

4 / EN
Cooker Hood / Instructions Booklet
1
Important Safety and Environmental Instructions
1.1 General Safety
Important Safety Instructions Read
Carefully And Keep For Future Ref-
erence This section contains safety
instructions that will help protect
from risk of fire, electric shock, ex-
posure to leak microwave energy,
personal injury or property damage.
Failure to follow these instructions
shall void any warranty.
• Beko products comply with the
applicable safety standards;
therefore, in case of any damage
on the appliance or power cable,
it should be repaired or replaced
by the dealer, service center or a
specialist and authorized service
alike to avoid any danger. Faulty
or unqualified repair work may be
dangerous and cause risk to the
user.
• This appliance is intended to be
used in household and similar ap-
plications such as:
– Staff kitchen areas in shops, of-
fices and other working environ-
ments;
– Farm houses
– By clients in hotels, and other
residential type environments;
– Bed and Breakfast type environ-
ments.
• Operate the appliance for its in-
tended purpose only as described
in this manual.
• The manufacturer cannot be held
liable for damages resulting from
improper installation or misuse of
the product.
• This appliance can be used by
children aged from 8 years and
above and persons with reduced
physical, sensory or mental ca-
pabilities or lack of experience
and knowledge if they have been
given supervision or instruction
concerning use of the appliance
in a safe way and understand the
hazards involved.
• Children shall not be allowed play
with the appliance. Cleaning and
user maintenance shall not be
made by children without super-
vision.
• The minimum distance between
the supporting surface for the
cooking vessels on the hob and
the lowest part of your product
must be at least 65 cm
• If the instructions for installation
for the gas hob specify a greater
distance, this has to be taken into
account.
• Make sure that your mains power

Cooker Hood / Instructions Booklet
5 / EN
1
Important Safety and Environmental Instructions
supply complies with the informa-
tion supplied on the rating plate
of the appliance.
• Never use the appliance if the
power cable or the appliance it-
self is damaged.
• Prevent damage to the power
cable by not squeezing, bending,
or rubbing it on sharp edges. Keep
the power cable away from hot
surfaces and naked flame.
• Use the appliance with a grounded
outlet only.
WARNING: Do not connect the
appliance to the mains until the
installation is fully complete.
• Place the appliance in a way so
that the plug is always accessible.
• Do not touch the lamps if they
have operated for a long time.
They can burn your hands since
they will be hot.
• Follow the regulations set out
by competent authorities on dis-
charge of the exhaust air (this
warning is not applicable for use
without flue).
• Operate your appliance after put-
ting a pot, pan etc. on the hob.
Otherwise, high heat may cause
deformation in some parts of your
product.
• Turn off the hob before taking the
pot, pan etc. from it.
• Do not leave hot oil on the hob.
Pans with hot oil may cause self
combustion.
• Pay attention to your curtains
and covers since oil may catch fire
while cooking food such as fries.
• Grease filter must be replaced
at least monthly. Carbon filter
must be replaced at least every 3
months.
• Product shall be cleaned accord-
ance with user manual. If cleaning
was not carried out in accordance
with user manual, there may be
fire risk.
• Do not use non-fire-resistant fil-
tering materials instead of the
current filter.
• Only use the original parts or
parts recommended by the man-
ufacturer.
• Do not operate the product with-
out the filter and do not remove
the filters while the product is
running.
• In the event of be started any
flame, de-energize your product
and cooking appliances.
• In the event of be started any
flame, cover the flame and never

6 / EN
Cooker Hood / Instructions Booklet
1
Important Safety and Environmental Instructions
use water to extinguish.
• Unplug the appliance before each
cleaning and when the appliance
is not in use.
• The negative pressure in the en-
vironment should not exceed 4 Pa
(4 x 10 bar) while the hood for
electric hob and appliances run-
ning on another type of energy
but electricity operate simultane-
ously.
• In the environment where the ap-
pliance is being used, the exhaust
of devices running on fuel oil or
gas, such as room heater must be
absolutely isolated or device must
be hermetical type.
• When connecting the flue, use
pipes with a diameter of 120 or
150 mm. Pipe connection must
be as short as possible and have
as few elbows as possible.
Danger of choking! Keep all the
packaging materials away from
children.
CAUTION: Accessible parts may
become hot when used with
cooking appliances.
• The product outlet must not be
connected to air channels that in-
clude other smoke.
• The ventilation in the room may
be insufficient when the hood for
electric hob is used simultane-
ously with the devices operating
on gas or other fuels (this may not
apply to appliances that only dis-
charge the air back into the room).
• Objects placed on the product
may fall. Do not place any objects
on the product.
• Do not flambe under the your
product.
WARNING: Before installing
the Hood, remove the protective
films.
• Never leave high naked flames
under the hood when it is in op-
eration
• Deep fat fryers must be continu-
ously monitored during use: over-
heated oil can burst into flames.

Cooker Hood / Instructions Booklet
7 / EN
1
Important Safety and Environmental Instructions
1.2 Compliance with the WEEE
Directive and Disposing of the
Waste Product:
This product complies with EU
WEEE Directive
(2012/19/EU). This product bears a
classification
symbol for waste electrical and
electronic equipment (WEEE).
This symbol indicates that
this product shall not be
disposed with other house-
hold wastes at the end of
its service life. Used device must be
returned to offical collection point
for recycling of electrical and elec-
tronic devices. To find these collec-
tion systems please contact to your
local authorities or retailer where
the product was puchased. Each
household performs important role
in recovering and recycling of old
appliance. Appropriate disposal of
used appliance helps prevent po-
tential negative consequences for
the environment and human health.
1.3 Compliance with RoHS
Directive
The product you have purchased
complies with EU RoHS Directive
(2011/65/EU). It does not contain
harmful and prohibited materials
specified in the Directive.
1.4 Package Information
Packaging materials of the
product are manufactured
from recyclable materials in
accordance with our National
Environment Regulations. Do not
dispose of the packaging materials
together with the domestic or other
wastes. Take them to the packaging
material collection points designat-
ed by the local authorities.

8 / EN
Cooker Hood / Instructions Booklet
2.1 Overvew
Fig. 1
2.2 Techncal Data
Fig. 2
2 General Appearance
1. Flap
2. Chimney Body
3. Power Cord
4. Aluminum Grease Filter
5. Lighting
6. Mechanical Control
Model HCA62321B
Supply Voltage and Frequency 220-240 V 50 Hz
Lamp Power (W) 6 W
Motor Power (W) 115 W
Ar Flow (m/h) – 3. Level 310
Motor Insulaton Class Class F
Insulaton Class Class II
330
333
430
O
120
min:20
596
405
268
218
158
268
min:320max:548
1
2
3
4
5
6

Cooker Hood / Instructions Booklet
9 / EN
speed settings.
• For a better performance, we advise you to
use low speeds in normal conditions, and high
speeds when smell and vapors are intensified.
• You can start the hood by pressing the desired
speed level key.(1,2,3 )
• You can illuminate the cooking area by pressing
the light key.( )
3.4 Lamp Replacement
Disconnect the hood from the mains supply. This
appliance is equipped with 3 W spot LED lamps.
A
Before replacing the light bulbs,
disconnect the power supply of the
hood.
A
Do not touch the light bulbs when
they are hot.
A
Be careful not to touch the replaced
light bulb directly with hands.
C
You may procure lamps from
Authorised Service Agents.
3.1 Use of the Rocker Swtch
The hood is equipped with a mechanical control.
• Pressing the “0” - disables the hood.
• Pressing the “1” - to turn the hood with a
minimum speed.
• Pressing the “2” - turns the hood with an
average speed.
• Pressing the “3” - turns the hood at maximum
speed.
Higher speed means more air flow.
• Press the button - to turn on the lights.
Repeat pressing the button to turn off the
lighting.
3.2 Thngs to Do for Energy
Savng
• Ensure sufficient air intake to make the hood
operate efficiently and with low operation noise
during cooking.
• Set the fan level according to the density of
steam in kitchen. Use the high level only when
needed. A lower fan level means less energy
consumption.
• If dense smoke is expected in the kitchen, select
a higher level of fan in advance. It is required to
operate the hood much longer to remove the
smoke already spread all over kitchen.
• Turn off the hood when not in use.
• Clean or replace the filter at intervals stated,
thus, the efficiency of the ventilation is
increased and the risk of fire is eliminated.
3.3
Operatng the Hood
• Hood is equipped with a motor having various
1 2 3 0
Fig. 3
GU10
1
2
1
2
Symbol
Symbol
Bulb installation
Bulb dismantling
Fig. 4
Max: 3 W
3 Usng the Applance

10 / EN
Cooker Hood / Instructions Booklet
C
You can wash the grease filter in
the dishwasher
4.2 Changng of Carbon Flter (Ar
Crculaton Mode)
The hood can be fitted with an active carbon filter.
The carbon filter is applied only in case the hood is
not connected to the vent duct.
In any case it is necessary to replace the carbon
filter at least every three months.
A
WARNING
:
The carbon filter is
never washed.
A
WARNING
:
Carbon filter is available
from Authorized Services.
Prior to cleaning and maintenance, unplug the
appliance or turn the main swich off or loosen the
fuse that supplies the hood.
A
Failure to comply with the provi-
sions relating to cleaning of the
device and replacement of filters
may cause fire risks. It is therefore
recommended to comply with the
guidelines given herein. The manu-
facturer is not liable for any damage
to the engine or fires caused by im-
proper use.
Clean using only a cloth dampened with neutral
liquid detergent. Do not clean with tools or
instruments. Do not use abrasive products. Do not
use alcohol
4.1 Cleanng of Alumnum Grease
Flter
This filter captures oil particles in the air. You are
recommended to clean your filter every month
under normal usage conditions. First remove
the grease filters for this process. Wash the
filters with liquid detergent and rinse them with
water and install them back after they get dry.
Aluminium grease filters may get discolered as
they are washed; this is normal and you don’t need
to change your filter.
1
2
Fig. 5
Fig. 6
Fig. 7
4Cleanng and Mantenance

Cooker Hood / Instructions Booklet
11 / EN
123
1- Hood
2- Chimney
3- User Manual
4- 4 x Ø 5 x 45 Screw
5- 6 x Ø 8 x 40 Screw Plug
6- 2 x Ø 3,9 x 9,5 Screw
7- Ø150/120mm Plastic Flue Adapter
8- Back Pressure Valve
45 6 78
A
WARNING
Please read saffety instructions
before setting up.
A
WARNING
Failure to install the screws or fixing
device in accordance with these
instructions may result in electrical
hazards.
5.1 Installaton Accessores
Fig. 8
5Settng Up the Devce

12 / EN
Cooker Hood / Instructions Booklet
5Settng Up the Devce
5.2 Hood nstallaton
B
The use of screws and fastening
elements not specified in the
Operation Manual may cause the
electrical shock.
The minimum distance of hood hanging between
the surface of kitchenware placement over the
cooking range (gas, electric range), and lowest
part of the hood (Fig.3) shall amount at least 65
cm for electric cooking ranges and at least 65 cm
for gas cooking ranges. Should the cooking range
operation manual provide the higher distance
for hood installation, such higher distance
requirement shall be maintained. The installation
of the hood and chimney body is shown at the
figures (Fig.4 - Fig.9). The hood is equipped with
the fixing pins matching to the most part of walls
and ceilings. In course of the assembly, observe the
common rules for air exhaust from the premises.
L
Fig.9 Recommended distances from the cooking
range
Gas cooking ranges L ≥ 65cm
Electrical cooking ranges L ≥ 65cm
Before startng the nstallaton:
• Check if the purchased device dimensions match
to the planned installation place.
• Disassembly and remove (if possible) any
furniture remaining in the hood installation area,
in order to ensure the easy access to ceiling or
wall, where the hood shall be mounted. If it is
not possible, protect the furniture elements
remaining in the adjacent area.
• Check, if there is a socket near the mounting
area, and control if the hood may be connected to
the ventilation channel for vapours evacuation.
• Check if there are no cables (electrical, hydraulic,
etc.) in places in which the drilling will be
performed.
• Prepare the following tools: tape ruler, pencil,
drill / electric screwdriver, drilling tool Ø8,
screwdriver, builder’s level.
Assembly operaton:
1. Define the axis of cooking range, and project it
onto the wall, where the hood will be mounted.
Sign all characteristic points of hood fastening.
Make the openings with the drill. (Fig. 10)
325mm
4xO8
2xO8
325mm
142mm
L+170mm 124mm max:550mm
min:30
Fig.10 Assembly dimensions
2. Into the openings, insert the screw plugs. In two
openings marked with A screw also the screws

Cooker Hood / Instructions Booklet
13 / EN
(leaving 7 mm of screw length outside the screw
plug, Fig.11).
2 x O5 x 45mm
4 x O8 x 40mm
7mm
2 x O8 x 40mm
A
Fig.11 Screw plugs assembly
3. Screw the chimney body fastening element,
hang the hood on two untightened screws (Fig.
12).
Fig.12 Hood hanging
5Settng Up the Devce
4. Open the hood cover and remove the fat filter
(Fig.13).
1
2
Fig.13 Aluminium fat filter removing
5. Place the level on the hood body. Rotating the
element marked with A, adjust the hood level
according the level’s indications, and then
tighten two screws previously screwed partially
and screw in two remaining screws (Fig. 14).
2 x O5 x 45mm
A
Fig.14 Range hood positioning

14 / EN
Cooker Hood / Instructions Booklet
5Settng Up the Devce
Place the chimney body on the hood body. Then,
draw delicately the hood part signed with B
upwards, until it becomes possible to screw it
to the fastening element previously attached to
the wall (Fig. 15).
A
B
A
B
2 x O3,9x9,5
Fig.15 Chimney body assembly
Be especialy attentive while sliding the
chimney body
C
This assembly operation
shall be performed very ca-
refully, in order to avoid the
scratching of chimney body
and hood itself.
5.3 Electrcal connectons
The network voltage shall correspond to the
voltage indicated at the plate placed inside the
hood. If the hood is equipped with a plug, insert
it into the socket complying with the applicable
requirements, and located in the easily accessible
place. If the hood is not equipped with a plug,
the hood installations shall be performed by a
person having the required authorizations (such
as electrician).

Cooker Hood / Instructions Booklet
15 / EN
6 Troubleshootng
Symptoms Cause Reparng method
During hood operation, the pulsating
letter „F” is displayed.
After 35 hours of operation the hood
indicates the need for cleaning or
replacing the grease filter.
Press and hold for about 8 sec. “-” on
the touch control. The filter should be
washed in the dishwasher or replace with
a new one.
The display shows only the symbol
“-.” (minus and dot in the right bottom
corner), the hood does not respond to
disabling.
The touch control has been locked
– this feature facilitates the hood
cleaning.
To disable the lock, press and hold for
about 10 sec the field with the symbol of
switching on.
No symbol is shown on the display, the
hood does not respond to pressing the
control fields.
The touch control is probably
suspended.
Disconnect the hood from the power
supply for about 15 sec. and switch it on
again.
The display shows the symbol of one of
the gears; the hood does not respond to
pressing the control fields.
The touch control is probably
suspended
Disconnect the hood from the power
supply for about 15 sec. and switch it on
again.
The hood turbine disconnects after 15
min of operation, the display shows
a pulsating digit i.e. “1.” (current gear
number and dot in the right bottom
corner).
The automatic time switch of the
touch control has been activated.
To deactivate the time switch, press and
hold for about 10 sec the symbol „+”or
disable the hood.
On fourth gear the digit “4” is pulsating
on the display, after 5min the gear is
changed into third.
The hood is equipped with a turbo
mode, which automatically switches
over into third gear after 5 min of
operation to save energy.
The turbo gear shall be used only with
intensive cooking.
The hood can be operated only with
use of the control panel, it does not
respond to the remote control.
The battery of the remote control is
empty or the distance is too long.
Replace the battery with a new one.
The hood has very poor vapor suction. Probably cause is dirty filters. The grease filter must be cleaned in the
dishwasher or replace with a new one.
The carbon filter (if present) must be
replaced with a new one.
One or more light points do not
operate.
Defective halogen/ LED bulb. The light bulb needs to be replaced
with a new, compatible with the symbol
specified in the instruction manual for
the cooker hood.
The hood generated excessive noise
and vibration.
This may be caused by an incorrect
installation of the hood to the wall
or kitchen cabinets. Not all provided
screws have been used or screws are
loosely fitted leaving clearance.
The hood must be mounted to a wall or
cabinet by using all the points provided
for by the manufacturer. After adjusting
the position of the hood horizontally and
vertically, tighten all mounting screws.
* applies to hoods with touch control.
If the recommendations above do not solve the problem, contact an authorized home appliances service entitled to repair.
Under no circumstances is the hood user entitled to independent repair. A list of service points is included in the warranty card
and the website.

Proszę najpierw przeczytać tę instrukcję obsługi!
Szanowny Kliencie,
dziękujemy za wybranie urządzenia marki Beko. Mamy nadzieję, że zakupione
urządzenie, wyprodukowane z zapewnieniem wysokiej jakości przy użyciu na-
jnowszych technologii, okaże się w pełni zadowalające. W tym celu przed użyciem
urządzenia należy uważnie przeczytać całą instrukcję obsługi oraz dołączone doku-
menty i zachować je do wglądu na przyszłość. Przekazując urządzenie innemu użyt-
kownikowi, należy dołączyć również niniejszą instrukcję. Należy postępować zgodnie
z instrukcjami, zwracając uwagę na wszystkie informacje i ostrzeżenia zamieszczone
w niniejszym dokumencie.
Należy pamiętać, że niniejsza instrukcja może odnosić się także do innych modeli.
Różnice pomiędzy modelami są wyraźnie opisane w instrukcji.
Znaczenie symboli
W różnych częściach niniejszej instrukcji obsługi stosowane są następujące symbole:
CWażne informacje i przydatne wska-
zówki dotyczące użytkowania.
AOSTRZEŻENIE: Ostrzeżenia przed
niebezpiecznymi sytuacjami zagraża-
jącymi życiu i mieniu.
Niebezpieczeństwo pożaru.
BOstrzeżenie przed porażeniem
prądem.
Wyrób zgodny z Dyrektywą WEEE. Nie zawiera polichlorowanych
bifenyli (PCB).
Urządzenie zostało wyprodukowane w przyjaznych środowisku, nowoczesnych
zakładach bez negatywnego wpływu na przyrodę.

17 / PL
Okap / Instrukcja obsługi
1.1 Ogólne zasady doty-
czące bezpieczeństwa
Ważne zasady dotyczące bezpie-
czeństwa Przeczytaj je uważnie i
zachowaj na przyszłość Rozdział
ten zawiera instrukcje zachowa-
nia bezpieczeństwa, które pomogą
chronić się przed ryzykiem pożaru,
porażenia prądem elektrycznym,
wycieku mikrofal, obrażeniami ciała
lub szkodami w mieniu. Nieprze-
strzeganie tych instrukcji spowo-
duje unieważnienie gwarancji.
•Produkty firmy Beko spełniają
wszystkie wymogi stosownych
norm bezpieczeństwa. W przy-
padku jakiegokolwiek uszkodze-
nia urządzenia lub przewodu
zasilającego, aby uniknąć wszel-
kich zagrożeń, należy oddać je
do naprawy lub wymiany przez
sprzedawcę, punkt serwisowy
lub specjalistę albo autoryzowany
serwis. Błędna lub niefachowa
naprawa może być niebezpieczna
i powodować zagrożenie dla użyt-
kowników.
•To urządzenie jest przeznaczone
do użytku domowego i podobnych
zastosowań, na przykład:
– na zapleczu kuchennym przez
personel sklepów, biur i innych
miejsc pracy;
– w gospodarstwach rolnych;
– do użytku przez klientów hoteli i
innych obiektów noclegowych;
– w pensjonatach.
• Urządzenie należy stosować tylko
zgodnie z jego przeznaczeniem,
w sposób opisany w niniejszej in-
strukcji.
•Producent nie ponosi odpowie-
dzialności za szkody powstałe w
wyniku nieprawidłowej instalacji
lub niewłaściwego stosowania
produktu.
•Urządzenie może być obsługi-
wane przez dzieci w wieku 8 lat
i starsze, osoby o ograniczo-
nych możliwościach fizycznych,
postrzegania lub umysłowych,
a także osoby bez doświadcze-
nia lub wiedzy w zakresie obsługi
urządzenia, o ile będą one pod
nadzorem lub zostaną szczegó-
łowo poinstruowane o bezpiecz-
nym korzystaniu z urządzenia
i zrozumieją potencjalne zagroże-
nia.
•Nie należy pozwalać dzieciom
bawić się urządzeniem. Dzieci nie
mogą czyścić ani konserwować
urządzenia bez nadzoru.
1
Ważne instrukcje dotyczące bezpieczeństwa
i ochrony środowiska

Okap / Instrukcja obsługi
18 / PL
•Minimalna odległość pomiędzy
powierzchniami podpór garnków
znajdującymi się na szczycie ku-
chenki a najniższą częścią pro-
duktu musi wynosić co najmniej
65 cm.
•Jeżeli w instrukcji instalacji gazo-
wej płyty kuchennej podano od-
ległość większą, wówczas należy
zastosować wskazaną wartość.
•Zasilanie z domowej sieci elek-
trycznej musi być zgodne z infor-
macjami podanymi na tabliczce
znamionowej urządzenia.
•Urządzenia nie wolno nigdy uży-
wać, jeśli przewód zasilający lub
samo urządzenie są uszkodzone.
•Aby zapobiec uszkodzeniu prze-
wodu zasilającego, nie wolno do-
puścić do jego ściskania, zginania
lub ocierania o ostre krawędzie.
Trzymaj przewód zasilający z dala
od gorących powierzchni i otwar-
tego ognia.
•Urządzenia można używać tylko
wtedy, gdy jest podłączone do
gniazda ściennego z uziemieniem.
OSTRZEŻENIE: Podłącz urzą-
dzenie do zasilania dopiero po cał-
kowitym zakończeniu montażu.
•Urządzenie ustaw tak, aby zawsze
był możliwy dostęp do wtyczki.
•Nie należy dotykać lamp, jeśli były
włączone przez długi czas. Grozi
to poparzeniem dłoni gorącą ża-
rówką.
•Należy stosować się do wyma-
gań dotyczących odprowadza-
nia powietrza wywiewanego (to
ostrzeżenie nie dotyczy sytuacji
korzystania z okapu bez prze-
wodu spalinowego).
•Okap należy uruchamiać po usta-
wieniu garnka, patelni itp. na
płycie grzewczej. W przeciwnym
wypadku wysoka temperatura
może doprowadzić do zniekształ-
cenia niektórych części produktu.
•Okap należy wyłączać przed zdję-
ciem garnka, patelni itp. z płyty
grzewczej.
•Nie pozostawiać rozgrzanego
oleju na płycie grzewczej. Garnki z
gorącym olejem mogą się zapalić
samoczynnie.
•Należy uważać na zasłony i inne
elementy osłaniające okna, po-
nieważ olej może zapalić się sa-
moczynnie podczas smażenia np.
frytek.
•Filtr tłuszczu należy wymieniać co
najmniej raz w miesiącu. Filtr wę-
1
Ważne instrukcje dotyczące bezpieczeństwa
i ochrony środowiska

19 / PL
Okap / Instrukcja obsługi
glowy należy wymieniać co naj-
mniej raz na 3 miesiące.
•Produkt należy czyścić zgodnie
z instrukcją obsługi. Czyszczenie
w sposób niezgodny z instrukcją
obsługi może prowadzić do ryzyka
pożaru.
•Zabrania się stosowania materia-
łów filtracyjnych nieodpornych na
ogień zamiast właściwych filtrów.
•Należy stosować wyłącznie ory-
ginalne lub zalecane przez produ-
centa części zamienne.
•Nie uruchamiać produktu bez
zamontowanego filtra ani nie
wyjmować filtrów z pracującego
okapu.
•W razie pojawienia się płomieni
odłączyć produkt oraz urządzenia
kuchenne od zasilania.
•W razie pojawienia się płomieni
przykryć płomień i w żadnym wy-
padku nie gasić go wodą.
•Przed każdym czyszczeniem urzą-
dzenia i gdy nie jest ono używane
należy wyjąć wtyczkę z gniazdka
ściennego.
•Podciśnienie w otoczeniu nie
może przekraczać 4 Pa (4 ×
10 barów) przy równoczesnym
działaniu okapu nad elektryczną
płytą grzewczą i urządzeń AGD
zasilanych elektrycznie prądem o
innych parametrach.
•Jeśli w pomieszczeniu, w którym
działa okap, są wykorzystywane
urządzenia zasilane olejem opało-
wym lub gazem, jak np. ogrzewa-
cze pomieszczeń, to wylot spalin
z takich urządzeń musi być całko-
wicie odizolowany lub takie urzą-
dzenia muszą być hermetyczne.
•Jako przewody spalinowe należy
stosować rury o średnicy 120 lub
150 mm. Rura łącząca musi być
możliwie jak najkrótsza i mieć jak
najmniej kolanek.
Niebezpieczeństwo zadła-
wienia! Wszystkie materiały
opakowaniowe należy trzymać z
dala od dzieci.
1
Ważne instrukcje dotyczące bezpieczeństwa
i ochrony środowiska

Okap / Instrukcja obsługi
20 / PL
1
Ważne instrukcje dotyczące bezpieczeństwa
i ochrony środowiska
OSTRZEŻENIE: Jeśli jest to okap
nad kuchnią, jego wystające czę-
ści mogą się nagrzewać.
•Wylotu produktu nie wolno przy-
łączać do kanałów powietrznych,
które odprowadzają inny dym.
•Wentylacja w pomieszczeniu może
być niewystarczająca w przy-
padku równoczesnego korzysta-
nia z okapu nad elektryczną płytą
grzewczą oraz urządzeń zasila-
nych gazem lub innymi paliwami
(niniejsze ostrzeżenie może nie
dotyczyć urządzeń, które odpro-
wadzają powietrze z powrotem do
pomieszczenia).
•Przedmioty znajdujące się na pro-
dukcie mogą spaść. Nie stawiać
żadnych przedmiotów na produk-
cie.
•Nie flambirować bezpośrednio
nad urządzeniem.
OSTRZEŻENIE: Przed zamon-
towaniem okapu usunąć folię
ochronną.
•Nie wolno pozostawiać otwartego
ognia pod działającym okapem
•Frytkownice trzeba stale obser-
wować w trakcie użytkowania:
przegrzany olej może zająć się
płomieniem.
1.2 Zgodność z dyrektywą WEEE
i pozbywanie się zużytych wyro-
bów:
Wyrób ten jest zgodny z dyrektywą
Unii Europejskiej w sprawie zuży-
tego sprzętu elektrycznego i elek-
tronicznego (WEEE) (2012/19/UE).
Wyrób opatrzony jest symbolem
klasyfikacyjnym dla zużytego sprzę-
tu elektrycznego i elektronicznego
(WEEE).
Symbol ten oznacza, że pro-
duktu nie należy utylizować
z innymi domowych śmie-
ciami po zakończeniu okre-
su użytkowania. Zużyte urządzenie
należy oddać do oficjalnego punktu
odbioru zajmującego się recyklin-
giem urządzeń elektrycznych i elek-
tronicznych. Aby odnaleźć tego typu
miejsce, należy skontaktować się z
lokalnymi władzami lub sprzedaw-
cą, u którego zakupiono produkt.
Każde gospodarstwo domowe od-
grywa ważną rolę w odzyskiwaniu i
recyklingu starych urządzeń.
Odpowiednia utylizacja zużytego
urządzenia pomaga zapobiegać
potencjalnie negatywnym konse-
kwencjom dla środowiska i zdrowia
ludzi.
Other manuals for HCA 62321 B
1
Table of contents
Languages:
Other Beko Ventilation Hood manuals

Beko
Beko BHCB63640B User manual

Beko
Beko CTB 9250 XA User manual

Beko
Beko CTB 6407 X User manual

Beko
Beko HNU61425B User manual

Beko
Beko BHCB 93640 B User manual

Beko
Beko HB60PX User manual

Beko
Beko BHCIW 31322 BBH User manual

Beko
Beko CCB 6254 S User manual

Beko
Beko BHCB66741BZGSH User manual

Beko
Beko CFB 6432 X User manual

Beko
Beko CTB 6407 X-W User manual

Beko
Beko BHCA66341BBH User manual

Beko
Beko CTB 6407 User manual

Beko
Beko BHCB 61632 XH User manual

Beko
Beko BHCA 64640 B User manual

Beko
Beko BRH52UX User manual

Beko
Beko HNT61310X User manual

Beko
Beko CWB 9610 X User manual

Beko
Beko CWB 6550 X User manual

Beko
Beko HNT61220XH User manual