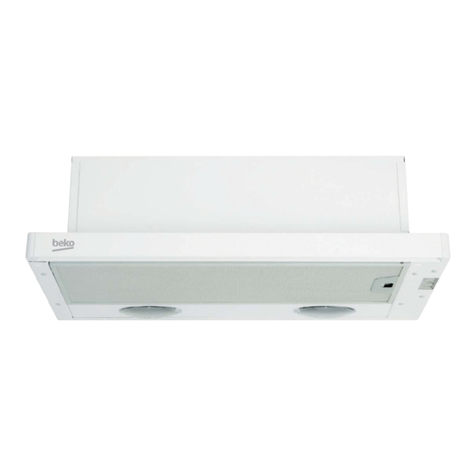
Beko HCA62321B User manual

www.beko.com
01M-8803373200-
2618
-01
HCA62321B
EN PL CS SK ET
LV LT UA RO
Hood
User Manual

Please read this manual first!
Dear Customers!
Thank you for preferring a Beko product. We hope that you get the best results from
your product which has been manufactured with high quality and state-of-the-art
technology. Therefore, please read this entire user manual and all other accompanying
documents carefully before using the product and keep it as a reference for future use.
If you handover the product to someone else, give the user manual as well. Follow all
warnings and information in the user manual.
Remember that this user manual is also applicable for several other models. Differences
between the models are explicitly described in the manual.
Meanings of the Symbols
Following symbols are used in the various section of this manual:
C
Important information and useful hints about
usage.
AWARNING:
Warnings for dangerous situa-
tions concerning the safety of life and property.
B
Warning for electric shock.

Hood / User Manual 3 / EN
ENGLISH
POLSKI
ESKY
SLOVENSKÝ
EESTI
LATVIJAS
БЪЛГАРСКИ
CONTENTS

4 / EN Hood / User Manual
This section contains safety in-
structions that will help protect
from risk of personal injury or prop-
erty damage. Failure to follow these
instructions invalidates the granted
warranty.
1.1 General safety
•This Operation Manual shall be
maintained, in order to be able to
use it in every further moment.
•The device may be used by the
children in the age of at least 8
years, and by the persons with
limited physical, mental abilities,
or by persons with a lack of ex-
perience in device operation, pro-
vided that the due supervision or
training in terms of the safe device
operation was ensured, in order to
make clear all the related risks.
•Read this Operation Manual atten-
tively, as it contains the detailed
information regarding the instal-
lation, assembly and maintenance
of the hood.
•The hood appearance may dif-
fer from the hood presented at
drawings in this Manual, however
all recommendations regarding
the operation, maintenance and
assembly of the hood remain un-
changed.
•Do not make any electrical or me-
chanical changes in the hood con-
struction.
•Do not connect the device to
power before finishing the assem-
bly.
•Any assembly or maintenance op-
erations shall be performed in the
protective gloves.
•Do not use the hood without the
correctly installed filter.
•The assembly non-complying with
this Operation Manual, may cause
the electrical shock danger.
•Do not use the open flame under
the kitchen hood.
•The meals cooked on the fat base
shall be constantly controlled, as
overheated fat may flame out eas-
ily.
1

Hood / User Manual 5 / EN
•The air sucked by the hood may
not be withdrawn into the chim-
ney channel used for extraction of
the combustion gases from gas or
other fuel devices (does not apply
to the closed circuit hoods).
•If any other non-electric devices
are used in the house besides the
hood (for example, liquid fuel fur-
naces, blowthrough heaters, boil-
ers), the sufficient ventilation of
air (air supply) shall be ensured.
•Do not disconnect the plug from
the socket drawing the power
cable.
•The power cable may not touch
the hot surface.
•Do not start the device if the
power cable is damaged.
•The replacement of the damaged
power cable may be performed
by the manufacturer; the service
maintenance shall be performed
by the qualified technician.
•The hood shall be cleaned both in-
side and outside, at least monthly,
or every 35 hours of hood opera-
tion. Each time, before the hood
cleaning, the hood shall be discon-
nected from the power (discon-
nect the power cable plug or turn
off the safety levers).
•The children shall not play with the
device.
•The children without the supervi-
sion shall not perform the device
cleaning and maintenance.
•The device is market accord-
ing to European Union Directive
2002/96/EU, about the electric
and electronic equipment (WEEE).
Ensuring the correct disposal of
the device, you will help to limit
the risks of a negative impact over
the environment and health.
•The accessible parts may become
hot in course of the cooking range
operation. The use of screws or
other fastening elements with vio-
lation of the Manual requirements,
may cause the electrical shock.
1
6 / EN Hood / User Manual
This product complies with EU WEEE
Directive (2012/19/EU). This product
bears a classification symbol for waste
electrical and electronic equipment
(WEEE).
This product has been manufactured with high
quality parts and materials which can be reused
and are suitable for recycling. Do not dispose of
the waste product with normal domestic and oth-
er wastes at the end of its service life. Take it to
the collection center for the recycling of electrical
local authorities to learn about these collection
centers.
The product you have purchased complies with EU
RoHS Directive (2011/65/EU). It does not contain
harmful and prohibited materials specified in the
Directive.
-
clable materials in accordance with our
National Legislation. Do not dispose of
the packaging materials together with the domes-
tic or other wastes. Take them to the packaging
material collection points designated by the local
authorities.
1

Hood / User Manual 7 / EN
2
Technical data contained in this manual and labels
attached to the hood were obtained from meas-
urements and calculations in accordance with the
requirements of EU Regulation No. 65/2014 and
66/2014.
Chimney
body
cabel
Mechanical
control
Lighting
Fig.1 General view of the range hood
Hinged
flap
Aluminium
grease
filter
330
333
430
O
120
min:20
596
405
268
218
158
268
min:320max:548
Fig.2 Dimension drawing

8 / EN Hood / User Manual
3 Operation
The hood is intended for sucking in the vapours
during the meals cooking. The device may work in
two modes:
As the extracting hood: the vapours are extracted
from the premise through the withdrawal tube.
The withdrawal tube is not supplied with the de-
vice, and should be acquired separately.
C
•The shortest possible vapours
evacuating channel shall be used.
•Use the flue pipe with maximally
smooth internal surface (the use
of Spiro type pipes is not recom-
mended).
•Use the flue channel with as low
number of bends as possible (the
bending angles shall not exceed
90º).
•The changes in flue channel sec-
tions are not advised (from higher
section to lower section, for ex-
ample the change from Ø150 mm
to Ø120 mm).
As the absorber: the vapours are cleaned from fat
and odours, before they are returned back to the
premise through the grills in the top part of the
chimney body. To make the hood work in the ab-
sorber mode, install the coal filter
(Fig.10). The coal filter is not included in the stand-
ard equipment, and should be acquired separately.
The hood is equipped with the mechanical control
system.
•Button “0” – hood fan switched off
•Button “1” - hood fan switched on, with mini-
mum speed
•Button “2” - hood fan switched on with medium
speed
•Button “3” - hood fan switched with maximum
speed
The higher speed means the higher air circulation.
•Button switches the light on. To switch the
life off, press the button one more time.

Hood / User Manual 9 / EN
4 Installation
B
The use of screws and fasten-
ing elements not specified in the
Operation Manual may cause the
electrical shock.
The minimum distance of hood hanging between
the surface of kitchenware placement over the
cooking range (gas, electric range), and lowest
part of the hood (Fig.3) shall amount at least 45
cm for electric cooking ranges and at least 65 cm
for gas cooking ranges. Should the cooking range
operation manual provide the higher distance for
hood installation, such higher distance require-
ment shall be maintained. The installation of the
hood and chimney body is shown at the figures
(Fig.4 - Fig.9). The hood is equipped with the fix-
ing pins matching to the most part of walls and
ceilings. In course of the assembly, observe the
common rules for air exhaust from the premises.
L
Fig.3 Recommended distances from the cooking
range
•Check if the purchased device dimensions match
to the planned installation place.
•Disassembly and remove (if possible) any furni-
ture remaining in the hood installation area, in
order to ensure the easy access to ceiling or wall,
where the hood shall be mounted. If it is not pos-
sible, protect the furniture elements remaining
in the adjacent area.
•Check, if there is a socket near the mounting
area, and control if the hood may be connected
to the ventilation channel for vapours evacua-
tion.
•Check if there are no cables (electrical, hydrau-
lic, etc.) in places in which the drilling will be per-
formed.
•
drill / electric screwdriver, drilling tool Ø8, screw-
driver, builder’s level.
1.
Make the openings with the drill. (Fig. 4)
325mm
4xO8
2xO8
325mm
142mm
L+170mm 124mm max:550mm
min:30
Fig.4 Assembly dimensions

10 / EN Hood / User Manual
2.
A screw also the screws
(leaving 7 mm of screw length outside the
screw plug, Fig.5).
2 x O5 x 45mm
4 x O8 x 40mm
7mm
2 x O8 x 40mm
A
Fig.5 Screw plugs assembly
3.
6).
Fig.6 Hood hanging
4 Installation
4.
1
2
Fig.7 Aluminium fat filter removing
5.
2 x O5 x 45mm
A
Fig.8 Range hood positioning

Hood / User Manual 11 / EN
4 Installation
A
B
A
B
2 x O3,9x9,5
Fig.9 Chimney body assembly
Be especialy attentive while sliding the
chimney body
C
This assembly operation shall be
performed very carefully, in order
to avoid the scratching of chimney
body and hood itself.
The network voltage shall correspond to the volt-
age indicated at the plate placed inside the hood.
If the hood is equipped with a plug, insert it into
the socket complying with the applicable require-
ments, and located in the easily accessible place. If
the hood is not equipped with a plug, the hood in-
stallations shall be performed by a person having
the required authorizations (such as electrician).

12 / EN Hood / User Manual
5
•
immediately after you have made frying.
•Use a soft cloth soaked with liquid detergent to
clean the outer surface of your hood.
•Never use abrasive or scratching materials for
cleaning.
•You may use the cleaning agents commercially
available for persistent grease etc. by follow-
ing the warnings on the product. In order not
the scratch the brushed steel body, wipe in the
same direction with the bush trace.
•Do not use cleaning agents containing hydro-
chloric acid, bleach or abrasive powders in order
to maintain the surface quality of your product.
Use a cloth dampened in soapy water or special
stainless steel cleaning spray for stainless steel
steel surfaces. Remove the protective foil on the
appliance.
A
Caution! You may cause a fire if you
do not follow the instructions on the
cleaning and replacement of the fil-
ters of your hood.
The hood is equipped with aluminium filter stop-
ping the particles of fat emitted in course of
cooking. To remove the filter, move the clamps in
the direction of arrows (Fig.7). The filter shall be
cleaned manually by its immersion into the water
with dish washing liquid for approx. 15 minutes,
under the temperature equal to 40-50ºC. After
15 minutes, wash and accurately rinse the filter.
The filter must be dry before its installation in the
hood. It is also possible to wash the filter in the
dish washing machines. In course of washing, the
filter colour may change, which does not influence
its filtering characteristics. The failure to clean the
filter regularly reduces the hood performance, and
may cause the fire. The filter shall be cleaned at
least every 35 hours of hood operation.
The hood may be equipped with the coal filter. The
coal filter is used when the hood is not connected
to ventilation duct only. The filter shall be installed
on the fan body, like it is shown in the drawing
(Fig.10). The coal filter shall be replaced every 6
months.
C
Do not wash or regenerate the coal
filter.
1
2
1
2
Fig.10 Coal filter replacement
filter installationMark
Mark filter removal

Hood / User Manual 13 / EN
5
Before starting any works related to the light re-
placement, switch off the power. If the hood was
previously turned on, wait previously until the
lams become cold, and then start their replace-
ment. The lamp replacement is illustrated in Fig.
11.
C
•Before the replacement of lamps,
switch the hood power off.
•Do not touch the lamps when they
are hot.
•Be attentive not to touch the lamp
installed with hands.
GU10 12
1
2
Fig.11 Lights replacement
lamp installationMark
Mark lamp removal
•In order to reduce the energy consumption, cook
in the kitchenware under the cover.
•The hood aluminium filters shall be kept clean
(the recommended time of work of aluminium
filter between its cleaning: max. 35h of hood
operation).
•The ventilation ducts shall not be blocked.
•The fan operation speed during the cooking
shall be always set on minimum level which al-
lows to withdraw the vapours considering the
actual cooking intensiveness.
If you need to transport the appliance:
•Keep the original packaging of the appliance.
Transport the appliance with its original pack-
age, and follow the transport markings on the
original package.
•Do not place any objects on the hood.
•
•-
aged during transport.

14 / EN Hood / User Manual
6 Troubleshooting
Symptoms Cause
a new one.
corner), the hood does not respond to
The touch control has been locked
-
pended.
the gears; the hood does not respond
-
pended
corner).
hold for about 10 sec the symbol „+”or
respond to the remote control.
operate.
the cooker hood.
screws have been used or screws are
The hood must be mounted to a wall or

WEEE.
Drodzy Klienci,
C
-
A
-
-
niu.
B

16 / EN Hood / User Manual
-
-
-
dami w mieniu. Nieprzestrzeganie
-
Zasady ogólne
•
-
• -
kowany przez dzieci w wieku co
najmniej 8 lat i przez osoby o obni-
-
-
•-
-
-
serwacji okapu.
•-
-
wionego na rysunkach w niniejszej
•-
trycznych czy mechanicznych w
okapie.
•
-
•
•-
•-
-
nym.
•
•
-
1

Hood / User Manual 17 / EN
•Zasysane powietrze przez okap
•
-
trycznym (np. piece na paliwa cie-
powietrza).
•
•-
•
-
dzony.
•Wymiana uszkodzonego prze-
-
serwis lub wykwalifikowanego
•-
-
zowo przed czyszczeniem okapu,
-
-
•-
tem.
•-
-
cji.
•
w czasie pracy kuchenki.
• -
-
1

18 / EN Hood / User Manual
ten oznaczony jest symbolem klasyfikacy-
elektronicznego (WEEE).
-
-
-
jscowych.
Europejskiej (2011 /65 / UE). Nie zawiera wska-
i zakazanych.
Opakowanie tego wyrobu wykonano z
zgodnie z naszym ustawodawstwem kra-
-
-
mowymi. Oddaj je w jednym z wyznaczonych przez
-
kowaniowych.
1

Hood / User Manual 19 / EN
2
Dane techniczne zawarte w niniejszej instrukcji
nr 65/2014 oraz 66/2014.
kominowa
zasilajacy
Sterowanie
mechan-
iczne
Rys.1 Rysunek pogldowy okapu kuchennego
Klapa
uchylna
Filtr
aluminiowy
330
333
430
O
120
min:20
596
405
268
218
158
268
min:320max:548
Rys.2 Rysunek gabarytowy

20 / EN Hood / User Manual
3
-
-
-
C
•
opary.
•-
-
•-
stopni).
•
na mniejszy np. wylot powietrza
Ø150 mm na wylot powietrza
Ø120mm).
-
-
u sprzedawcy
-
ne.
•„0”
turbiny okapu
•„1”
•„2”
•„3”
•-
trza.
Button switches the light on. To switch the life off,
press the button one more time.
•
-
Table of contents
Languages:
Other Beko Ventilation Hood manuals

Beko
Beko HNT61210X User manual

Beko
Beko HCB93042X User manual

Beko
Beko CWB 6600 X User manual

Beko
Beko CFB 5432 W User manual

Beko
Beko CTB 9407 User manual

Beko
Beko HNT62610BH User manual

Beko
Beko HCP 91400 I User manual

Beko
Beko CFB 6432 User manual

Beko
Beko CEB 6020 S User manual

Beko
Beko 01M-8896743200-3520-09 User manual

Beko
Beko CWB 9910 B User manual

Beko
Beko HCA92641WH User manual

Beko
Beko HNS 61120 WHS User manual

Beko
Beko CFB 6310 W User manual

Beko
Beko HCA62640W User manual

Beko
Beko CWB 9700 X User manual

Beko
Beko HNU51310SH User manual

Beko
Beko HCB61731BXH User manual

Beko
Beko BHCB67841BBHSI User manual

Beko
Beko HNU 61422 B User manual