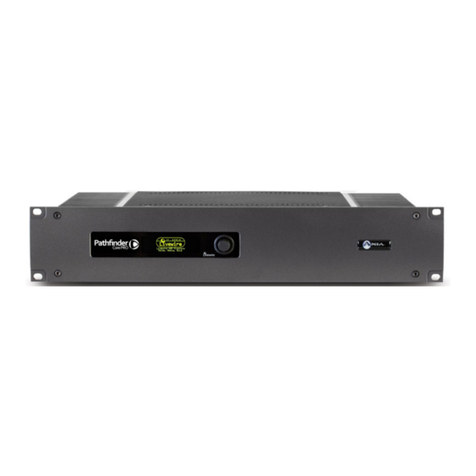
Belar FMHD-1 User manual

BELAR
Broadcast Equipment
FMHD-1
FM HD RADIO MONITOR

WARRANTY, FACTORY RECALIBRATION AND FACTORY SERVICE
FOR ASSISTANCE:
•CONTACT YOUR BELAR SALES REPRESENTATIVE
•CUSTOMER SERVICE AT THE BELAR FACTORY.
Immediately upon receiving your equipment, please make a careful inspection for any shipping damage.
If damage is found or suspected, please notify the carrier at once and then contact your dealer or the
BELAR factory. We strongly encourage you to save the shipping carton and shipping materials supplied
with your equipment. They are specially designed to properly protect your equipment, and in the event
that you need to return it for service, only these OEM shipping materials can ensure its safe return to our
factory.
All BELAR products are warranted against defects in materials and workmanship. This warranty applies
for one year from the date of delivery, FOB factory or, in the case of certain major components listed in
the instruction manual, for the specified period. BELAR will repair or replace products which prove to be
defective during the warranty period provided that they are returned to BELAR pre-paid. No other
warranty is expressed or implied. BELAR is not liable for consequential damages.
ARETURN MATERIAL AUTHORIZATION NUMBER MUST BE OBTAINED FROM BELAR IN
ADVANCE OF RETURN.
$Please call (610-687-5550) or email (sales@belar.com) to request an RMA number to display on the outside of your
shipping carton and all paperwork.
$A written statement with the name, address, telephone number & email address together with a brief description of the
work requested, must accompany all returns.
$The customer shall be responsible for all costs of transportation and insurance to and from the
BELAR factory, and all such costs must be prepaid.
PLEASE VISIT:WWW.BELAR.COM AND REGISTER YOUR PRODUCT SO WE MAY KEEP YOU
INFORMED OF THE LATEST HARDWARE AND SOFTWARE UPDATES.
We no longer ship PC Control Software with the units. Please visit www.belar.com and download the
latest WizWin© and Server PC Control Software. Software updates will be posted on our website
periodically. The FMHD-1 can be updated in the field using the PC Software.

BELAR ELECTRONICS LABORATORY, INC.
Operator’s Manual
FMHD-1
FM HD Radio Monitor
2006-2018© v 10.0.2
Starting Serial #450395
Edited 10/2/2018 12:44 PM
Broadcast Equipment


Table of Contents
1General Information _____________________________________________________________ 1
1.1 General Description _________________________________________________________ 1
1.2 Physical Description _________________________________________________________ 1
1.3 Electrical Description ________________________________________________________ 1
1.4 Electrical and Mechanical Specifications _________________________________________ 3
1.5 Accessories ________________________________________________________________ 4
2Preliminaries ___________________________________________________________________ 4
2.1 Initial Inspection ____________________________________________________________ 4
2.2 Claims ____________________________________________________________________ 5
2.3 Repacking for shipment ______________________________________________________ 5
3Installation _____________________________________________________________________ 5
3.1 Operating Environment & AC Line Power ________________________________________ 5
3.2 Monitoring Location & RF Signal Source _________________________________________ 6
3.3 FMHD-1 Installation at the Transmitter__________________________________________ 7
3.4 FMHD-1 Installation at the Studio ______________________________________________ 8
3.5 FMHD-1 Output Connections __________________________________________________ 9
3.5.1 Audio Outputs_____________________________________________________________________ 9
3.5.2 XLR Connections (analog channels 1–8) ________________________________________________ 9
3.5.3 AES/EBU BNC Connections (digital output channels 1–6)__________________________________ 10
3.5.4 Composite Signal Outputs __________________________________________________________ 10
3.5.5 Relay Connections_________________________________________________________________ 10
3.5.6 Ethernet Connection_______________________________________________________________ 10
3.5.7 RS-232 Connection ________________________________________________________________ 10
3.6 FMHD-1 System De-Emphasis ________________________________________________ 11
4Operation _____________________________________________________________________ 11
4.1 The User Interface__________________________________________________________ 11
4.2 Front-Panel Operation ______________________________________________________ 11
4.2.1 The Rotary Encoder _______________________________________________________________ 11
4.2.2 Navigation _______________________________________________________________________ 11
4.2.3 Selecting & Changing a Parameter____________________________________________________ 12
4.2.4 Exiting an Adjustment Screen________________________________________________________ 12
4.2.5 Entering a Popup Menu ____________________________________________________________ 12
4.2.6 Exiting a Popup Menu______________________________________________________________ 13

4.3FMHD-1 Modulation/Program-Level Readings (screen label change) ________________ 13
4.4 FMHD-1 Bargraph Displays___________________________________________________ 14
4.5 Spectrum Display __________________________________________________________ 14
5The FMHD-1 Display Screens______________________________________________________ 14
5.1 Main Tuning Screen ________________________________________________________ 14
5.2 SIS Data Screen ____________________________________________________________ 16
5.3 PSD Data Screen ___________________________________________________________ 17
5.4 Audio Bargraphs Screen _____________________________________________________ 19
5.5 Analog FM Stereo Screen ____________________________________________________ 19
5.6 Time Alignment Screen______________________________________________________ 20
5.7 Program Selection Screen____________________________________________________ 21
5.8 BER Data Screen ___________________________________________________________ 22
5.9 Alarms/Relays Screen _______________________________________________________ 23
6The FMHD-1 Popup Menus _______________________________________________________ 23
6.1 RF Popup Menu____________________________________________________________ 24
6.2 Composite Popup Menu _____________________________________________________ 25
6.3 Settings Popup Menus ______________________________________________________ 25
6.3.1 Unit Settings Popup Menu __________________________________________________________ 25
6.3.2 Output Settings Popup Menu________________________________________________________ 26
6.3.3 Network Status Popup Menu ________________________________________________________ 27
6.3.4 Network Configuration Popup Menu__________________________________________________ 27
6.3.5 Email Settings Popup Menu _________________________________________________________ 28
6.3.6 Information Popup Menu___________________________________________________________ 28
7FMHD-1 RF Spectrum Screen______________________________________________________ 29
7.1 General __________________________________________________________________ 29
7.2 On-Screen Spectrum Parameters ______________________________________________ 29
7.3 The RF Spectrum Popup Menu________________________________________________ 30
8List of Definitions _______________________________________________________________ 33
9Software Setup and Unit Update Information ________________________________________ 38
9.1 Connecting to the unit using the RJ-45 Network Jack ______________________________ 38
9.2 Connecting to the unit using the RS-232 Port ____________________________________ 38
9.3 Updating the FMHD-1 Firmware ______________________________________________ 39

9.4 Updating the FMHD-1 Lantronix® Ethernet Controller _____________________________ 39
10 Tables ________________________________________________________________________ 40
10.1 Table 1. - FMHD-1 DISPLAY SCREENS ___________________________________________ 40
10.2 Table 2. - FMHD-1 POPUP MENU MAP _________________________________________ 41
10.3 Table 3. - FMHD-1 Alarms/Relays Screen Defaults and Ranges ______________________ 46

FMHD-1 Operator’s Manual

FMHD-1 Operator’s Manual
BELAR ELECTRONICS LABORATORY, INC. Page 1
1General Information
1.1 General Description
The Belar FMHD-1 Modulation Monitor for FM HD Radio™ is a state-of-the-art wideband monitor
designed specifically for the measurement and characterization of FM hybrid In-Band/On-Channel
broadcast signals in the 88-MHz-to-108-MHz band. It simultaneously decodes and meters the
modulation of the analog FM carrier and the Main program audio carried by the IBOC digital sidebands
(subcarrier sets). In its base configuration, the FMHD-1 provides multiple high-quality audio output
signals for the analog FM program and any one of the digital audio program channels available in an
HD™ broadcast. (Optional hardware permits simultaneous monitoring of up to four digital program
channels.) The monitor simultaneously presents information about the digital data stream as well as
technical and program-related information carried by the data stream. On-board processing provides real-
time spectral analysis of the hybrid IBOC RF signal. Internally generated calibration signals permit
checking the accuracy of the analog metering at any time. Diagnostics assist servicing the HD Radio
system. Communications ports and a graphical user interface enable local or remote operation of the
FMHD-1 via an external PC.
1.2 Physical Description
The FMHD-1 is constructed on a standard 3½ X 19-inch EIA rack mount panel (2 EIA rack units; 89mm
X 483mm). The unit and rear-panel connectors extend 14¼ inches (362mm) to the rear of the front face of
the rack rails, but additional space should be allowed to accommodate the connectors used to make the
necessary electrical connections and adjust the RF input level controls. The standard XLR audio output
connectors require a total depth of no less than about 16½ inches (419mm) behind the front panel to
easily make connections. The front-panel encoder knob protrudes about one inch (25.4mm) outward from
the rack mounting.
All connections to the FMHD-1: the RF input connectors, the instrument communications connectors,
and digital and analog audio outputs are located on the rear panel. The rear-panel connectors include
panel-mounted BNC jacks and XLR output plugs, D-sub connectors, RJ-45 jacks, and an F connector.
Two rear-panel potentiometers facilitate adjustment of the signal level applied to each of the two high-
level RF inputs.
No user adjustments to the monitor circuitry are required to maintain specified performance. All factory
adjustments are located within the shielded compartment of the monitor.
1.3 Electrical Description
The Belar FMHD-1 is a precision DSP-based solid-state FM receiver that down-converts and
demodulates FM hybrid In-Band/On-Channel signals in the FM broadcast band. Front-panel tuning spans
the 88-MHz-to-108-MHz FM band in 100-kHz increments. The FMHD-1 may be driven by either
high-level RF transmission-line samples, or off-air from a receiving antenna. For installations at the
transmitter, the FMHD-1 provides two isolated, 50-Ω inputs that accept either a single RF feed from one

FMHD-1 Operator’s Manual
Page 2FMHD-1
directional coupler in “common-line” facilities, or separate analog and digital RF samples in “separate-
line” facilities.
The FMHD-1 provides high-accuracy modulation indications of conventional FM Stereo composite
signals present on the analog FM carrier of hybrid IBOC broadcasts. Peak analog modulation indications
of Total, Pilot, Left, Right, L+R, and L–R are presented both in bargraphs and in numerical readouts.
Average and minimum values appear in bargraphs. Simultaneously, the FMHD-1 decodes and meters the
audio levels of the Main HD program, providing both bargraph and numerical indications. By user
selection, the HD decoder may be set to provide the audio and program level readings of any other digital
audio program present on the station data stream. Supplemental HD decoder modules may be installed to
provide simultaneous aural monitoring of up to four HD channels, if present in the data stream.1
As a monitor of FM hybrid IBOC transmissions, the FMHD-1 provides visual indicators for time
alignment and amplitude agreement of the analog and Main HD programs, as well as an “audio in-phase”
indication, to help operators maintain smooth analog-digital blends in receivers. The presence or absence
of all eight possible digital audio programs is indicated on the main tuning screen. HD transmission
status indications include signal presence, program data acquisition, station information recovery, service
mode, received signal-to-noise power, two quality metrics, and the data and audio acquisition times. A
second screen presents data specific to the tuned station; a third presents the program information carried
on the data stream for listeners.
All readings are presented on a single 640 X 240 pixel LCD display centered on the front panel.
The FMHD-1 provides audio outputs for all stereo program channels. The outputs are available in both
analog and digital form. There are eight user-configurable outputs in analog format. These are
low-distortion, low-noise outputs suitable for driving high-quality audio monitoring equipment via long,
terminated lines. Any of the audio signals may also be monitored via a front-panel headphone jack. There
are six digital user-configurable AES-3ID outputs. The recovered analog FM stereo composite signal is
available in both analog and digital form. Four digital composite filters minimize the effects of
interference on the composite signal caused by IBOC carriers. The filtered composite signals may be
used to drive conventional FM monitors. The down-converted analog FM I and Q signals are provided
only in digital form.
Internal processing in the FMHD-1 provides spectrum analysis of the hybrid IBOC FM RF carrier-set.
Special computations provide numerical readouts of the lower, upper, and total sideband power ratios in
dBc. User-selectable calibration signals conveniently verify proper operation of the analog FM metering
circuitry and other monitors fed by the FMHD-1 FM composite outputs. Four user-selectable test signals
are provided for testing audio systems connected to the unit.
Configurable alarms with adjustable thresholds are available for twenty-two FMHD-1 measurement
parameters. User-selectable external alarm indications include email messages and relay-contact closures.
The FMHD-1 may be operated as an addressed Internet device. Remote operation and interrogation of the
FMHD-1 by a PC is also possible via either the rear-panel RS-232 connector or RJ-45 Ethernet port using
the included Belar WizWin© software. Firmware updates for the FMHD-1 and its internal Lantronix
1Every FMHD-1 is provided with at least one HD Radio™ digital audio program decoder. Purchasing a second
HD decoder allows simultaneous audio program recovery of two HD programs. The second decoder is simply
inserted in an open card-edge connector. Addition of either a third or a third and fourth encoder requires the
purchase of one FMHD-1 expander card in addition to the additional HD decoder cards.

FMHD-1 Operator’s Manual
BELAR ELECTRONICS LABORATORY, INC. Page 3
Ethernet controller are also installed using a PC (with internet access) communicating with the FMHD-1
through either the RS-232 or the RJ-45 rear-panel port.
1.4 Electrical and Mechanical Specifications
RF Inputs
Frequency Range ...............................................87.3 to 108.1 MHz, Frequency Agile, 100-kHz Increments
High Level Input.......................................................................... 1Vrms to 10 Vrms, 50Ω, BNC Connector
Antenna Input........................................ 2.2mV sensitivity2, 75Ω, F-type Connector, 500mVrms maximum
Audio Outputs
Analog Outputs (8 assignable).................................................+10 dBm, 600Ω balanced, XLR Connector
AES-3ID (6 assignable)......................................................................... 1.0 Vpk-pk, 75Ω, BNC Connector
Headphone (1 assignable) .................................................................................................. 1/4" Phone Jack
Indicators
Analog Total Peak Modulation ● Analog L+R Presence ● RF Presence ● Pilot Presence ● HD Station ●
Digital Audio Acquisition ● SIS CRC ● Audio Time Alignment ●Audio Amplitude Alignment ●
Audio Polarity ● HD Program Presence (8 channels) ● HD L+R Presence (8 channels)
Analog FM Modulation Measurement
Modulation (Peak, Ave, Min):
Total, L, R, L+R, L−R .................................................................................0 to 125.0%, 0.1% resolution
Pilot............................................................................................................... 0 to 15.0%, 0.1% resolution
Accuracy is better than 1%. Metering of Analog FM Stereo conforms to legacy FCC guidelines.
FFT RF Spectrum Analysis
Display Modes.......................................................................Realtime, Peak Hold, Average, Infinite Hold
Amplitude
Number of Points.................................................................................................................................181
Scale.........................................................................................................+100.0 to −150.0 dB adjustable
Resolution........................................................................................................................................0.1 dB
Frequency
Number of Points.................................................................................................................................501
Resolution BW......................................................................................50, 100, 250, 500, 1000, 1500 Hz
Analog FM Composite Outputs
Analog format (2 buffered) .................................... 1.5 Vrms @ 100%, 75Ω unbalanced, BNC Connector
Digital format (2 buffered).................................................................................. LVDS, 100Ω, RJ-45 Jack
Analog FM Composite Output Performance (High-Level Input, LVDS Output)
Frequency Response ..........................................................................................±0.01 dB, 10 Hz to 100 kHz
SNR......................................................................................................................100 dB, 75 µs de-emphasis
Distortion........................................................................................................... 0.001%, 75 µs de-emphasis
Analog FM Composite Output Stereo Capability (High-Level Input, LVDS Output)
Frequency Response (L and R)..............................................................................±0.1 dB, 10 Hz to 15 kHz
SNR (Stereo)......................................................................................................... 90 dB, 75-µs de-emphasis
2For >60 SNR at any of the Composite Outputs.

FMHD-1 Operator’s Manual
Page 4FMHD-1
Distortion.............................................................................. 0.001%, 10 Hz to 15 kHz, 75-µs de-emphasis
Separation
L to R, R to L ....................................................................................................... 100 dB, 10 Hz to 15 kHz
Crosstalk
L+R to L−R ............................................................................................................................... 100 dB min
L−R to L+R............................................................................................................................... 100 dB min
SCA to L+R............................................................................................................................... 100 dB min
SCA to L−R............................................................................................................................... 100 dB min
Alarm Outputs
Relays (4 assignable)...............................................................FORM C, 15-pin Female D-Sub Connector
Computer Interface
RS-232............................................................................................................9-pin Male D-Sub Connector
Ethernet 10/100 Base -T..............................................................................................................RJ-45 Jack
Physical
Dimensions .............................................................................................19"x3.5"x14.5", 2 EIA Rack Units
Power Requirements ...................................................................................34 Watts, 100-240V, 50/60 Hz
Shipping Weight ....................................................................................................................15 lbs. (6.8 kg)
1.5 Accessories
For stations wishing to simultaneously decode multiple HD program streams, Belar offers additional
separate plug-in IBOC HD™ decoding modules. Each module adds the capability of independently
decoding one additional HD stream. Up to three additional modules may be installed, offering a total of
four simultaneous HD audio program outputs. The first additional HD decoder plugs into an auxiliary
card-edge connector on the FMHD-1 main circuit board. Addition of either a third or a third and fourth
HD encoder requires the added purchase of one expander card for their installation.
There are no other accessories for the FMHD-1 available from Belar.
2Preliminaries
2.1 Initial Inspection
Check the shipping carton for external damage. If the carton exhibits evidence of abuse in handling
(holes, broken corners, etc.) ask the carrier's agent to be present when the unit is unpacked. Carefully
unpack the unit to avoid damaging the equipment through use of careless procedures. Inspect all
equipment for physical damage immediately after unpacking. Bent or broken parts, dents and scratches
should be noted. If damage is found, refer to Paragraph 2-2 for the recommended claim procedure. Keep
all packing material for proof of damage claim or for possible future use.
The FMHD-1 is shipped with the booklet “Guide to Operations,” this manual (“FMHD-1 Operator’s
Manual”), a three-conductor line cord, and four black rack mounting screws.

FMHD-1 Operator’s Manual
BELAR ELECTRONICS LABORATORY, INC. Page 5
2.2 Claims
If the unit has been damaged, notify the carrier immediately. File a claim with the carrier or transportation
company and advise Belar of such action to arrange the repair or replacement of the unit without waiting
for a claim to be settled with the carrier.
2.3 Repacking for shipment
If the unit is to be returned to Belar, attach a tag to it showing owner and owner's address. A description
of the service required should be included on the tag. The original shipping carton and packaging
materials should be used for reshipment. If they are not available or reusable, the unit should be
repackaged in the following manner:
•Use a double-walled carton with a test strength no less than 275 pounds.
•Use heavy paper or sheets of cardboard to protect all surfaces.
•Use at least 4 inches of tightly packed, industry approved, shock absorbing material such as extra firm
polyurethane foam or rubberized hair.
•NEWSPAPER IS NOT SUFFICIENT FOR CUSHIONING MATERIAL.
•Use heavy-duty shipping tape to secure the outside to the carton.
•Use large FRAGILE labels on each surface.
•Return the unit, freight prepaid, via airfreight.
•Be sure to insure the unit for full value.
NOTE: All text below that duplicates text appearing on the FMHD-1 display appears in a Courier font.
Example: In this manual, “Bypass” corresponds to the word “Bypass” appearing in the display.
3Installation
3.1 Operating Environment & AC Line Power
The FMHD-1 All-In-One FM Modulation Monitor is designed to be mounted in a standard
19-inch (48cm) rack with EIA standard spacing. Air space should be provided above and below the unit
to provide cooling. When mounted above heat-generating equipment, consideration should be given to the
requirement of the free movement of cooler air around and through the FMHD-1. In no instance should
the chassis temperature be allowed to rise above 113°F (45°C). Mount the FMHD-1 in the rack using the
four black 10-32 rack mounting screws provided.
Prior to serial number 450395,the FMHD-1 was powered by an external switching
power supply module (supplied with the unit) that operates on line voltages in the range of 100 to 240VAC,
50 to 60 Hz. It provides outputs of +5 VDC, and ±12 VDC for the FMHD-1 chassis via a 48-inch (1.2m)
captive cable and a 5-pin DIN connector. The power supply module is connected to the AC line via an
IEC-320 three-conductor cable with a PH-386 grounded connector. When the power supply module is
connected between the FMHD-1 and an appropriate AC line source using an appropriate power cord, the
monitor is grounded. (To preserve the grounding when operating the unit from a non-standard two-contact
AC outlet, use a three-prong-to-two-prong adapter at the AC-line end and connect the green pigtail on the
adapter to a good electrical ground.)
Use the power supply module supplied with the FMHD-1. Substituting another power supply module may
result in damage to the FMHD-1, or at a minimum, a reduction in performance.

FMHD-1 Operator’s Manual
Page 6FMHD-1
The FMHD-1 does not have a power switch. When the AC-line power cord is connected to the power
supply module and the module is connected to the DIN power jack on the FMHD-1 chassis, the unit is
operating.
3.2 Monitoring Location & RF Signal Source
The FMHD-1 is designed to operate either at the station’s transmitter site or at a remote receiving
location using an outdoor antenna. Operation using a direct feed from the transmitter provides the most
accurate readings and should always be used for proof-of-performance or system performance
measurements.
Monitoring hybrid IBOC HD™ FM broadcasts at the transmitter presents multiple connection
possibilities for the FMHD-1. It is important that the RF samples used for monitoring (as well as for
determining compliance with spurious emissions limits) be taken as close to final antenna feed point as
possible. This way, all of the effects of any band-limiting or other imperfections in the RF system are
included in the performance and spurious emissions measurements.3
Common-Line Facilities:
For the low-level combining case, a single high-level RF sample to feed the FMHD-1 is taken from the
transmission line to the antenna. Similarly, in the case where the analog and digital signals are combined
at high-level in a coaxial combiner, a single high-level RF sample is taken from the transmission line to
the antenna. It is important that the directional coupler used to obtain this RF sample have sufficient
bandwidth to provide an accurate representation of spurious emissions. Additionally, it is recommended
that the directivity of the coupler be at least 30dB to prevent reflected power in the line from overloading
or corrupting the readings of the FMHD-1 or other instrumentation used to evaluate the RF system.
Separate-Line Facilities:
In the situation where two transmitters independently feed either a dual-feed antenna or two separate
antennas via two transmission lines, the two high-level inputs on the FMHD-1 are fed RF samples
obtained from each transmission line. A precision RF combiner in the monitor sums the analog and
digital RF components to form the complete IBOC RF signal, while maintaining isolation between the
two RF feeds. Two rear-panel set screws allow adjustment of the relative amplitudes of the analog and
digital portions of the HD signal so that the FMHD-1 spectrum display and relative power calculations
accurately represent the off-the-air signal. Just as for common-line HD facilities, it is important that the
directional couplers used to obtain the RF samples have sufficient bandwidth and directivity to both 1)
provide an accurate spectral representation of the transmitted signal and 2) to prevent overloading or
corruption of the readings of the FMHD-1 or other test instruments.
NOTE: Because the analog and digital RF signal levels in separate-line facilities are adjusted
independently at the monitor, it is necessary to have completed the NRSC-recommended mask
compliance measurement immediately prior to setting the input levels on the FMHD-1. Otherwise the
monitor’s indication of the analog-to-digital sideband power ratio will be inaccurate.
Monitoring at the Studio:
Placing the FMHD-1 at a remote site, typically the main studio, requires an outdoor receiving antenna
capable of providing an un-impaired off-air signal of the station(s) to be monitored. For remote
3Recommendations for measurements of hybrid FM IBOC transmission systems are presented in National Radio
Systems Committee document NRSC-G201-A, NRSC-5 RF Mask Compliance: Measurement Methods and Practice,
April 2010. This document is available on-line at www.nrscstandards.org.

FMHD-1 Operator’s Manual
BELAR ELECTRONICS LABORATORY, INC. Page 7
monitoring at any distance from the station transmitting, the accuracy of FMHD-1 readings is dependent
on the radio transmission path between the transmitter and the receiving antenna. Also, readings may be
compromised in receiving locations off the main beam of the transmitting antenna.
Once the monitoring location is known, follow the set-up directions in the appropriate section following
below. Then, to minimize the chance of damaging the FMHD-1 by excessive RF input levels, carefully
follow the procedures for adjusting the input level(s) following power-up.
3.3 FMHD-1 Installation at the Transmitter
Once the FMHD-1 is properly mounted in the rack (see “Operating Environment,” above), make sure the
level of both the analog and digital 50Ω FM RF samples to be supplied to the monitor are less than
10Vrms (28.3Vpk-pk). Operation above 10Vrms input may damage the unit. Simultaneously, for
separate-line facilities, a sufficient analog RF signal level must be provided so that a proportionally scaled
IBOC digital RF signal sample does not fall below 1Vrms (2.8Vpk-pk). Otherwise, accuracy of the
monitor readings may be reduced. If there is any doubt about the output level of the RF feed, follow the
directions in the following paragraphs carefully.
Prepare, but do not connect, a good quality 50Ωcoaxial cable, such as RG-58, to carry the analog RF
sample from its source to the BNC jack labeled “IN 1” on the rear of the FMHD-1. (The jack is located
within the “RF INPUTS” demarcation on the rear panel.) Note that the RF sample source and the coaxial
cable feeding the FMHD-1 high-level inputs must have an impedance of 50Ω. Otherwise, performance of
the unit will be degraded.
For separate-line facilities, similarly prepare, but do not connect, a second 50Ω coaxial cable to carry the
digital RF sample from its source to the BNC jack labeled “IN 2” on the rear of the FMHD-1.
The FMHD-1 RF input level is displayed near the center of the “Main Tuning Screen”, directly under the
tuning frequency readout. When the RF “Input Select”is set to “High Level”, the RF level
indication is a bargraph indicating in percent, which is demarcated in 20% increments. One hundred
percent is the optimum value. The bar lights yellow for readings below 80%, green between 80% and
110% and red from 110% to 120%. Operation anywhere in the green region will provide adequate
performance.
Transmitter Installation Procedure—Separate-Line Facilities:
1. Mount the FMHD-1 in a rack with the required AC power and sufficient cooling.
2. Obtain a 50Ω RF sample of less than 10Vrms from the analog antenna transmission line. Install, but do not
connect, a 50Ω coaxial line to carry the RF sample to the rear panel of the FMHD-1.
3. Obtain a 50Ω RF sample of less than 10Vrms from the digital antenna transmission line. Run, but do not
connect, a 50Ω coaxial line to carry the RF sample to the rear panel of the FMHD-1.
4. Apply power to the FMHD-1.
5. After the Main Tuning Screen appears, tune the FMHD-1 to the carrier frequency using the encoder knob.
(Control of the FMHD-1 and use of the encoder knob are described under “Front Panel Operation”, on page
11.)
6. Bring up the RF Popup Menu on the display by depressing the encoder knob. Enter the “Input Select”
sub-menu and set the input to “High Level”.
7. Set the potentiometer adjacent to jack “IN 1” on the rear panel to roughly three-quarters fully clockwise. Set
the potentiometer adjacent to jack “IN 2” on the rear panel to roughly one-half full.
8. With the analog transmitter on, connect the analog RF sample feed to the FMHD-1 “IN 1” BNC jack. If the
RF Level bargraph indicates red, immediately remove the RF feed and reduce the level of the analog RF
sample at its source.
9. Adjust the FMHD-1 “IN 1” potentiometer setting to obtain approximately 100% RF Level.

FMHD-1 Operator’s Manual
Page 8FMHD-1
10. With the digital transmitter on and transmitting data, connect the digital RF sample feed to the FMHD-1 “IN
2” BNC jack. If the RF bargraph indicates red, immediately remove the RF feed and reduce the level of the
digital RF sample at its source.
11. Using the rotary encoder, activate the FMHD-1 “RF Spectrum Screen”. (See Section 4 beginning on page 11
for instructions.) Activate the “Spectrum” popup menu and set “Measurements:” to “ON”.
12. While observing the “Ratio” indication in the spectrum display, carefully adjust the “IN 2” potentiometer to
obtain the same IBOC carrier-to-sideband power ratio reading as was previously obtained using the NRSC-
G201 mask compliance procedure.
13. Connect any desired FMHD-1 outputs and continue with the FMHD-1 setup.
Transmitter Installation Procedure—Common-Line Facilities:
1. Mount the FMHD-1 in a rack with the required AC power and sufficient cooling.
2. Obtain a 50Ω RF sample of less than 10Vrms from the analog antenna transmission line. Install, but do not
connect, a 50Ω coaxial line to carry the IBOC RF sample to the rear panel of the FMHD-1.
3. Apply power to the FMHD-1.
4. After the Main Tuning Screen appears, tune the FMHD-1 to the carrier frequency using the encoder knob.
(Control of the FMHD-1 and use of the encoder knob are described under “Front Panel Operation”, on page
11.)
5. Bring up the RF Popup Menu on the display by depressing the encoder knob. Enter the “Input Select”
sub-menu and set the input to “High Level”.
6. Set the potentiometer adjacent to jack “IN 1” on the rear panel to roughly three-quarters fully clockwise.
7. With the analog transmitter on, connect the IBOC RF sample feed to the FMHD-1 “IN 1” BNC jack. If the RF
Level bargraph indicates red, immediately remove the RF feed and reduce the level of the RF sample at its
source.
8. Adjust the FMHD-1 “IN 1” potentiometer setting to obtain approximately 100% RF Level.
9. Using the rotary encoder, activate the FMHD-1 “RF Spectrum Screen”. (See Section 4 beginning on page 11
for instructions.) Activate the “Spectrum” popup menu and set “Measurements:” to “ON”.
10. If the RF sample is properly obtained, the “Ratio” indication in the spectrum display should be the same as the
IBOC carrier-to-sideband power ratio previously determined using the NRSC-G201 mask compliance
procedure.
11. Connect any desired FMHD-1 outputs and continue with the FMHD-1 setup.
3.4 FMHD-1 Installation at the Studio
A good off-air (remote) installation of the FMHD-1 will provide high performance for all but
proof-of-performance measurements and critical testing. For studio installation of the unit, proceed as
follows.
The Main Tuning Screen indicates the FMHD-1 RF input level just below the tuning frequency numerals
at the top-center of the display. Both a bargraph and numerical readout indicate the RF Level, with a
green indication of “–60.0dB” or above being in the optimum range. The bargraph for off-air inputs is
demarcated in 20-dB increments. The bar lights yellow for readings below –60.0dB. Red indicates an
input overload—immediately reduce the input level.
Off-Air Antenna Requirements:
1. Antenna is oriented directly at the transmitter and has a clear path free of any obstructions or adjacent
reflecting surfaces, prominent ground formations, and heavy vegetation. The receiving location should fall in
the main lobe of the transmitting antenna, in both the horizontal and vertical planes;
2. Avoids strong local sources of radio-frequency interference;
3. Provides at least 2 millivolts of the desired signal into 75Ω. For optimum performance, 300 microvolts or
more is desirable;
4. Uses a high-quality, low-loss 75Ωcoaxial cable, such as RG-59, to connect the receiving antenna to the
Antenna Input of the FMHD-1 with an F connector.

FMHD-1 Operator’s Manual
BELAR ELECTRONICS LABORATORY, INC. Page 9
Studio Installation Procedure:
1. Mount the FMHD-1 in a rack with the required AC power and sufficient cooling.
2. Set up an appropriate receiving antenna with a clear path to the transmitter. Run a 75Ω lead-in with an
F connector to the rack.
3. Apply power to the FMHD-1.
4. After the Main Tuning Screen appears, tune the FMHD-1 to the carrier frequency using the encoder knob.
(Control of the FMHD-1 and use of the encoder knob are described under “Front Panel Operation” on page
11.)
5. Bring up the RF Popup Menu on the display by depressing the encoder knob. Enter the “Input Select”
sub-menu and set the input to “Antenna”.
6. Connect the antenna lead-in to the FMHD-1 “Antenna” F connector. If the RF level bargraph on the
Main tuning Screen indicates red, immediately remove the antenna feed and place a 75-Ω attenuator in the
antenna feed line.
7. Adjust the external attenuator to obtain an RF Level bargraph reading in the green.”
8. Connect any desired FMHD-1 outputs and continue with the FMHD-1 setup.
3.5 FMHD-1 Output Connections
All electrical connections to the FMHD-1 are made through connectors on the rear panel of the unit.
Refer to the photograph of the FMHD-1 rear-panel on page 3 of the booklet FMHD-1 Guide to
Operations for the locations of the various connectors.
3.5.1 Audio Outputs
There are eight XLR output connectors carrying the monitor audio and test signals in analog form and
three BNC output connectors providing six signals in the serial digital AES/EBU format. (At initial
power-up, the monitor signals are automatically assigned to the outputs according to the defaults listed in
Table 2: “FMHD-1 Popup Menu Map,” under “Settings: Outputs”.)
3.5.2 XLR Connections (analog channels 1–8)
Analog output channels 1 through 8 employ active-balanced output circuitry designed to drive 600Ω
differential loads via XLR-type connectors. The outputs are chassis-mounted XLR plugs, with the
following connections:
Pin 1 Circuit ground and shield
Pin 2 Negative polarity output
Pin 3 Positive polarity output
Positive polarity has the sense that modulation raising the carrier or sub-carrier frequency results in an
increasing output voltage at pin 3 of the connector. The output level is +10dBm into 600Ω, or 2.45Vrms,
for 100% modulation.
These lines will drive up to 500 feet (150m) of shielded twisted-pair broadcast cable, such as Belden™
8451, when terminated in 600Ω.
If an XLR output is used to drive an unbalanced load, the output connection of the alternate polarity
(either pin 2 or pin 3 of the XLR chassis connector) must be connected to pin 1 of that same connector
with a short lead.
(Note that while the two outputs of the active-balanced pair may be used to drive separate unbalanced
loads, imperfect loading of the line-balancing mechanism of the circuit results in interaction between the
two outputs. Independently loading the two signal connections may jeopardize signal integrity.)

FMHD-1 Operator’s Manual
Page 10 FMHD-1
3.5.3 AES/EBU BNC Connections (digital output channels 1–6)
These are three 75Ω coaxial outputs conforming to the AES-3ID serial transmission standard for
distribution via 75Ω coaxial cables. The output swing is 0.5Vpk-pk into a properly terminated cable. The
sources designated as odd-numbered are transmitted first; those designated as even-numbered follow in
the three output channel pairings of channels 1 & 2, 3 & 4, and 5 & 6.
3.5.4 Composite Signal Outputs
The FMHD-1 provides precision versions of the demodulation composite signals of analog FM broadcast
stations in their un-altered baseband form. These may be used to drive FM exciters in re-broadcast
applications, for performing proof-of-performance testing of FM Stereo broadcasts, for observation on an
oscilloscope, or for other test purposes. There are two analog composite outputs and two digital
composite outputs. The analog outputs appear on rear-panel BNC jacks and have a source impedance of
75Ω. Full modulation, or 75.0 kHz peak deviation, provides about 2.1 volts peak, or about 1.5Vrms,
un-terminated. (For a terminated 75Ωcable, divide these voltages by two.) The two digital composite
outputs appear on separate RJ-45 jacks and carry 24-bit serial data on an LVDS physical interface.
(I and Q outputs of the down-converted FM signal are also available in digital form. Consult the factory
concerning their use.)
To obtain the most the most accurate measurements, with the lowest noise and distortion residuals, set up
the FMHD-1 at the transmitter and use a high-level input signal taken from the transmission line feeding
the antenna. With this arrangement, the analog receiver front-end is bypassed. When the LVDS digital-
format Composite Output is used, the entire demodulation chain in the FMHD-1 is DSP-based.
3.5.5 Relay Connections
Four Form-C relays provide electrically isolated normally open (NO) and normally closed (NC) contacts
to control external circuits. The relays are activated by alarm conditions set by the user in the
Alarms/Relay Screen. Maximum ratings of the relay contacts are 10 watts, 0.5 amps, and 200 VDC.
Connections to the contacts are made via a chassis-mounted female two-row, 15-pin, sub-miniature D
connector with locking nuts mounted on the rear panel of the FMHD-1.
The relay D-connector pin numbers are:
Relay
Common
Normally
Open (NO) Normally
Closed (NC)
#1 1 3 2
#2 4 6 5
#3 7 9 8
#4 10 12 11
Pins 13–15 are not used.
3.5.6 Ethernet Connection
A standard RJ-45 jack is provided to establish a connection between the FMHD-1 and a local area
network. Addressing for the FMHD-1 network connection is set in the Network Configuration Popup
Menu.
3.5.7 RS-232 Connection
The FMHD-1 may be operated remotely via the rear-panel RS-232 serial interface using the PC-based
WizWin© software. The FMHD-1 rear-panel RS-232 connector is a male, two-row, 9-pin, D
sub-miniature connector with locking nuts.

FMHD-1 Operator’s Manual
BELAR ELECTRONICS LABORATORY, INC. Page 11
The RS-232 D-connector pin numbers are:
Description Pin# Type
CTX 1 Input
RX 2 Input
TX 3 Output
RTS 4 Output
GND 5 Ground
Pins 6–9 are not used.
3.6 FMHD-1 System De-Emphasis
All audio outputs of the FMHD-1 are de-emphasized, i.e. the audio has the same frequency response at
the output as the program signals driving the IBOC encoder feeding the transmitter. The analog channel
outputs conform to the US standard 75-microseconds. De-emphasis is defined on page 34 in the
“Definitions” section.
4Operation
4.1 The User Interface
The FMHD-1 is controlled via a single large rotary encoder knob, which incorporates a momentary push
switch. A 640 X 240-pixel LCD color display is the primary front-panel readout for the monitor. User-
controlled settings of the unit are assigned to the multiple screens and “popup” menus which may be
selected for display.
Operation via the front-panel is described below. The unit may also be operated remotely via Belar’s
WizWin© software running on a remote PC. The PC may be connected to the FMHD-1 via either the
rear-panel RS-232 port or an Ethernet-type LAN or internet connection. The WizWin software presents a
virtual image of the FMHD-1 front-panel display on the PC screen. Therefore, remote operation on a PC
mimics operation from the front-panel and will not be discussed. (To download the latest version of the
WizWin software, go to www.belar.com. Instructions for downloading appear there, as well as in
Sections 9.3 and 9.4 of this manual.)
4.2 Front-Panel Operation
4.2.1 The Rotary Encoder
The rotary encoder, much like a computer mouse, provides the means to navigate the FMHD-1 display
screens, to select parameters, and to change settings. For a listing of the top-level screens, see Table 1,
“FMHD-1 Display Screens”, on page 40. For the popup menus and their access points, see Table 2,
“FMHD-1 Popup Menu Map”, on page 41.
4.2.2 Navigation
Rotating the (rotary) encoder knob navigates through the display screens in both directions, in a
wrap-around fashion. The presence of the ▲
▼
▲
▼
symbol, for “Exit Screen”, in the upper-right corner of any
screen indicates that the cursor is active in the screen presently in the display and that the cursor is

FMHD-1 Operator’s Manual
Page 12 FMHD-1
enabled to navigate only within the present screen. When the ▲
▼
▲
▼
is absent, the cursor is disabled, and
navigation to other screens occurs with rotation of the encoder knob.
4.2.3 Selecting & Changing a Parameter
For display screens which access user-selectable parameters (and within which navigation is possible), the
cursor position is marked by a rectangle formed by thin yellow lines surrounding one of the adjustable
parameters in question. To enter any screen and to make adjustments within the screen, it is first
necessary to momentarily depress the encoder knob to activate the cursor.Then, rotating the encoder
knob will move the cursor successfully through the adjustable parameters present on the screen (and only
the adjustable parameters) in both directions, in a wrap-around fashion. (Note that the “Exit Screen”
symbol ▲
▼
▲
▼
automatically appears in the upper-right corner of the display when the cursor is activated.)
To change a parameter highlighted by the cursor, momentarily depress the encoder knob. The selected
parameter will change from yellow to green. With the parameter highlighted in green, rotation of the
encoder knob will change its setting. The change will be reflected in the operation of the FMHD-1
immediately. To move to a different adjustment, momentarily press the encoder knob a second time. The
highlighted parameter will turn yellow, locking out further adjustment of that parameter. Subsequent
rotation of the knob will move the cursor through the other adjustable parameters present in the displayed
screen.
4.2.4 Exiting an Adjustment Screen
If the parameter marked by the surrounding yellow cursor is highlighted green, momentarily depress the
encoder to turn it yellow. Rotate the encoder knob until the cursor is at the ▲
▼
▲
▼
Exit Screen symbol at the
upper-right corner of the display. Momentarily depress the encoder knob. The ▲
▼
symbol will disappear.
Then, with the▲▲
▼
symbol absent, rotation of the knob will advance the display to the next screen.
4.2.5 Entering a Popup Menu
Any of the popup menus may be entered through the popup menu selection pull-down, which is
accessible from any screen. A listing of the popup menus and the user-adjustable parameters they each
contain appears in Table 2, “FMHD-1 Popup Menu Map”, on page 41.
Depress and hold in the encoder knob sufficiently long for the popup menu selection pull-down to appear.
(It is a blue and yellow pane in the upper right of the FMHD-1 front-panel display.) The initial selection,
“RF” is highlighted, and appears in blue type against a yellow background. Other selections in the popup
menu selection pull-down are made by rotating and depressing the encoder knob (two rotational detents
per selection). Once the desired category has been highlighted, pushing the encoder knob momentarily
enters that category, typically offering multiple sub-categories of adjustable parameters.
The desired sub-category again is selected by momentarily depressing the encoder knob. If only a single
category is present, a parameter adjustment is then made by rotating the encoder until the desired choice
appears. If multiple categories are present, the encoder knob is used to navigate through a multi-parameter
blue pane to select the parameter to be adjusted. In the first case, when the knob selects the parameter
options directly, simply depressing the knob following the adjustment clears the popup menu, and returns
the user to the display screen.
In the case where a blue, multi-parameter popup menu pane appears, the cursor is automatically activated
and is placed at the first adjustable parameter in the pane. In the same manner as for the display screens, a
Table of contents