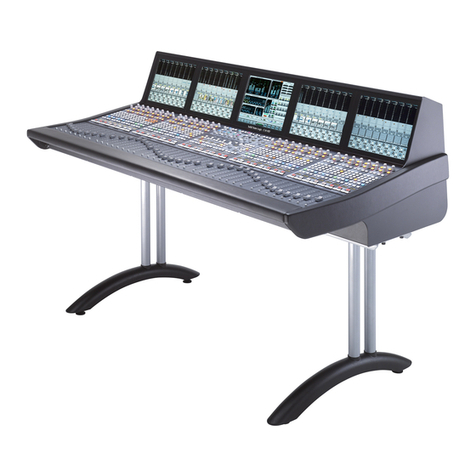
Solidyne D-612 User manual


www.SolidynePro.com Page 2

Contents-
CHAPTER 1 – Overview .........................5
1.1 Abou his manual........................................5
1.2 Shipping lis ..................................................5
1.3 Fea ures........................................................5
1.3.1 Input channels...................................................5
1.3.2 Monitors.............................................................5
1.3.3 Outputs..............................................................6
1.3.4 ETM – VCA aders.............................................6
CHAPTER 2 – Ins alla ion ......................7
2.1 Overview.......................................................7
2.1.1 Parasitic signals.................................................7
2.2 Power source................................................8
2.3 Inpu channels..............................................8
2.3.1 LINE inputs........................................................8
2.3.2 USB audio inter ace...........................................8
2.3.3 MICROPHONE INPUTS....................................9
2.4 AUDIO OUTPUTS.........................................9
2.4.1 PROGRAM AND RECORDINGS......................9
2.4.2 USB send..........................................................9
2.4.3 MONITORING OUTPUTS...............................10
10
2.4.3.1 HEADPHONES....................................10
2.4.3.2 MONITOR SPEAKERS........................10
2.5 Tally ligh ....................................................10
2.6 Telephonic Hybrid......................................10
2.6.1 CONNECTING A STANDARD LINE...............10
2.6.1.1 Null- actor.............................................10
2.6.2 CONNECTING A CELL PHONE.....................10
2.6.2.1 Re-connect a paired mobile.................11
2.6.2.2 Setup the level.....................................11
2.6.2.3 TURN OFF BLUETOOTH....................11
2.6.3 EXTERNAL HYBRID.......................................11
2.7 Grounding agains ligh ing.......................12
CHAPTER 3 – Opera ion ......................13
3.1 Overview.....................................................13
3.1.1 Quick test.........................................................13
Hybrid channel.................................................13
3.2.1 Operation.........................................................14
3.2.2 Using a cell phone...........................................14
3.2.2.1 Incoming call........................................14
3.2.2.2 End the call..........................................15
3.2.2.3 Resume the call on the cell phone.......15
3.2.2.4 Make a call...........................................15
3.2.3 Con erences....................................................15
3.2.3.1 Being the cell phone on-air..................16
3.2.3.2 Being the landline on-air......................16
3.2.4 Send PGM signal to the phone........................16
3.3 Moni or sec ion..........................................16
3.3.1 Using monitors and headphones.....................16
3.3.2 Use into integrated Studios.............................17
3.3.3 Previous listening (CUE).................................17
3.3.4 Talk back.........................................................17
3.4 Microphone channels................................18
3.4.1 Features..........................................................18
3.4.2 Processing.......................................................18
3.5 Line channels.............................................19
3.6 Recordings.................................................19
3.6.1 Direct to Hard Disc recording..........................20
3.6.2 Recording the phone lines...............................20
CHAPTER 4 – D612/IP ..........................21
4.1 In roduc ion................................................21
4.2 Power source..............................................21
4.3 STL link.......................................................21
4.3.1 IP access.........................................................21
4.3.2 Destiny IP address..........................................21
4.3.3 Audio settings..................................................22
4.3.4 Using a microwave digital link.........................22
4.3.5 Decoding using a computer.............................22
4.4 Decode an incoming s reaming................23
4.4.1 Audio rom the incoming streaming.................23
4.5 O hers connec ions....................................23
4.5.1 Full-duplex link with unknown IP at the Studios
..................................................................................23
4.5.2 Link with repeaters..........................................24
CHAPTER 5 – HD3/HD5 ........................25
5.1 Overview.....................................................25
5.2 Connec ions...............................................25
5.2.1 Connection to the mixer console.....................25
5.2.2 Connections at the Studio...............................25
5.3 Using he HD3/HD5.....................................25
CHAPTER 6 – Specifica ions ...............27
6.1 How to get a long li e o the console...................27
6.2 Preventive Maintenance.....................................27
6.3 Spare parts.........................................................27
5.5 Tech specs.........................................................29
No es.................................................................30
Page 3 www.SolidynePro.com

This page was lef emp y in en ionally.
www.SolidynePro.com Page 4

CHAPTER 1 Overview
1.1 Abou his manual
REVISION 18.09, September 2018
Solidyne® All rights reserved. No part o this man-
ual may be reproduced, copied or transmitted in
any orm or by any electronic or mechanical
means: either in whole or in part.
1.2 Shipping lis
When unpacking the unit; check the contents to
veri y that the console has not received blows
during the shipment. Inside the packaging you
receive the ollowing elements:
•1 switching power source 90-240 V
•This user manual
•
1 guaranty agreement
•
1 tubular connector (2,5 mm for Tally Light
•
4 self-adhesive rubber pads.
Optionally:
•
Wiring kit (optional . If you did not acquire the
wiring kit, you will receive the corresponding
DIN connectors.
•One RJ45 Ethernet wire (only for models
/AoIP
1.3 Fea ures
D612 console is a compact, solid and elegant unit;
with a great lexibility or interconnection. It in-
cludes USB digital I/O which brings digital link with
the computer; avoiding the use o sound cards in
the computer.
D612 has 5 100mm pro essional
Conductive-Ce-
ramic ader o with ETM-VCA control that o er a
li e utility o one million operations (over 15
years). It is the best solution or small and
medium radios; and or auxiliary recording stud-
ies in great stations.
1.3.1 Inpu channels
There are 2 microphone channels, that manages
our microphone inputs. Each input has dual input.
Main inputs MIC-1 and MIC-2 supports phantom
power o 48V, switched rom the ront panel. Mic
channels have a processing stage that includes 4
bands equalizer and automatic dynamic range
compressor. Each microphone channel can be
sent individually to the air signal (PGM) or as-
signed to the processing stage. MIC-3 channel can
be switched to AUX stereo line input.
Each mic ader can manage two dynamic micro-
phones. At the rear panel you ind 4 XLR inputs
(MIC-1a; MIC-1b; MIC-2a; MIC-2b). The built-in
dynamic compressor compensates the level be-
tween the microphones. It's appropriated that
mic's connected to the same channel are the
same model.
3 LINE channels allow connecting up to 6
sources. Channels 3 and 4 manages unbalanced
analogical inputs (Line-1 and Line-2) and balanced
inputs (Bal-1 and Bal-2) whereas channel 5 are
digital, with direct connection to the computer via
USB. In addition, all channels have one analog
auxiliary input.
All the channels count on a gain control, that take
e ects on the selected input (main or auxiliary).
“Telephone Hybrid” manages one land telephone
lines (2 wires) and one cellular phone linked via
Bluetooth. Both can be in con erence. The use is
very simple, since many unctions are auto-
mated. Additionally, the console has send and
return connector or external hybrids.
1.3.2 Moni ors
The monitoring area distributes the signals to the
loudspeakers and headphones on the studio and
the control room.
S udio & Con rol Room has a unique level knob
or loudspeakers and headphones; and the assign-
ment switches that allow select between ON-AIR
signal (external tuner), console output (PGM) or
recording output (REC). Usually the level in the
console is ixed; since a headphones mixer allows
to manage each headphone and active speakers
has it own level knob.
CUE moni or The console has a built-in loud-
speaker or cueing, with its own control level. CUE
is an internal send that allows listening to the audio
signal previous to the ader. The cue signal also is
sent to the Control Room headphones.
Additionally, monitoring section contains the
Talkback circuit; that operates as well in combi-
nation with loudspeaker CUE to engage in a pri-
vate dialog rom the hybrid with a telephone call
without disturbing the on-air signal.
Page 5 www.SolidynePro.com

1.3.3 Ou pu s
Solidyne D612 has wo main ou pu s named
PGM (Program) and REC (recording). Phone lines
are sent only to PGM.
In addition it has an USB digi al ou pu that ap-
pear in the computer as external sound record-
ing devices (USB recording devices) and sends
the program signals.
The outputs are:
1. PGM, The PROGRAM output is used the
send the signal to the air.
2. REC, used to recordings (and allows to lis-
ten a channel in the main monitors without
send it to the air .
3. PGM/REC USB, program or recording out-
put is also available via USB.
4. PGM over Ethernet (optional): Available
in models with the expansion /IP. The con-
sole can send RTP streaming to link with
the transmitter plant; or mpeg streaming to
upload to an Icecast server (see Chapter 4
– Models D612/IP
D612 has send & return connections or ex ernal
hybrid. The audio rom the external hybrid enters
trough the “hybrid channel” and operates just as
the built-in hybrids; which continue being operative.
Please note that land lines o internal & external
hybrids will work in con erence.
The Tally ou pu allows the direct connection o
ON-AIR LED’s lights. Tally activates when opening
the mic channels. The mixer has built-in tally LED.
TALLY OUTPUT LOAD DOES NOT HAVE TO
EXCEED 120mA (two Solidyne ON-AIR lights).
If your radio uses the old incandescent light
bulbs, a 1 V relay must be connected.
1.3.4 ETM – VCA faders
Using a technique o control called ETM-VCA
(Electrometric Voltage Controlled Ampli ier) the
aders DO NOT manage audio signals. The
change on the level is made using low noise ampli-
iers o great stability. The main aders only handle
control signals that modi y the gain o the elec-
tronic ampli iers. For more in ormation please visit
our WEB site.
The main advantages o this technology are:
•Eliminates the noisy signals due to dirty
faders.
•Eliminates the maintenance and improves the
life of faders.
•Gives a perfect stereo tracking (less than 0,1
dB error) between Left and Right channels.
•Allows using Conductive Ceramic faders of
two million guaranteed operations (about 15
years of use).
www.SolidynePro.com Page 6

CHAPTER 2 Installation and wiring
2.1 Overview
Installation o Solidyne D612 doesn’t present par-
ticular jobs. However, keep in mind the basic rules
or all pro essional audio installations. The bal-
anced inputs o the D612 uses DIN-5 multipin con-
nectors (provided with the console). In option, you
can acquire the Solidyne wiring kit (MNG612),
which include all the cables and connectors
needed or the set up.
For console grounding use the rear side GND
bronze ip with a mm cable to a good buried
cooper bar.
2.1.1 Parasi ic signals
All unwanted signals that appear in audio lines
usually consider parasitic signals. A common type
are denominated humming, low requency signals
(multiples o 50/60 Hertz) caused by the interaction
o electromagnetic ields coming rom the AC line.
When the inter erence source is a magnetic ield
(generally originated in a supply trans ormer) the
resultant inter erence will be denominated electro-
magnetic humming. When the inter erence is due
to such electric potentials as cables that take sup-
ply tensions, that are elevated in comparison with
the audio signals present in the circuit, you will be
in presence o electrostatic humming. The distinc-
tion is not merely academic, because the resolu-
tion o a problem supposes the knowledge o the
noise type to apply the correct solution.
Examples: To minimize the reception of electromag-
netic humming in the wires, remember the following rule:
"THE AREA AMONG TWO AUDIO WIRES WILL BE
MINIMUM." It implies that the cables will be tied very
close, like the shielded twisted pair audio cables. They
should pass far away from any transformer or devices
that manage high-intensity currents. Is important to re-
member that a wire can be good shielded, but if his con-
ductors don’t complete the conditions of minimum area it
will be susceptible to take magnetic humming.
Other parasitic signals are: AC HUM, RADIO FRE-
QUENCY and CROSSTALK. As hum noises like
the radio requency are originated by electromag-
netic ields o high requency; the irst ones are
originated by disturbances due to the connection
and disconnection o equipment’s to the AC line,
the seconds ones are generated by communica-
tions transmitters or industrial equipment. I these
signals penetrate into audio lines, with su icient in-
tensity, can surpass the action o the special pro-
tection ilters, and to reach some sensible part o
the input stages. In that case, the inter ering sig-
nals can be demodulated and already turned audio
signal, and will be ampli ied by the rest o the sys-
tem. It is undamental, there ore, to maintain the in-
ter erence within reduced margins. It is obtained
avoiding very long audio lines, with aerial sections
or that pass near o trans ormers or RF transmit-
ters. For protection against very high requencies is
advisable to use double shielded cables, guar-
antied by the manu acturer.
CROSSTALK is the reception o signals coming
rom other lines o audio. This, like all unwanted
noise, it can be supposed controlled when its level
is below the level o the system residual noise.
Then, all considerations mentioned or the case o
buzz are valid.
2.1.2 RF in erference (Hum)
D612 consoles have numerous internal protections
against RF ields, or the AM and FM broadcasting
band. When the transmission station is installed
correctly, there will be no inter erence problems,
still with FM equipment o 50 KW installed in the
terrace o the radio station. Nevertheless, when the
antenna is badly positioned with respect to the Stu-
dio or has severe SWR problems, then it does not
have the minimum value o ield intensity, down-
ward. Or maybe there is a aulty ground connec-
tion, then, strong standing waves will appear on
the cables o the Studio that can induce high elec-
trical currents inside the audio console.
Symp oms: I the inter erence takes place at the
A.M. band, the sound transmitted by the A.M. radio
will be listened in the loudspeakers on background
(or at buses PGM, REC). In case o FM transmis-
sions, the inter erence inside the console demodu-
lates the A.M component o the FM carrier; (usually
hum rom power supply) causing background hum-
ming, because in many transmitters o FM, the inal
output stage is not powered with stabilized tension.
There ore, i console D612 presents humming,
please make a test shutting down the transmitter a
ew seconds to check i the problem disappears.
Sometimes, an FM transmitter with the output stage
badly calibrated also produce inter erence in which
you can hear the transmitted audio (due to the mis-
alignment a part o the FM modulation is translated
to AM modulation).
Solu ion: D612 consoles have internal ilters
against RF inter erence. There ore, i inter erence’s
appears, normally is caused by installation problems
on the transmission station that generate elevated
currents in the wiring o audio on the Studies, due to
the standing waves. These currents circulates inside
the cabinet o the console, and inter eres to the cir-
cuits when overpass the barriers that impose to this
Page 7 www.SolidynePro.com

currents the built-in RF ilters. The solution, then,
must be external to the console.
To solve it, pass all cables
through ferri e O-rings o 2”
diameter. They will be used in
each connector, o input and
outputs. The total set o cables that goes to each
connector, will have to be twisted around the ring.
2.2 Power source
At the le t side o the rear panel you will ind the
connector or the power supply. The switching
power supply (provided with the unit) works with
any AC network (90-240 V) and tolerate great
variations o tension. Gives regula ed 28VCC.
PLE A S E DON ’ T R EPL A C E T HE O R I GINA L
POW E R SUP P L Y.
The console doesn't have on/o switch. It remains
ed while the power supply is connected.
The grounding made through a bronze tip lo-
cated in the rear panel that provides the ground
connection to the chassis. Use cable o 2mm to a
good buried cooper bar.
2.3 Inpu channels
On the rear panel are located all the inputs and
outputs connectors. Take in mind that good connec-
tions o er sa e and ree o aults operation. By this rea-
son we recommend you: take it the time necessary to
make the connections care ully and use always mate-
rial o irst quality.
2.3.1 LINE inpu s
Each line channel has two stereo inputs, selected
rom the rontal panel. ‘BAL-1' and 'BAL-2' inputs
are symmetrical balanced, available at DIN con-
nectors. 'LIN-1' and 'LIN-2' inputs are unbalanced,
and uses Phono-RCA connectors.
To connect an equipment with balanced output you
will need a cable rom DIN-5 to two CANNON
(XLR) or stereo Plug’s (TRS ¼”) according to cor-
responds. The pin distribution o DIN-5 and XLR
are described next. Remember that you need to
connect TWO XLR to the DIN (balanced le t and
balanced right).
DIN 5 (s ereo bal.) Female XLR
1 AUDIO (-) RIGHT 1GND (shield)
2 GND (shield) 2AUDIO (+)
3 AUDIO (-) LEFT 3AUDIO (-)
4 AUDIO (+) RIGHT
5 AUDIO (+) LEFT
Unbalanced lines manages signals o -10dBV @
10KOhms (home type or semi-pro).
The GAIN con rol is common for bo h inpu s; ha
is o say, ha opera es on he selec ed inpu s.
2.3.2 USB audio in erface
The Channel-5 is or direct con-
nection to the computer using an
USB port.
Standard cable USB A/B are
used. Ports 1.1 or 2.0 are sup-
ported. Place the CPU so next to the console as it
will be possible, in order to use a wire o 2 to 3
meters o length. USB extension can be used; but
it is recommended no o exceed 4 me ers.
The channel must be connected to a computer
running Windows©7/10; Linux or OSX. When con-
necting the channel to the PC, Windows© auto-
matically recognizes it and installs the correspon-
dent drivers. Additional drivers are not required.
Be ore connecting the USB cable, make sure the
computer has e ectively grounded through its
terminal on the rear panel.
I you want to check the ground, connect a tester
on the scale o 25 Vac between the chassis o the
PC and console, and veri y that the voltage is zero
volts (+ / - 5V). Only then connect the USB.
I the equipment is not properly grounded, could
damage the USB port on the console or computer.
Windows© detect the USB channel as “USB au-
dio device”. At the console; the display indicator
“Digital In/Out” will show “U4”, indicating that
stereo input and output o USB channel was rec-
ognized.
www.SolidynePro.com Page 8

Remember that you can see the playing and
recording devices rom “Control Panel > Audio
and sound Devices > Audio”. In this window you
de ine the pre erred devices or Windows (those
that applications use by de ault). This is simple
since the devices are selected rom a drop-down
menu.
Con igure the USB devices in the automation and
editing so tware. I the computer does not have in-
stalled a soundcard, de ault playing and recording
device will be the USB device (Channel-5 input
and PGM or REC output).
In addition to the input, USB o ers a digi al send
o he compu er, that appears in Windows© as
“USB recording device” (PGM or REC). So that
you have available in the computer, the program
or recording signal.
ABOUT USB DETECTION
Window 7: Check if Window ha properly recognized
the recording device. If Windows recognizes the device
wrongly as “microphone device”, the recording will be mono
(same signal in both channels). To fix it, go to: Control Pannel
→ Sound → Recording → and choose USB device (appears
as USB microphone). Press [Properties]. Then select 'Ad-
vanced Options', open the drop-down menu Recording format
and choose stereo ( channels, 16 bits, 44.1KHz).
2.3.3 MICROPHONE INPUTS
Microphone channels are balanced electronically,
with XLR standard connectors.
Each channel has two XLR connectors that are
added internally. I two microphones to the same
channel, agrees that these are dynamic type, the
same make and model. Level di erences in the
voices are balanced by the audio compressor con-
sole. The action o the compressor depends on the
level o the PGM signal and is indicated on the
console.
The"48V"phantom power is available only or the
channels MIC-1a and MIC-2a. Remember that i
by mistake a dynamic MIC receives 48V, there is
no possibility o damage because its coil has ree
loating decouples this tension.
2.4 AUDIO OUTPUTS
2.4.1 PROGRAM AND RECORDINGS
Program ou pu (PGM) is the main output that
takes the signal that will be emitted to the air. It is
balanced, with emale TRS connectors (a.k.a.
“jack” ¼”).
Recording ou pu (REC) is balanced with Phono-
RCA connectors.
In order to connect PGM outputs to an unbalance
input, connect
only he (+)
pin, and leaving uncon-
nected the (-) pin.
To connect the balanced TRS output to a balanced
XLR input, the cable will be:
Balan ed onne tion Plug to male XLR
(for each channel
TRS (Plug XLR (Cannon
GND = sleeve
signal (+ = tip
signal (- = ring
GND = pin 1
signal (+ = pin 2
signal (- = pin 3
Please do not connect pin or pin 3 to ground. Never
uses “mono plug' s” (TS) to connect this outputs.
The nominal ou pu level is +4 dBu @ 0VU. I
you unbalance the outputs, take in mind that the
level reduces in 6 dB, there ore 0VU = -2dBm.
Note that i some nonpro essional equipment is
connected to the balanced output, may the level be
too high, causing saturation. In those cases a ixed
attenuation must be used to reduce the level (a re-
sistive splitter is a good solution).
2.4.2 USB send
USB allows direct connection with a computer, and
gives PROGRAM or REC signal (it switches rom
“USB OUT” in Channel-5). This eature don't re-
quires special drivers. Windows automatically rec-
ognizes the USB device (see “2.2.2.2 – USB).
Usually USB signal will be used or direct to hard
disk recordings; or webcasting. For details o use
the USB outputs in Windows© please see “3.6 -
Recording o programs”.
Page 9 www.SolidynePro.com

2.4.3 MONITORING OUTPUTS
2.4.3.1 HEADPHONES
There are outputs or STUDIO and Control Room
headphones. A unique knob manages the level o
the headphone and speakers outputs.
At the Studio, usually is used a headphone's mixer
like the Solidyne Studio-box (not included) to dis-
tribute the signal to each people. See “Chapter 5 –
Studio Box” or details.
2.4.3.2 MONITOR SPEAKERS
D612 was designed to work with active loudspeak-
ers. The STUDIO
and CONTROL outputs work with
line level at 0 dBu (0,775 V RMS). They have inde-
pendent controls or bus assignment and level. Both
outputs use emale 1/8” TRS connectors.
Remember that studio monitors are muted when mics
are on-air. Control Room speakers are muted when
the button Talkback is pressed.
2.5 Tally ligh
Tally light output gives 12V/120 mA when MICs
are turned on rom the Master Mic button. This out-
put supports the connection o two standard Soli-
dyne “on-air” tally lights.
NEVER exced 120 mA consump ion on Tally ou pu
The console has a built-in light; that resolves the on-
air signalization or small studios.
2.6 Telephonic Hybrid
2.6.1 CONNECTING A STANDARD LINE
The hybrid channel manages ONE land telephone
lines and ONE cellular phone. The internal adjust-
ments are rom actory; so the user do not needs to
make adjustments. Only the null- actor must be ad-
justed or the land line, only once on setup.
On the rear panel there are two RJ11 connectors;
or the telephone lines and the associated phone
set. The line can directly be connected to public
central telephone or the local central (PBX) o the
radio station. The private central sometimes deteri-
orates the hybrid rejection, reason why we advised
to directly connect the console to the public line,
whenever it is possible.
The telephone lines internally are protected against
lightings by metallic oxide varistors (SIOV). Never-
theless, we recommend to use additionally external
line protection o good quality.
Although the console has internal protection; it is recom-
mended to use external line a protection against tran-
sient voltage peaks due to accidents or lightings.
2.6.1.1 Null-fac or
This adjustment is only or LAND lines. The rejec-
tion actor expresses the capacity o the hybrid to
avoid that the transmitted signal returns distorted
to the air. Whichever greater it’s this actor more
“clean” will be the sound quality o the local
speaker on the air. In order set the rejection, pro-
ceed as ollowing:
1.
Make a calling through one
hybrid o the con-
sole.
Ask a speaker to talk into the
microphone to the interviewee. Increase the
level rom "Telephone Control" until the voice
o the interviewee move the PGM VU meter
into the red zone.
2.
Listening to the voice o the local speaker on
main monitors, turns the preset “Null” until re-
ducing to zero the distortion superposed to
the speaker’s voice. Please make this adjust
when the console is installed.
3.
In case that the phone line connected to
the console be changed, this adjustment
must be repeated.
2.6.2 CONNECTING A CELL PHONE
It requires a phone with Bluetooth connectivity. Any
phone with Bluetooth can be linked to Solidyne
D612, eliminating the dependency on the adapter
cable "hands- ree". While the phone can be up to
10 meters away rom the console, you should
www.SolidynePro.com Page 10

leave it near, but not on the console. The
procedure to link the phone to the console is
similar to that used or other Bluetooth devices.
By linking your cell phone to the console creates a
link between the two devices, and allows the
phone to store the ID o the console. This
operation is per ormed only once ( or one cell).
Once the console and phone are connected, the
console automatically connects to the phone when
the Bluetooth link is enabled on both devices.
Procedure:
1. A he console, Make sure that the LED o
“Cellular Phone Bluetooth” is o . When Blue-
tooth is on, the LED “Cellular Phone Bluetooth”
lash in blue slowly (one lash every 2 sec-
onds). In this case, turn o Bluetooth pressing
and holding until the lashing button turn o .
1. A he console, enable the “discovery” mode.
This mode only can be accessed i Bluettoth is
turned o . Being the Bluetooth turned o ,
press and hold by 10 seconds the button “Cel-
lular Phone Bluetooth”, until the LED ast blinks
in blue-red. It indicates that the console is in
“Discovery” mode, to be recognized by by the
cell phone.
2. A he cell-phone: start a search or a Blue-
tooth device. This procedure can vary accord-
ing to the brand and model o cell phone.
Please re ers to the cellphone users manual.
3. When the searching ends, look or the D612
Bluetooth device, which will appear as Soli-
dyne BTM641. I the cell phone ask or a
password, enter 0000 and con irm (see the
user’s manual o the cell phone).
4. The ID o the Solidyne D612 is now stored in
the cell phone. The devices are "paired", no
need to repeat this operation while using the
same phone. The Bluetooth indicator light on
the console switches to slow lashing,
indicating "Bluetooth is active".
On some phones you need to "connect" the new device
found to stay active. In others, the new device is
enabled after being detected.
2.6.2.1 Re-connec a paired mobile
To reconnect a cell phone, proceed as ollow:
1. Turn on the Bluetooth o the D612 by
pressing “Cellular Phone Bluetooth” until the
LED lights (5 secs aprox). The button will
lash slowly in blue.
2. Enable the Bluetooth at the cell phone.
When the cell phone notice that the
connection has been made you are ready to
operate. When you make or receive a call,
the audio is routed to the console.
In some phones the re-connection is not automatic. You need
to "connect" the new device found to stay active.
2.6.2.2 Se up he level
VERY IMPORTANT: A he cell phone, Blue-
oo h volume mus be adjus ed a maximum
level in order to obtain a good reception and to
sure the best signal to noise ratio.
Thi adju ting mu t be done with a real calling u -
ing Bluetooth. Usually, the volume of the phone's speaker
is independent of the volume of Bluetooth device. If you
change the phone's level without make a Bluetooth calling,
you will only be changing the volume for the phone's
speaker, not the Bluetooth level. To change the Bluetooth
level, make a call using the console (or a hands free headset)
and set the Bluetooth level to the maximum. This setting is
stored at the cell phone's memory. If you u e another cell
phone with the con ole, you need to et the Bluetooth
level again.
2.6.2.3 TURN OFF BLUETOOTH
To turn-o Bluetooth at the console, press and
hold “Cellular Phone Bluetooth” until LED o .
2.6.3 EXTERNAL HYBRID
D612 supports external hybrids using a ¼” TRS
or
send and re urn signals. “External Hybrid” sends
PGM signal through the “tip” and receives through
the “ring” (return or input to console).
Ext-Hyb output (Tip); Is the return rom micro-
phones rom the console and PGM to the phone
lines. This is a MIX-MINUS signal, and connects
to the input “return to phone lines” at the external
hybrid (audio input o the hybrid).
Ext-Hyb input (Ring); Is the input or the audio
that incomes rom the external hybrid. This signal
is mixed to PGM but not to MIX-MINUS signal.
This input connects to the audio output o the ex-
ternal hybrid.
The audio rom external hybrid is routed to
TELCO. The Hybrid level knob works in the same
way that with the lines connected directly to the
D612’s built-in hybrid.
Page 11 www.SolidynePro.com

2.7 Grounding agains ligh ing
It is very important to ollow these recommendations to avoid irreparable damage to equipment and people.
www.SolidynePro.com Page 12

CHAPTER 3 Operation
3.1 Overview
Solidyne D612 is an compact audio mixer de-
signed or small radios. You can see di erent ar-
eas in the console:
•Input channels.
•Hybrid controls.
•Monitoring and talk-back.
•CUE
•MIC EQ
•Audio compressors and USB
•VU-meters
The bus PGM is the main output, that generates the
mix that sent to the transmitter (or streaming).
The bus REC is a secondary mixing. Usually or
recordings.
The operator can listen any signal be ore send it on-
air; by pressing the CUE buttons.
Line channels will be on-air just opening the ader.
MIC channels are turned on rom Master MIC but-
ton. The switch “PGM/REC” assigns the output or
each channel to the on-the-air mixing (PGM) or/and
the recording output (REC).
Line channels have two inputs; which are selected
rom a switch located at the top o the panel.
•Channels MIC 1 and MIC 2 only manages mi-
crophone signal. The phantom 48V switch en-
ables the phantom power to MIC-1a and MIC-
2a inputs. Remember that all dynamic micro-
phones are designed to support 48V phan-
tom, so you can mix condenser with the dy-
namic microphones.
•The microphone channels can be routed
to the processing s age (4 bands EQ and
compressor) with independence.
•The analog line channels manage bal-
anced (BAL) and unbalanced (LINE) stereo
inputs.
•The digi al channels manage the USB
digital inputs (DIG) and one analogical
stereo inputs (LINE).
•Additionally; USB o ers direct recording to
Hard Disk rom PGM or REC.
The D612 turret contains LED’s VU-meters that
show the recording and program level (average
peak level) and the action o audio compressor.
3.1.1 Quick es
Next are described the basic procedures to veri y
the console wiring. In order to check that all is
working well, please ollows the next steps:
•Choose a signal source, like a microphone,
a CD player, etc. According to the source,
select in the channel the corresponden in-
pu (MIC-LINE or BAL-LIN). This can be the
irst cause o error (there is no signal be-
cause the mistaken input is assigned).
•Press CUE button in the channel in which
the signal is.
•Open the CUE ader in the MONITOR SEC-
TION. The audio will have listened in the
built-in loudspeaker.
To send on-air:
•Send the channel to PGM, so that the signal
is sent to the main output.
•Open the main ader until reach 0VU in pro-
gram VU-meter. The signal will be aired.
•The gain knob must adjust so that the nor-
mal work position o the main ader is -15
dB (gray zone). In some countries (like Eng-
land) the user pre ers to adjust the normal
level with the ader at maximum.
Hybrid channel
The hybrid section manages 1 s andard elephone
line, and 1 Blue oo h cell phone (see “2.6.2 Con-
necting a cell phone”) Both can be in simultaneous
con erence (see 3.2.3 – Conferences .
Its use is simple and error free due to its logic of se-
curity and automatic control. The following instruc-
tions explains different scenarios of use.
Page 13 www.SolidynePro.com

3.2.1 Opera ion
When a call incomes, a blue LED blinks with the 'ring'
cadence. The calling can be answered in two ways:
a) Using the telephone associated to that line
b) From the console, by pressing the
HOLD/AIR button. When doing it, the line is
taken and the LED stops blinking.
To answer the call rom the telephone (connected to
the RJ11 on the rear panel) pick up the phone and
proceed as in normal communication. To put the call
on the air, press the HOLD/AIR button and then hang
up the phone.
To answer the call directly rom the console, press
HOLD/AIR. The console picks up the line and the
ring's pilot light turns o .
In this condition, the caller receives the program
signal, and will be on-air i the 'AIR LEVEL' knob
opens. There ore it is important to check that the 'AIR
LEVEL' knob be closed when take the line.
To talk privately with the caller, press CUE. The caller
is lietened on CUE speaker. In this condition (cue
pressed) the caller not hear the program signal. To
talk, press TALKBACK and use the talck-back MIC.
To pu he call on he air:
•Release the button CUE.
•Turn the control 'AIR LEVEL' until reach
the apropiate level.
The appropiate level or the communication is
adjusted by observing the level meter "PGM", but
also listening to the processed audio on the air.
To put the call o -air and resume in private, turn
down the knob “AIR LEVEL” and press CUE to
listen and Talkback to talk.
To ransfer he call o he phone se , close
"AIR LEVEL" to zero, pick up the phone and then
release the “HOLD/AIR” button on the console. I
the telephone was hung up when release the
HOLD/AIR, the communication will lost.
To hang up he line, turn AIR LEVEL to zero and
release "HOLD/AIR".
3.2.2 Using a cell phone
The cell phone connects to the Solidyne D612 via
Bluetooth. The irst time that a cell phone is used
with the console, it must be paired as explained at
"2.6.2 - Connecting a cell phone".
Once paired, the procedure used or the connec-
tion every time is simple:
•Make sure that the control “AIR LEVEL” is
closed, and the button CUE pressed.
•Turn ON Bluetooth at the console. For this,
press and hold “CELLULAR PHONE BLUE-
TOOTH” by 2 seconds (approximate) and
release when the green LED (located in the
VU meter panel) lashes. The LED remains
lashing slowly indicating that Bluetooth is
enabled.
•Turn on Bluetooth at the cell phone. I the
cell phone was already paired, in ew sec-
onds the connection reestablishes and the
cell phone stays linked with the console. Un-
der this condition, incoming calls are trans-
erred directly to console.
I the console is used exclusively with cellphone,
ie, there is little or no use o the land line, you
should leave the cellphone connected to the con-
sole and handle the calls rom the hybrid.
When there is a continuous use o both lines, ei-
ther alternately or simultaneously (con erence)
raises some peculiarities in the operation, de-
tailed in "3.2.3 Con erences".
3.2.2.1 Incoming call
Is explained bellow the use o a cell phone in per-
manent link to the console. In this condition, the
procedure to put a calling on-the-air is similar to
the seen or land lines:
•When a call incomes, the 'ringing' is listened
simultaneously on the telephone and on the
CUE speaker o the console (CUE button
pressed)
•Check or “AIR LEVEL”. It must be zero.
•To answer; make a ast touch on the button
“CELLULAR PHONE BLUETOOTH” o the
console (the calling can be answerer too
rom the cellphone).
A ter answering the call, talk to the caller, always us-
ing the hybrid o the console as ollows:
•With the button CUE pressed the caller is
listened on CUE speaker. Under this condi-
tion, PGM send to the cell phone is muted.
•Press and hold TALKBACK to talk with the
caller.
•When CUE is released, the caller will listen
to the PGM signal, but remains o -air due
to the control “AIR LEVEL” stays closed.
•To put the calling on-the-air, turn up “AIR
LEVEL” until reach the appropriate level on
VU meters.
www.SolidynePro.com Page 14

3.2.2.2 End he call
Pressing with short touch the "CELLULAR PHONE
BLUETOOTH" button on the console, communica-
tion ends. It is also possible to end the call rom the
cell phone screen.
3.2.2.3 Resume he call on he cell phone
To resume the call on cell phone; rom the phone
menu exit "Headset" (or Bluetooth) mode and
switch to the "speaker" mode (Speaker).
To trans er the call back to the console, return to
the "Headset" mode. This operation di ers de-
pending on brand and model o cell phone.
Below shows a screenshot o a cell phone with An-
droid, in the case o Bluetooth enabled.
The example shows the "Headset" icon, which
trans ers the call to Bluetooth device when it is
powered on; and passes the phone when it is o .
Other phone models can display two buttons; a
button with dropdown options; or other combina-
tions. Re er to the cell phone user manual.
3.2.2.4 Make a call
To make the call using the cell phone:
•In the cell phone, change the "Bluetooth"
mode to "Headset" mode as explained in
"3.2.2.3 - Resume call on cell phone."
•Dial the number in the cell phone and call
(SEND).
•To trans er the call to the console, return to
the Bluetooth mode on the cell phone (see
"3.2.2.3 - Resume call on cell phone").
•Release the CUE button on the console.
The cell phone receives the program signal,
but remains o the air i "AIR LEVEL" is
zero.
•To put the calling on the air, turn "AIR
LEVEL" to the correct volume.
•To end the call rom the console, make a
short tap the "CELLULAR PHONE
BLUETOOTH" button. The call can also be
terminated rom the mobile phone.
NOTE
The calling can be do rom cell phone without leave the Blue-
tooth mode, using the console's talkback circuit.
•The ring tone and the voice o the caller are listened on
CUE speaker (button CUE pressed).
•To dialogue, use the button Talkback o D-816.
•To hold the call, release the button CUE.
•To put the calling on-air, release “AIR LEVEL”
•To end the call, make a short tap on “CELLULAR PHONE
BLUETOOTH” button o the hybrid; or can hang-up rom
the cell phone screen.
Blue oo h advan ages
Besides the convenience o being able to connect
any cell phone without cables or special
connectors, provides the advantage o placing up
to 8 meters away, or example in a window to get
the best reception.
But also enables new operational advantages or
journalism, it is possible to connect the console in
seconds with the private cell journalist or stories to
people whose phone number is con idential and
the reporter did not want to reveal (very common
circumstance as journalists should be reserved
with your contacts).
3.2.3 Conferences
When regularly using cell phone simultaneously
with the landline, the user must be care ul to OFF
'BLUETOOTH' ON CELL PHONE whenever a call
ends. This way, i a new call comes while the land-
line is on the air, the call rings at the telephone. I
Bluetooth were active, the call would sound on air.
The procedure or setting a con erence depends
on which o the two lines (landline or cell) is on the
air. See the two cases below:
Page 15 www.SolidynePro.com

3.2.3.1 Being he cell phone on-air
Suppose the announcer is talking with a caller via
cell phone; and the operator requires adding to
someone else to the conversation:
•
Make (or receive) the call using the tele-
phone associated with the landline.
•
Talk with the caller. Warn him that the call
will go directly to the air. Remember that this
is because the hybrid is being used by a cell
phone, so operator can not put the second
line on hold or use the talk-back circuit.
•
Press "HOLD/AIR" to put the calling on-air,
then hang up the telephone. The call goes
immediately on-air (since "AIR LEVEL" is
open).
3.2.3.2 Being he landline on-air
Suppose the announcer is talking with a caller via
landline; and the operator requires adding to
someone else to the conversation:
•When is not used, Blue oo h mus be off
a he cell phone, and so unlinked rom
the console. This way an incoming call (or
is made) arrives to the cell phone with in-
dependence rom the console.
•To trans er the call to the console, urn on
he Blue oo h on he cell phone (see the
cell phone user manual). Depending on
brand and model o cell phone, the con-
nection with the console can be immedi-
ately re-established; or it may be neces-
sary to select rom a menu 'Bluetooth de-
vices' one to re-connect (in this case Soli-
dyne BTM641) Once activated Bluetooth
at cell phone, the call is put on-air immedi-
ately, staying in con erence with the land-
line that is on-air at this time.
•To end the cell phone call, hang up rom
the cell phone.
•Then, turn o Bluetooth at cell phone. This
is only necessary when there are a perma-
nent use o the landline, to avoid that an
incoming call to the cell phone acciden-
tally appears on-air when the landline is
on-air.
•Alternatively, to resume he call on cell
phone; using the cell phone menu it will
switch to "Headset" mode, as explained in
"3.2.2.3 Resuming the call on the phone"
3.2.4 Send PGM signal o he phone
The internal built-in hybrids dont’n have a level
control or the signal sent to phone line (aka “re-
turn” rom the point o view o the remote caller).
This is because the signal sent to phone line is
processed by AGC, peak limiter and ilters. There-
ore the send level is automatically adjusted during
the transmission and its level is the maximum al-
lowed by the modern digital telephone exchanges.
To check the send level to phone line, use an oscil-
loscope in parallel with the phone line and veri y
that the signal level is 2V peak to peak. Levels
over this value can cause like intermodulation dis-
tortion in the PGM signal.
For this reason the Solidyne hybrids use a pro-
cessed return channel, to avoid distortion at the
on-air signal. T
he send signal is limited to 400 –
2.200 Hz in order not to distort the signal on the
air. This narrow band intelligibility remains high
(due to processing) but occasionally may seem to
the remote people that it "has little volume" be-
cause the band is narrow. This should not worry
because it is a subjective sensation that does not
a ect the intelligibility o speech.
3.3 Moni or sec ion
3.3.1 Using moni ors and headphones
At the monitors section you can observe the ol-
lowing areas:
•
Studio Monitor:
here you define what sig-
nal
you will listen at the Studio monitors
and headphones.
•
Control Room Monitor:
define what sig-
nal
you will listen at the Control Room
monitors and headphones.
•
CUE:
set the CUE level
of
the built-in loud-
speaker.
There is a knob to manages the level o head-
phones and monitor outputs or the Studio. Usu-
ally the monitoring level adjusts rom the console
or a com ortable listening in the headphones. I
needs individual level control or each head-
phone; a headphones mixer (Solidyne Studio-box
or similar) can be used.
The S udio speaker moni ors have their own
gain control, since the console’s output was de-
signed to operate with powered speakers. When
the microphones are on-air studio monitors are
muted, to avoid eedbacks loops.
Like the Studio section, the Control Room has a
unique knob or the headphone and the speakers.
The Control Room monitors must be powered
units (active speakers).
www.SolidynePro.com Page 16

Routing switches allows to choose the signal
source or monitors and headphones. The assign-
ments or Studio and Control Room are indepen-
dent. The options are:
•PGM to listen the console output.
•REC to listen the channels that are as-
signed to recording output.
•AIR switches to an input designed to con-
nect an external tuner in order to moni-
toring the transmission from the air.
This is the right way for monitoring; rec-
ommended for all situations.
3.3.2 Use in o in egra ed S udios
There are many radio stations in which the
console, broadcasters and journalists are
located in the same room, avoiding the use o
double cabinet and glazing windows separator;
reducing the costs o construction and acoustic
treatment.
In this case, connect only one active speakers
to the output o Studio Monitor. This way, when
the microphones are on-the-air, the speakers
are muted. Also connect headphones to this
output o journalists and guests. Operator
headphones are connected instead to the
output o Control Monitor.
3.3.3 Previous lis ening (CUE)
The D612 has an internal loudspeaker or previous
listening. Each channel has a button “CUE” that al-
lows to listen the signal present in that channel
with the channel ader closed.
I CUE is pressed in several channels, the signals
are added. Rotary CUE level controls the volume
in loudspeaker CUE.
Additionally, signal CUE is sent to the control
room headphones. In this way the operator can
check the channels using headphones.
3.3.4 Talk back
The talk-back circuit allows the operator to talk with
the speaker while he is into the studio.
In order to talk, press the Talk-back button (see
monitor panel drawing) . The Control Room moni-
tors will be muted, to avoid eedbacks loops. Your
voice will be listened inside the Studio, by the le t
channel. The right channel stays with the on-air au-
dio, so that speakers and journalists do not lose
the On-Air re erence. At the same time talk-back
microphone will be listen in all studio headphones.
The operator can press CUE in a microphone
channel to engage in a dialog with the Studio.
The level of the talk-back microphone comes calibrated
from factory, and usually it is not necessary to modify it. If
you need to change it, there is a preset called “LEVEL”
to make the adjustment.
Page 17 www.SolidynePro.com
PZM MIC. For Talk-
Back and hybrid
Audition level or
Studio loudspeakers
and headphones
Assign PGM or REC to the
Studio monitors
Talkback to Studio
Talkback volume
Audition level or
Control Room loudspeakers
and headphones
CUE level. Adjust the volume
of the built in loudspeaker.
The signal CUE also is sent to
the C. Room headphones.
Change the monitoring between
ex ernal inpu ‘ON AIR’ and
PGM/REC (Requires an exter-
nal tuner)

3.4 Microphone channels
3.4.1 Fea ures
There are two microphone channels. The “Phan-
om 48V” is common or both channels; but only
MIC-1a and MIC-2a gives phantom voltage. Re-
member that all dynamic microphones can connect
to a line with phantom voltage, without risk o dam-
age; because internally they have a trans ormer
that disconnects the DC. So it is possible to mix
dynamic and condenser microphones.
All the channels have a gain knob. It must adjust
so that the main ader works over the overload
“OVL” indication (- 30 dB). Remember that in all
audio consoles, excessive input gain reduces the
dynamic range. I you work with the main ader be-
low this level, the signal rom the previous stage
must be very high and the peaks will be clipped.
3.4.2 Processing
Each MIC channel can be sent directly to the air
(PGM) or the processing stage (EQ + compressor).
As well, the processed signal can be sent to the air
or to recording out.
Equalizer
The equalization settings are the same or all as-
signed channels. The igure shows the equalization
curves. These curves are designed to improve the
quality o the human voice. The ends o the spec-
trum work in shelving way, with 15 dB action.
As re erence we said that the LOW (or bass) con-
trol o ers “body” and “weight” to the voices;
whereas the HIGH one adds “presence” and usu-
ally improves the intelligibility. The central requen-
cies have a bell-shaped curve (peak EQ). Mid-bass
is centered in 160 Hertz, where usually the plop-
ping e ect are concentrated, or there is excessive
resonance in certain masculine voices. The mid-
high band is located at 5 KHz, because around this
requency usually appear the problems with the
“sss” (excessive emphasis the sibilants sounds,
like “shhh”)
Compression
The compressor maintains constant the peak level
o the human voice. It starts to work when the sig-
nal surpasses the 0 VU level. Below that level the
dynamic range is not a ected. D612 has a very
steep compression slope and ast attack and re-
covery times.
Indicator “MIC COMPRESSOR” shows in dB the
reduc ion applied to the signal.
www.SolidynePro.com Page 18
Gain
4 bands EQ. This stage has a
dynamic range compressor
compresor that begins to work
over 0 VU. The indicator “MIC
compressor” shows its action.
The processed signal can
be sent to PGM and REC.
To the le t, the switch
cancels the sending.
Enable/disable the
phantom power (48V) or
MIC-1a and MIC-2a.
Main ader. To enable the
microphones press the
MASTER MIC bu on, located
at the right on the console.
The apropiate operation level is
mantaining the peaks at 0 VU
The channels can be
assigned direct to PGM or
be send to the processor
stage (EQ)
The gain must be adjusted in
order to the main ader works
over -30 dB indication. OVL
indicates overload, thjat is to
say, excesive input gain.
Previous listening (Cue)

3.5 Line channels
Solidyne D612 mixer console has 3 stereo LINE
channels. LINE channels have two inputs that are
selected rom the ront panel.
•
Channels 3 and 4
have balanced stereo inputs
(DIN-5 connector) and unbalanced stereo inputs
(RCA).
•
Channel 5
are digital, with direct connection to the
PC via USB. It is equivalent to have an external
sound card. Additionally it gives one USB send to
the computer (PGM or REC). The secondary input
is analog unbalanced stereo (RCA).
LINE channels have gain
knob. For the case o USB
channels, there is not input
gain. Level adjusts rom Win-
dows audio mixer.
Set the input gains in order to
the main aders, with an nomi-
nal level at input, works al-
ways above the OVL zone, to
avoid overload.
Connections are explained at
“Chapter 2 – Installation and
wirings”
To put a channel on-the-air;
assign the channel to PGM
and open the ader. The cor-
rect level is when the peaks at
0VU continuously.
Main aders works with ETM-
VCA echnology (Electromet-
ric-Voltage Controlled Ampli-
ier). The ader only manages
DC, that control ampli ier with
variable gain.
This method guarantees very
low distortion and is noisly-
ree. For more in ormation
about the ceramic ader tech-
nology, please visit:
www.SolidynePro.com.
3.6 Recordings
D612 consoles have two stereo output channels.
The main channel is denominated Program (PGM)
and used or the On-Air signal.
For recordings, REC bus is used. The user can
make recordings while, simultaneously, the con-
sole is on the air. We will see like example the pro-
cedure to make a recording in the computer
whereas a musical program is on air.
NOTE: the two telephone hybrids o this console
are units "aired" and there ore can not be assigned
to the channel REC. I you need to record an
interview you should connect to the console a
hybrid external; Solidyne type HL-202.
Page 19 www.SolidynePro.com

3.6.1 Direc o Hard Disc recording
Remember that the main output (PGM) and the
recording output (REC) are available in digital or-
mat, through connections USB.
Once connected, the outputs appear in Windows©
like: (Control Panel/Audio and Sound Devices/Au-
dio)
“USB Recording device”: cor-
responds to channel USB 5
and gives the PGM or REC
signal.
On the PC: configure your
recording sof ware to use
an USB recording device.
At the onsole: route the
channels that you want to
record to REC bus. The oth-
ers remain assigned to PGM. You must proceed as
ollows:
a) In Monitor Section assign the Control Room
monitors to the recording bus (REC). I you
want you can send REC signal to the studio
monitors too.
b) Assign to REC the channels required or
the recording ( or example MIC-1 and Line-
4). When a channel is routed to REC it is
removed rom Air
c) Meanwhile the radio still on air through, or
example, the channel 5 with a musical pro-
gram.
Channel-5 can be used for playing with independence
of the assignment to USB OUT (PGM - REC).
Now makes the recording on the PC. In order to
activate the microphone, open the ader o MIC-1
channel.
The recording level is veri ied in the REC VUmeter
o the recording so tware, and it adjusts rom the
console. You cannot change the input level rom
so tware (Windows Mixer).
USB RECORDING DEVICES DO NOT HAVE
GAIN CONTROL FROM THE SOFTWARE
The speakers will listen to the recording USING
HEADPHONES or in loudspeakers. When the
recording ends, it can be listened using the same
REC bus, assigning to REC the channel in which
the PC is. At this point; BE CAREFUL OF NOT
PRODUCING A FEEDBACK LOOP IN THE OWN
COMPUTER. MAKE SURE TO MUTE IN THE PC
(FROM WINDOWS MIXER) ALL SOURCES OF
SIGNAL EXCEPT “WAVE” AND “GAIN CON-
TROL” (MAIN).
When the work is inished, reset all the controls to
the original position, to return the console to the
normal way o operation.
3.6.2 Recording he phone lines
Hybrids o the D612 signal sent only to program,
there ore, only be recorded telephone
communications PGM signal recording.
To record the PGM output, you must use a wire tap
"Y" or a "copy" o the program output, simply
connecting two parallel cables.
“Y” cable - Plug 1/4" BAL to XLR BAL and unbal RCA, to one input
channel. For the other channel you need a second “Y” cable.
www.SolidynePro.com Page 20
Other manuals for D-612
1
Table of contents