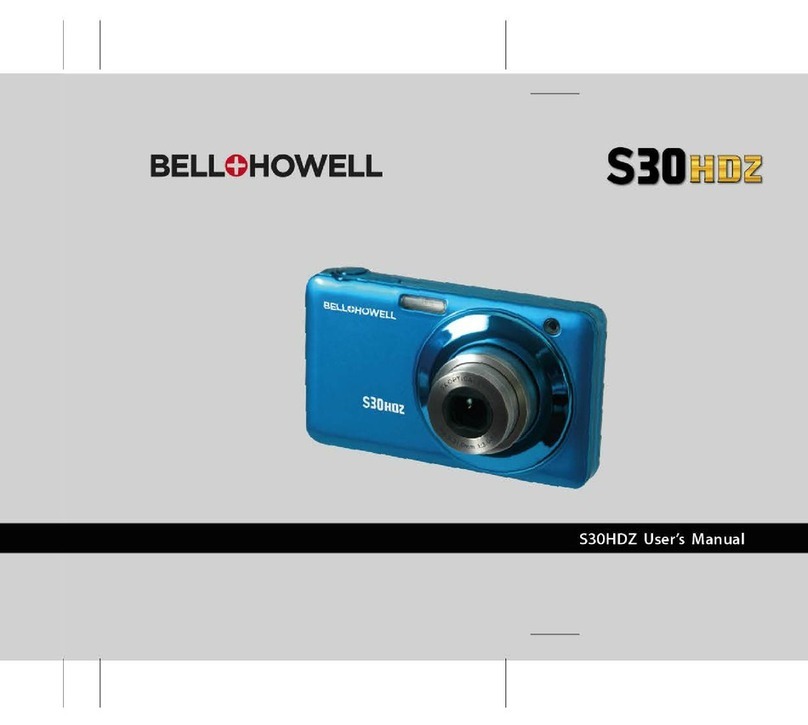
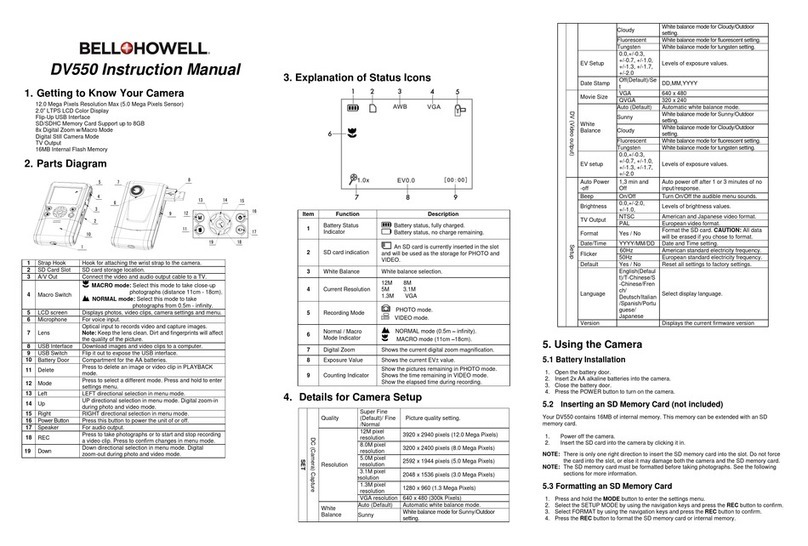
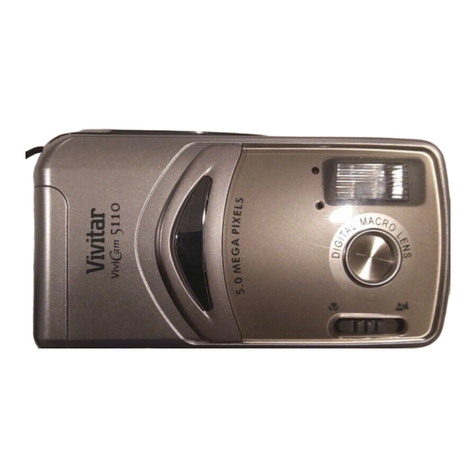
Bell and Howell Canon Canonet QL19 Operating instructions

• •
• • • •
• • • • • •
·
Bell
£.
Howe
·
lI/
· · · ·
..
/Canoll
• • • •
~nonet-
QL19 •
•
•
35mm
•
STILL
CAMERA
• • • • • •
• • •
•

FEATURES
OF
CANONET
QL
17
& CANONET
QL
19
_____
_
Canonet
17
and Canonet 19 are
EE
cameras that have captured the most camera
jans
in
th
e
world. They have brought the greatest satisfaction to the largest number
of
camera fans due to
their superior mechanism. With the introduction
of
Canon's revolutionary and unique
QL
film
loaa-
ing device into the latest Canonet
QL
17
and
Canonet
QL
19, the troublesome
task
has been com-
pletely eliminated. This new
QL
system, which was developed by Canon ahead
of
other camera mak-
ers, will be enthusiastically received as was the
EE
mechanism.
1.
New
film
loading
with
QL
device
Just
place
the
film
in
the
prescribed
place
and
the
"magic
claw"
of
the
QL
device
accurately
leads
the
film
for
correct
load-
ing.
It
is a
revolutionary
mechanism,
developed
by
world
-
famous
Canon,
tliat
uses
ordinary
35mm
film
in
cartridge
sold in
any
camera
shop_
2_
The
fast
Canon
Lens
Fl.7
is
the
bright-
est
among
the
EE
cameras
.
6-element,
5-component
construction
including
its
three
new
type
glasses, enables
sharp
pic-
tures
to
be
taken.
The
lens
is also
parti-
cularly
well-suited
for
color
photography
.
3.
Highly
sensitive
CdS
exposure
meter
The
built
-in CdS
exposure
meter,
with
a
wide
photometric
scope and
high
pre-
cision
,
always
guarantees
a
proper
amount
of
exposure.
4.
Operating
aperture
manually
for
ordi-
nary
photography
In case
of
flash
photography
as well as
photography
for
a
specific
purpose,
the
extent
of
the
aperture
may
be
regulated
manually.
5.
Finder
with
multi-layered
film
coat-
ing
multi-layered
coating
have been ap-
plied
to
the
ha:f-transparent
mirror
inside
the
finder
to
increase
the
transparency
factor,
and
to
make
clearer
the
rangefinder.
6.
Other
features
Both
the
lens and
exposure
meter
are
covered
with
one
filter.
There
is no need
for
adjusting
the
exposure
even when us-
ing
a
filter.
Comes
complete
with
various
safety
devices
for
preventing
misuse.
2

3
o-.<
~
:0:
~
:::
4;:::=::::===m=~'i'7
-----------
Film Rew
ind
Crank
~--
---------
Range
Viewfinder
Window
-,-
-----------
Accessory
Shoe
~
-----------
Flash
Synchronization
Socket
,.___----------
Safety
Stopper
Release
Lever
:"-:
:---------
Flash
Setting
Lever
oa
.-:o-
-------
Auto
Mark
ua-
:!..-
------
CdS
Meter
Window
~~
-------
Lens
..
1'0-
------
Shutter
Speed Ring
'-ft~
'--
------
Aperture
Scale
Ring
i1if"
~
-------
Film
Plane
Mark
="~.::i'!""~IIiiII~
...:::..
--------
Film
Advance
Lever
-
------------
Cable Release
Socket
~
----------
Shutter
Release
Button
____________
Film
Counter
•
Keep
this
page
open
while
reading
the
instructions
in
the
Manual
This
will
permit
the
position
of
each
designation
to
be
seen
at
glance.
On
the
last
page
there
is
a
photograph
as
seen
from
th
,
opposite
side.

4
CANONET
QL
19
The
positions
of
the
various
parts
for
Canonet
QL
19
and
their
terminology
are
the
same
as
for
the
Canonet
QL
17
.
Refer
to
the
left
hand page.
Canon

.MAIN SPECIFICATIONS
FOR
CANONET
QL
17
& CANONET
QL
19
.
Type
:
Film
size
:
Lens
:
Shutter:
Exposure
Meter
:
EE
Me
chanism:
35mm
Lens
Shutter
Type
EE
camera
.
2
4mm
x
36mm
.
Canone
t
QL
17
Canon
Lens
SE
45mm
F
1.7
6·
element
5·
component
construction.
Canonet
QL
19
Canon
Lens
SE
45mm
F
1.9
5·element
4·
component
construction
.
B 1 1' 2 1,'4 I / S 1,' 15 1/
30
1/
60
1/
125
1/
250
1/
500
Built
·
in
self
·
timer
.
Highly
sensitive
CdS
exposure
meter
.
Mercury
battery
used as
power
source.
Fully
coupled
with
exposure
meter
,
shutter
<lnd
lens
aper
·
ture.
Shutter
priority
type
EE.
Manual
ap
e
rture
settin
g
possible
.
Operating
Rang
e
of
Me
ter
:
EV2.5
·
19
.
Film
Speed
Index
:
ASA
25
·
800.
Finder
:
Double
·
ima
ge
superimposing
system
,
coupled
rangefinder
.
Marked
find
er
with
parallax
error
automatically
corrected
.
Magnification
ratio
0 .
7X.
Visible
aperture
readin
gs
and
warning
ma
rk
s
in
th
e
viewfind
er.
Flash
Synchronization
:
MX
flash
sy
nc
hronization
. Spee
dlight
, M
cla
ss
and
F
cla
ss
Film
Loadin
g:
Film
Winding
:
Film
Counter
:
Film
Rewind:
Size
:
Weight
:
of
flash
bulb
s can be
synchronized
.
Re
volutionary
film
loading
with
Canon
's
unique
QL
de
vice.
us
ing
film
in
cartridg
e
Single
operation
120
0
winding
lever
type
.
Self
·
resetting
type.
Press
rewind
button
and
rewind
with
crank
.
140
x
79
x
31mm
(
lens
protruded
QL
17
,
37mm
;
QL
19
,
33mm
).
Canonet
QL
17
Canonet
QL
19
830
grams
800
grams
5

PRECAUTIONS
FOR
HANDLING CANONET
QL
17 AND CANONET QL
19
Please read
the
following
instructions
3.
When
the
back
cover
of
the
camera
is
carefully
in
order
to
avoid
damaging
any
of
the
mechanism
or
causing
incorrect
exposures
.
1. Do
not
turn
the
shutter
ring
or
the
aper
-
ture
rillg
while
pressing
down
on
the
shutter
button
.
2.
The
shutter
ring
is
equipped
with
a
safety
stopper
device
.
When
the
stopper
catches
,
do
not
turn
6
the
shutter
ring
any
more
. (See page 11)
opened,
the
inner
cover
- i.e. QL
co
ver
--
opens
simultaneously
. Do
not
touch
th
e
QL
cover
when
opening
and
closing
.
It
is
preferable
not
to
touch
the
entire
QL
mechanism
unless
necessary.
4.
When
loading
film
, be
sure
that
the
tip
of
the
film
comes
to
the
red
mark
(- ).
5.
Do
not
use
the
intermediate
space
bet
-
ween
the
shutter
speed
index
.
6 .
Always
charge
the
self
-
timer
after
set
-
ting
the
flash
setting
lever
to
X.

.MERCURY BATTERY LOADING
••••••••••••
Load
the
mercury
battery
in a
separate
envelope
into
the
battery
compartment
.
Since
the
mercury
battery
powers
the
CdS
meter
,
unless
the
battery
is in
position
the
meter
will
not
function
.
1.
Insert
coin
into
groove
of
battery
cover
and
turn
to
the
left
to
remove.
2.
Fa
ce
the
central
contact
of
the
mercury
battery
inwards
and
insert
,
then
screw
the
cover
back
in.
When
inserting
,
do
not
confuse
the
Ij;) 8 .
In case
of
reverse
insertion,
the
meter
will
not
function
properly
.
.•
For
mercury
battery,
the
National
M·1P
model
'
or
the
Toshiba
TH
·MP is used-
equivalent
to
the
United
States
Mallory
RM·1R.
Life
of
the
battery
in
continuo
us
use is
about
two
years
.
* Do
not
soil
with
perspiration
or
finger·
prints
.
Before
insertion,
clean
mercury
battery
thoroughly
with
dry
cloth.
Perspiration
or
finger
marks
may
cause
corrosion
.
Be
careful
not
to
insert
unclean
battery
as
it
may
damage
the
camera
contact
point
.
* W
hen
not
in
use
for
a
long
period,
remove
the
mercury
battery
and
keep
in a
dry
place
. 7


r
;
:::E~:~
,
rl
I I
~
I
Scope
of
::u
orre
Gt
I
exposure
I
I •
--
;

.PREPARATIONS
FOR
EE
PHOTOGRAPHy
•••••••••
Before
using
the
EE
mechanism
for
takihg
pictures
, prepare
the
camera
so
that
the
following
three
cond
itions are
fulfilled:
1 Adj
ust
the
AUTO
mark
of
the
aper·
ture
ri
ng
to
the
indi
cator
.
2 Press and
turn
the
film
speed
setting
lever
,
adjusting
it
to
the
speed
index
of
the
loaded
film
.
*
Film
speed index is
indicated
on
the
film
box.
* When
setting
the
film
speed lever,
it
is
essent
i
al
that
the
shutter
speed
should
10 be
set
at
a hi
gh
speed
of
over
1/
15
sec.
..
In
d
oor
c
loud
y
Sunn
y
* The
click
stop
functions
for
the
follow
i
ng
16
indicated
film
speeds:
(
32
)(
~0
)
(
6
~ )(
80
)
(
12
5
)(
160) (250
)(
320)
(
50
0
)(
6~0
)
ASA
25·
.
50·
•
100·
•
200·
.
400
· .
800
DIN
15·
•
18·
•
21·
.
24·
.
27·
.
30
( 16
)(
1
7)
( 19
)(
20) (22
)(
23) (25
)(
26) (28
)(
29)
* In case
of
using
a high speed
film
,
if
it is
under
1/
15
sec.,
the
Under & Over Expo·
sure
Lock
will
catch
,
making
sett
ing
impossible
.
3
Turn
the
entire
shutter
ring, and
adjust
the
index
posit
ion
of
the
film
speed
setting
lever
to
the
simple exposure
mark
of
either
sunny,
cloudy
or
indoors.

* When
adjustin
g
the
simple
exposure
mark,
always
make
the
adjustment
by
turning
the
entire
shutter
ring.
The
setting
may
be
approximate
.
Set
at
a
position
where
the
shutter
ring
catches
the
click
stop.
Safety
device
against
incorrect
exposure
*
To
avo
id
setting
the
exposure
conditions
beyond
the
working
range
of
the
EE,
the
Under
&
Over
Exposure
Lock
device
has been
incorporated
into
the
shutter
ring
. When
the
shutter
ring
stops
,
do
not
unduly
try
to
make
the
rotation
.
The
Under
&
Over
Exposure
Lock
catches
at
the
follow
i
ng
positions
:
Under
ASA
80
1 sec.
For
ASA
100
1/ 2 sec.
For
ASA
200
1/ 4 sec.
For
ASA
400
1/ 8 sec.
For
ASA
800
1
115
sec.
When
wishing
to
click
the
shutter
at
a
slower
speed,
beyond
the
lim
it
of
the
Under
&
Over
Exposure
Lock
dev
ice,
the
lock
may
be
freed
by
turning
the
shutter
ring
while
pressing
the
Under
&
Over
Ex
·
posure
Lock
release
lever
. In
this
case, as
the
EE
mechanism
will
not
function,
release
AUTO
and
set
the
lens
aperture
manually
.
Do
not
use
B
exposure
for
EE
photo-
graphy
As
it
is
meaningless
to
use
the
B
exposure
for
EE
photography,
it
should
not
be used.
Accordingly,
the
Under
&
Over
Exposure
Lock
works
for
the
B i
ndex
. (See page
20
for
setting.
)
* Do
not
use
the
intermediate
space
of
the
shutter
speed
index
.
11

12
_ HOLDING THE CAMERA
_____________
_
Holding
the
camera
firmly
is
very
important
if
you
want
to
take
a
clearly
focused
picture.
Hold
the
camera
in
either
a
vertical
or
horizontal
position
, as
shown
in
the
photographs
.
Look
through
the
finder,
and
adjust
the
focus
while
determining
the
composi
.
tion
.
Then
,
gently
press
the
shutter
button.
1.
Hold
the
camera
with
both
hands
as
firmly
as
possible.
2.
Stabilize
the
camera
by
pressing
it
against
the
cheek
or
forehead.
izontal
position,
both
should
be
firmly
the
body,
and
at
ne
elbow
should
be
against
the
body
a
vertical
position
.

13

_PREPARATIONS
FOR
EE
PHOTOGRAPHY_
•••••••
_
1
1
Wind
the
fi
lm
advance
lever
.
By
winding
the
lever
, a
sing
le
frame
of
film
is
advanced,
charging
the
shut
-
ter
.
At
the
same
time,
the
film
counter
advances
by
one
number
.
2
Focus
by
looking
through
the
viewf
i
nder.
When
the
f
ocusing
lever
is
mo
ved,
co
rrect
focus
is
achieved
when
the
two
im
ages seen in
the
center
of
the
viewfinder
14coi
n
cide
comp
l
etely
.
3
Determine
the
composition
to
be
recorded
within
the
frame.
The
field
-
of
-
view
which
will
appear on
the
film
can be seen
within
the
rectangu
-
lar
frame
.
The
frame
is
coupled
to
the
rangefinder,
and as
the
parallax
error
is
automatically
corrected,
the
range
which
is
in
view
will
appear on
the
fi
lm
in
its
entirety.
4
Press
the
shutter
button
while
l
ooking
through
the
viewfinder.
When
the
needle is
pointing
to
the
aperture
stop
the
shutter
may
be clicked.
I~
;"
important
to
press
the
shutter
button
gent
ly in
order
to
avoid
blurry
pictures
.

* Do
not
press
the
shutter
button
indiscrim·
inately.
* When
the
shutter
actuates
,
the
film
ad·
vance
lever
is
again
ready
to
advance.
In case
the
exposure
is
incorrect
for
EE
pho·
to
g
raphy
,
the
safety
device
will
prevent
the
pressed
shutter
button
from
being
reo
leased. In
this
case,
the
needle
inside
the
viewfinder
will
be
within
the
arrow
mark
.
Turn
the
shutter
ring
in
the
direction
of
the
arrow
so as
to
bring
the
needle
within
the
range
of
the
aperture
stops
.
Distance
scale
Although
for
ordinary
picture·taking
the
dis·
tance
scale is
unnecessary,
it
indicates
the
distance
between
the
subject
in
focus
and
t
U4Ii
Indicator
~7'''''
. t
olIlane
mark
the
film
surface
.
It
is
possible
to
g
et
the
photographic
distance
by
adjusting
the
dis
·
tance
scale
tio
the
indicator
.
15

16
l
EE
PHOTOGRAPHY INDICATOR AND CHANGE
IN
SHUTTER
SPEED
_
Look
at
the
marks
and
figures
within
the
viewfinder.
The
arrow
marks
to
the
left
and
right
indicate
the
change
in
shutter
speed, and
the
aperture
readings
the
cor-
rect
exposure
section.
The
needle
shows
the
aperture
reading.
The
needle
is
not
within
the
correct<.
exposure
section.
*
Picture
can
be
taken
if
the
shutter
speed is
changed.
Shutter
may
be
clicked
at
correct
exposure.
When
the
needle
is
within
the
arrow
mark
pointing
to
the
left,
turn
the
shutter
ring
to
the
left.
When
the
needle
is
within
the
a·
rrow
mark
pointing
to
the
right,
turn
the
shutter
ring
to
the
right
.
.,
Picture
cannot
be
taken
even
--..
If
the
needle
does
not
advance
to
the
correct
though
the
shutter
speed is
exposure
section,
the
picture
cannot
be
taken.
altered
. (
beyond
the
range
of
the
exposure
meter
).
'f.
When
turning
the
shutter
ring
(
or
aperture
ring
).
remove
the
finger
from
the
shutter
button.

-
125
60
30
15
I
.AUTO
1.7
When
the
camera
is
directed
towards
the
subject,
the
Ileedle
will
swing
according
to
the
strength
of
light,
indicating
the
conditions
for
photographing,
For
obtaining
the
proper
exposure,
make
adjustments
according
to
the
diagrams
be,
iow
before
taking
the
picture,
Under
exposure
Over
exposure
t
,
When
the
stopper
catches,
do
not
turn
the
shut,
ter
ring
further,
(see
page
]]
)
,
When
the
needle
does
not
point
to
the
correct
t
exposure,
although
the
shutter
ring
is
fully
turned,
it
indicates
that
the
subject
is
either
too
bright
or
too
dark,
beyond
the
limits
of
the
exposure
meter.
Taking
of
pictures
under
such
a
condition
is
not
recommendec:i.---"'""
As
the
shutter
ring
has
two
arrow
marks,
turn
the
shutter
ring
so
that
adjustment
can
be
made
in
the
direction
of
the
arrow
where
the
needle
of
the
viewfind",
stays,
When
the
aperture
is
switched
to
the
manual
aperture
setting,
the
needle
will
stay
to
the
right
corner.
*
The
intermediate
points
of
the
aperture
stops
show
F2.8,
]]
from
the
right.
If
the
film
advance
lever
is
not
fully
wound,
the
shutter
will
not
click
although
the
shutter
button
is
pressed,
,
When
the
background
is
excessively
bright
compared
to
the
main
subject,
or
in
case
taking
pictures
against
the
light,
there
is
always
the
possibility
that
the
main
subject
is
under,
exposed,
Picture
may
be
taken
by
lowering
the
film
speed
index
by
one
stop,
For
instance,
by
setting
the
film
speed
at
ASA
50
in
case
the
ASA
is
]00.
This
procedure
should
be
regarded
as
an
exception,
as
soon
as
the
picture
is
taken
the
film
speed
index
should
be
returned
to
its
original
position,
In
case
even
this
step
is
not
applicable,
switch
the
aperture
setting
to
manual.
17

18
• SELF-
TIMER
________________
_
When
the
se
lf
·
timer
is used,
the
shutter
will
be
actuated
about
ten
seconds
after
'
the
shutter
button
has
been
pressed
.
Follow
the
instructions
below
:
1
Turn
the
flash
setting
lever
to
X.
Set
the
self·timer
lever
by
turning
it
in
2
the
direction
of
the
arrow
and
then
wind
the
film
advance
lever.
3
Press
the
shutter
button
sufficiently
downwards.
mm~.~
s
~
elf.t
ime
r
l
eve
r
Do
not
move
the
self·
timer
lever
without
turning
the
flash
setting
lever
to
X.
Press
the
shutter
button
from
the
back
of
the
camera.
If
you
press
the
shutter
button,
standing
in
front
of
the
camera,
the
exposure
will
be
affected
by
the
shade
and
you
cannot
get
the
properly
exposed
mqin
subject.
In case
the
self
·
timer
is
utilized,
use
the
shutter
with
speed
of
slower
than
1
30
sec.
for
M
type
bulb
photography.
The
self
·
timer
may
be used
for
manually
operated
aperture.

• MANUALLY OPERATED APERTURE
PHOTOGRAPHy
•••••
When
the
A
UTO
mark
of
the
Canonet
5
has
been
removed,
the
automatic
mecha
·
nism
ceases
to
function
.
It
is
then
possible
to
manually
operate
the
aperture
and
shut·
ter
speed
separately
.
Accordingly,
when
the
effective
use
of
the
shutter
speed
or
aperture
is
desired,
or
in
case
it
is
essential
to
expose
the
dark
subject
for
a
long
time,
as
well
as
to
regulate
the
aperture
for
flash
photography,
the
manual
mechanism
should
be
employed
.
Everything
else
is
operated
as
usual.
The
aperture
regulates
the
amount
of
light.
As
the
numerical
value
increases,
it
gets
darker.
For
each
stop
of
the
index,
the
light
decreases
by
one·
half.
Thus,
when
the
index
is
lowered
by
one
stop
the
exposure
time
must
increase
two
times,
two
stops
by
four
times
.
The
ratio
between
the
aper
·
ture
stop
and
the
amount
of
exposure
,
with
F2
as
the
basis
is
as
follows:
Aperture
stop:
1.7
2 2.8 4 5.6 8
11
16
Exposure
ratio
: 1/ 1.
38
1 2 4 8
163264
Effect
i
veness
of
the
apertu
re
*
As
the
numerical
value
increases
,
quantity
of
light
becomes
lesser.
For
each
indexed
point,
the
light
is
reduced
one·
half.
*
The
bigger
the
numerical
value,
the
deep
·
er
the
scope
of
the
focusing
.
*
The
farther
"
the
distance
of
the
subject,
the
deeper
is
the
scope
of
focusing.
...
On
the
other
hand
,
the
greater
the
lens
opening
,
the
shallower
the
focus.
The
shutte
r
speed
adjusts
the
exposure
time
.
Similar
to
the
lens
aperture
scale,
each
index
of
the
shutter
speed
means
double
or
one·
half
of
the
expQ.sure
time.
50
,
if
you
turn
the
shutter
speed
ring
one
stop
faster,
open
the
lens
aperture
one
stop
.
Effect
i
vene
ss of
shutter
speed
H i
gh
speed
:
For
preventing
blurs,
taking
a
fast
moving
object,
and
for
effective
·
ness
of
use
of
aperture
.
Low
speed
:
For
taking
dark
subjects,
using
blurs
for
effects,
and
for
effectiveness
of
use
of
deep
aperture
.
19

li
B (
BULB
) EXPOSURE
............................
.
B
stands
for
bulb
exposure
.
Since
the
shl,lt·
ter
remains
open as
long
as
the
shutter
button
is
being
pressed,
it
is used
for
long
exposures
exceeding
1 sec.
1.
The
aperture
ring
is released
from
AUTO
and
set
a
desired
aperture
stop
.
2.
Keep
the
safety
stopper
release
lever
in
pressed
state.
3.
Turn
the
shutter
speed
ring
and
match
B
to
the
indicator
.
4.
Wind
the
film
advance
lever
and
press
the
shutter
button
.
The
B
exposure
works
while
the
shutter
button
which
keeps
the
20
shutter
open is
being
pressed.
.
;(.
Unless
the
safety
stopper
release
lever
is
pressed,
B
index
cannot
be
set
to
the
indicator.
.::.
The
safety
stopper
works
for
the
safety
device
of
the
EE
mechanism.
When
th
e
shutter
ring
is
turned
from
B,
the
safety
stopper
release
lever
will
get
ejected
and
return
to
its
original
position
.
T
exposure
When
exposure
is
being
made
over
an ex-
tended
period,
make
the
setting
at
B expo·
sure
as
explained
above.
Open
the
shutter
with
a
lock
attached
release and
lock
th
e
release
during
exposure
.
This manual suits for next models
1
Table of contents
Other Bell and Howell Digital Camera manuals


