Installation Instructions: Deco Grande (06810/11/12/13)
Important Information
We recommend that luminaires are installed by
a qualified electrician ensuring the installation
complies with current IEE wiring regulations
BS7671:2018 & local building control.
• All tests should be carried out in accordance to EN
50172:2004.
• BELL will not accept responsibility for any claims
arising from a poor installation.
• The light source of this luminaire is not replaceable:
when the light source reaches end of life, the
whole luminaire must be replaced.
• Operating Temperature 0°C to +35°C.
• You are advised to test 5 samples before mass
application of sensor in a new lighting project. The
distance between any inductive sensors should be
greater than 3m.
• Microwave maximum operating height 3.2m
Safety
• Before installation/maintenance, ensure that the
supply to the luminaire is switched of and the circuit
breakers or fuses are removed or switched o
• This product is IP20 rated and not suitable for
external applications
• This product is class II rated
• This product is non-dimmable / 230V 50Hz
Read these instructions before installation and retain for future reference
This equipment should be installed by a competent electrician
Installation:
• Pull away the diuser from the base of luminaire
• Loosen but do not remove the 4 x lamp retaining screws
• Adjust the position of the lamp to align the hole in the keyhole slots with the retaining screws, and
remove the lamp from the base
• Unplug the driver and emergency module leads from the lamp
• Select a suitable cable entry point already provided or by drilling into the base
• Prepare the ceiling/mounting points and mains supply cable, ensuring the fixing surface/mechanism
is sucient to support the luminaire weight.
Technical Helpline +44 (0)1924 893380
www.belllighting.co.uk
British Electric Lamps Ltd
Unit A Foxbridge Way, Normanton Industrial Estate
Normanton, West Yorkshire. WF6 1TN
www.belllighting.co.uk
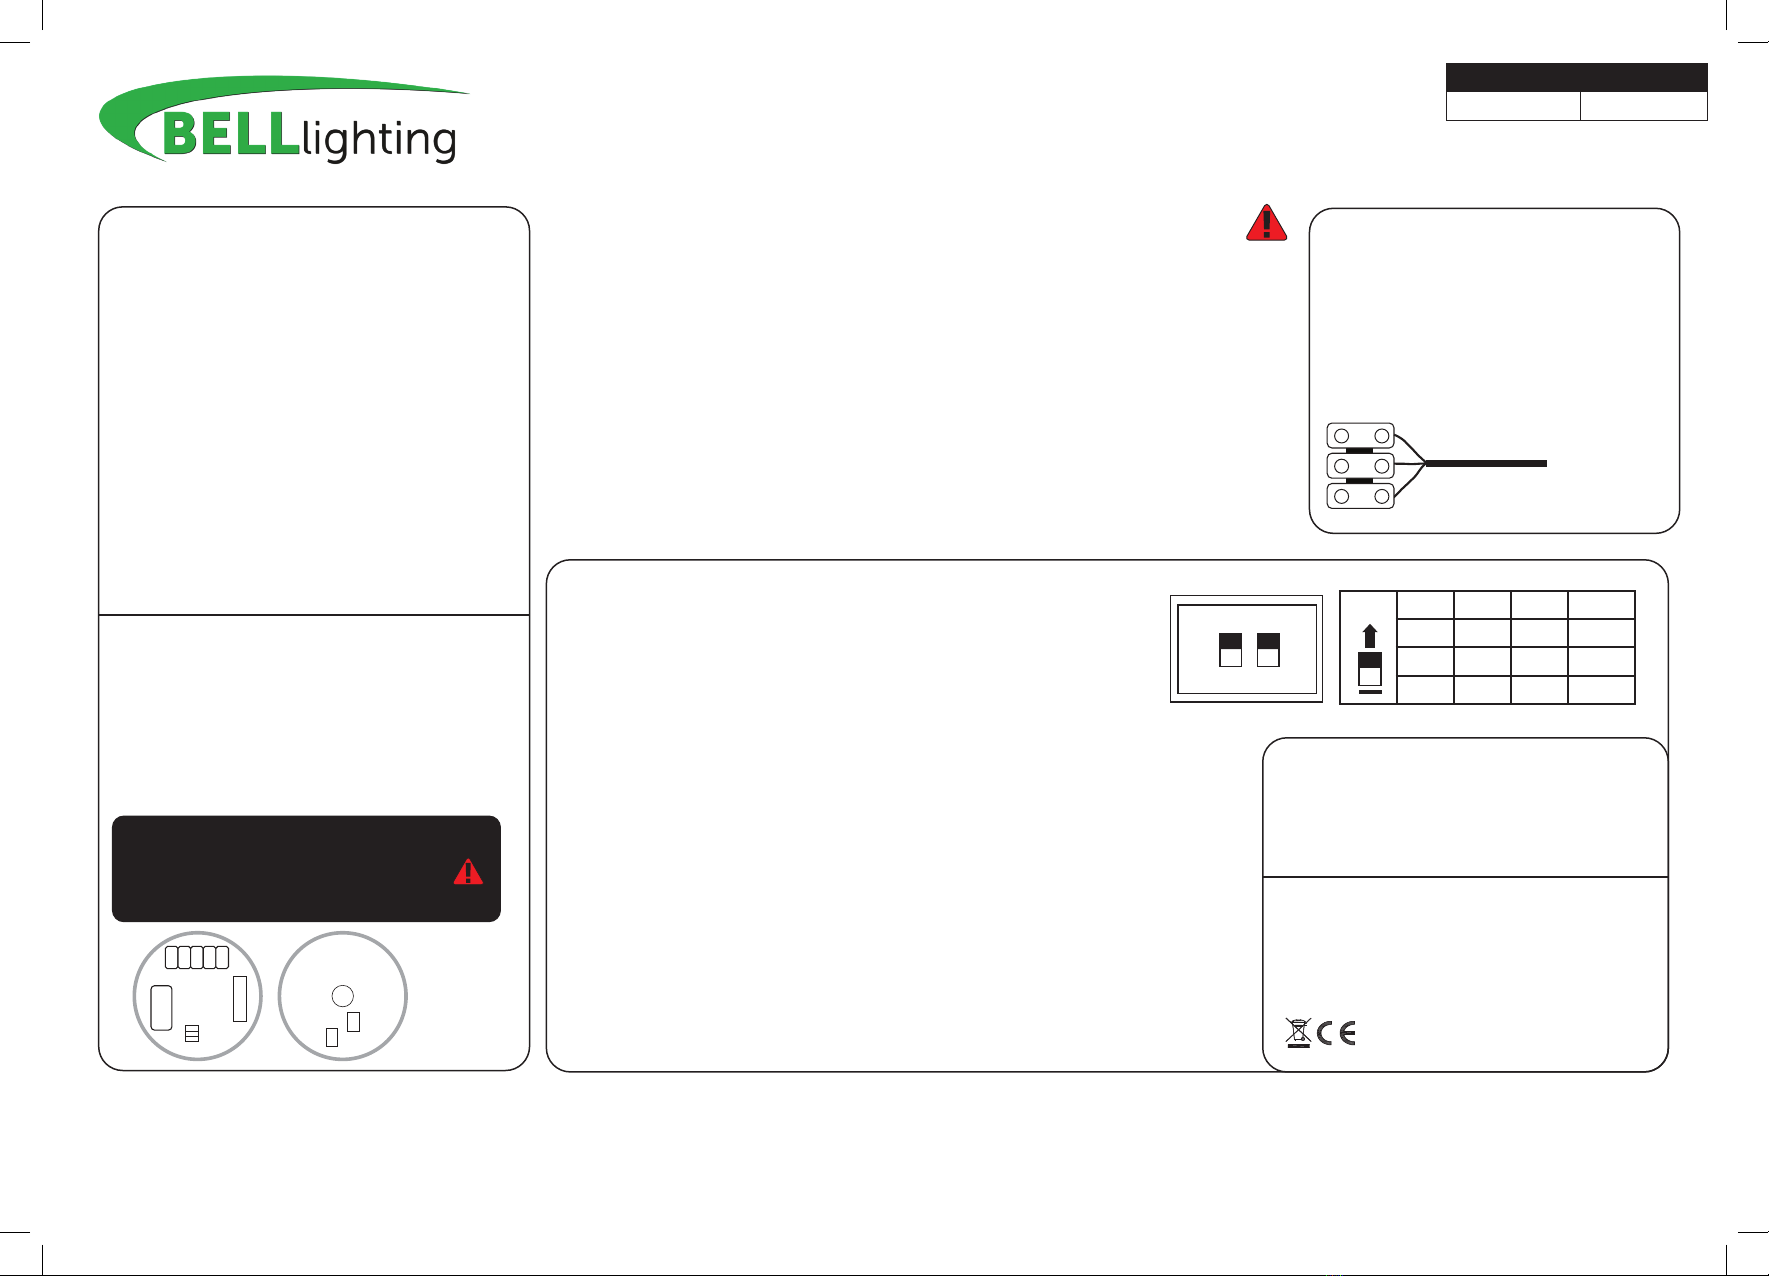
Battery Pack
Terminal
Block
Emergency
Module
LED Driver
DC
YJD
Base
LED Lamp
Important
The LED driver lead must be connected to the
socket marked DC
The emergency module lead must be connected
to the socket marked YJD
Maintained operation:
(In this mode the luminaire is continuously on.
In the event of power failure the luminaire will
revert to emergency mode).
Connections:
• NEUTRAL to (N)
• Permanent 230V mains to PERMANENT LIVE (L)
• SWITCHED LIVE (K) -link to PERMANENT LIVE
Non maintained operation
(In this mode the luminaire can be lit and controlled by a switched live enabling
the luminaire to be switched on and o. In the event of power failure the
luminaire will revert to emergency mode).
Connections:
• Live from the light switch to SWITCHED LIVE (K)
• NEUTRAL to N
• Permanent 230v mains to PERMANET LIVE (L)
• Connect the battery plug into the emergency module observing correct polarity
• Reconnect the LED driver lead to the socket marked DC on the lamp
• Reconnect the emergency module lead to the socket marked YJD on the lamp
• Replace the lamp by aligning the holes in the keyhole slots with the retaining
screws on the base, tests as this may cause damage to the electronics adjust the
lamp so the retaining screws now are aligned with the slots of the keyhole slots,
and retightened the retaining screws
• Set the colour temperature on LED plate
• Re-fit the diuser by placing over the base and push it into the right position
• Reconnect the power supply and check for correct operation
• Luminaires fitted with an electronic ballast or LED driver are exempt from
insulation resistance tests as this may cause damage to the electronics
ON
1 2
1 2
ION - 3000K
II ON ON 4000K
III - ON 5700K
ON
Maintenance:
This emergency luminaire can be operated in
maintained or non-maintained mode, but when
operated in emergency (battery back-up) mode, the
lamp will illuminate at reduced light output.
This product may contain substances that can be
hazardous to the environment if not disposed of
properly. Electrical and electronic equipment should
never be disposed of with general household waste
but must be separated for its correct treatment and
recovery. Where possible recycle your packaging.
KL
(K) Switched Live (Brown)
(L) Permanent Live (Black)
(N) Neutral (Blue)
N
Date Revision
1.6.2022 2
06810-11_12_13 Deco Grande Installation Ins.indd 106810-11_12_13 Deco Grande Installation Ins.indd 1 23/06/2022 09:2223/06/2022 09:22


