Belling 48422 User manual

PROFFESIONAL STAND MIXER
INSTRUCTION MANUAL
Model No 48422
3 YEAR
GUARANTEE
*when registered on line
*To extent your warranty by a further Two years
please register your appliance
at the website below
www.belling.co
Belling Customer Care 08771 221 3623

TECHNICAL SPECIFICATION.
Product Code 48422
AC: 220V-240V ~50Hz
Power 600W-800W
Sutton House,
Berryhill Road,
Fenton,
Stoke on Trent
Staordshire, ST4 2NL.
1 Tilting mixer head
2 Retainer for mixer
accessories
3 Mixing bowl
4 Working light
5 Release lever
for mixer head
6 Speed controller
1
5
4
6
2
3
• Stand Mixer
• Large Mixing Bowl
• Shallow Mixing Bowl
• Dough Hook
• Mixing Paddle
• Wire Whisk
PARTS IDENTIFICATION
12
Belling Customer Care 08771 221 3623
www.belling.co
WHAT’S I THE BOX

34
Belling Accessories
Pasta Sheet Roller -48422/007Wide Pasta Cutter-48422/008
Mincer & Blades -48422 /010
Roto Slicer - 48422/011
Pouring Sheild -48422/006
in Pasta Cutter -48422 /009
Cookie maker -48422/012
Belling Accessories
Large Bowl - 48422/004 Shallow Bowl -48422/005
Wire Whisk -48422/003Mixing Paddle -48422/002Dough Hook- 48422/001
www.belling.co www.belling.co
To purchase any of the accessories above please go to
the web site below
To purchase any of the accessories above please go to
the web site below

SAFETY INFORMATION
Do not use the device if highly flammiable gases are present in the air.
Never immerse the device, the mains plug and/or the cable in water or other liquids.
Do not place the device near to any sink or wash basin so that the device,
the mains plug and the cable cannot accidentally come into contact with water.
If the appliance, mains plug or cable falls into water, turn o the power
immediately.
Do not touch the device, cable or mains plug with wet hands.
e device should not be used outside or in wet or damp environments .
Place the device on a stable, firm surface.
Place the device on a dry surface so that the device is stable.
Maintain a sucient distance from heat sources such as hobs or ovens in order not to damage the
device.
Connect the device only to a properly installed socket with safety contacts. T
e power socket must also be readily accessible aer connection.
e mains voltage must match the technical data for the device.
Only use suitable extension cables whose technical data is the same as that of the device.
Make sure that the connected mains lead is not a tripping hazard.
Do not allow the cable to hang over the edge of tables or kitchen counters as this is a trip hazard.
Position the cable in such a way that it does not become squashed or bent
Position the cable in such a way that it does not come into contact with hot surfaces.
Do not expose the device to extreme temperatures, or wet or damp environments .
Only connect the device to a socket that is properly installed, is easily accessible and corresponds
to the technical data of the device.
Make sure that the rotary switch for setting the speed levels is in the OFF position before
you connect the device to the mains.
Do not over fill the mixing bowl. is might result in the device overheating or damage
to the motor.
e device should only be used when it is fully and correctly assembled in order to prevent
damage to the device.
Set the device up on a dry surface so that the device is stable.
Do not leave the device unattended during operation!
During operation, keep children and animals away from the device in order to avoid injury or
damage to materials and the device itself!
Always assemble the device in full before you connect it to the mains power.
6
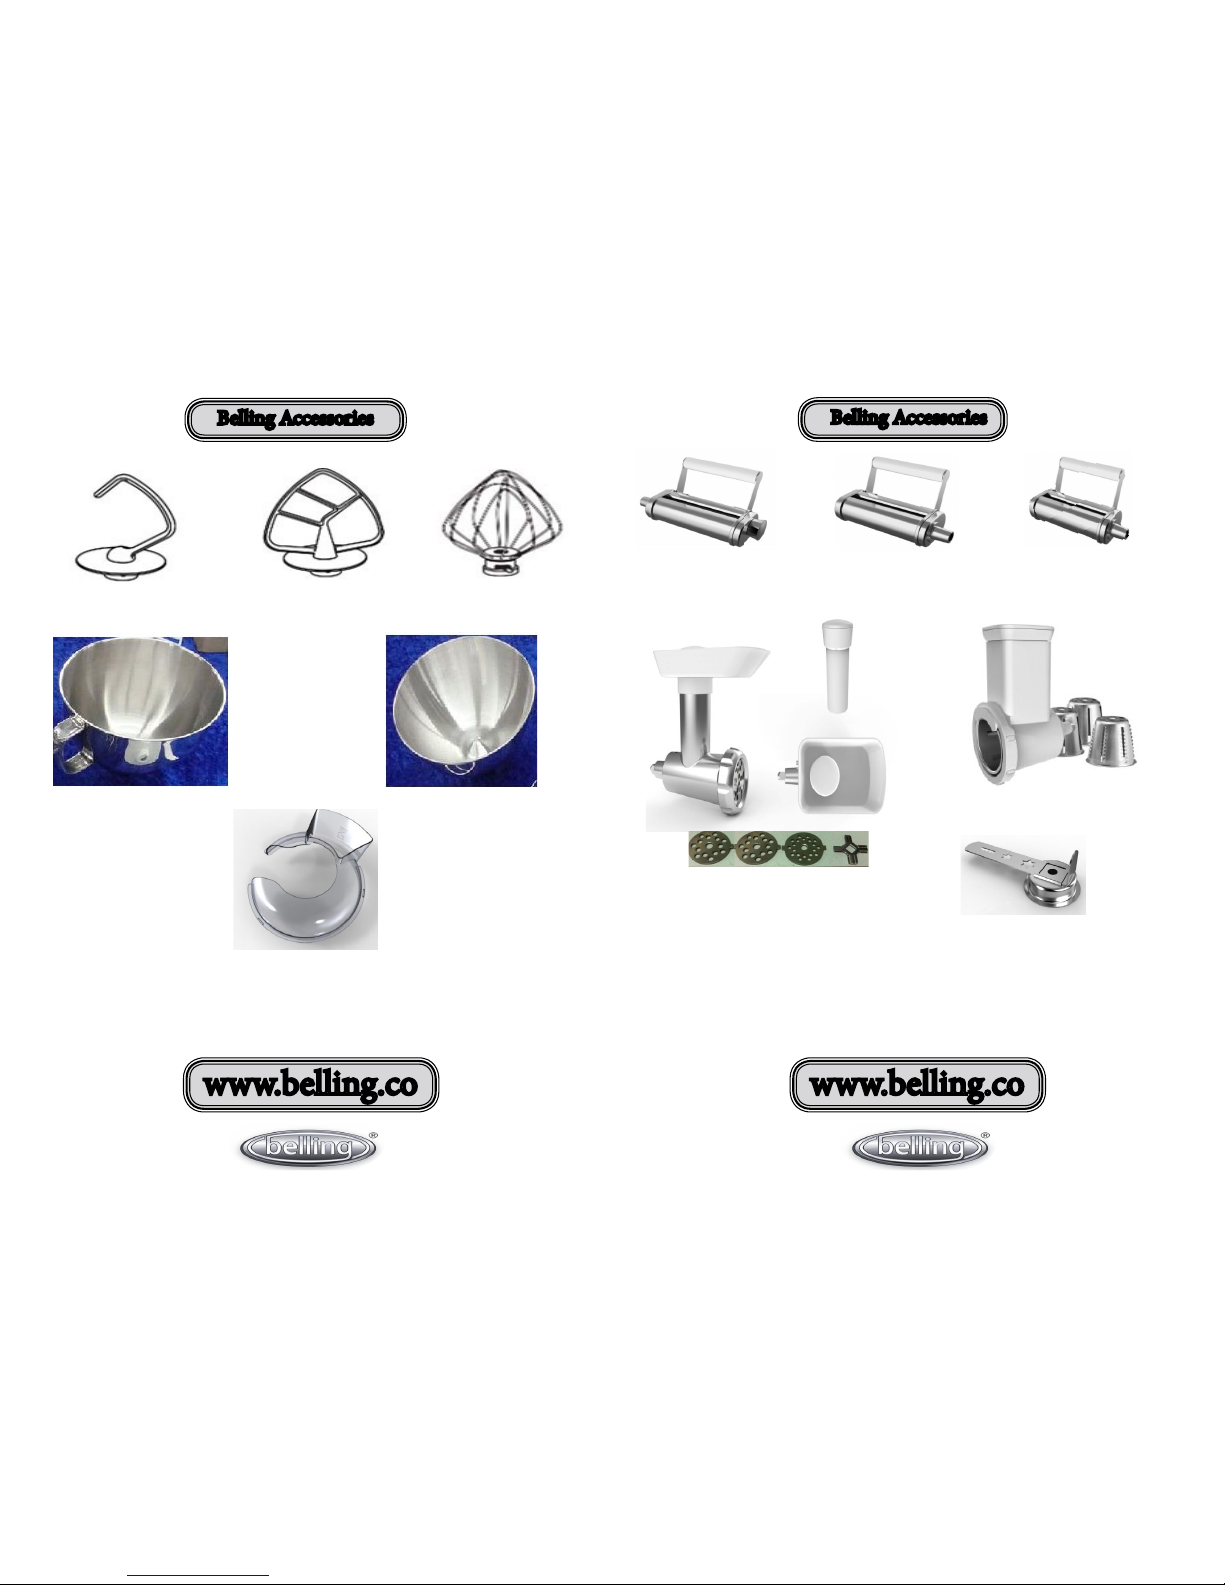
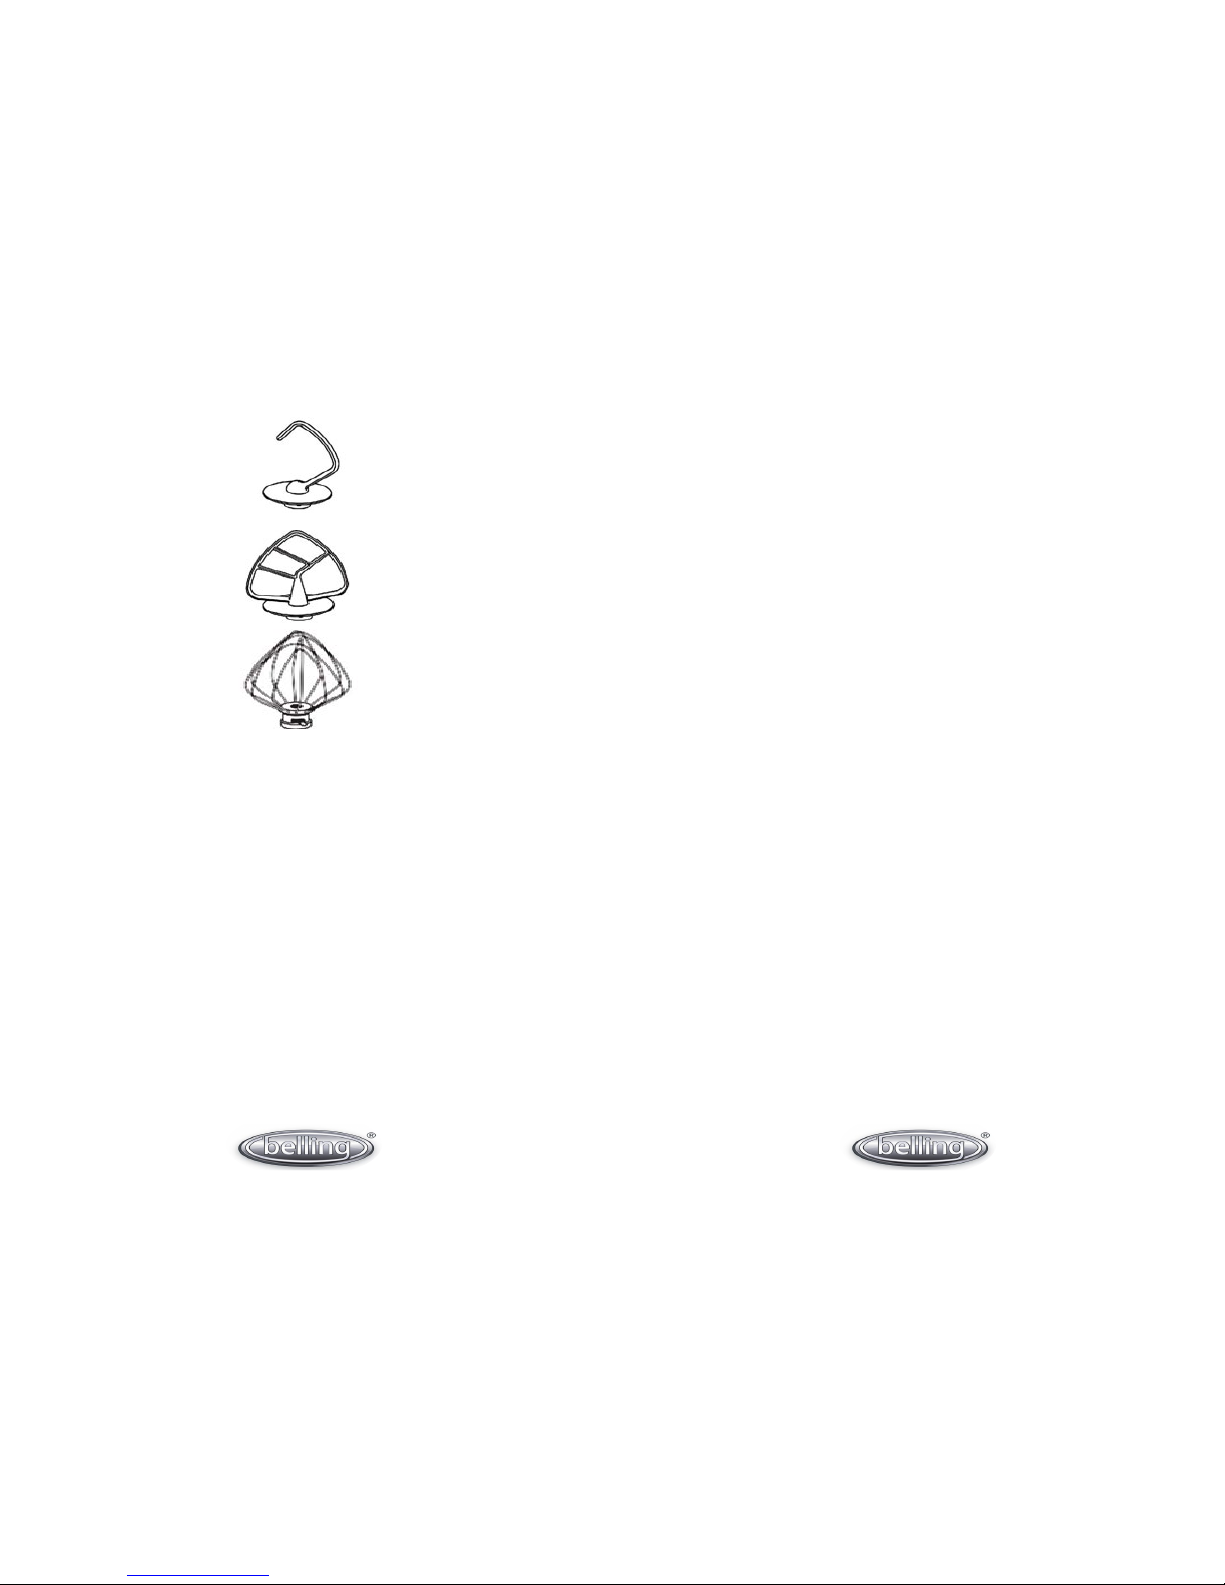
MIXING ATTACHMENTS (provided )
Dough Hook
is mixer accessory is suitable
for mixing and kneading heavy
dough mixtures, such as bread
doughs or yeast doughs.
Mixing Paddle
is mixer accessory is suitable
for mixing and kneading
normal to medium-heavy dough
mixtures, such as cake and torte
dough or shortcrust pastry.
Whisk
is mixer accessory
is particularly suitable for beating
light mixtures, such as eggs, egg
white, cream, mayonnaise, etc.
BEFORE USING THE DEVICE FOR THE FIRST TIME,
Please read the instructions carefully and store them in a safe place for future reference. If you
give the device to others, you should also give them these instructions.
e manufacturer and importer do not accept any liability if the information in these instructions
is not complied with!
We would recommend that all attachments and bowls are washed thoroughly to remove any pro-
duction residue and or any foreign material that may have accumulate during transportation.
INTENDED USE
is device is suitable for mixing, kneading and beating e.g. cake and bread dough’s, eggs or
whipped cream.
is device should not be used by children unless they are supervised by the person responsible
for their safety, or have received instructions from such a person on how to use the device.
Children must be supervised to ensure that they do not play with the device.
is device is for personal use only and is not intended for commercial applications.
Use the device only as described in the instructions. Any other use is considered contrary to the
intended purpose.
5

TIPS AND TRICKS
Mixing and kneading dough
Use the Mixing paddle or the dough hook to mix or knead dough.
Do not overfill the mixing bowl!
First mix all of the ingredients by moving the rotary switch for setting the speed levels
for approximately 20 seconds to a low position (e. g. position 1 or 2).
en set the rotary switch for approximately 3 minutes to a higher position
(e.g. 3 or 4) to knead the dough.
Beating egg whites or cream
Use the whisk to beat cream or egg whites.
For optimum results we recommend putting a maximum of 12 egg whites in the mixing bowl.
For optimum results we recommend beating the egg whites for approximately 5 minutes
at a speed level between 7 - 10.
For whipping approximately 250 ml of cream, set the rotary switch for setting the speed levels
for approximately 3 minutes to a speed level between 5 – 10.
8
USING YOUR PROFFESIONAL MIXER
• e device has a safety switch: the device cannot be switched on until the mixer head has been
lowered and is locked securely in the motor unit!
1. Place the device on a level, stable surface.
2. Make sure that the rotary switch for setting the speed levels is in the OFF position before you
connect the device to a properly installed socket.
3. Place the ingredients in the mixing bowl in accordance with your recipe.
4. Slide the release lever for the mixer head in the direction of the open lock symbol in order to set
up the mixer head.
5. Insert the mixing bowl into the device. Tighten the mixing bowl in a clockwise direction until it
is correctly and securely in position.
6. Place the splash guard on the mixing bowl.
7. Select an appropriate mixing attachment.
8. Slide the mixing attachment on to the retainer on the mixer head. Please make sure that the lug
on the retainer is passed through the slot on the mixing attachment.
9. Turn the mixing attachment to the right until the lug is positioned in the recess provided on
the mixing attachment.
10. Slide the release lever for the mixer head in the direction of the open lock symbol and lower
the mixer head until it clicks into the motor unit. e device cannot be switched on until the
mixer head has been lowered and clicks securely into place.
11. Use the rotary switch for the speed levels to select a suitable speed level:
OFF, Slow mixing and stirring, Fast mixing and kneading, Fast kneading and beating
As soon as a speed level has been set, the indicator light around the speed control lights
up and the working light switches on.
12. In order to turn the device o, move the rotary switch used for setting the speed levels to the
OFF position. e indicator light around the speed control goes o immediately. e working
light stays on for approximately 3 minutes before automatically switching o.
13. Slide the release lever for the mixer head in the direction of the open lock symbol in order
to set up the mixer head.
14. Remove the mixing attachment by pushing the mixing attach¬ment upwards and turning it to
the le until the lug on the retainer is located at the recess of the mixing attachment.
Now you can pull o the mixing attachment.
15.Turn the mixing bowl counter clockwise and remove it.
7

VICTORIA SPONGE
INGREDIENTS
Makes: 1 (7 in) Victoria sponge cake
3 eggs
150g (6 oz) self raising our
150g (6 oz) caster sugar
150g (6 oz) butter or margarine
1/2 teaspoon vanilla extract
jam to sandwich the cake
For the buttercream:
100g (4 oz) icing sugar
50g (2 oz) butter
1/2 teaspoon of vanilla extract
PREPARATION METHOD
Prep: 30 mins | Cook: 35 mins
1.Preheat the oven to 170 C / Gas 3. Place the shelf in the centre of the oven.
Grease and line two 18cm (7 in) sandwich tins with baking parchment.
2.Weigh the three eggs. Note the weight and measure the same amount of sugar, our and butter.
(See footnote.)
3.Sieve the our into a bowl and add the sugar, butter or margarine and vanilla. Crack in the eggs
and beat well, until the mixture is light coloured and uy.
Divide the cake mixture between the tins and smooth the tops.
4.Bake for 30 to 40 minutes or until golden brown. Cool for 5 minutes in the tins, then turn out
onto a wire rack to cool completely.
5.To make the buttercream, sieve the sugar into a bowl, add the butter and vanilla and beat well.
6.To sandwich the cakes together: Add a layer of jam to the top of one of the sponges, followed
by a layer of cream on top of the jam, nish by placing the last of the sponges on top.
Dust with a layer of icing sugar if desired.
Tips
Always use margarine, butter is too heavy.
Eggs can vary a lot in size, for perfect results weigh the 3 eggs.
is will more than likely weigh over or under 150g (6 oz).
For example, if the eggs weigh 175g you would use 175g each of the our, sugar and margarine.
CLASSIC RECIPIES
10
CLEANING AND STORAGE
Set the rotary switch for adjusting the speed levels to the OFF position and always remove
the mains plug from the socket before cleaning the device.
Never immerse the motor unit in water or other liquids!
Do not use any caustic or abrasive cleaning agents to clean the device. ese can damage the
surface.
All accessories (apart from the motor unit!) are dishwasher-safe.
Clean all accessories (apart from the motor unit) in the dishwasher or by hand using warm water
and mild detergent. If necessary, soen the individual parts in warm soapy water so that even
more stubborn remnants of dough can be removed.
Clean the motor unit with a slightly damp cloth and, if necessary, a little detergent.
Wipe the device dry with a clean cloth.
Store the device in a dry, clean place that is not accessible to children.
TROUBLESHOOTING
If the device should stop working properly, first check whether you are able to correct
the problem yourself. Otherwise you should contact customer service.
Do not attempt to repair a broken or damaged device yourself!
Problem Possible Cause/Solution
Is the rotary switch for setting the speed levels in the OFF position? Set the switch to a position
between 1 and 10.
Has the mixer head not been lowered? e device can only be
e device does switched on if the mixer head has been lowered. not work.
Is the mains plug correctly inserted into the socket?
Is the plug socket defective? Try another plug socket.
Check the fuse of your mains connection. e device stalls or
Is the mixing bowl too full? stirring/kneading is
Remove dough if necessary and stir/knead the dough in several sluggish. smaller portions.
CARE LINE
ere is a customer Care line for problems that cannot be addressed by the troubleshooting guide
Belling Customer Care 08771 221 3623
9
www.belling.co

12
CLASSIC RECIPIES
225g/8oz self raising our
pinch of salt
55g/2oz butter
25g/1oz caster sugar
150ml/5 oz milk
1 free-range egg, beaten
1. Heat the oven to 220C/425F/Gas 7. Lightly grease a baking sheet.
2. Mix together the our and salt and rub in the butter. Stir in the sugar and then the milk
to get a so dough.
3. Turn on to a oured work surface and knead very lightly. Pat out to a round 2cm/¾in thick.
Use a 5cm/2in cutter to stamp out rounds and place on a baking sheet. Lightly knead together
the rest of the dough and stamp out more scones to use it all up.
4. Brush the tops of the scones with the beaten egg. Bake for 12-15 minutes until well risen and
golden.
5. Glazing with egg wash .
ready in approximatly 24 mins
6. Cool on a wire rack and serve with butter and good jam and maybe some clotted cream.
SCONES
INGREDIENTS
PREPARATION METHOD
DOUBLE CHOCOLATE BROWNIES
White chocolate chips grace these deliciously dark chocolate brownies.
Enjoy with a cup of tea or with a big scoop of ice cream for dessert.
INGREDIENTS
275g caster sugar
4 eggs
225g unsalted butter, melted
225g plain chocolate, melted
75g unsweetened cocoa powder
75g self-raising our, sied
110g white chocolate chips
PREPARATION METHOD
Prep: 15 mins | Cook: 30 mins
1.Preheat oven to 180 C / Gas 4. Grease or line a baking tray with baking parchment.
2.Beat together eggs and sugar until light and uy. Set aside.
3.Melt butter and chocolate in a double boiler or microwave. Allow to cool slightly, then mix
into egg-sugar mixture.
4.In a small bowl, combine our and cocoa. Gradually fold this into the batter.
5.Stir in chocolate chips and pour mixture into baking tray.
Bake in preheated oven for 25-30 minutes.
Allow to cool and cut into portions
11

Disposal of Unit
Disposal instructions for Belling items in accordance with the WEEE directive.
Appliances bearing the symbol shown here may not be disposed of in domestic
rubbish. You are required to dispose of old electrical and electronic appliances like
this separately. Please visit www.recyclemore.co.uk, or www.recylcenow.co.uk for access
to information about the recycling of electrical items.
Please visit www.weeeireland.ie for access to information about the recycling of
electrical items purchased in Ireland.
e WEEE directive, introduced in August 2006, states that all electrical items must be recycled,
rather than taken to landll. Please arrange to take this appliance to your local Civic Amenity
site for recycling, once it has reached the end of its life.
Declaration of Conformity
We PFD Ltd Declare that this product conforms to all the following
product legislation
In accordance with the following directive(s):
2004/108/EEC. e Electromagnetic compatibility Directive
2006/95EC. e LVD directive (Low Voltage Directive)
2002/95/EC. e RoHS. Directive. (Restriction of Hazardous substances Directive)
1935/2004/EC Materials & Articles in Contact with Food. (LFBG section 30, 31 & 35)
Peter Bowden
Quality Assurance Manager
Sutton House, Berryhill Road, Fenton, Stoke-On-Trent,
Staordshire, ST4 2NL.
13
is product is made under licence.
Imported and distributed by PFD ltd ST4 2NL
14
Table of contents