Belltech 6519 User manual

6519-888 9/05
A Division of KW AUTOMOTIVE North America, Inc.
1
INSTALLATION INSTRUCTIONS
----3300 W. Pontiac Way Clovis, CA 93612 toll free: 1-800-445-3767 web: www.belltech.com----
6519
REAR AXLE FLIP & HANGER KIT
04-UP CHEVROLET 1500 QUAD CAB
Thank you for being selective enough to choose our high quality BELLTECH PRODUCT. We
have spent many hours developing our line of products so that you will receive maximum
performance with minimum difficulty during installation.
Note: Confirm that all of the hardware listed in the parts list is in the kit. Do not begin installation if
any part is missing. Read the instructions thoroughly before beginning this installation.
Warning: DO NOT work under a vehicle supported by only a jack. Place support stands securely under
the vehicle in the manufacturer’s specified locations unless otherwise instructed.
Warning: DO NOT drive vehicle until all work has been completed and checked. Torque all hardware to
values specified.
Reminder: Proper use of safety equipment and eye/face/hand protection is absolutely necessary when
using these tools to perform procedures!
Note: It is very helpful to have an assistant available during installation.
RECOMMENDED TOOLS:
Properly rated floor jack and six (6) support stands
Wheel chocks
Die grinder equipped with abrasive cut-off wheel
½” drive torque wrench
Standard socket wrench set
Air powered ½” drive impact wrench
Flat bladed screw driver
Safety glasses
Air powered chisel
KIT INSTALLATION
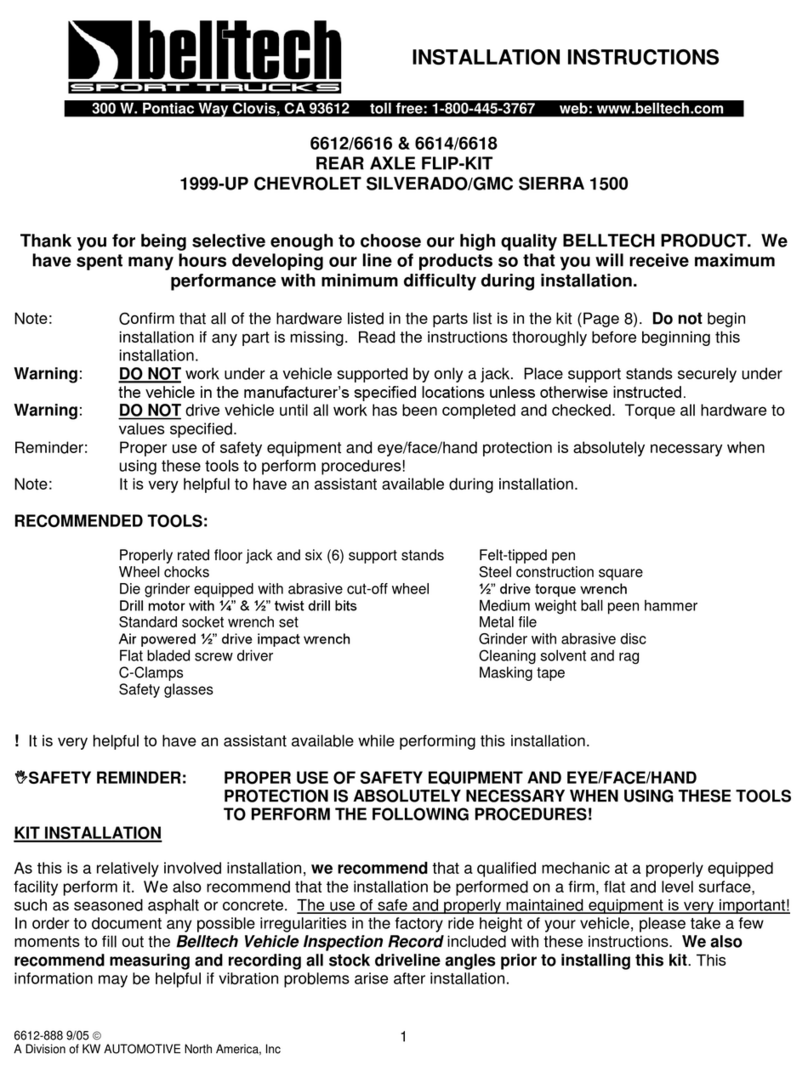
As this is a relatively involved installation, we recommend that a qualified mechanic at a properly equipped
facility perform it. We also recommend that the installation be performed on a firm, flat and level surface,
such as seasoned asphalt or concrete. The use of safe and properly maintained equipment is very important!
In order to document any possible irregularities in the factory ride height of your vehicle, please take a few
moments to fill out the Belltech Vehicle Inspection Record included with these instructions. We also
recommend measuring and recording all stock driveline angles prior to installing this kit. This information may
be helpful if vibration problems arise after installation.

6519-888 9/05
A Division of KW AUTOMOTIVE North America, Inc.
2
1. JACKING, SUPPORTING AND PREPARING THE VEHICLE
1a) Block the front wheels of the vehicle with appropriate wheel chocks. Make sure the
vehicle’s transmission is in “Park”(automatic) or 1st gear(manual. Activate the parking
brake.
1b) Loosen, but DO NOT REMOVE the rear lug nuts.
1c) Using a properly rated floor jack, lift the rear of the vehicle off the ground. Lift the
vehicle so that the rear tires are approximately 6-8 inches off the ground surface.
1d) Support the vehicle using four (4) support stands, rated for the vehicle’s weight. The
stands should be positioned, two on each of the frame rails, just forward of the front leaf
spring hangers and just below the rear leaf spring shackle hangers. Prior to lowering
the vehicle onto the stands, make sure the supports will securely contact the straight,
flat portions of the frame area.
!It is very important that the vehicle is properly supported during this installation to
prevent frame damage and personal injury! Make sure that the support stands are
properly placed prior to performing the following procedures.
1e) Slowly lower the vehicle onto the stands and, before placing the vehicle’s weight on
them, again check that they properly and securely contact the frame rails described
above. Check for possible interference with any lines, wires or cables.
!SAFETY REMINDER: Check for safe vehicle stability before proceeding under
the vehicle to begin the following procedures. Never work under a vehicle supported by
only a jack. Always use properly rated support stands to support the vehicle.
2. TRAILER HITCH REMOVAL (IF APPLICABLE)
2a) If your vehicle has come equipped with a Trailer Hitch, more than likely, this will
interfere with the installation process. This will need to be removed. This makes
access easier when mounting the REAR SHACKLE hardware.
2b) Disconnect the wire plug, as shown below in (Photo 1)
2c) Using a 21mm wrench, remove all the mounting hardware for the Trailer Hitch. There is
a total of six bolts, three (3) per side.
2d) Lower and remove the Trailer Hitch and place out of the way, along with the hardware.
3. GAS TANK PROTECTIVE SHIELD AND GAS TANK REMOVAL
3a) In order to get to the front mounting hardware that mounts the leaf spring(driver’s side),
the GAS TANK will need to be lowered to get access to the bolt head.
3b) First, support the GAS TANK from underneath. NOTE: This step would be easier to do
if the GAS TANK was near empty. Otherwise, moving a half-full or a full tank of gas is
going to be more laborious.

6519-888 9/05
A Division of KW AUTOMOTIVE North America, Inc.
3
3c) The PROTECTIVE SHIELD that shrouds the GAS TANK is mounted with three (3)
mounting bolts on one side(driver’s side), that mount directly to the frame. (Photo 2).
Using a 13mm wrench, remove the bolts completely and set aside. On the inside
(opposite of driver’s side), the SHIELD hangs on four (4) rectangular hooks.(Photo 3)
Lift this side up above the hooks. You should now be able to wiggle the PROTECTIVE
SHIELD down and out. Set this aside. Put the three (3) mounting hardware back in
their respective mounting holes for safe keeping.
3d) Holding the GAS TANK in place are two (2) straps that are mounted at each end of the
TANK (Photo 4). Each strap is mounted directly to the frame on one end only. The
opposite end is attached primarily by a hook attachment.
3e) Remove the two mounting bolts completely. These are located on the driver’s side of
the TANK itself and the inside part of the frame chassis.
3f) Pull the straps down from the driver’s side and un-hook the straps from the other end.
3g) Next locate the three (3) mounting hardware that bolts the GAS NOZZLE INTAKE,
behind the gas door (Photo 5). Remove the three (3) bolts completely.
3h) With the GAS TANK supported from underneath, slowly lower the GAS TANK six(6”) to
(12”) inches, pulling the rubber gas neck down as the GAS TANK travels down.
4. U-BOLT REMOVAL
4a) There are two(2) sets of U-BOLTS, two per each LEAF SPRING, that is attached to the
rear axle. Using a 21mm wrench, (Photo 6) un-bolt all mounting hardware (nuts and
washers) on each U-BOLT. Remove all four (4) stock U-BOLTS completely.
The LEAF SPRING not becomes detached from the rear axle.
5. LEAF SPRING REMOVAL
! CAUTION: LEAF SPRINGS may be under tension. SPRINGS under tension store a great
amount of energy. Use caution during the following steps to avoid personal injury
and/or damage to the vehicle. BE CAREFUL not to damage the brake hoses/and or
driveline when re-locating the rear axle assembly.
5a) With the vehicle raised and the chassis supported with stands, raise the rear axle to
remove the load from the shackle.
5b) Starting with the front end of the LEAF SPRING towards the engine (front), using a
21mm wrench, un-bolt the hardware and remove completely. (Photo7) With the GAS
TANK lowered slightly, you should be able to get to this hardware. Once the bolt is
removed, the LEAF SPRING should be able to sit atop the rear axle.
5c) With the LEAF SPRING sitting atop the rear axle, move back to the REAR SHACKLE
HANGER. (Photo 8) Using a 21mm wrench, un-bolt the hardware and remove
completely.
IMPORTANT NOTE: Once the LEAF SPRINGS have been removed, keep them in tack. Once you
lay them on the ground, keep them in tact by using c-clamps.

6519-888 9/05
A Division of KW AUTOMOTIVE North America, Inc.
4
Also, for ease of re-installation, mark each LEAF SPRING left and right, to insure that
the same ones go back on the same side as they were removed.
6. REAR SHACKLE(STOCK) REMOVAL
6a) With the LEAF SPRING removed and set aside, you now have easy access to the
REAR SHACKLE. (one on each side of the vehicle) Below are the steps to follow to
remove the stock REAR SHACKLE from the chassis frame;
6b) Using a cut-off wheel or a type of abrasive cutting tool, makes a slot thru the heads of
the rivets, three (3) each on each REAR SHACKLE HANGER. (Photo 9) There are
three (3) rivets on each side that need to be removed. The slots should be straight thru
the rivet heads and flush with the surface they are mounted to
6c) With a pneumatic hammer and chisel attachment, remove the rivet heads. (Photo 10).
It should take no more than a few seconds to chisel each head off. Once all rivet heads
have been removed, it is helpful to use a punch and hammer or a punch with the air
hammer to push the rivets thru the chassis.
6d) Also located here on the REAR SHACKLE HANGER is a single bolt, that mounts, along
with the rivets, to the chassis. Using a 15mm wrench, un-bolt the hardware and remove
completely.
6e) Remove the entire REAR SHACKLE HANGER completely off the chassis.
6f) Also located in this area is the REAR SHACKLE HANGER SUPPORT BRACKET. This
is a stock piece that is no longer needed and more than likely will interfere with the new
BELLTECH HANGER. Mounted by a small weld to the chassis frame, it is also
mounted with a heavy-duty rivet. Using a cut-off wheel or type of abrasive cutting tool,
make a slot straight (PHOTO 11) thru the rivet head and flush with surface they are
mount to.
Using a hammer, channel-locks or vice-grips, pull and push the SUPPORT BRACKET
upwards towards the spare tire. Repeat procedure back and forth until it breaks free.
(Photo 12)
7. REAR SHACKLE INSTALLATION
7a) Prior to installing the REAR SHACKLE, our R & D Techs have found it easier to pre-
assemble the REAR SHACKLE HANGER and the SPRING SHACKLE MOUNT.
7b) Using the kit supplied hardware, bolt up the new BELLTECH REAR SHACKLE
HANGER to the existing holes in the chassis. (Photo 13)
IMPORTANT NOTE:
Located on your new REAR SHACKLE HANGER, are four (4) sets of holes, four (4) on each
side of the HANGER. Using the top hole and the third hole from the top, (Photo 13) this lowers
the vehicle 4”. Using the second and fourth holes from the top, lowers the vehicle 5”.

6519-888 9/05
A Division of KW AUTOMOTIVE North America, Inc.
5
8. LEAF SPRING INSTALLATION
8a) Start with the front end of the LEAF SPRING (towards the engine) (Photo 14). With the
GAS TANK still slightly lowered, install the original hardware from the GAS TANK side
outward towards the driver’s side of the vehicle, thru the frame and the LEAF SPRING
eye. Start the lock nut, but do not tighten completely.
8b) Swing the LEAF SPRING upward. The LEAF SPRING will now locate underneath the
rear axle.
8c) Swing the rear of the LEAF SPRING upward to the SPRING SHACKLE MOUNT, align
the LEAF SPRING eye with the SPRING SHACKLE MOUNT holes. (Photo 15)
Insert the new hardware and but do not tighten completely. This is to be done once the
vehicle has been lowered and put on the ground.
8d) Using a 21mm wrench, re-tighten the front hardware on the LEAF SPRING.
9. SPRING SADDLE AND U-BOLT INSTALLATION
! Locate the BELLTECH axle ADPATER SADDLES supplied in the kit. Place the
ADPATER SADDLES on top of the springs with the hole over the head of the spring center
bolt. To properly position the axle, the offset holes MUST be oriented toward the front of the
vehicle. Slowly lower the rear axle assembly down onto the saddles. (Photo 16) The ears
should fit into the stock spring perches on the axle tubes. Make sure both ears on each
SADDLE locate completely in the perches.
9a) With the new kit U-BOLTS hanging on the axle, one on each side of the SADDLE, slide
the U-BOLTS up against the SADDLE.
9b) Install the U-BOLT PLATES below (under the LEAF SPRINGS), with the off-set holes
forward, so the U-BOLTS pass through the appropriate slots. (Photo 17)Attach the
PLATES using washers and locknuts. Tighten and torque locknuts to 90 lb ft.
10c) Install the kit supplied shim. Its VERY IMPORTANT to make sure the shim is installed
properly, with the large part facing the rear of the vehicle (Photo 17a). The new
location for the shim is between the top of the leaf spring and the bottom of the rear
axle.
!The AXLE ADAPTER SADDLES have been designed to properly position the rear axle
pinion shaft relative to the driveline so that vibrations are eliminated. If driveline
vibrations are experienced, take the vehicle to a driveline service shop immediately for
driveline angle inspection and necessary adjustments. DO NOT drive vehicles
exhibiting driveline vibrations, as U-joint wear could occur prematurely. Be sure to
lubricate the U-joints if deemed necessary.

6519-888 9/05
A Division of KW AUTOMOTIVE North America, Inc.
6
10. SHOCK ABSORBER, SHOCK EXTENSION AND BUMP STOP INSTALLATION
10a) Install SHOCK ABSORBER EXTENSIONS (Photo 18) (P/N 6654) as described in the
6654-88 instructions. (These instructions are included separately in the kit)
10b) Install the appropriate BELLTECH Nitro-Drop® or Nitro-Active® rear shock absorbers
using the original hardware. See the current BELLTECH APPLICATION GUIDE or
contact your nearest BELLTECH Dealer for the appropriate part numbers for your
application. Tighten and torque hardware to 70 lb ft.
10c) The BUMP STOP will also need to be replaced. Locate the BUMP STOP, one per side
and remove. (Photo 19) Here removal of the stock BUMP STOP is shown. In Photo
20, you can see a difference in height from the stock to the BELLTECH BUMP STOP.
2
1
3
4

6519-888 9/05
A Division of KW AUTOMOTIVE North America, Inc.
7
5
6
7
8
STOCK
U-BOLTS
8b
8a

6519-888 9/05
A Division of KW AUTOMOTIVE North America, Inc.
8
10
14
9
11
12
13

6519-888 9/05
A Division of KW AUTOMOTIVE North America, Inc.
9
16
15
19
17
U-BOLT
PLATE
SADDLE
AXLE
SPRING
SHACKLE
MOUNT
REAR
HANGER
MOUNT
20
18
SHOCK
EXTENSIONS
STOCK

6519-888 9/05
A Division of KW AUTOMOTIVE North America, Inc.
10
11. All hardware being fastened to the vehicle’s original fastening points should be torqued to the
proper specifications. To prevent chassis damage, never over-torque the hardware.
12. Check that all components and fasteners have been properly installed, tightened and torqued.
13. Lift vehicle and remove support stands. Carefully lower vehicle to ground.
14. Immediately test-drive the vehicle in a remote location so that you can become accustomed to the
revised driving characteristics and handling. Be aware that the vehicle will handle substantially
different now that it has been modified.
15. Installation is complete. Check all of the hardware and re-torque at intervals for the first 10, 100,
1000 miles.
Parts List: 6519 Axle flip kit
Part #
Description
Quantity
6612-005
Axle Saddle
2
6600-010
U-Bolt Plate
2
6519-010
Rear Leaf Hanger
2
6612-012
Shock Extension Rear
2
7000-880-95
Zinc Plated Spacer Tube
2
110670
Flat Washer A325 9/16"
4
110454
Nylon Insert Lock Nut 9/16"-12
2
110456
HHCS 9/16"-12 X 3.5"
2
6654
Shock Extension 99-00 Chevy
1
4920-001
Bump Stop W/Nylon LN
2
110502
Flat Washer A325 5/8"
8
110505
Nylon Insert Lock Nut 5/8"-18
8
110645
Flat Washer A325 7/16"
12
110303
Stover Lock Nut 7/16"-20
6
110650
HH Cap Screw 7/16"-20 X 1-1/4"
6
6612-015
U-Bolt 99-00 Chevy Flip Kit
4
4977-001
4° Pinion Shim
2
Table of contents
Other Belltech Automobile Accessories manuals
Popular Automobile Accessories manuals by other brands
Go Rhino
Go Rhino Lightning Series Assembly/installation instructions

Safe Fleet
Safe Fleet RVS-116-W instruction manual
PerTronix
PerTronix 1625S-6 1998 Installation Instructions and Warranty
Clarion
Clarion PP-2538T Service manual

Axxess
Axxess AXDSPL-HK3 installation instructions
Peak
Peak M1 NIGHTHAWK installation manual
