Benelli ZAFFERANO 250EFI User manual

Owner’s Manual
PURE PASSION SINCE 1911

TABLE OF CONTENTS
Preface....................................................................................2
Scooter Safety Guidelines.......................................................2
Scooter Serial Number............................................................4
Name of Each Part..................................................................5
Meters and Indicators.............................................................6
Operaon of Each Part...........................................................7
1. Key..........................................................................7
2. Power Lock.............................................................7
3. Switches for Right Handle.......................................8
4. Switches for Le Handle.........................................9
5. Helmet Container....................................................9
6. Front Loading Box.................................................10
7. Baery...................................................................10
Check Before Driving.............................................................10
Starng your Scooter............................................................15
Riding your Scooter...............................................................16
Periodical Check....................................................................19
1. Replacement and Refuel for Motor Gear..............19
2. Parts Lubricang...................................................19
3. Oil Pipe.................................................................20
4. Spark Plug.............................................................20
5. Fuel Injector and Fuel System...............................21
6.Tires.......................................................................22
7. Tire Pressure.........................................................22
8. Lamp Specicaons..............................................22
9. Headlight Beam Adjustment.................................23
10. Headlight Bulb Replacement..............................23
11. Front Lamp Replacement....................................23
12. Fuse Replacement...............................................23
Baery............................................................................................24
Air Filter Maintenance...................................................................27
Storage Guide................................................................................28
Specicaons and Technical Parameters.......................................28
Daily Maintenance Schedule..........................................................29
Electrical Diagram..........................................................................30

Aenon
Tips for Breaking-in your Benelli Scooter
The inial mileage of 1000 mi. plays the most important role for the whole service life of your scooter. During this period, proper
break-in is vital to ensure the maximum service life as well as its opmized performance.
Preface
We sincerely appreciate you choosing the Benelli ZAFFERANO
250 scooter. By observaon and applicaon of advanced tech-
nology both at home and abroad, we are producing a motor
scooter designed to bring you both a safe and pleasurable riding
experience.
Riding a scooter is one of the most excing sports. Prior to
driving your scooter, you should fully understand the regulaons
and requirements proposed in this operaon and maintenance
manual.
This manual outlines the proper methods of repairing and main-
tenance of your scooter. The opmum performance and durabil-
ity of your scooter can be ensured by following the suggesons
outlined in this manual.
Specially trained personnel are available at any authorized
Benelli/SSR Dealer to provide you with service, parts and acces-
sories. With the persistent pursuit of quality tenet – “making
consumers more sased”, the company has been connuously
improving both the quality and performance of the product.
However, due to such changes, some color appearance dierences
and structural dierences may be possible to cause inconsistency
with this manual. We hereby ask for and appreciang your under-
standing.
Aenon/Cauon/Warning
Please read this manual carefully and heed it cauons. The words
“Warning”, “ Cauon” and “Noce” are described in this manual
to classify the severity of events, please fully understand each
denion.
Aenon: refers to the explanaon as to facilitate mainte-
nance or make clear important notes.
Cauon: refers to events being related to operaon of the
scooter, to prevent damage to the scooter.
Warning: refers to events involved with the personnel safe-
ty of the driver, injury may be caused if it is ignored.
Motorcycle Safety Guidelines
Safe Driving Rules
1. The vehicle shall be checked before driving, to prevent any acci-
dents or damage to the vehicle.

2. The scooter should be ridden only by a rider who has
passed the required rider safety course and has obtained an
applicable driving license. The vehicle should not be operated
by any person(s) not in possession of an applicable driving
license.
3. The driver should be as visible as possible to prevent any
accidents caused by other vehicles, follow these rules:
• Dress with bright ght-ng clothes;
• DO NOT follow other vehicles closely.
4. Strictly follow the trac regulaons, DO NOT try to cut in
and out of trac or race.
5. Do not exceed the recommended speed limit, which is the
cause for many trac accidents.
6. The turn signals shall be turned on when making a turn or
changing lanes, so as to aract other people’s aenon.
7. The driver should pay special aenon when approaching
intersecons, to the entry and exit of parking lots, and on the
freeway.
8. Please drive with both hands, driving with a single hand is
extremely dangerous. The passenger shall grasp the safety rail
or clasp the driver, with feet placed on the footrests.
9. Your safety cannot be ensured if there is any modicaon
to your scooter or disassembly of original ngs, which will
impact the warranty.
10. Any accessory equipped shall not aect the safety and per-
formance of the scooter. Overloading of the electrical system
is especially dangerous.
Wear a Safety Helmet
The helmet is the most important piece of motorcycle/scooter
safety equipment. Be sure to purchase a helmet that meets at
least the minimum DOT regulaons and wear it at all mes when
riding.
Dress when Driving
Your riding gear should be comfortable and highly visible. The
cus should be buckled before driving, to prevent your sleeve be-
coming caught on the brake lever. For driving safety, please wear
shoes with at heels.
Notes on Rainy-day Driving
Drive with cauon on slippery roads and on rainy days, because
the braking distance of the vehicle on a wet road is at least twice
as that of on a dry road. Please avoid riding on marked road paint,
manhole covers, and surfaces with greasy dirt, to avoid skidding.
Take special care when going through railway crossings, railings
and bridges. Reduce your speed when you fail to verify the road
condions ahead visually.
Loading
If any loads placed on the scooter change how the steering play
in the handlebars feels, remove said load or move it to a dier-
ent locaon. Overloading may cause accidents or damage to the
scooter, please make sure the following:
Warning

• The max. load of front loading box is: 3.3 lbs.;
• The max. load of rear luggage rack is: 6.6 lbs.;
• The max. load of helmet container is: 22 lbs.;
Motorcycle Serial Number
The Frame No. and Engine No. are used for the registraon
of the scooter. When you need to order spare parts or ask for
special service, those numbers make it easier for the deal-
ership to oer beer service. Please record those numbers
for future reference. Frame No. is shown on the main frame
beam on the middle of the frame as in posion ① (it can be
seen by opening the front glove box, and removing the right
inspecon cover), and the Engine No. is shown at the le side
of the gearbox as in posion ②. The brand label is shown at
the le side of frame front as posion ③ (it can be seen by
opening the front load box and removing the le inspecon
cover).
Frame No. :________________________________________
Engine No. :________________________________________

Name of Each Part
(1) Rear Brake Lever (2) Le Handlebar Switch
(3) Instrument Cluster (4) Right Handlebar Switch
(5) Front Brake Lever
(6) Throle Grip
(7) Ignion Switch (8) Front Loading Box
(9) Underseat Storage (10) Air Filter
(11) Center Stand (12) Side Stand
(13) Passenger Grab Rail (14) Storage Baery
(15) Fuel Tank (16) Exhaust Muer

Meters and Indicators
(1) Speedometer (2) Low Fuel Warning Lamp
(3) Turn Signal Indicator Lamp
(4) High Beam Indicator Lamp
(5) Water Temperature Indicator Lamp
(6) F.I. Indicator Lamp
(7) Engine Tachometer
(8) Engine Oil Indicator Lamp
(9) Clock (10) Fuel Level Indicator
(11) Odometer (12) Odometer
(13) Water Temperature Indicator (14) Thermometer
(15) Baery Power Indicator Lamp
(1) Speedometer
The speedometer indicates the driving speed. The outer circle
refers to kilometers per hour while the inner circle refers to miles
per hour.
(2) Fuel Indicator Lamp
When the fuel level is less than 0.5 gallons, the amber fuel indica-
tor lamp starts to blink, when this happens, please refuel in me
to ensure the normal operaon of your vehicle.
(3) Turn Signal Indicator Lamp
When operang the turn signal light for turning le or right, the
turn signal indicator lamp on the dash panel will blink green corre-
spondingly.
(4) High Beam Indicator Lamp
When the headlight high beam is switched on, the blue high beam
indicator lamp will light up.
(5) Water Temperature Indicator Lamp
When the temperature of the cooling liquid is higher than a range
of 240F°-250F°, the water temperature indicator lamp will light up
a red alarm light.
(6) F.I. Indicator Lamp
When the ignion switch is on and the side stand is retracted, the
FI lamp will light up, and the lamp will shut o when the engine is
started normally. The lamp will stay lit if the engine fails to start up
properly or a FI problem is present.

(7) Engine Tachometer
The tachometer indicates the speed of the engine as revolu-
ons per minute.
(8) Engine Oil Indicator Lamp
When the inial mileage reaches 600mi, the red oil alarm will
light up to remind you to replace the oil. Aerwards, the red
alarm will light up when the mileage reaches each increment
of 1,800mi. Press the right dash key for a long me aer oil
replacement and the indicator will turn o.
(9) Clock
It displays the me. To set the me, press the le key for a
long me. Adjust the digit posion by pressing the le key
and adjust the value by pressing the right key.
(10) Fuel Level Indicator
Fuel level indicator records the quanty of fuel, the more
squares on the display, the more fuel quanty le. Please
refuel according to your schedule.
(11) Odometer
The odometer records the total driving kilometers and miles,
and the kilometer system and mile system can be switched
freely by pressing the le buon for a short me.
(12) Trip Meter
The trip meter records mileage for a certain me, which can
be zeroed. Press the right key for three seconds, the mileage
will be cleared.
(13) Water Temperature Indicator
This indicates the temperature of the cooling liquid. When the
pointer is in between C and H, the temperature is normal. You
should pull over and disconnue use if the indicator reaches over
the H mark.
(14) Thermometer
The thermometer indicates the ambient air temperature.
(15) Baery Power Indicator
When the baery power is lower than 10.5V, the red indicator
lamp will light up.
Operaon of Each Part
1. Key
Two keys are provided for your scooter. Please keep one as a
spare.
2. Ignion Lock

“ON”......when the key is turned to the ”ON” posion, power
is on, the engine can be started, and the key cannot be re-
moved; “OFF”.....when the key is turned to the “OFF” posi-
on, power is o, the engine cannot be started, and the key
can be removed.
“OPEN”......when the key turns to “OPEN”, you’ll hear a
“pop”, the helmet container opens.
“LOCK“......turn the handlebars to le, press in the key and
turn it to the “LOCK“ posion, remove the key, the handle-
bars are locked. When you need to unlock the handlebars,
insert the key and turn it to the “OFF ” posion, and the
steering lock is released.
3. Right Handlebar Switch
Warning
DO NOT turn the key to the “LOCK“ posion
while riding, otherwise it may cause an accident due
to the fact that the handlebars are locked and cannot
be turned.
Aenon
In case of the, please lock the steering and
remove the key when parking. Wiggle the handlebars
back and forth to verify if it is locked. Please DO NOT
park in places blocking trac.
(1) Electric-start Switch
“”......when the switch is put to the ” ” posion, power-on,
and the engine can be started;
“”......when the switch is put to the “ ” posion, power-o,
and the engine cannot be started;
“ ”......when grasping the front brake handle or rear break han-
dle, press in the starter buon, and the engine will start.
Aenon:
Immediately remove your nger from the starter buon
aer the engine starts, DO NOT press the starter buon when the
engine is running. The starng me should not exceed 3 seconds
with 10 second pauses between starng aempts. If the engine
fails to start 5 mes in a row stop aempng to electrically start
in order to keep the baery from discharging. You can use the
electric starter again once the failure or problem has been elimi-
nated.

(2) Hazard Light Switch
“ ”......when the switch is turned to the “ ” posion, all
four turn signal lights will turn on; “●”......when the knob for
light switch is moved to the “●” posion, all of the turn signal
lights will turn o.
4. Le Handlebar Switch
(1) Switch for High Beam Headlight, Low Beam Headlight and
Passing Light.
“ ”......when the switch is pressed up in “ ” posion, the
high beam headlight will be on as well as the blue indicator
lamp for the high beam on the instrument panel.
“ ”......when the switch is in “ ” posion, the low beam
headlight will be on. The low beam headlight cannot be turned
o when the engine is running, to avoid disturbance of the line
of sight.
“PASS”......when the switch is in “PASS” posion, both the high
beam headlight and the low beam
headlights will be on, to warn a pedestrian or other vehicle. The
high beam headlight will go o when the buon is released.
(2) Horn Switch
When the ignion switch is turned to the “ON” posion, press the
horn switch, the horn sounds.
(3) Turn Signal Switch
When the switch is ipped to the “ ” posion, the le side turn
signal will blink, while ipped to “ ” posion, the right side turn
signal will blink. As the turn signal lights up, the green turn signal
indicator lamp on the instrument panel will also blink accordingly.
To turn o the turn signal, move the switch to the middle posion.
Warning:
The turn signals shall be used when the vehicle is turning
or changing lanes. Aer turning, the turn signal shall be switched
o in me to avoid any disturbance to the normal running of oth-
er vehicles, prevenng accidents from happening.
5.Helmet Container
The helmet container is under
the seat. There is not a special
keyhole for the helmet container
for this scooter. The ignion lock
is the switch. When the switch
turns to the “OPEN” posion, the
container can
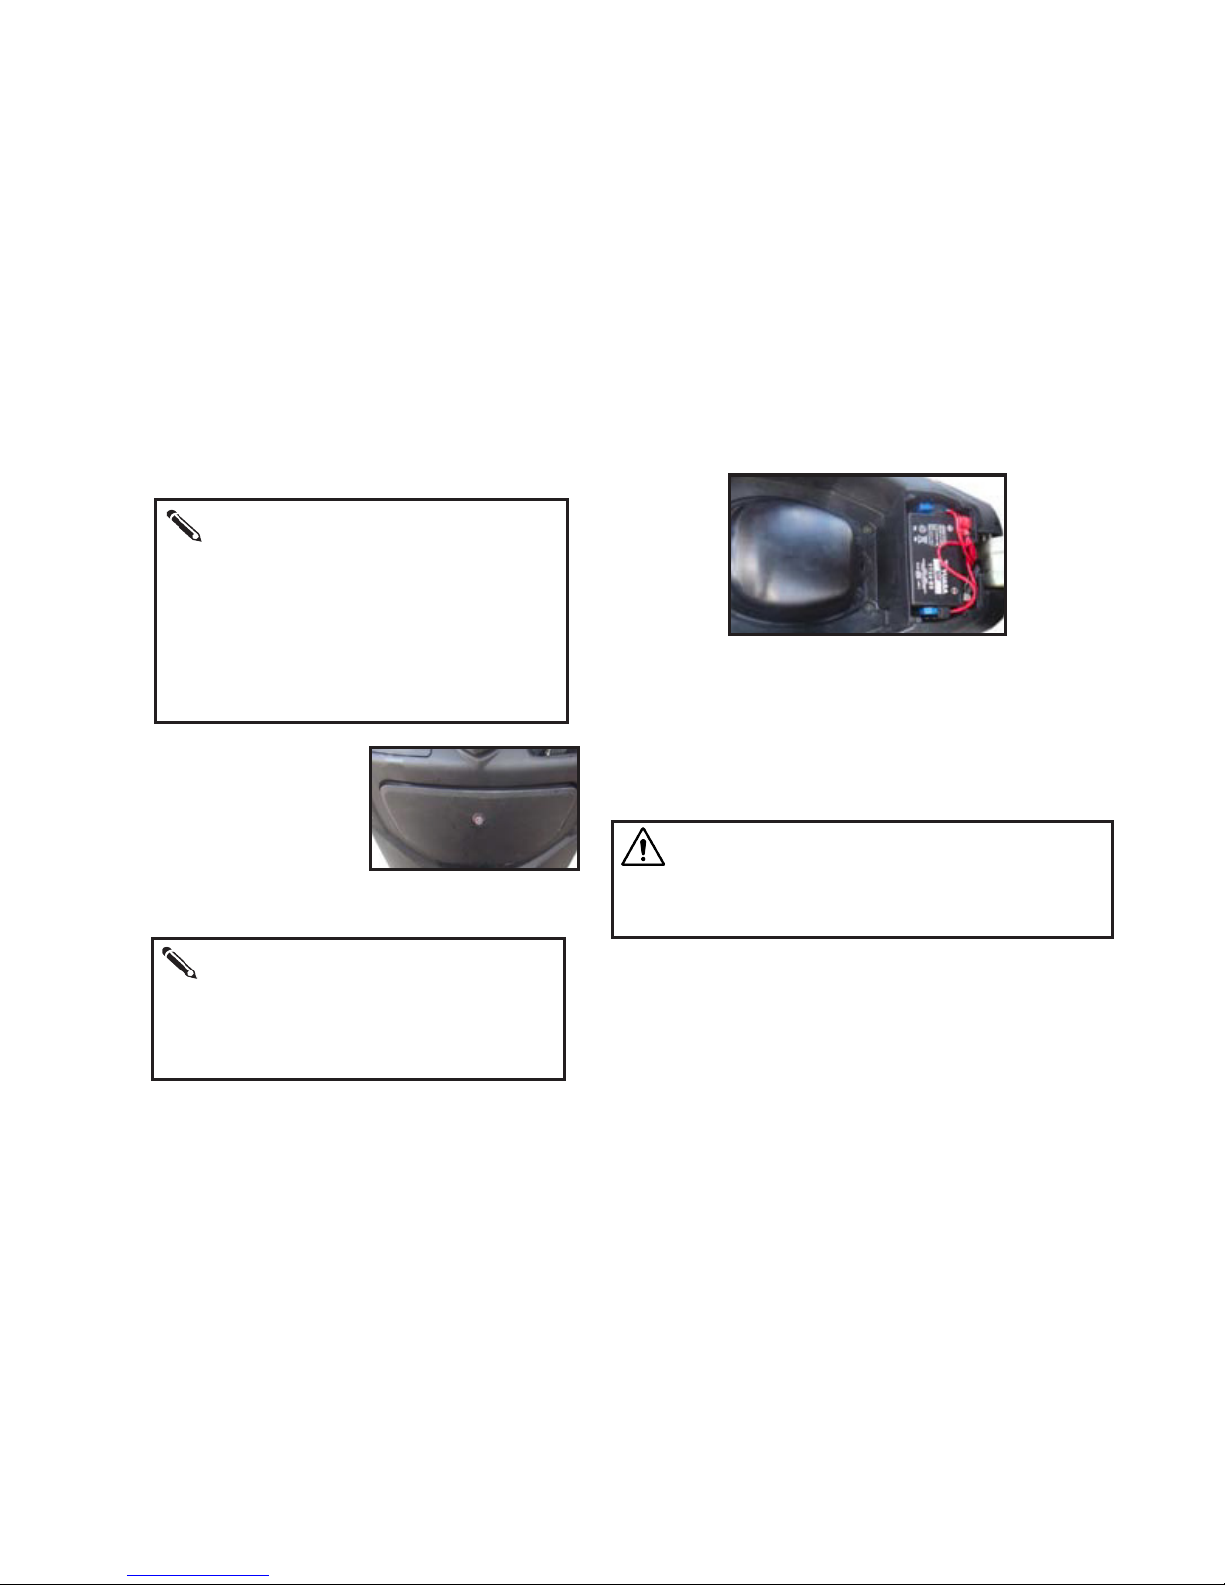
7. Baery
(1) The baery specicaons are 12V/8AH (YTX9-BS).
(2) The baery is equipped in the front of the helmet container.
(3) To remove the baery: the ignion switch shall be turned o,
then remove the mounng screw on the baery cover with a
screwdriver, remove the cover and loosen the mounng bolts for
the baery posive and negave terminals, then remove the bat-
tery. The fuses is also installed inside the baery box area.
Check Before Driving
The vehicle shall be inspected before driving to prevent accidents
caused by failure during driving, so as to ensure safe driving.
1. Check the Front and Rear Brake System
(1) The freeplay of the front brake handle and rear brake handle:
Front Brake Lever Freeplay: 10-20mm.
Rear Brake Lever Freeplay: 10-20mm.
Warning:
The baery will produce explosive gas, beware of using
open ames or sparks near the baery. Your baery is sealed and
should not be opened at any me. The baery contains sulfuric
acid (electrolyte) which can cause eye damage or skin burns.
be opened. It can be locked by lowering the seat cushion and
slightly pressing the rear of the seat.
6. Front Storage Box
Insert the key into the lock and
rotate the key to the right to
open the front storage box. To
close, insert the key and close
the front storage box, then
rotate the key lewards, once closed, remove the key aer lock-
ing.
Aenon:
The load of the helmet container shall NOT
exceed 22 lbs. DO NOT put goods, food with low
heat-resistance, or inammable items into the con-
tainer, due to the high temperature of engine. Do NOT
put valuables into the box. When cleaning the motor-
cycle, water may go in, take great care if there are any
important arcles inside. The jaw of helmet (open-
face helmet) should be placed downward inside the
container.
Aenon:
The load of the front storage box shall NOT
exceed 3.3 lbs. DO NOT put valuables into the box.
When cleaning the motorcycle, water may go in, take
great care if there are any important arcles inside.
Remove valuables from the box when parking.
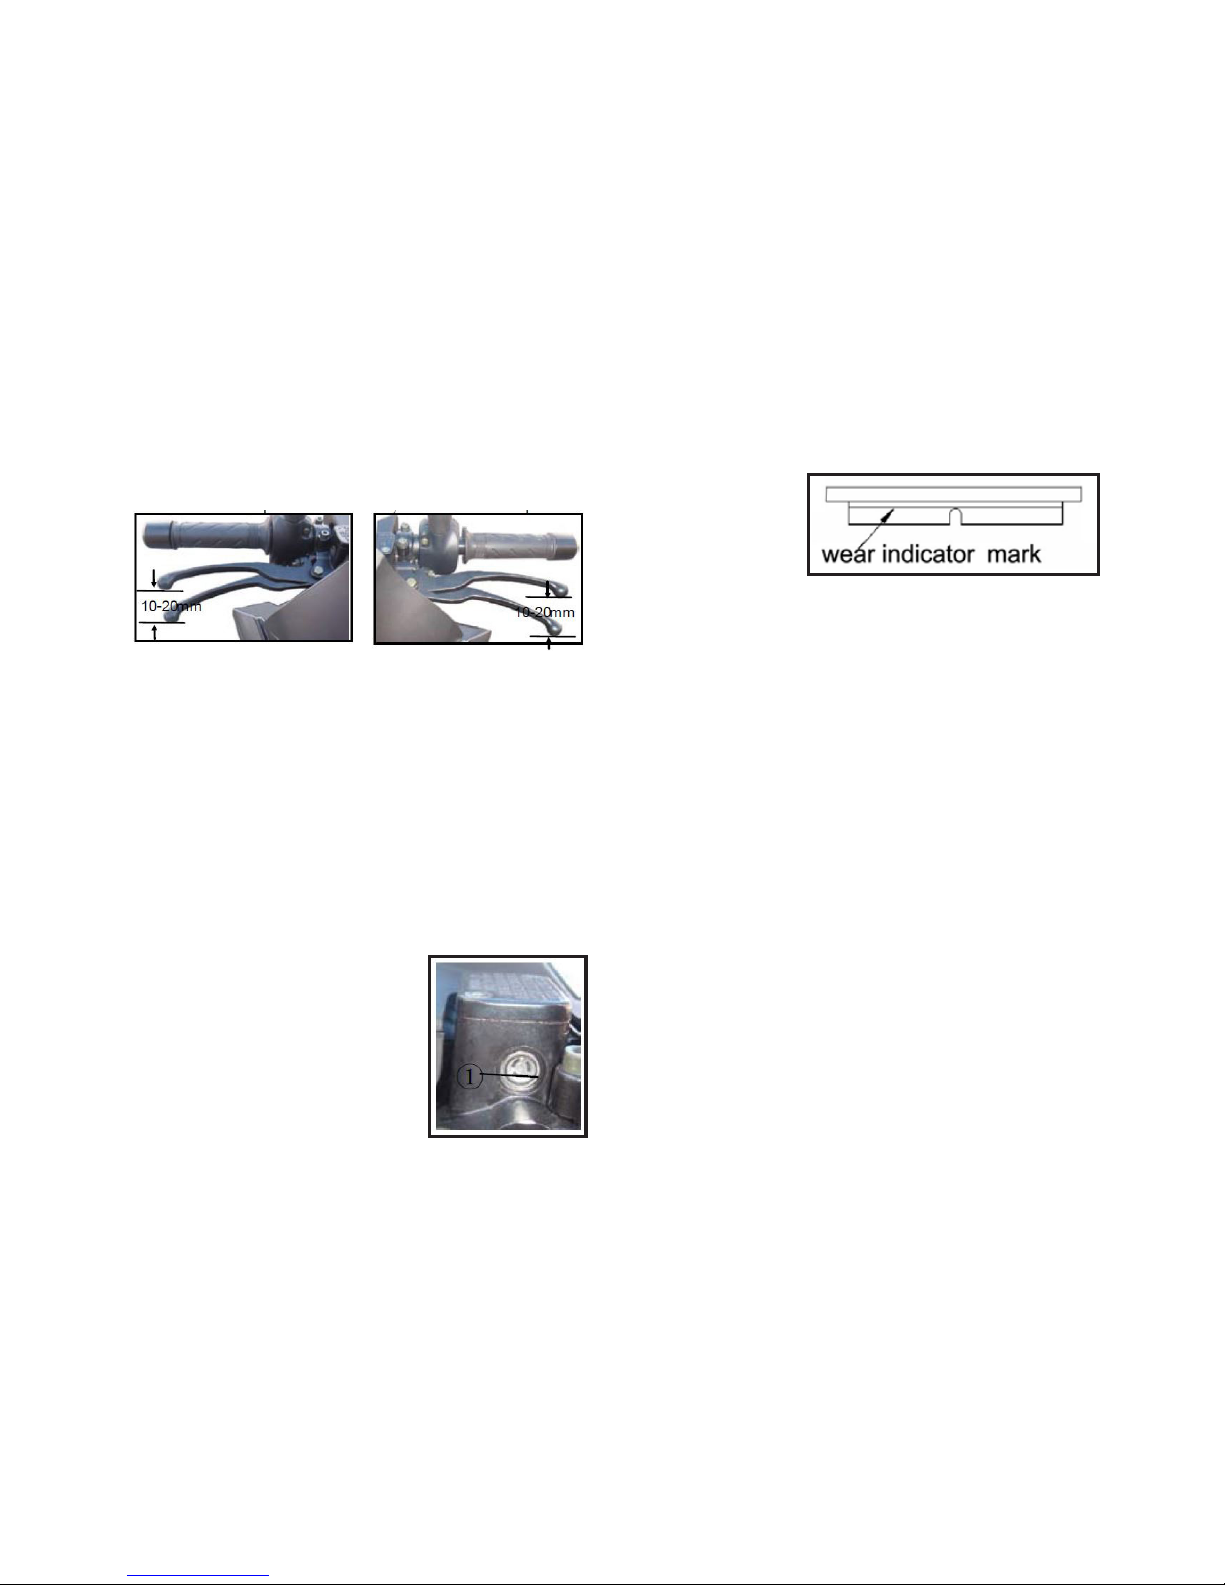
(4) Brake Pads
The brake pads shall be
inspected periodically to
check if the wear reaches
the wear limit.
If it reaches, the brake
pads shall be replaced immediately to ensure opmized brake
performance. If the brake system or brake pads require repair, we
advise you ask your local dealership for service. Your scooter u-
lizes a high pressure hydraulic brake system for braking. To ensure
proper safety, the hydraulic brake lines should be replaced every 4
years, and the brake uid should be replaced every 2 years. Do not
ride immediately aer replacing the brake pads. First squeeze the
front brake lever several mes to restore proper braking pressure
and to fully push the brake pistons into their normal posion. Also,
when riding the rst me aer replacing the brake pads apply the
brakes a few mes at low speeds to opmize brake performance.
2.Fuel Check and Filling
Ensure the fuel quanty in the fuel tank is sucient for driving the
miles planned.
When the fuel gauge reaches the nal bar it will begin blinking
and it will light the amber low fuel warning light in the center of
the gauge cluster. When this happens approximately 0.5 gallons
of fuel remain in the fuel tank. When refueling use #91 octane
for opmum engine performance and service life of the engine.
Low octane fuels will cause damage to the engine or could lead to
engine failure.
“Free Play” refers to a travel distance of the end of brake
handle. The brake handle should be provided with proper free
play and operated smoothly with instant response.
(2) Check if the brake works normally
When driving on a dry road surface, reduce your speed, to
check if the front and rear brake systems work well. It should
be adjusted accordingly to make sure of opmized perfor-
mance.
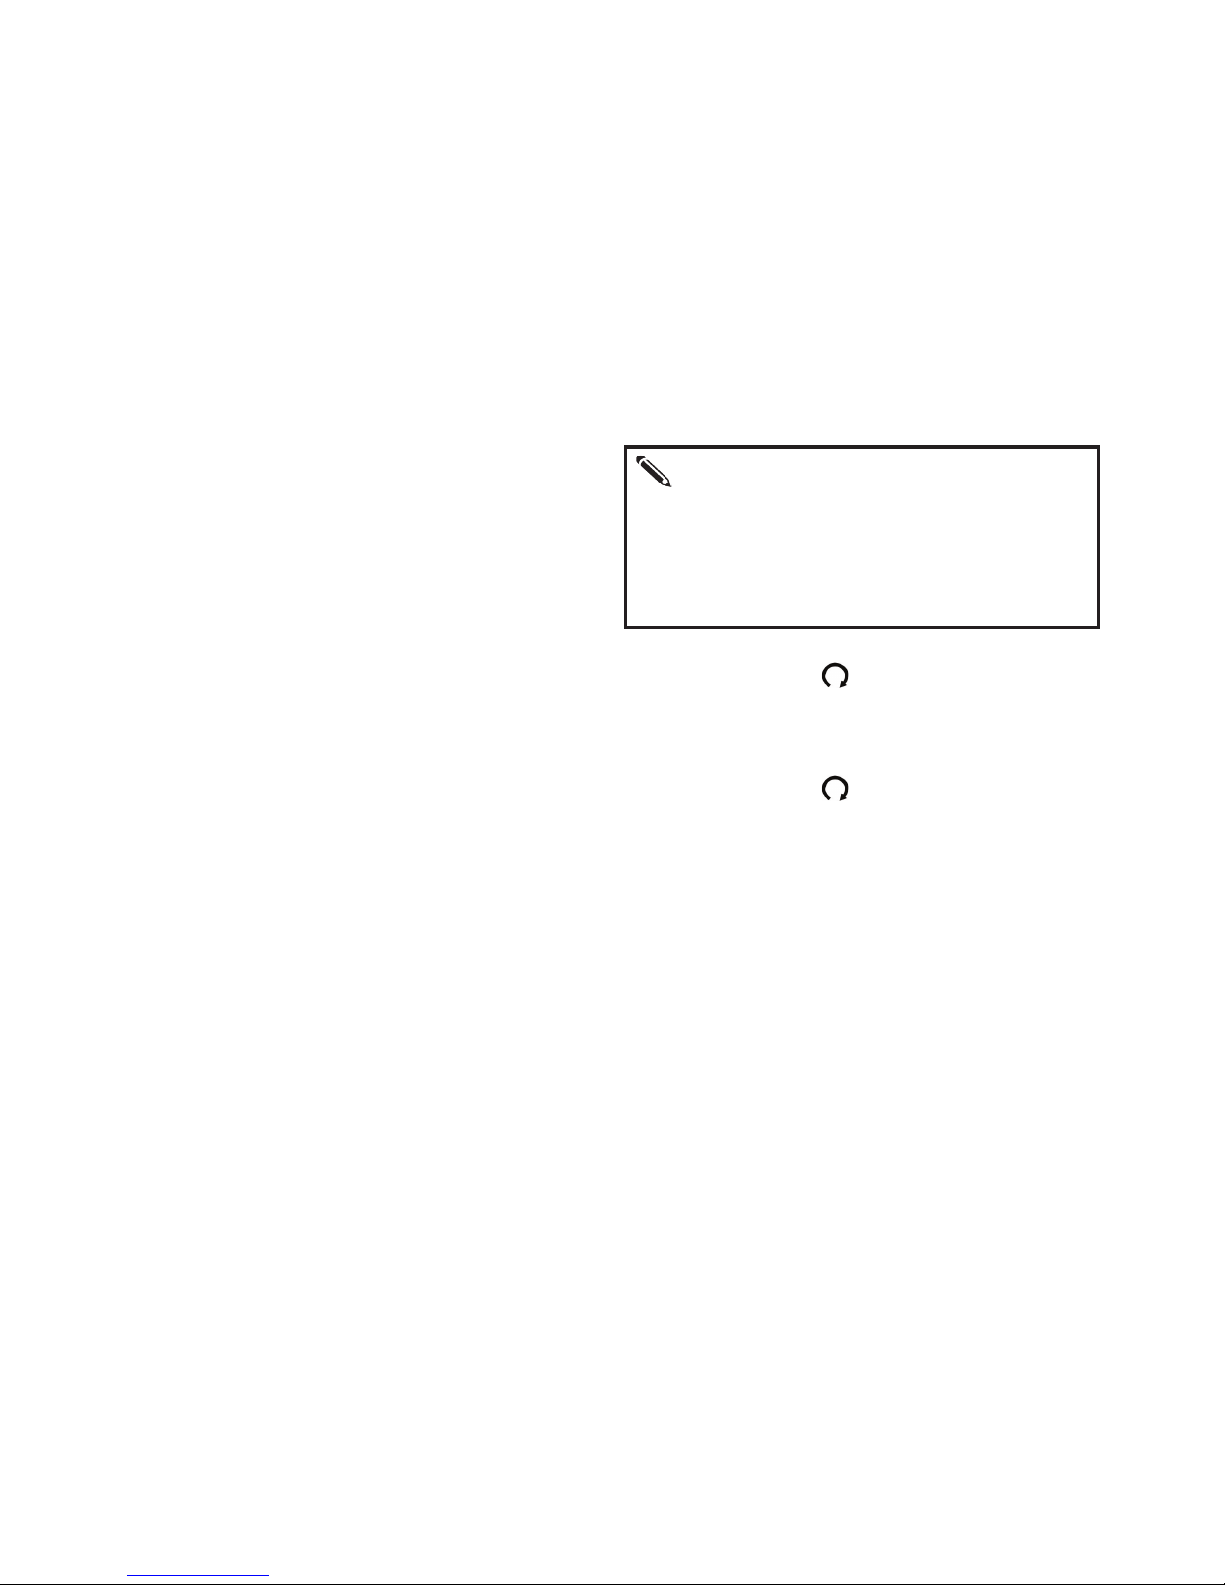
(3) Brake Fluid
DOT 4 Brake uid is used for this motorcycle. Only use brake
uid from a sealed container when topping o or replacing
the brake uid. Brake uid from an open container may absorb
atmospheric moisture which will cause the premature break
down of the brake uid. Take care not to spill brake uid on
plasc or painted surfaces as it can damage them.
Use cauon when checking the level of
brake uid in the master cylinder. If the
level is lower than the limit ①, the
brake uid shall be relled to the upper
limit. When the brake pads are worn,
the liquid in the master cylinder will
automacally feed into the brake line
which will reduce the level.

3. Check and Replacement of Engine Oil
Using a high quality engine oil and replacing it frequently are
vital to the long term performance and durability of the en-
gine. The engine oil level should be checked prior to vehicle
use each day and should be maintained at the upper dipsck
mark between preventave maintenance inspecons.
Warning:
The engine should be turned o, ignion switch in
the o posion, and away from heat sources and re during
refueling.
Use cauon not to overll the fuel tank when relling. DO
NOT ll the fuel level in the fuel tank above the ller neck.
Start the engine and allow it to idle for a few minutes to warm up
the engine oil, then turn o the engine and allow it to sit for one
minute:
① Place the scooter on the center stand, remove the dipsck and
wipe it using a clean rag.
② Reinsert the dipsck (DO NOT screw it in)
③ Remove the dipsck and check the oil level on the dipsck,
rell the engine if the level is below the upper level mark.
④ During the break-in period, the engine oil should be changed
at 200mi, 400mi, 600mi and 1000mi aer this period, you should
change it every 2000mi.
⑤ The oil volume is 1.4 L, and 1.3L when replacing.
⑥ The oil volume shall not fall below the lower limit on the dip-
sck.
⑦ Driving on dusty roads, cold environments and places with
poor trac condions, may cause the degradaon of the engine
oil. Please replace more frequently if used in these condions.
⑧ Please use a high quality oil with high purity and perfor-
mance which complies with SF grade or super grade. The type is
SAE10W/40.
Aenon:
The oil level should be checked frequently during use,
please rell in a mely fashion if the oil level is low. The oil level
will be inaccurate if checked while the scooter is on an incline or
other uneven surface. Only check the engine oil when the engine
has been shut o and take care not to get burned by the hot en-
gine surfaces.
The oil replacement procedure is as follows: (the replacement
should be performed aer the engine has warmed up)
(1) Support the scooter using the center stand on level ground;
(2) Remove the engine oil dipsck once the engine has been
shut o;
(3) Place an oil pan below the engine oil drain bolt;
(4) Remove the engine oil drain bolt and completely drain the
oil;
(5) Reinstall the oil drain bolt and ghten;
(6) Fill the engine with new oil of the proper specicaon and
place the dipsck into the ller hole. Remove the dipsck and
check the oil level, if sucient install the dipsck and screw it
in;
(7) Start the engine and let it run for 2-3 minutes at dierent
speeds and verify no oil leaks are present;
(8) Turn o the engine and wait 1 minute, remove the dipsck
and verify the oil is at the upper mark, if not add oil unl the
level is correct.
4. Steering Stem Bearing Adjustment Inspecon
Place the unit on the center stand and have someone sit on
the passenger seat to li the front wheel o the ground.
Check the steering by turning the handlebars from le to right,
and right to le.
Check if the steering is too ght or too loose, check for clunk-
ing by liing the front wheel slowly.
If an abnormality is detected contact your local dealership for
repair.
5. Brake Lamp Inspecon
Turn the ignion switch to “ ” posion. Apply the front and
rear brakes respecvely to make sure the brake lamp will light up.
Check if the brake lamp cover is dirty or damaged.
6. Turn Signal Inspecon
Turn the ignion switch to “ ” posion. Operate the turn signal
switch to conrm if the le and right turn signal lamps work and
the steering indicator blinks. Check if the lamp cover is damaged
or dirty.
7. Check the Headlight, Taillight and Headlight High Beam
Aer the engine is started, conrm that the lights come on and
that the headlight high beam can be acvated. Check if the light
covers are damaged or dirty.
Special Aenon
The valve clearance should be checked and adjusted
when the inial mileage reaches 200mi. The nal drive oil
doesn’t need to be changed oen, it should be changed every
year or every 3,000mi of use whichever comes rst. However,
the cleanliness of the oil should be checked frequently. The oil
level should also be checked frequently and topped o when
low between replacement.

8. Tire Pressure Check
Check the pressure of the front and rear res.
Normal pressure (single rider):
Front wheel: 36 ±1 psi;
Rear wheel: 36 ±1 psi.
Check if any metal fragments
or broken stones are caught in the
re grooves, if observed,
please remove them before driving.
When re cracks or the re wear reaches the limit, please re-
place the re(s) with new. An abnormally worn re is extreme-
ly easy to cause accidents.
9. Front and Rear Suspension Check
Sit on the scooter and apply the front brake, push the scooter
forward to compress the front suspension. Keep applying the
front brake and sit in the saddle abruptly from a standing posi-
on to compress the rear suspension to check if the front and
rear suspension is in good condion.
10. Speedometer Funcon Check
Check if each funcon of speedometer works properly.
11. Horn Check
Turn the ignion switch to “ ” posion, press the horn but-
ton to conrm the horn sounds.
12. Rearview Mirror Check
Sit on the seat cushion in your normal driving posion to view
the rear-view mirror perspecve and conrm the angles are
appropriate, you should be able to clearly see objects behind
you, and check if the mirrors are damaged or contaminated.
13. License Plate Check
Check if the license plate is damaged or loose.
14. Exhaust Check
Check if the exhaust pipe is loose or if it is making excessive
noise.
15. Check if the Previous Abnormality is Eliminated
16. Cooling Liquid Check and Supply

Coolant is crical to your liquid cooled scooter engine. If
there is no coolant in the engine during operaon it may
cause sever damage to the engine. The piston, cylinder and
cylinder head could all become damaged if the engine is
run without coolant. Therefore, the coolant level should be
checked prior to use. If low, add coolant and bring the level
up to the proper level. The coolant is green and can be ob-
served by looking through the leg shield vent on the le hand
side. Add coolant when the level is at or below the MIN mark.
To add coolant: support your scooter on the center stand,
open the glove box and remove the le inspecon cover,
remove the coolant ller cover from the top le of the leg
shield. Rotate the cap (2) counterclockwise to remove it and
using a funnel add coolant to the cooling system observing
the coolant level (1) unl it reaches the MAX mark.
Starng your Scooter
Warning:
When the scooter engine is warm, DO NOT remove
the radiator cap, the coolant temperature is sll very high
and it will spray out under pressure and can cause burns
if done so. Wait unl the engine has cooled to check/add
coolant to the cooling system. .
1. The fuel, engine oil, and coolant levels should be checked prior
to the engine being started and the fuel quanty should be suf-
cient to sasfy the driven mileage planned. The engine oil and
coolant levels should be between the lower and upper level. If
they are low, top o the levels to the MAX/Upper mark before
use.
2. Place the scooter on the center stand with the rear wheel o of
the ground.
3. Insert the key into the ignion switch and turn it to the “ “
posion.
4. If starng electrically, pull in the front or rear brake handle.
5. If operang in cold temperatures and especially during the
winter start the engine and allow it to warm up before riding, then
wait for the coolant temperature gauge to read “C” before riding.
Aenon:
Aer your FI scooter has started at low temperatures
wait for at least 2 minutes before exceeding 5,000RPM. This will
reduce the chances of lubricaon drag causing internal engine
damage.

Warning:
Improper starng may pose a safety risk. When
starng the engine if the scooter is not on the center stand
it may rush forward. Before starng the engine, place the
scooter on the center stand and do not drop it from the
center stand unl the engine is on and idling. DO NOT
twist the throle unl the scooter is ready to be ridden
away.
DO NOT start the engine in poorly venlated places as
it poses a carbon monoxide poisoning risk. The engine
should be o when no one is around the scooter.
Scooter Operaon
1. Li the side stand or center stand
Push the scooter forward and the center stand will auto-
macally return to the up posion.
If using the side stand, li the scooter to the vercal po-
sion then push the side stand to the up posion. When
stopping the scooter, put down the side stand with your
le foot and lean the scooter to the le onto the stand.
Keep your foot on the side stand unl it touches the
ground before geng o of the scooter.
Cauon:
Aer the scooter starts and before riding, the
brakes should be kept applied.
Warning:
Before riding your scooter, check the posion of the side
stand carefully. If the side stand is not returned to the original
posion it may touch the ground when making a le hand turn,
this could cause the scooter to loose tracon/balance which is
dangerous.
2. Release the brake lever.
3. Slowly rotang the throle, the scooter will start to move for-
ward.
4. Drive Safely
Before riding, turn on the turn signals to conrm safety and then
drive.
5. Speed is adjusted by the throle:
● Rotate the throle rearward……
Warning:
Aer the brake lever is released, DO NOT abruptly rotate
the accelerator to avoid the scooter suddenly rushing forward.
Warning:
DO NOT abruptly rotate the accelerator to avoid the scoot-
er suddenly rushing forward.
Rotate the throle rearward and the engine
will accelerate. Rotate the throle slowly
to accelerate smoothly and slowly.
● Reset to the original posion……
Rotate the throle forward, the speed will
decrease. Return the throle slowly to avoid
abrupt deceleraon.
6. Proper riding can prolong the service life of your scooter.
The inial mileage of 1,000mi is the break-in period of your
new scooter, please keep the speeds at 38mph or below
and avoid sharp acceleraon. For details please refer to the
table below:
During the break-in period, the gearbox oil should be re-
placed under thermal condion.
7. Use the Front and Rear Brakes when stopping
Please use the front and rear brakes at the same me to
ensure beer braking.
Mileage
(miles) 0-300 300-500 500-1,000 1,000-
1,500
Speed
(MPH) 25 35-40 45-50 55-60
Warning:
Braking distances are proporonal to the speed traveled.
You must esmate the distance between vehicles in front of you
and keep a safe distance to allow enough room for braking. Inex-
perienced riders oen use the rear brake only. Using only the rear
brake can cause the scooter to become unstable when braking
and will accelerate brake wear.
8. Emergency braking and sharp turns NOT recommended
Emergency braking and/or sharp turns are the main reasons for
wheel lock or low side crashes.
9. Take special care when riding on rainy road surfaces
Rainy days produce slippery wet roads, this will increase braking
distances. Reduce your riding speed and keep adequate distance
between yourself and the vehicles in front of you. On downhill
roads, close the throle when operang the brakes and modulate
them to keep your scooter under control.
10. Parking methods
● When approaching a parking lot or driveway turn on your turn
signal early, check your mirrors, pay aenon to passing vehicles
and gradually slow down.
Close the throle, use the front and rear brakes so the tail lamp
will light up to warn the vehicles behind you.

● When parking
Turn o the turn signal, turn the ignion switch to the “ “
posion. Place the scooter on a at surface and support it on
the center stand.
Use your le hand to grasp the le handlebar and your right
hand on the passenger grab handle, step down on the center
stand lever and then pull back with your right hand. To use
the side stand, it is suggested that you get o of the scooter
and slide the side stand support down with your right foot
to the down posion. Aer your scooter has been stability
parked lock the handlebars and remove the key to prevent
the.
11. Trouble Shoong
If the engine can not start normally, please check the follow-
ing items:
a. If their is sucient fuel in the fuel tank.
b. Start the engine electrically several mes, and check if fuel
sprays normally from the fuel injector.
Warning:
When the engine is in operaon the muer will be-
come hot. Avoid being burned. Once the scooter is parked,
DO NOT touch the muer and related parts of the engine,
and pay aenon that the muer side of the scooter can-
not easily burn passers by.
c. If the fuel injector works normally, the ignion system should be
checked.
d. Remove the spark plug and touch it to the metal body of the
engine, then turn over the engine to check if any spark appears on
the spark plug, if no spark, please take your scooter to a dealer-
ship for inspecon and repair.
Warning:
The proper maintenance procedure must be followed aer
your new scooter mileage reaches 600 miles. Please make sure
to perform the periodical maintenance carefully and according to
the instrucon manual.
Aenon:
If you are unable/unaware of the failure on your scooter
return to your local authorized dealership for repairs. The dealer-
ship is in the best posion to provide you with service and parts,
especially when your scooter is under warranty. DO NOT disas-
semble your scooter if under warranty, simply return to an autho-
rized dealership.

Periodic Maintenance
In order to keep your scooter in opmum operaonal condi-
on please perform periodical inspecon and maintenance.
Any authorized Benelli dealership can provide you with any
service or maintenance needs you will have. For the me
schedule and item inspecon list please refer to the mainte-
nance schedule.
1. Transmission Oil Replacement
Park your scooter on the center stand and allow it to sit for
2-3 minutes aer shung the engine o. Loosen the gear oil
ller plug.
If the gear oil level is insucient, rell with the appropriate
amount of gear oil via the ller plug hole (1). Replace the
transmission oil every year or 3,000 miles, whichever comes
rst.
GL-5 85W/90 gear oil is recommended.
Full capacity of gear oil is 0.15L, 0.13L for replacement. When
done check if the gear drive box has any oil leakage.
2. Parts Lubricaon
Proper lubricaon is very important to keep every part of motor-
cycle in normal operaon, prolong the service life and maintain
safe driving. Aer the scooter has been used for some me or
has become wet from rainfall or cleaning, we recommend that
you perform lubricaon maintenance. For specic key lubricaon
points please refer to the pictures below:
Aenon:
Add gear oil via the oil ller.
Too much or too lile gear oil will aect engine performance. DO
NOT use gear oil of other brands or oil of poor quality.
If the scooter is used in bad condions the gear oil should be
replaced more frequently.
Table of contents
Other Benelli Scooter manuals

Benelli
Benelli CAFFENERO User manual

Benelli
Benelli Pepe User manual

Benelli
Benelli qattronove x User manual

Benelli
Benelli Velvet User manual

Benelli
Benelli CLASSICA28 User manual

Benelli
Benelli ZAFFERAN 250 User manual

Benelli
Benelli Hornet Manual

Benelli
Benelli macis User manual

Benelli
Benelli Pepe Lx User manual


