BenQ Home Entertainment PE5120 User manual

PE5120 Digital Projector
Home Entertainment Series
User’s Manual
Welcome

2Copyright
Copyright
Copyright © 2004 by BenQ Corporation. All rights reserved. No part of this publication may be
reproduced, transmitted, transcribed, stored in a retrieval system or translated into any language
or computer language, in any form or by any means, electronic, mechanical, magnetic, optical,
chemical, manual or otherwise, without the prior written permission of BenQ Corporation.
Disclaimer
BenQ Corporation makes no representations or warranties, either expressed or implied, with
respect to the contents hereof and specifically disclaims any warranties, merchantability or fitness
for any particular purpose. Further, BenQ Corporation reserves the right to revise this publication
and to make changes from time to time in the contents hereof without obligation of BenQ
Corporation to notify any person of such revision or changes.
*DLP, Digital Micromirror Device and DMD are trademarks of Texas Instruments. Others are copyrights of their
respective companies or organizations.

3Table of Contents
Table of Contents
Safety, regulatory and legal information ................................................. 5
FCC statement (for U.S. users) .............................................................................................. 5
EEC statement (for European users) ..................................................................................... 5
MIC statement ........................................................................................................................ 5
Safety instructions .................................................................................................................. 6
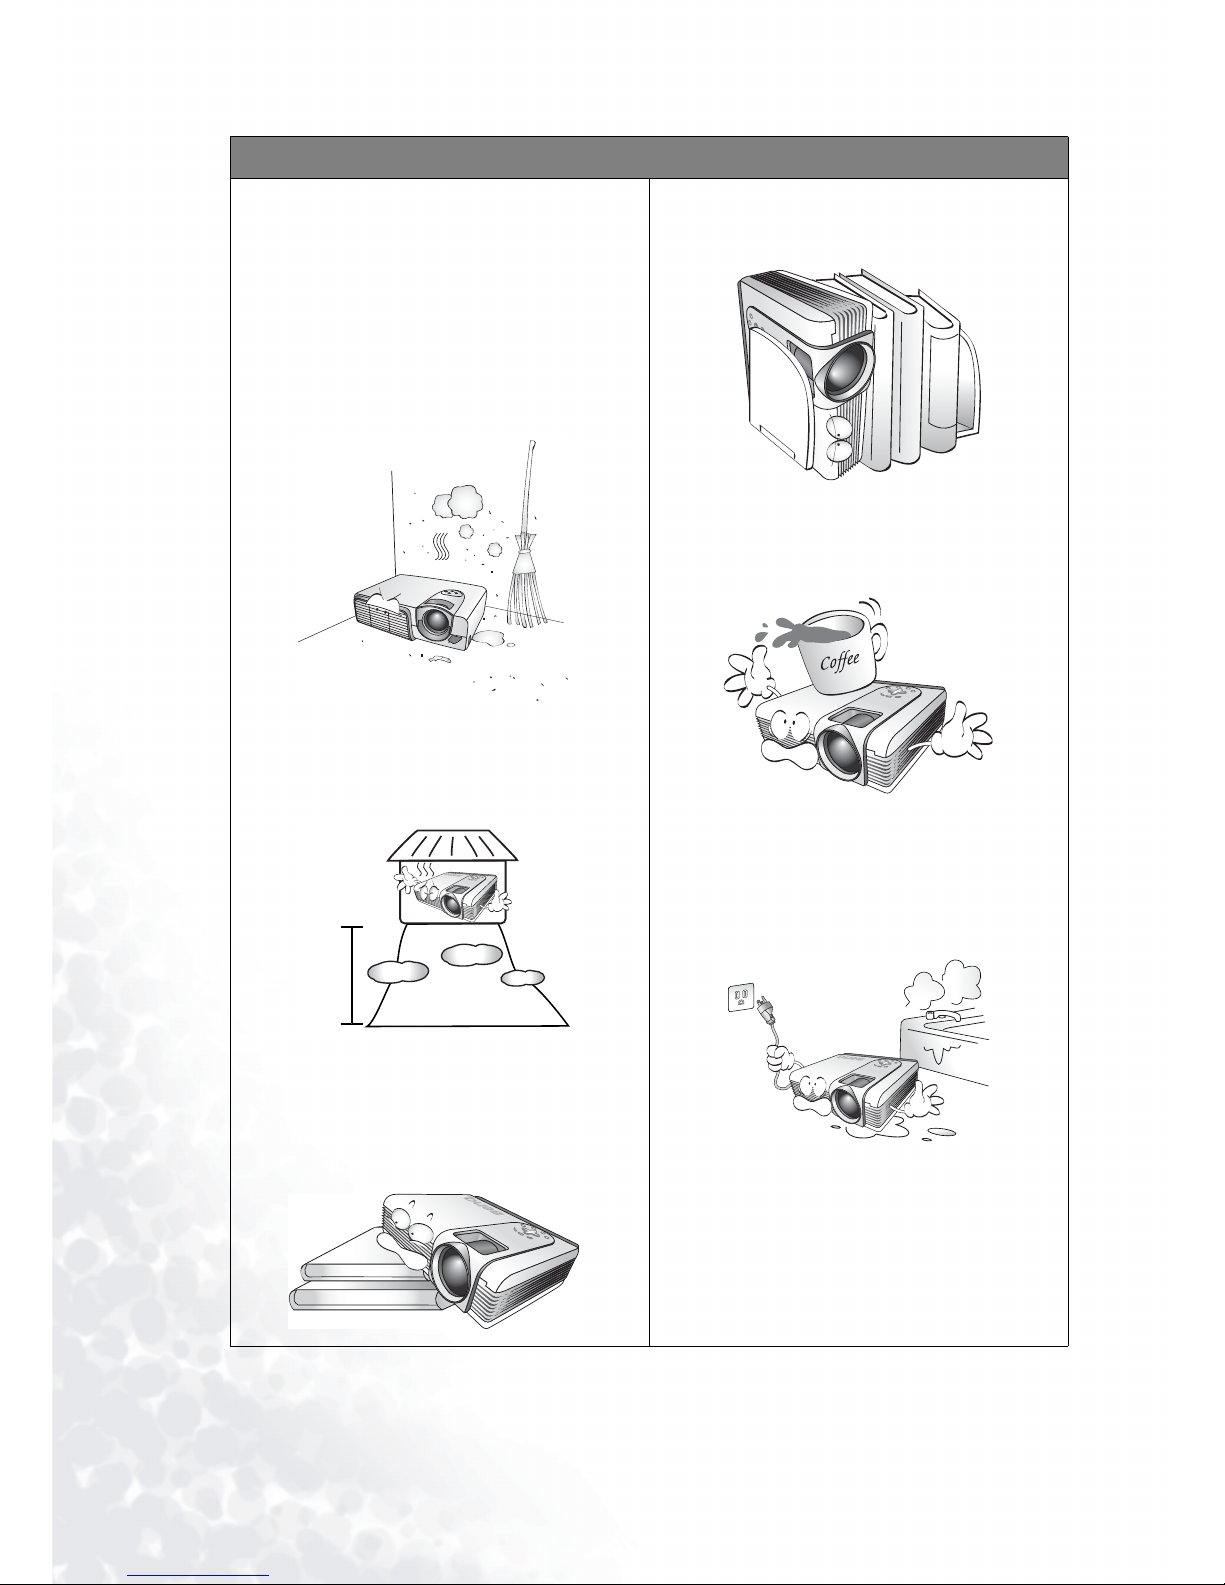
Moisture condensation ........................................................................................................... 9
Avoid using volatile liquids .................................................................................................... 9
Disposal ................................................................................................................................... 9
Overview .................................................................................................... 10
Features ................................................................................................................ 10
Accessories ........................................................................................................... 10
Projector exterior view ........................................................................................ 11
Front / upper side ................................................................................................................... 11
Rear side .................................................................................................................................. 11
Bottom side ............................................................................................................................. 11
Rear connector panel .............................................................................................................. 11
Controls and functions ....................................................................................... 12
Projector .................................................................................................................................. 12
Remote control ....................................................................................................................... 12
Positioning your projector ....................................................................... 14
Choosing a location ............................................................................................ 14
Obtaining a preferred projected image size ....................................................... 15
Ceiling installation for a 16:9 (widescreen) ratio screen ...................................................... 15
Floor installation for a 16:9 (widescreen) ratio screen ......................................................... 15
Ceiling installation for a 4:3 (standard) ratio screen ............................................................ 17
Floor installation for a 4:3 (standard) ratio screen ............................................................... 17
Connecting various equipment ................................................................ 18
Connecting video inputs .................................................................................... 19
Connecting component-video devices .................................................................................. 19
Connecting S-video or video device ...................................................................................... 19
Connecting a computer ..........................................................................................................19
Using the projector and remote control .................................................. 20
Preparations ........................................................................................................ 20
Turning the power on ......................................................................................... 20
Switching input signals ....................................................................................... 20
Adjusting the image ............................................................................................ 21
Adjusting the angle height ...................................................................................................... 21
Auto-adjusting the image .......................................................................................................21
Correcting Keystone picture distortion ................................................................................. 21
Fine-tuning the image size and clarity ................................................................................... 22
Optimizing the image ......................................................................................... 23
Personalizing the projector menu display ......................................................... 23
Turning the power off ......................................................................................... 24
Using the on-screen display menus ......................................................... 25
Menu structure .................................................................................................... 25
How to use the on-screen display menus .......................................................... 26

4 Table of Contents
Picture menu .......................................................................................................27
Pro-picture menu ................................................................................................ 27
Setting menu ........................................................................................................28
Advance menu ..................................................................................................... 28
Information menu ............................................................................................... 28
Additional information ............................................................................ 29
Care of the projector ........................................................................................... 29
Cleaning the lens ..................................................................................................................... 29
Cleaning the projector case ....................................................................................................29
Storing the projector .............................................................................................................. 29
Transporting the projector .....................................................................................................29
Replacing the lamp (contact your BenQ dealer for assistance) ........................30
Indicator lights ..................................................................................................... 31
Service information .............................................................................................32
Troubleshooting ..................................................................................................33
Specifications .......................................................................................................34
Optical characteristics ............................................................................................................ 34
Electrical characteristics ......................................................................................................... 34
Input terminal ......................................................................................................................... 34
Output terminal ...................................................................................................................... 34
General characteristics ............................................................................................................ 34
Dimensions .........................................................................................................35

5Safety, regulatory and legal information
Safety, regulatory and legal information
Thank you for your purchase of this quality BenQ video projector! It has been designed to provide you with a
home theater viewing experience. For the best result, please read this manual carefully as it is your best guide to
the control menus and product operation.
FCC statement (for U.S. users)
This equipment has been tested and found to comply with the limits for a Class B digital device, pursuant to
Part 15 of the FCC Rules. These limits are designed to provide reasonable protection against harmful
interference in a residential installation.
CLASS B: This equipment generates, uses and can radiate radio frequency energy and, if not installed and used
in accordance with the instructions, may cause harmful interference to radio communications. However, there
is no guarantee that interference will not occur in a particular installation. If this equipment does cause harmful
interference to radio or television reception, which can be determined by turning the equipment off and on, the
user is encouraged to try to correct the interference by one or more of the following measures:
- Reorient or relocate the receiving antenna.
- Increase the distance between the equipment and receiver.
- Connect the equipment into an outlet on a circuit different from that to which the receiver is connected.
- Consult the dealer or an experienced radio/TV technician for help.
EEC statement (for European users)
This machine was tested against the 89/336/EEC (European Economic Community) for EMC (Electro Magnetic
Compatibility) and fulfills these requirements.
MIC statement
B class equipment (Household purpose info/telecommunications equipment)
As this equipment has undergone EMC registration for household purpose, this product can be used in any area
including residential areas.

6 Safety, regulatory and legal information
Safety instructions
Your BenQ projector is designed and tested to meet the lastest standards for safety of information technology
equipment. However, to ensure safe use of this product, it is important that you follow the instructions
mentioned in this manual and marked on the product.
Safety instructions
1. To reduce the risk of electric shock, do not
disassemble this appliance. There are no
user serviceable parts inside. Take it to a
qualified technician when service or repair
is required. Incorrect reassembly can cause
malfunction of the projector or electric
shock when the appliance is subsequently
used.
2. Please read this user’s manual before you
operate your projector. Save this user’s
manual for future reference.
3. Refer servicing only to qualified service
personnel.
4. Always open the lens shutter or remove the
lens cap when the projector lamp is on.
5. Do not look straight at the projector lens
during operation. The intense light beam
may damage your eyes.
6. In some countries, the line voltage is NOT
stable. This projector is designed to
operate safely with a mains voltage
between 100 and 240 volts AC, but could
fail if power cuts or surges of ±10 volts
occur. In areas where the mains voltage
may fluctuate or cut out, it is recommended
that you connect your projector through a
power stabilizer, surge protector or
uninterruptible power supply (UPS).

7Safety, regulatory and legal information
Safety instructions (continued)
7. The lamp becomes extremely hot during
operation. Allow the projector to cool for
approximately 45 minutes prior to removing
the lamp assembly for replacement.
8. Do not operate lamps beyond the rated
lamp life. Excessive operation of lamps
beyond the rated life could cause them to
explode on rare occasions.
9. Never replace the lamp assembly or any
electronic components unless the projector
is unplugged.
10. Do not place this product on an unstable
cart, stand, or table. The product may fall,
sustaining serious damage.
11. This product is capable of displaying
inverted images for ceiling mount
installation. Please use BenQ’s Ceiling
Mounting Kit for mounting the projector and
ensure it is securely installed.
12. Do not block the ventilation holes.
- Do not place the projector on a blanket, bedding
or any other soft surface.
- Do not cover the projector with a cloth or any
other item.
- Do not place inflammables near the projector.
If the ventilation holes are seriously obstructed,
overheating inside the projector may cause damage
to the lamp, the projector to fail or result in fire.

8 Safety, regulatory and legal information
Safety instructions (continued)
13. Do not place the projector in any of the
following environments.
- Space that is poorly ventilated or confined. Allow
at least 50 cm clearance from walls and free flow
of air around the projector.
- Locations where temperatures may become
excessively high, such as the inside of a car with
all windows rolled up.
- Locations where excessive humidity, dust, or
cigarette smoke may contaminate optical
components, shortening the projector’s lifespan
and darkening the screen.
- Locations near fire alarms
- Locations with an ambient temperature above
35°C / 95°F
- Locations where altitude are higher than 10000
feet.
14. Always place the projector on a level,
horizontal surface during operation.
- Do not use if tilted at an angle of more than 10
degrees left to right, nor at angle of more than 15
degrees front to back. Using the projector when it
is not fully horizontal may cause a malfunction of,
or damage to, the lamp or other components.
15. Do not stand the projector on end vertically.
Doing so may cause the projector to fall over,
causing injury or resulting in damage to it.
16. Do not step on the projector or place any
objects upon it. Besides probable physical
damage to the projector, doing so may result in
accidents and possible injury.
17. Do not place liquids near or on the projector.
Liquids spilled into the projector may cause
it to fail. If the projector does become wet,
disconnect it from the power supply’s wall
socket and call BenQ to have the projector
serviced.
ft.
10000

9Safety, regulatory and legal information
Moisture condensation
Never operate the projector immediately after moving it from a cold location to a hot location. When the
projector is exposed to such a change in temperature, moisture may condense on the crucial internal parts. To
prevent the projector from possible damage, do not use the projector for at least 2 hours after a sudden change
in temperature.
Avoid using volatile liquids
Do not use volatile liquids, such as insecticide or some types of cleaner, near the projector. Do not leave rubber
or plastic products touching the projector for a long time. They will leave marks on the finish. When cleaning,
be sure to follow the cleaning product’s safety instructions.
Disposal
This product contains the following materials which are harmful to humans and the environment.
• Lead, which is contained in solder.
• Mercury, which is used in the lamp.
To properly dispose of the product or used lamps, consult your local environmental authority for advice.

10 Overview
Overview
Features
The projector integrates high-performance optical engine projection and a user-friendly design to deliver high
reliability and ease of use.
The projector offers these following features:
• Compact and portable unit
• One-key auto-adjustment to display the best picture quality
• Ultra-high brightness projection lamp
• Ability to display 16.7 million colors
• On-screen menus in 10 languages: English, French, German, Italian, Spanish, Russian, Traditional Chinese,
Simplified Chinese, Japanese and Korean.
• 8 sets of preset mode
• 5-segment color wheel
• Powerful AV function
• 26dB Noise Level under Economic Mode
• Native 16:9 aspect ratio
• HDTV compatibility (YCbCr)
Note: The apparent brightness of the projected image will vary depending on the ambient lighting conditions and
contrast/brightness settings.
Accessories
The standard accessories that came with your projector can be found on the included Quick Start Guide.
Optional accesssories are listed below. You can purchase these accessories through your projector dealer. Refer
to page 31 for a full list of the accessories part numbers which may get you communicate with your dealer easier.
1. Ceiling mount kit
2. Spare lamp kit
3. DVI cable

11Overview
Projector exterior view
Front / upper side
Rear side
Bottom side
Rear connector panel
Refer to page 17 for more information on making connections to various equipment.
1. Ventilation grill
2. Front adjuster button
3. Front adjuster foot
4. External control panel
(See page 12 for detailed information.)
5. Focus ring and zoom ring
6. Front IR remote sensor
7. Projection lens
8. Lens cap
9. Connector panel (See below for more
information.)
10. Rear adjuster feet
11. Kensington lock slot
12. Front adjuster foot
13. Lamp door
14. Rear adjuster feet
15. Rear IR remote sensor
16. DVI-I Video digital input
17. USB port (for servicing)
18. RGA Video analog input
19. S-Video input
20. Component Video input
21. Power cord socket
1
2
3
7
6
5
4
8
9
10 11
12
13
14 14
15
16
17
18
19
20
21

12 Overview
Controls and functions
Projector
Remote control
Notes on remote control operation
Make sure that there is nothing between the remote control and the IR sensors on the projector that
might obstruct the infrared beam.
The effective range of the remote control is up to 8 meters from the front of the projector or 8 meters
from the rear of the projector. The remote control must be held at an angle within 22.5 degrees of the
projector’s IR remote control sensor.
7. Auto (Refer to page 20 for more informa-
tion.)
Automatically determines the best picture
timings for the displayed image.
8. Preset (Refer to page 22 for more informa-
tion.)
Selects one of the preset modes to suit your
program type.
9. Power indicator light (Refer to page 30 for
more information.)
Lights up or flashes when the projector is
under operation.
10. Temperature warning light (Refer to page
30 for more information.)
Lights up if the projector’s temperature
becomes too high.
11. Lamp indicator light (Refer to page 30 for
more information.)
Indicates the status of the lamp. Lights up
when the lamp has developed a problem.
12. Zoom ring (Refer to page 21 for more
information.)
Adjusts the size of the image.
13. Focus ring (Refer to page 21 for more
information.)
Adjusts the focus of the projected image.
1. Power (Refer to pages 19 and 23 for more
information.)
Turns the projector on or off.
2. Source (Refer to page 23 for more information.)
Sequentially selects the input signal Component
Video, DVI-D, Video, S-Video or DVI-A.
3. 3Left
4. Right 4
When the on-screen menu is not activated, #3 and
#4 function as Keystone -/+ hot keys.
5. 5Exit
Exits and saves the menu settings.
6. 6Menu
Turns the on-screen menu on.
When the on-screen menu is activated, the #3 to #6
buttons are used as directional arrows to select the
desired menu items and to make adjustments.
Refer to page 25 for more information.
13
12
10
11
5
34
8
7
1
2
9
6
22.5
22.5
8 m

13Overview
Replacing the batteries in the remote control
Caution with batteries
Avoid leaving the remote control and batteries in an excessive heat or humid environment like the
kitchen, bathroom, sauna, sunroom, or in a closed car.
Take care to align the polarities when installing the batteries. Be aware that there is the possibility of an
explosion if the batteries are incorrectly fitted.
Replace batteries only with the same or equivalent type as recommended by the battery manufacturer.
Dispose of used batteries according to the battery manufacturer’s instructions and local environment
regulations for your region.
If the remote control will not be used for an extended period of time, remove the batteries to avoid
damage to the control from possible battery leakage.
1. Power (Refer to pages 19 and 23 for more information.)
Hold this button down for one second to turn the projector on.
Press this button twice to turn the projector off.
2. Source buttons (Refer to page 23 for more information.)
Selects an input signal to display on the projector.
3. Aspect buttons
Selects an image aspect ratio to suit the input signal.
4. Auto (Refer to page 20 for more information.)
Automatically determines the best picture timings for the
displayed image.
5. Preset (Refer to page 22 for more information.)
Selects one of the preset modes to suit your program type.
6. Menu and directional buttons (c/e/d/f) (Refer to page 25 for
more information.)
Press Menu to turn the on-screen menu on.
Press directional buttons to select the desired menu items and
make adjustments.
Exit and saves menu settings by pressing Menu again.
7. Picture quality adjustment buttons (Refer to 26 for more informa-
tion.)
8. Keystone buttons (Refer to 21 for more information.)
Press to reduce the upper portion of the image. Press to
reduce the lower portion of the image.
9. Default
Returns all settings to the factory preset values.
10. Light
Turns the remote control’s backlight on or off.
1. Push and open the battery
compartment lid in the direction
shown.
2. Install batteries as
indicated by the diagram
inside the compartment.
3. Insert the lid hinge into
the compartment end and
close the lid.
CT
3

14 Positioning your projector
Positioning your projector
Choosing a location
Your projector is designed to be installed in one of four possible installation locations:
1. Floor in front of screen;
2. Ceiling in front of screen;
3. Floor at rear of screen; or
4. Ceiling at rear of screen.
Your room layout or personal preference will dictate which installation location you select. Take into
consideration the size and position of your screen, the location of a suitable power outlet, as well as the location
and distance between the projector and the rest of your equipment.
For Setting menu options and descriptions, please refer to page 27.
I. Floor front:
Select this location with the projector placed near the
floor in front of the screen. This is the most common
way to position the projector for quick setup and
portability.
II. Ceiling front:
Select this location with the projector suspended
from the ceiling in front of the screen.
Purchase the BenQ Projector Ceiling Mounting Kit
from your dealer to mount your projector on the
ceiling.
Set in the Setting > Mirror menu after you turn
the projector on.
III. Floor rear:
Select this location with the projector placed near the
floor behind the screen.
Note that a special rear projection screen is required.
Set in the Setting > Mirror menu after you turn
the projector on.
IV. Ceiling rear:
Select this location with the projector suspended
from the ceiling behind the screen.
Note that a special rear projection screen and the
BenQ Projector Ceiling Mounting Kit are required
for this installation location.
Set in the Setting > Mirror menu after you turn
the projector on.

15Positioning your projector
Obtaining a preferred projected image size
The distance from the projector lens to the screen, the zoom setting, and the video format each factor in the
projected image size. BenQ has provided separate tables of dimensions for both 16:9 and 4:3 screen ratios to
assist you in determining the ideal location for your projector.
1. Figure out the aspect ration of your screen, 16:9 or 4:3?
2. Select the Screen Size you desire from the 16:9 ration screen dimension table or 4:3 ratio screen dimension
table below, according to what screen type you have. Install the projector at a distance from the screen
corresponding to between the Min. and Max. Projection Distance values in the table.
3. Decide the exact height of your projector.
For example, if you are using a 16:9 screen with 80 inches diagnally, you are suggested to place your projector
within a range between 2.76m to 3.39m from the screen. The exact heigh of your projector will be 33 to 34cm
above or below your screen from the center of the lens.
Ceiling installation for a 16:9 (widescreen) ratio screen
Floor installation for a 16:9 (widescreen) ratio screen
Screen
Height
Projection Distance
Type
Offset
Ceiling
Center of the lens
Projection Distance
Screen
Type
Height
Offset
Floor
Center of the lens

16 Positioning your projector
16:9 (widescreen) ratio screen dimension table
An examination of the table reveals that you can place the projector lens in the range from 1.73 to 8.47m
distance from the screen, which will give you a projected image from 1.11 x 0.62m to 4.43 x 2.49m full screen.
Screen Size Projection Distance Offset
Type (inch) Height (cm) Width (cm) Min. (cm) Max. (cm) Tele (cm) Wide (cm)
50 62 111 173 212 21 20
60 75 133 207 254 25 25
70 87 155 242 297 29 29
80 100 177 276 339 34 33
90 112 199 311 381 38 37
100 125 221 345 424 42 41
110 137 244 380 466 46 45
120 149 266 414 508 50 49
130 162 288 449 551 55 53
140 174 310 483 593 59 57
150 187 332 518 636 63 61
160 199 354 553 678 67 65
170 212 376 587 720 71 70
180 224 398 621 763 76 74
190 237 421 656 805 80 78
200 249 443 691 847 84 82

17Positioning your projector
Ceiling installation for a 4:3 (standard) ratio screen
Floor installation for a 4:3 (standard) ratio screen
4:3 (standard) ratio screen dimension table:
The above numbers are approximate and may be slightly different from the actual measurements.
An examination of the table reveals that you can place the projector lens in the range from 1.73 to 8.47m
distance from the screen, which will give you a projected image from 1.02 x 0.62m to 4.43 x 2.49m.
Screen Size Projection
Distance Offset Image
Height
(cm)
Type
(inch) Height
(cm) Width
(cm) Min.
(cm) Max.
(cm) Tele (cm) Wide
(cm)
50 76 102 173 212 21 20 62
60 91 122 207 254 25 24 75
70 107 142 242 297 29 29 87
80 122 163 276 339 34 33 100
90 137 183 311 381 38 37 112
100 152 203 345 424 42 41 125
110 168 224 380 466 46 45 137
120 183 244 414 508 50 49 149
130 198 264 449 551 55 53 162
140 213 284 483 593 59 57 174
150 229 305 518 636 63 61 187
160 244 354 553 678 67 65 199
170 259 376 587 720 71 70 212
180 274 398 622 763 76 74 224
190 290 421 656 805 80 78 237
200 305 443 691 847 84 82 249
Screen
Image Height
Projection Distance
Offset
Screen Size
Ceiling
Center of the lens
Projection Distance Floor
Screen
Image Height
Offset
Type
Center of the lens

18 Connecting various equipment
Connecting various equipment
When connecting any signal source to the projector, be sure to:
1. Turn off all equipment before making any connections.
2. Use the correct signal cable for each source.
3. Ensure the cables are firmly inserted.
4. Connect all audio signals to external speakers. This projector is not equipped with speakers.
In the connections shown below, only certain cables are included in the standard package. If you need other cables,
please contact your place of purchase or nearby electronics stores.

19Connecting various equipment
Connecting video inputs
Connecting component-video devices
Connecting S-video or video device
If the selected video image is not displayed after the projector is turned on and the correct video source has been
selected, please check that the video source is turned on and operating correctly. Also check that the signal cables
have been connected correctly.
Connecting a computer
Note that the projector does not have a D-sub VGA analog video port. To connect to a computer, you will need to use
either a DVI-I Video digital cable, an RCA Video analog cable, or an S-Video cable.
AV equipment
Component Video cable
(optional accessory) Game player
From audio
output terminals To audio input
terminals
Component Video cable
(optional accessory)
RCA Video
cable
S-Video cable
From audio
output terminals To audio input
terminals
S-Video or video device
DVI-I Video cable
From audio
output terminals To audio input
terminals

20 Using the projector and remote control
Using the projector and remote control
Preparations
Turning the power on
1. Check that the Power indicator lights orange after power has been
applied.
2. Press and hold the Power button on the projector or remote
control to turn the projector on. The Power indicator light flashes
for about 30 seconds during warm up, then remains constantly
on (and the projector starts projecting) when ready.
3. Press Source on the projector or one of the Source buttons on the
remote control to select your desired input signal. A message
shows on the screen when the port is searched.
If you would like to change the input signal, please see below.
Switching input signals
To sequentially select input signals, press one of the Source buttons on
the remote control or Source on the projector.
The selected source will be displayed at the bottom right of the screen
for 3 seconds.
Activate the Source Scan function in the Advance menu if you want the
projector to automatically search input ports. It may take a few seconds for
the projector to search for input signals.
1. Turn all of the connected equipment on.
2. Remove the lens cap.
3. Plug the supplied power cord into the AC inlet on the
rear of the projector.
4. Plug the power cord into a wall socket and turn the
wall switch on.
Other manuals for Home Entertainment PE5120
3
Table of contents
Other BenQ Projector manuals

BenQ
BenQ W1100 User manual

BenQ
BenQ BH3020 User manual

BenQ
BenQ DX818ST User manual

BenQ
BenQ WI 1000H8060 User manual

BenQ
BenQ MW769 User manual

BenQ
BenQ PB6100 - SVGA DLP Projector User manual

BenQ
BenQ W703D Instructions for use

BenQ
BenQ CineHome I Series User manual

BenQ
BenQ MS550P User manual

BenQ
BenQ HT8050 User manual

BenQ
BenQ Home Entertainment Series User manual

BenQ
BenQ x3100i User manual

BenQ
BenQ MX816ST User manual

BenQ
BenQ EX800ST User manual

BenQ
BenQ MW855UST User manual

BenQ
BenQ Home Cinema W1110 User manual

BenQ
BenQ GV10 User manual

BenQ
BenQ PX9210 User manual

BenQ
BenQ MX507P User manual

BenQ
BenQ MP615P User manual