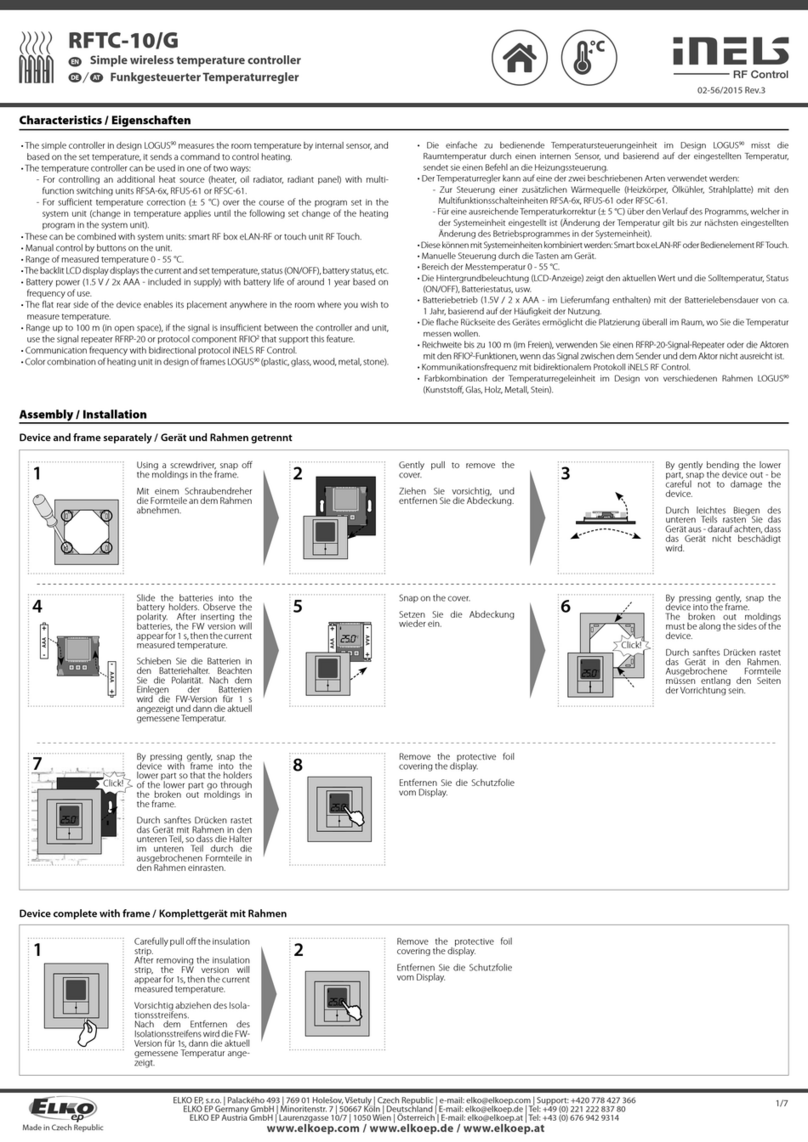
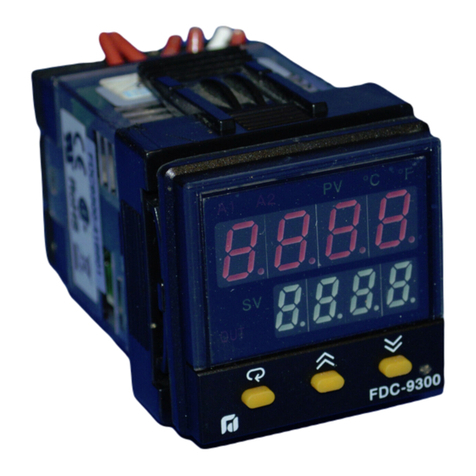
bentrup TC95 User manual

Die bentrup Kompaktserie V2. Perfektion vom Marktführer.
TC95
Bedienungsanleitung
Operating Instructions

2operating instructions TC95
TC 95
1 - Erläuterungen siehe Folgeseite
2 - Aktuelle Ofentemperatur
3 - Programmtaste: Programmwahl
4 - / Tasten: Wertänderung
5 -
S
tart /Stopp-Taste: Programmstart
6 - Leuchtring: Programmlaufanzeige
grün = aktiv
rot = inaktiv
gelb = angehalten
7 - Pfeiltasten: Segmentanwahl
8 - Reglersicherung (0.5 A mittelträge)
9 - Netzschalter
1 - Explanations see following page
2 - Current kiln temperature
3 -
Programme key: programme selection
4 - / keys: value change
5 - start/stop key: programme start
6 - Illuminated ring: programme status
green = run
red = idle
yellow = hold
7 - arrow keys: segment selection
8 - Controller fuse (0.5A semi lag)
9 - Mains switch
9
7
3
4
1
2
8
6
5

3
operating instructions TC95
8
10
1
2
7
6
9
911
3
4
5
Display-Erläuterung
1 - Uhrzeit - Anzeige nur wenn Regler online
2 - Programmnummer
3 - Darstellung Segment mit Segmentnummer
4 : USB Symbol
Heizsymbol
aktivierter Sicherheitsschütz
Verbindung zu SuperWise
WiFi-Verbindung
5 - Programmlauf:
Stopp
Run
Hold
Display explanation
1 - Time - only displayed when controller is online
2 - Programme number
3 - Display segment with segment number
4 : USB symbol
Heating symbol
Activated safety contactor
Connection to SuperWise
WiFi connection
5 - Programme run:
Stop
Run
Hold
bei Programmeingabe / on program entry
während Programmlauf/during program run
erweiterte Darstellung wärend Programmlauf /
extended readings during program run
9 - aktuelles Segment und Restzeit
10 - Solltemperatur
11 - Heizleistung in %
9 - Current segment and remaining time
10 - Set temperature
11 - Heating power in %
6 - vorheriger Programmwert
7 - zu verändernder Programmwert
8 - nächster Programmwert
6 - Previous programme value
7 - Programme value to be changed
8 - Next programme value

4operating instructions TC95
Programmregler TC95
Mit dem bentrup TC95 kommt erstmals eine
moderne Eingabeoberfläche auf einen Brennofen-
regler. Das Temperaturprofil ist frei wählbar, es
können bis zu 20 Segmente (jeweils aus Rampe
und Haltezeit bestehend) eingegeben werden.
10 Temperaturprofile werden als Programm ge-
speichert.
Die abgebildete Temperaturkurve (Bild A) besteht
aus einem Aufheizen auf 400°C mit 200°C pro
Stunde und 10 min Halten. Anschließend wird mit
maximaler Geschwindigkeit auf 810 °C geheizt
und 10 min gehalten. Nach ungeregeltem Abküh-
len auf 560 °C beginnt ein langsames Abkühlen
mit 50 °C/h.
Drücken Sie die Taste, um das erste Segment zu
wählen (SEG 01), mit den / Tasten wird die
Aufheizgeschwindigkeit von 200°C/h eingestellt
(Bild B). Nach Drücken von wird die Endtempe-
ratur dieser Rampe von 400°C eingestellt, nach
erneutem Drücken von die Haltezeit von 10 Min
(Bild C). Die weiteren Werte der Temperaturkurve
werden entsprechend eingegeben, „SKIP“ steht
für ungeregeltes Aufheizen/Abkühlen, halten
Sie die Taste gedrückt, bis „SKIP“ erscheint
(BildD). Die Werte können über beide Pfeiltasten
eingesehen und verändert werden. Die Rampe des
letzten Segments wird durch langes Drücken von
auf END gesetzt.
Programme Controller TC95
The bentrup TC95 is the first modern input inter-
face on a kiln controller. The temperature profile
is freely selectable, up to 20 segments (each con-
sisting of ramp and hold time) can be entered.
10temperature profiles are stored as a program-
me.
The temperature curve shown (fig. A) consists of
heating up to 400°C at 200 °C per hour and hol-
ding for 10 min. Then heating to 810°C at maxi-
mum speed and holding for 10 min. After uncon-
trolled cooling to 560°C, slow cooling at 50 °C/h
begins.
Press key to select the first segment (SEG 01),
use the / keys to set the heating speed of
200 °C/h (fig. B). After pressing , the final tem-
perature of this ramp of 400 °C is set, after pres-
sing again, the holding time of 10 min (fig.C).
The other values of the temperature curve are
entered accordingly, „SKIP“ stands for uncont-
rolled heating/ cooling, keep the key pressed
until „SKIP“ appears (fig. D). The values can be
viewed and changed using both arrow keys. The
ramp of the last segment is set to END by long
pressing key .
seg 1 seg 3 seg 4seg 2
400°C
560°C
810°C
0:10
0:10
200°C/h
SKIP
SKIP
50°C/h
(A)
(B)
(D)
(C)

5
operating instructions TC95
Segment 0 (SEG 00) dient der Programmstartver-
zögerung Bild A), d.h., wenn hier z.B. 5 Stunden
eingestellt werden und das Programm um 17 Uhr
gestartet wird, beginnt der Brennvorgang erst um
22 Uhr (z.B. für Nachtstrom).
Segment 0 (SEG 00) is for a delayed programme
start (fig.A). For instance enter 5:00 hours if you
want the firing to begin at 10:00 PM but start the
programme at 5:00 PM when leaving the work-
shop.
Brennvorgang starten
Durch die Taste wird der Brennvorgang ge-
startet (Leuchtring wechselt von rot auf grün) und
das Symbol zu . Oberhalb der Ofentemperatur
wird das aktuelle Segment und die Zeit bis zum
Ende der Rampe angezeigt. Die Brennkurve ist nun
blau dargestellt bzw. der bereits durchlaufene
Teil grün (Bild B). In der obersten Zeile zeigt das
Heizsymbol an, dass der Ofen heizt. Das Symbol
rechts daneben zeigt das aktivierte Sicherheits-
schütz und somit einen sicheren Brennverlauf.
Falls der Ofen dem programmierten Tempera-
turprofil nicht folgen kann, wechselt die Tempe-
raturanzeige kontinuierlich von grün nach rot.
Somit ist mit einem Blick zu sehen, ob der Prozess
reibungslos abläuft.
Starting the Firing
Pressing the key starts the firing process (il-
luminated ring changes from red to green) and
the symbol to . Above the kiln temperature,
the current segment and the time until the end
of the ramp are displayed. The firing curve is now
shown in blue or the part that has already passed
through is shown in green (fig. B). In the top line,
the heating symbol indicates that the kiln is he-
ating. The symbol to the right of it shows the
activated safety contactor and thus a safe firing
process.
If the kiln cannot follow the programmed tempe-
rature profile, the temperature display changes
continuously from green to red. Thus, it can be
seen at a glance whether the process is running
smoothly.
(A)
(B)

6operating instructions TC95
Detailanzeigen
Über langes Drücken der Taste während des
Brennverlaufs schaltet die Anzeige auf Detail-
ansicht um (Bild A), neben aktuellem Segment
und Restzeit links, wird in der Mitte die aktuelle
Solltemperatur und rechts die Heizleistung darge-
stellt. Eine Heizleistung von Beispielsweise 50 %
entspricht gleichlangen Ein- und Ausschaltzyklen.
Durch erneutes Drücken und Halten der Taste
kann wieder auf die kompakte Darstellung umge-
stellt werden (Bild B).
Programme
10 Temperaturkurven können als Programm ge-
speichert werden. Das Programm wird durch mehr-
faches Drücken der [P] Taste (gefolgt von bzw.
) ausgewählt (Bild C).
Werteänderungen während des Brandes
Um einen Wert zu ändern, halten Sie den Brand
über die Taste an (Bild D) und starten ihn da-
nach wieder damit (Bild E). Der Brand wird an der
gleichen Stelle fortgesetzt, außer wenn ein bereits
durchlaufenes Segment geändert wurde, das Pro-
gramm wird dann ab diesem geänderten Segment
ausgeführt.
In der Abkühlphase ist der Brand bei einer Ofen-
temperatur von 150°C beendet.
Öffnen Sie den Ofen nicht im heißen Zustand!
Detailed displays
Pressing and holding the key during the firing
process switches the display to the detailed view
(fig. A). In addition to the current segment and re-
maining time on the left, the current setpoint tem-
perature is shown in the middle and the heat out-
put on the right. A heating capacity of, for example,
50% corresponds to on and off cycles of the same
length. By pressing and holding the key again,
you can switch back to the compact display (fig. B).
Programmes
10 temperature curves can be stored as a program-
me. The programme is selected by pressing the
[P]key several times (followed by or ) (fig. C).
Changing values during firing
To change a value, stop the firing by pressing the
key (fig. D) and also restart it with it (fig.E).
The firing continues at the same point, unless a
segment that has already been run through has
been changed, in which case the programme is run
from this changed segment.
In the cooling phase, the firing is completed at a
kiln temperature of 150 °C.
Do not open the kiln when it is hot !
(A)
(B)
(D)
(E)
(C)

7
operating instructions TC95
Additional Information
After a power breakdown the firing is continued (dur-
ing ramps at current kiln temperature). If the temper-
ature drops > 50°C the firing is interrupted to ensure
quality.
If the kiln is warmed up already a ramp time is
reduced automatically causing the ramp to start at kiln
temperature.
If the kiln is unable to follow in a controlled ramp the
controller stops increasing temperature (illuminated
ring colour changes from green to yellow). Once the
kiln temperature has caught up the ramp continues. If
this happens again and again the actual time of a ramp
will be longer than programmed. Corresponding event
messages are displayed (explained hereafter).
hold
stop
start
(A)
Ergänzende Informationen
Nach einem Netzausfall setzt der Regler den Brand fort
(bei Rampe mit der aktuellen Ofentemperatur). Bei Abfall
>50°C wird der Brand aus Qualitätsgründen unterbro-
chen. Bei warmem Ofen wird eine Rampe entsprechend
verkürzt, d.h. der Regler beginnt mit der aktuellen Ofen-
temperatur.
Falls in einer geregelten Rampe der Ofen dem geforderten
Anstieg nicht folgen kann, verweilt der Regler auf der Tem-
peratur (Leuchtring in der Taste wechselt von grün
zu gelb). Sobald der Ofen wieder aufgeholt hat, wird die
Rampe fortgesetzt. Dieser Vorgang kann sich wiederholen,
somit verlängert sich die Dauer einer Rampe. Hierbei wer-
den entsprechende Ereignismeldungen angezeigt (nach-
folgend erklärt).
Manuelle Ablaufsteuerung
Manche Prozesse erfordern den Programmverlauf
anzuhalten. Drücken und halten Sie die Taste
für 3 Sekunden bis das Symbol auf wechselt.
Zeit und Solltemperatur bleiben stehen während
der TC95 die Temperatur hält (Bild A).
Um sofort in den nächsten Abschnitt (Rampe nach
Haltezeit oder Haltezeit in die nächste Segmen-
trampe) zu springen, drücken und halten Sie die
Taste für 6 Sekunden.
Manual Process Control
Some processes require the programme to be stop-
ped. Press the key and hold for 3 seconds
until the symbol changes to . The time and
set temperature will stop while the TC95 holds the
temperature (fig. A).
To skip immediately into the next segment (or du-
ring a ramp into the following dwell), press and
hold the key for 6 seconds.

8operating instructions TC95
E A8
E A9
E B9
E A1
E A5
E A3
E A4
E B2
Brand wurde wegen eines Problems bei der Temperatur-
messung (s. o.) abgebrochen (Überlauf im Regelkanal).
Firing terminated due to temperature acquisition problem
(as described above, “control loop overrun”).
Brand wurde wegen Übertemperatur (Überschreiten der
max. Programmtemperatur um mehr als 20 °C) abgebro-
chen. Ofenabschaltung über Sicherheitsschütz (falls vor-
handen). Häufigste Ursache ist ein klebender Ofenschütz.
Firing terminated due to over temperature (maximum pro-
grammed temperature exceeded more than 20 °C). kiln
has been cut off by the safety contactor (if fitted). Mostly
caused by stuck contactor contacts.
Der Brennvorgang wird nach einem Netzausfall automa-
tisch fortgesetzt (wird für 1 Minute nur zur Info angezeigt)
.
Firing is continued automatically after a power break-
down information only message displayed for 1 minute).
Firing terminated due to heating problem (slow increase in
tempeature at 100% heating). Caused by broken heating
elements, missing mains phase, broken contactor contact,
thermocouple short circuit.
Brand wurde wegen Heizproblem (zu geringem Tempera-
turanstieg trotz 100 % Heizen) abgebrochen. Häufigste
Ursachen sind defekte Heizspirale, fehlende Netzphase,
defekter Schützkontakt, Thermoelement-Kurzschluss.
Ereignismeldungen
Besondere Vorkommnisse während des Programmablaufs
werden von der TC95 mit einem Hinweis auf die Ursache
dargestellt. Je nach Ursache wird der Brennvorgang wenn
möglich fortgeführt oder muss beendet werden (siehe ro-
tes X = abgebrochen).
Event messages
Special events during the programme run are displayed
by the TC95 with an indication of the cause. Depending
on the cause, the firing process is continued if possible
or must be terminated (see red X = aborted).
Geregelte Rampe wurde fortgesetzt, obwohl der geforder-
te Temperaturanstieg trotz Wartezeit nicht erreicht werden
konnte (wird für 1 Minute nur zur Information angezeigt).
Controlled ramp continued although the programmed rise
or drop in temperature was not achieved even after adding
a dwell (information only message displayed for 1 minute).
Ungeregelte Rampe (SKIP) wurde beendet, obwohl die Seg-
menttemperatur nicht erreicht werden konnte (verhindert
Selbstblockade; wird für 1 Minute zur Information angezeigt).
Uncontrolled ramp (SKIP) completed since the segment
temperature could not be reached (to avoid deadlock sce-
nario; information only message displayed for 1 minute).

9
operating instructions TC95
E B 3
E B 4
E c ...
E d ...
ovr
udr
inv
Internes Reglerproblem, technischer Service beim Herstel-
ler erforderlich (D1-CPU, D2-RAM, D3-I2C Bus, D4-EE-
PROM, D5-Kalibrierung, D6-NVM, DA-Master Konfig.).
Firing process terminated for safety reasons due to high
ambient temperature.
Der Brennvorgang wurde wegen zu hoher Umgebungs-
temperatur aus Sicherheitsgründen beendet.
Der Brennvorgang wurde nach einem Netzausfall unterbro-
chen, weil die Qualität des Ergebnisses nicht sichergestellt
werden kann (z. B. durch zu großen Temperaturabfall).
Firing is terminated after a power breakdown since
the quality of the load is not ensured (e.g. temperature
dropped too much).
Internal controller problem, manufacturer service required
(D1-CPU, D2-RAM, D3-I2C bus, D4-EEPROM, D5-calibra-
tion, D6-NVM, DA-master configuration).
Internes Reglerproblem, technischer Service beim Hersteller
erforderlich (C1 / C2 - ADC defekt / unpräzise, C3-COM).
Internal controller problem, manufacturer service required
(C1-ADC broken, C2-ADC drift check failed, C3-COM).
Kaltpunkt-Fühler (CJC) im Anschlußkabel defekt (invalid) Cold-Junction-Compensation of the lead broken (“invalid”)
Thermoelement verpolt, ggf. falscher Thermoelement-Typ
bei Ofentemperatur weit unter 0°C (underrun)
Thermocouple polarized bad, eventually wrong type if kiln
temperature far below 0°C (“underrun”)
Thermoelement defekt, nicht angeschlossen, Messleitung
unterbrochen, Steckerkontakte verschmutzt oder defekt
(overrun = Messbereichs-Überlauf)
Thermocouple broken, not connected, thermocouple
circuit interrupted, connections dirty or damaged (“over-
run”)
Störungsmeldungen Error messages

10 operating instructions TC95
(A)
(C)
(B)
www.superwise.eu
SuperWise App by bentrup
Holen Sie sich mit der SuperWise App den Ofen auf
Ihr Smartphone und überwachen Sie den Brennvorgang
von überall! SuperWise gibt Ihnen vollen Einblick – per
App, mit dem Tablet oder dem PC. Während die App die
wichtigsten Funktionen übersichtlich präsentiert, können
über den Browser auf alle Details zugegriffen werden
– essentiell z. B. für Service und Wartung. E-Mail- oder
WhatsApp-Benachrichtigungen sind ebenso möglich, wie
ein Programmstopp aus der Ferne.
Und so funktioniert es:
1. Verbinden Sie Ihren TC95 per WiFi mit dem Internet:
a.) Falls Ihr Router WPS unterstützt (z.B. Fritzbox), schal-
ten Sie den TC95 bei gedrückter Programmtaste [P]
ein. Neben den technischen Informationen werden
im unteren grauen Bereich des Displays Anweisungen
angezeigt (Bild A), folgen Sie diesen Anweisungen
(wie z.B. Bild B), um die Verbindung mit ihrem WiFi
herzustellen.
b.) Falls ihr Router kein WPS unterstützt, erstellen Sie
auf Ihrem Computer eine Textdatei mit dem Namen
„SNxxxxxx.txt“, wobei xxxxxx die Seriennummer
des Reglers ist (siehe Typenschild auf der Rückseite).
Die Textdatei selbst enthält
den Netzwerknamen (SSID)
und Ihr Passwort getrennt durch ein Komma (Bild C):
• für WPA/WPA2: SSID, Passwort
• für WPA Enterprise: SSID, ID, Passwort
SuperWise App by bentrup
Get the kiln on your smartphone with SuperWise App
and monitor the firing process from anywhere! Super-
Wise provides full access via app, tablet or PC. While the
App presents all essential details in a compact manner
SuperWise Desktop allows in depth view including even
maintenance parameters bringing customer support on
a new level. Setup E-mail or WhatsApp notification and
even terminate the firing process from remote.
And this is how it works:
1. Connect your TC95 to the internet via WiFi:
a.) If your router supports WPS (e.g. Fritzbox), switch
on the TC95 while holding down the programme
key[P]. In addition to the technical information, ins-
tructions are shown in the lower grey area of the dis-
play (fig. A), follow these instructions (such as fig.B)
to establish the connection with your WiFi.
b.) If your router does not support WPS, create a text
file on your computer „SNxxxxxx.txt“, where xxxxxx
is the serial number of the controller (see the type
label on the back). The text file itself contains the
network name (SSID) and your password separated
by a comma (fig. B):
• for WPA / WPA2: SSID, password
• for WPA Enterprise: SSID, ID, password

11
operating instructions TC95
www.superwise.eu
SuperWise Helpdesk
(A)
Save as TXT format (i.e. without formatting) to a USB
stick (FAT32 formatted). Insert the USB stick in your TC95
during normal operation mode (no buttons to be pressed
during startup).
If the transfer was successful „W.Set“ appears and the
TXT file on the USB stick is deleted.
If a (properly named) textfile was found but empty or
containing incorrect syntax, TC95 shows „W.Err“. In this
case textfile is not deleted and the WiFi setup preserved
(applies to a.) and b.)). If your controller is now online the
WiFi symbol is flashing .
2. Create a user account on www.superwise.eu eit-
her on a PC/tablet or download the app (scan QR
code above left).
Go to „manage devices“ (fig. A) and click „add
controller“.
After entering the controller serial number (see type
Label on the back) in SuperWise, press „Request
Pin“ which is prompted by a 4 digit PIN on your TC95.
Enter this PIN into SuperWise and complete the pa-
ring pressing “confirm”.
If the registration was successful your TC95 is now
shown in SuperWise and the WiFi LED lights conti-
nuously on.
In case of any difficulties please scan QR Code on the left
for our latest advices.
Speichern Sie die Datei im TXT-Format (d.h. ohne For-
matierungen) auf einen USB-Stick (FAT32-formatiert).
Dieser wird nun in den TC95 gesteckt (Regler normal
eingeschaltet, keine Tastenbetätigung notwendig).
Bei erfolgreicher Übernahme erscheint „W.Set“ und
die TXT-Datei auf dem Stick wird gelöscht.
Falls entsprechend benannte Datei gefunden wurde
aber leer ist bzw. Inhalt mit falschem Syntax enthält,
erscheint „W.Err“, Datei und WiFi-Setup bleiben
erhalten (gilt für a.) und b.)). Bei erfolgreicher Inter-
net-Verbindung blinkt das WiFi-Symbol .
2. Registrieren Sie sich bei www.superwise.eu entwe-
der auf einem PC/Tablet oder laden Sie die App herun-
ter (QR-Code oben rechts scannen).
Gehen Sie um Menüpunkt „Geräteverwaltung“
(Bild A) und wählen Sie „Regler hinzufügen“.
Nach Eingabe der Regler-Seriennummer (siehe Typen-
schild auf der Rückseite) in SuperWise drücken Sie
„Pin Anfordern“, nun wird im Display des TC95 eine
vierstellige PIN angezeigt. Diese PIN geben Sie in Su-
perWise ein und bestätigen sie.
Bei erfolgreicher Registrierung ist Ihr TC95 nun in Su-
perWise sichtbar und die WiFi-LED leuchtet dauerhaft.
Bei Problemen sehen Sie bitte unsere aktuellsten Hinweise
(nur Englisch), QR-Code rechts unten scannen.

12 operating instructions TC95
USB-Schnittstelle
Der TC95 bietet die Möglichkeit des Datenaus-
tauschs über einen USB-Stick. Hiermit kann z. B.
der genaue Temperaturverlauf eines Brandes als
Logdatei ausgelesen werden (CSV-Datenformat,
z.B. in EXCEL öffenbar). Für jedes Programm wird
eine Datei angelegt. Neben dem tatsächlichen
Temperaturverlauf werden auch Solltemperatur,
Leistung und Schaltausgänge aufgezeichnet,
wichtig im Falle von Störungen.
Eine weitere Funktion ist das Aus- und Einlesen
von Programmen. Die aktuellen Programme
werden auf dem USB-Stick abgelegt und können
mit einem Texteditor verändert oder neue Pro-
gramme angelegt werden. Anschließend werden
diese wieder in den TC95 zurückgelesen.
Ebenso kann die Konfiguration des Reglers
aus- und wieder eingelesen werden.
Achtung: Diese sollten mit Bedacht und nur nach
Rücksprache mit Ihrem technischen Ansprech-
partner geändert werden!
Bei allen Schreib- und Lesevorgängen erstellt der
Regler ein entsprechendes Unterverzeichnis mit
Reglertyp, Seriennummer und greift auf dessen
Inhalt (z. B. „TC95 S/N123456 Conf“) zu.
USB interface
Your TC95 offers data exchange via an USB stick.
This can be used, for example, to read out the
temperatures from previous firings as a log file
(CSV data format, e.g. EXCEL compatible). A file
is created for each firing. In addition to the actual
temperatures as well setpoints, power and control
outputs are recorded, crucial in case of unusual
events and maintenance.
Another helpful feature is modifying program-
mes. Backup the program set to the USB-Stick,
modify or create new programs using a text editor
and restore them to your TC95.
Likewise, the configuration of the controller
can stored, modified and then read back in again.
Attention: Be aware such changes might affect
kiln and controller essentially. Use caution and
consult your technician before doing so.
For all write and read operations the controller
creates a subdirectory named by controller mo-
del, serial number and its contents (e.g. “TC95 S/
N123456 Conf”).

13
operating instructions TC95
To use these features proceed as follows:
After inserting the USB stick, a menu appears in the dis-
play (fig. A). Now the desired operation can be selected
with the / keys and started with the programme
key[P].
Arrow right: writes on the stick
Arrow left: reads from stick (not with LOG)
To call up or quit the USB menu manually
Press and hold or key for 2 seconds.
Error messages:
no Config or no Prog
No directory with suitable S/N and file available
Conf invalid or Prog invalid
Syntax error, invalid variable in configuration
(e.g. MaxHelloTemp = 1320)
Log Err, Conf Err or Prog Err
(depending on LoG, ConF or ProG function)
Write or read process was interrupted.
(e.g. by removing the USB stick)
bad format
USB stick not readable (e.g. no FAT32 format)
Die beschriebenen Funktionen werden wie folgt
aufgerufen:
Nach Einstecken des USB-Sticks erscheint ein Menü im
Display (Bild A). Nun kann mit den / Tasten der ge-
wünschte Vorgang ausgewählt und mit der Programm-
taste [P] gestartet werden.
Pfeil rechts: schreibt auf den Stick
Pfeil links: liest vom Stick (nicht bei LOG)
Manuelles Anwählen und Verlassen USB-Menü
2 Sekunden Taste bzw. halten.
Fehlermeldungen:
no Config bzw. no Prog
Kein Verzeichnis mit passender S/N und Datei vorhanden
Conf invalid bzw. Prog invalid
Syntaxfehler, ungültige Variable in Konfiguration vorhan-
den (z. B. MaxHalloTemp = 1320)
Log Err, Conf Err bzw. Prog Err
(je nach Log-, Conf- oder Prog-Funktion)
Schreibe- oder Lesevorgang wurde unterbrochen.
(z.B. durch Entfernen des USB-Sticks)
bad format
USB-Stick nicht lesbar (z.B. kein FAT32 Format)

14 operating instructions TC95
Firmware-Update
Die Funktionen unserer Regler werden kontinuierlich ver-
bessert und erweitert. Profitieren Sie davon und bringen
Ihren TC95 wie folgt auf den neuesten Stand: Laden Sie
die neueste Firmware von www.bentrup.de/service.
Entpacken Sie diese auf einen FAT32-formatierten
Stick. Es sind dann mehrere *.upd Dateien sowie ein
FWUPDATE Ordner sichtbar (Bild A).
Stecken Sie den USB-Stick in den TC95 und schalten
Sie ihn mit gedrückter Taste ein. Die auf dem Stick
installierte Firmware wird gelesen und die gefundene Ver-
sion wird im Display angezeigt (Bild B).
Mit Drücken der Taste starten Sie die Installation
des Updates. Während der Installation zeigt die untere
Anzeige „updating...“ an.
Ist das Update erfolgreich installiert, erscheint im Display
die neue Version der Firmware und in der unteren Anzeige
„done, press “ (Bild C).
Der USB-Stick kann nun entfernt werden.
Firmware update
The features of our controllers are continuously im-
proved and expanded. To take advantage of this period-
ically check the latest firmware on www.bentrup.de/
service and proceed as follows for an update. Unpack
it onto a FAT32 formatted stick. You will then see several
*.upd files and a FWUPDATE folder (fig. A).
Insert the USB stick into the TC95 and switch it on while
holding down the key. The firmware installed on the
stick is read and its version is displayed (fig. B).
Press the key to start the installation of the update.
During installation, the display shows “updating...”.
If the update has been installed successfully, the new
version appears in the display and in the bottom display
shows “done, press “ (fig. C).
The USB stick can be removed.
(A)
(B)
(C)

15
par. no. Operating parameter unit
02 TempUnit Unit of all temperatures °C / °F
03. SensType Type of temperature sensor type S, R, J, K etc.
06. MaxTemp Maximum temperature kiln is approved for °C / °F
07 P (PID) Proportional band %
08 I (PID) Integral Time sec
09 D (PID) Derivative Time sec
11 HeatChk
Level of checking temperature increase of the kiln:
OPT – controller HOLDs for lagging kiln,
Grd – open Loop check only, none – no checks
13 Infomode
Parameters shown during firing (simplified: segment
no. and remaining time, standard: additionally
remaining time, setpoint and heating
%
20 TCyclus
Cyclus time for the contactor in seconds.
Lower settings increase accuracy but reducing
contactor’s lifetime
21. 2nd Out
Function of 2nd output (off, Safety, Event, Alarm
High, Alarm Low, Alarm Diff, Process relay, Cooling)
Depending on Setting followed by 2nd parameter
30 Lograte Time for 2 consecutive log entries on USB logging sec
40 SW Info MAC Address, SuperWise Interface Code
and current time and date
51 TimeZone Timezone of your region
(relative to Greenwich Mean Time) GMT
52 DST Mode Daylight Savings Time mode EU, USA, off
HAN7D HAN15D CPC14 PANEL
5A1 8 1 mains supply (L)
2B1 9 2 mains supply (N)
6A3 14 4control output heating (L)
7C3 12 3control output extra (L)
1B3 13 -control output (N)
3B5 1 7 thermocouple +
4S/R:C5 J/K:A5 S/R:2 J/K:3 8 thermocouple –
TC95
14 32
5876
AMP DUAC 8 POLE
6
5
4
1
2
3
7
HAN7D
3
1
7
4
11
8
14
12
15
4
3
2
a
c
b
CPC14
HAN15D
PANEL
Betriebsparameter
Hiermit kann der Regler auf speziel-
le Anwendungen adaptiert werden.
Eine detaillierte Beschreibung finden
Sie in der technischen Anleitung auf
www.bentrup.de. Zum Aufrufen Pro-
grammtaste 3 Sekunden lang drücken.
Über die und / Tasten können
die Parameter ausgewählt bzw. ggf. ver-
ändert werden.
Ein Punkt hinter der Parameter-Nr. bedeu-
tet, dass dieser Wert aus Sicherheitsgrün-
den gesperrt ist. Kontaktieren Sie ggf. Ihren
technischen Ansprechpartner.
Elektrische Details
Achtung! Der Regler darf auf keinen Fall
geöffnet werden. Sicherung ist von außen
zugänglich. Darstellung der Draufsicht des
Steckers (bzw. Buchse der Reglerrückseite
bei Panelversion). Einige Ofenhersteller nut-
zen eine andere Belegung als dargestellt.
Operating Parameters
This allows adapting the controller for
very specific applications. For a detailed
explanation refer to the Technical Manual
available on www.bentrup.com. To enter
operation parameters hold programme
key for 3 seconds. Use the or /
keys to navigate through or change the
parameters.
If the parameter number is marked “.“ the
value is locked for safety reasons. Contact
us or your technical advisor for details.
Electrical Details
Caution! Under no circumstances open
the controller. The fuse is accessible from
the outside. Sketches show the top view
of plugs (or socket on panel model). Note
that some kiln manufacturer use pin as-
signments different from the ones shown
below.

operating instructions TC95 compact series V2.4
© 2023 bentrup Industriesteuerungen Germany
www.bentrup.com
Table of contents
