Beretta IDRA MS 200 User manual

Installation and Operation Manual
Solar | solar storage cylinder
IDRA MS
Installation and Operation Manual
EN

2

This manual, Code 20058916 - Rev. 5 (12/16) comprises 16 pages.
3
Dear Customer,
Thank you for choosing a Bsolar storage cylinder. You have purchased a modern, quality product that is designed
to give dependable and safe service and to provide comfort in the home for many years to come. Arrange for your B
solar storage cylinder to be serviced regularly by an authorised Bservice centre. Their personnel are specially
trained to keep your solar storage cylinder efficient and cheap to run. Bservice centres also stock any original spare
parts that might be required.
This manual contains important instructions and precautions that must be observed to ensure the trouble-free installation
and efficient functioning of your Bsolar storage cylinder.
Please accept our renewed thanks for your purchase,
Beretta
CONFORMITY
Bstorage cylinders conform to DIN 4753-3 and UNI EN 12897 standards.
b This product must only be used for the purpose for which it is designed and made, as specified by B. B
declines all responsibility, contractual or other, for damage to property or injury to persons or animals caused by
improper installation, adjustment, maintenance or use.
RANGE
MODEL CODE
IDRA MS 200 BERETTA 20015324
IDRA MS 300 BERETTA 20015328
IDRA MS 430 BERETTA 20015333
IDRA MS 550 BERETTA 20015340
ACCESSORIES
For a complete list of accessories and details of their compatibility, refer to the Catalogue.
CONTENTS
The following symbols are used in this manual:
b
CAUTION! =
Identifies actions that require caution
and adequate preparation.
a
STOP! =
Identifies actions that you MUST NOT do.
This manual, Code
- Rev.
comprises
pages.
GENERAL ..................................4
1 General Safety Information .................. 4
2 Precautions .............................. 4
3 Description of the appliance................. 5
4 Identification ............................. 5
5 System layout ............................ 5
6 Technical specifications .................... 6
7 Water circuit ............................. 7
8 Location of sensors........................ 8
9 Overall dimensions and water fittings.......... 9
INSTALLER ................................11
10 Unpacking the product .................... 11
11 Handling ............................... 11
TECHNICAL ASSISTANCE CENTRE ............12
12 Place of installation ....................... 12
13 Installation in older systems and systems
requiring modernisation ................... 12
14 Putting into service ....................... 12
15 Temporary shutdown...................... 13
16 Preparing for extended periods of disuse ..... 13
17 Maintenance ............................ 13
18 Cleaning and removing internal components... 13
20 Troubleshooting.......................... 14
19 Recycling and disposal ................... 14
END USER .................................15
21 Start-up ................................ 15
22 Temporary shutdown...................... 15
23 Preparing for extended periods of disuse ..... 15
24 External maintenance ..................... 15

4
GENERAL
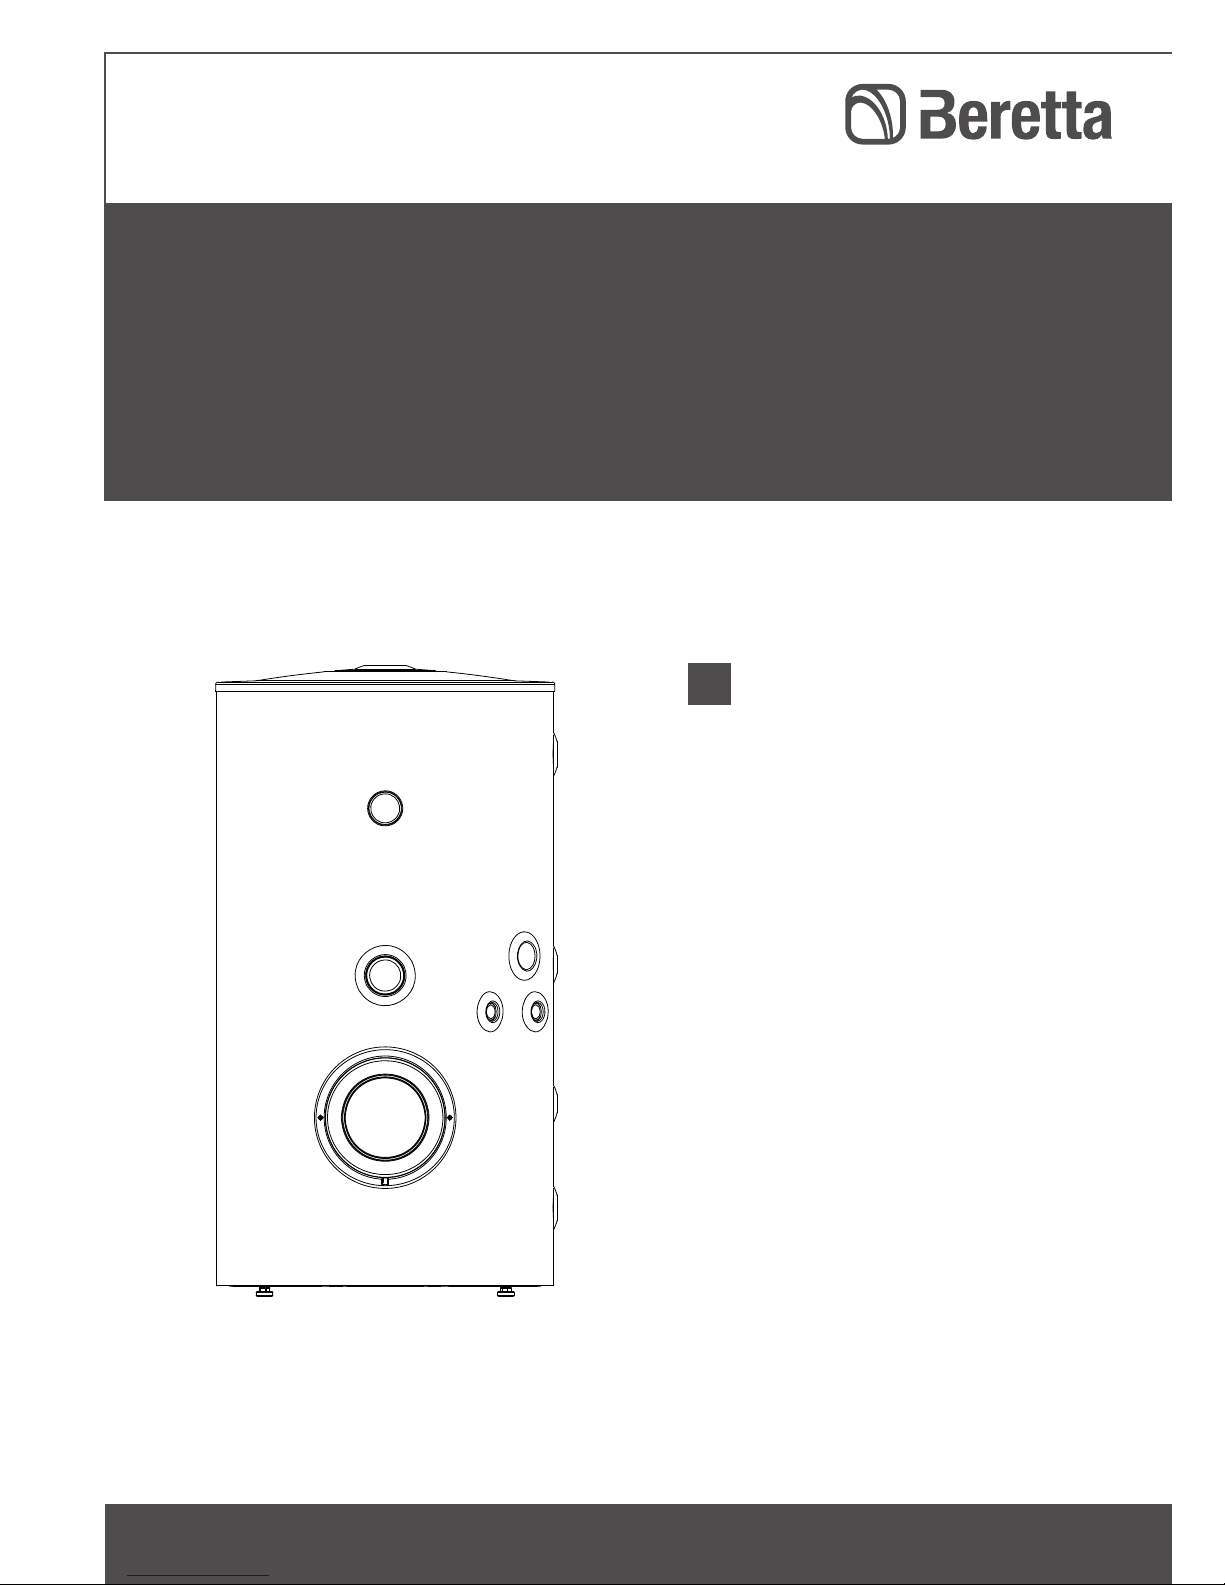
1 GENERAL SAFETY INFORMATION
b Check that the product is complete, undamaged
and as ordered as soon as you receive it. Report any
discrepancies or damage to the Bdealer who
sold it.
b This product must be installed by a legally qualified
heating engineer. On completion of the installation,
the installer must issue the owner with a declaration
of conformity confirming that the installation has been
completed to the highest standards in compliance with
the instructions provided by Bin this instruction
manual, and that it conforms to all applicable laws
and standards.
b This product must only be used for the purpose
for which it is designed and made, as specified by
B. Bdeclines all responsibility, contractual or
other, for damage to property or injury to persons or
animals caused by improper installation, adjustment,
maintenance or use.
b The product must be serviced at least once a year.
Servicing must be arranged in advance with the
BTechnical Assistance Centre.
b All servicing and repairs must be performed by a
qualified heating engineer.
b If water leaks from the storage cylinder, turn off
the water supply and contact B’s Technical
Assistance Centre or a qualified heating engineer
immediately.
b If the solar storage cylinder is not going to be
used for an extended period of time, contact the
manufacturer’s Technical Assistance Centre to have
at least the following operations performed:
- Close the shut-off cocks for the domestic hot water
circuit
- Shut down the boiler connected to the storage
cylinder as instructed in its own manual
- Switch the storage cylinder OFF at the control panel
(if fitted) and at the mains power switch
- Drain the central heating circuit and domestic hot
water circuit if there is any risk of freezing.
b Anti-freeze (propylene glycol) is available separately
and must be mixed with water in a percentage varying
from 30% to 50% as instructed in the installation and
maintenance manual for the Bsolar collectors.
b Only fill the solar collector (primary) circuit with water
and glycol premixed in the percentages specified in
the Binstallation and maintenance manual.
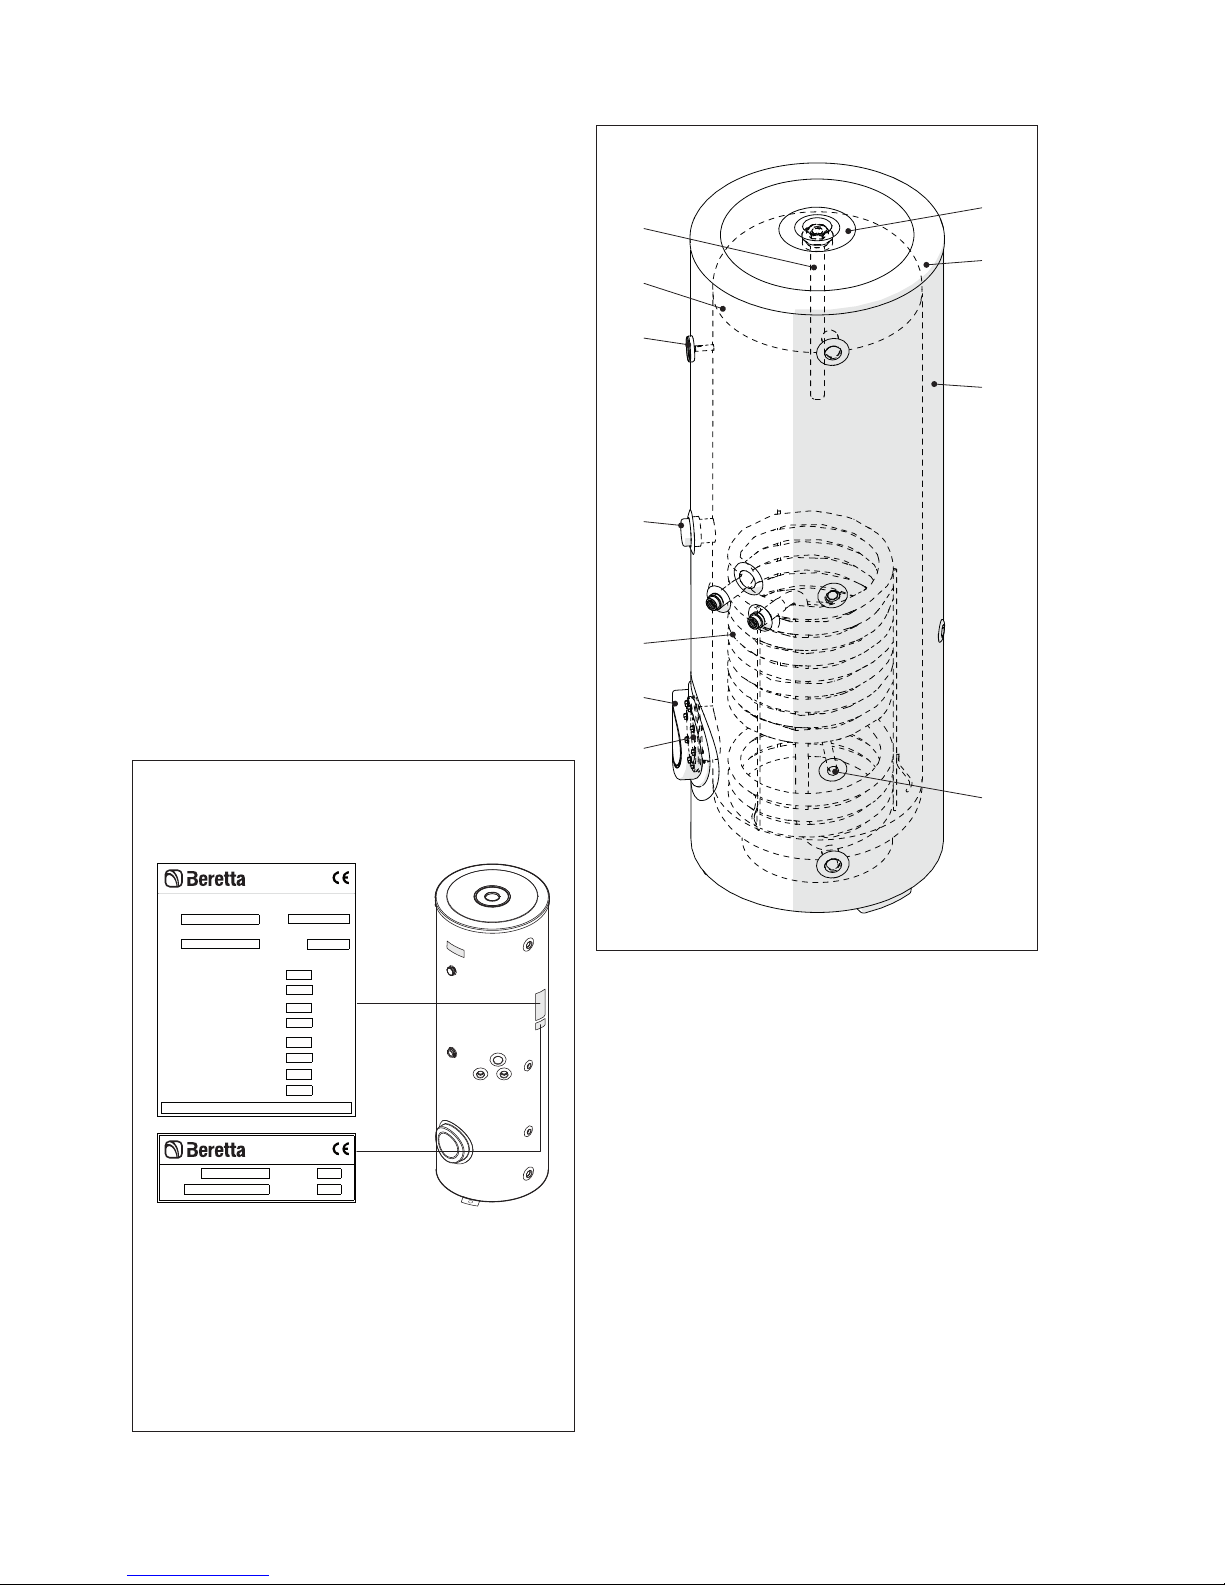
b This instruction manual is an integral part of the
product. It must be kept safe and must ALWAYS
accompany the product, even if it is sold to
another owner or transferred to another user or to
another installation. If you lose this manual, order a
replacement immediately.
2 PRECAUTIONS
The operation of any appliance that uses electrical power
demands that a number of fundamental safety precautions
be respected. In particular:
a Never attempt to install the system without using
suitable personal protection equipment and
without following all applicable occupational safety
standards.
a Do not touch the storage cylinder when barefoot or
wet if it has any electrical accessories connected to
it.
a Never clean or service the storage cylinder without
first turning the mains power switch OFF to disconnect
all electrical accessories (if fitted) from the mains
electricity supply.
a Never pull, disconnect, or twist any electrical cables
coming from the appliance even if it is disconnected
from the mains electricity supply.
a Do not expose the storage cylinder to the elements. It
is not designed for use outdoors.
a If the pressure in the solar collector circuit drops, do
not top up with water alone, since this increases the
risk of damage from freezing.
a Do not use connections or safety devices or fittings
(expansion vessels, pipes, insulation) that are not
specifically designed and tested for use in solar
water heating systems.
a Do not allow children or infirm persons to operate the
system unsupervised.
a Do not dispose of packaging material into the
environment, or leave it within the reach of children,
since it can become a potential hazard. Dispose of
packaging material in compliance with applicable
legislation.
General

5
GENERAL
3 DESCRIPTION OF THE
APPLIANCE
B
IDRA MS
solar storage cylinders come in capacities
of 200, 300, 430 and 550 litres, and are designed for
integration in solar domestic hot water production systems
heated by Bsolar collectors.
The most important technical features of these solar
storage cylinders are:
- The storage cylinder and coil are specially designed
and shaped for optimum performance in terms of
stratification, heat exchange and replenishment times
- Internal glazing, bacteriologically inert, to ensure the
maximum hygiene of treated water, reduce limescale
deposits and make cleaning operations easier
- CFC-free polyurethane insulation and an elegant
external casing reduce heat loss and improve
efficiency
- Temperature sensor and power cables are all
internally routed
- A flange is provided for easy cleaning and
maintenance of the anti-corrosion magnesium anode.
B
IDRA MS
solar storage cylinders can be equipped
with a special solar controller for easy integration in B
solar water heating systems.
4 IDENTIFICATION
B
IDRA MS
storage cylinders are identified by:
Data plate
This lists the technical specifications and performance
of the product.
Beretta Caldaie
Via Risorgimento, 13
23900 Lecco (LC)
Beretta Caldaie
Via Risorgimento, 13
23900 Lecco (LC)
INTERACUMULADOR SOLAR
Modelo N° Fabric.
Código Año
Pressão máxima de exercício
Alimentaçcao eléctrica
bar
V-Hz
Capacidade do termoacumulador l
T067659EPE02
Conexión a tierra obligatoria - Ligação á terra obrigatória - Obligatory ground connection
W
Potência eléctrica consumida
Potência consumida max.pela serp.sup. [T° Primário 80°C] kW
Caudal especifico sup. [∆T 35°C] l/1'
TERMOACUMULADOR SOLAR
Ano
Potencia absorbida max.serp.sup. [T° Primário 80°C]
Presión máxima de funcionamiento
Capacidad del interacumulador
Potencia eléctrica absorbida
Alimentación eléctrica
m2
Superficie serpentín superior
Superfície serpentina superior
Superficie serpentín inferior
Superfície serpentina inferior m2
kW
Pot. cons. max.pela serp.sup.
N° Fabric.
Pot. absor. max.serp.sup.
Modelo m2
Sup. serpentín inf.
Sup. serpentina inf.
SOLAR STORAGE CYLINDER
Model Serial number
Code Year
Power absorbed by top coil (T° primary 80°C)
Domestic Hot Water production - top coil
Maximum working pressure of storage cylinder
Storage cylinder capacity
Electrical consumption
Power supply
Top coil heat exchange surface area
Bottom coil heat exchange surface area
Bottom coil heat exch. surf. area
Serial number
Model
Power absorbed by top coil
Serial number plate
This specifies the serial number and model.
b If these plates or any other means of clearly
identifying the product are defaced, removed
or lost, proper installation and servicing may be
rendered difficult.
5 SYSTEM LAYOUT
1
2
3
4
5
6
7
11
10
9
8
1
Magnesium anode
2
Storage cylinder
3
Temperature gauge
4
Sleeve for electric heating element (not supplied)
5
Coil
6
Flange cover
7
Cylinder inspection flange
8
Sensor socket
9
Insulation
10
Cover
11
Plug for anode inspection and lifting

6
GENERAL
6 TECHNICAL SPECIFICATIONS
DESCRIPTION
IDRA MS
200 300 430 550
Type of storage cylinder Vitrified
Storage cylinder layout Vertical
Heat exchanger layout Vertical
Storage cylinder capacity 208 305 442 556 l
Diameter of storage cylinder with insulation 605 755 mm
Height with insulation 1330 1840 1630 1980 mm
Insulation thickness 50 mm
Diameter/length of magnesium anode 33/450 33/520 mm
Flange diameter 118 mm
Diameter/length of sensor sockets 16/175 mm
Sleeve for electric heating element (not supplied) 1 1/2” F Ø
Coil water capacity 5,7 9,3 11 12,8 l
Coil heat exchange surface area 0,94 1,53 1,8 2,1 m2
Maximum operating pressure of storage cylinder 10 bar
Maximum operating pressure of coil 10 bar
Maximum operating temperature 99 °C
Net weight with insulation 70 100 135 150 kg
Heat loss according to EN 12897:2006 at ∆T=45 °C 116 93 91 114 W
Energy efficiency class E C
Pressure drops COIL
PRESSURE DROP (mbar)
0
0
200
50
100
150
200
250
300
400 600 800 1000 1200 1400 1600
550
430
300
200
FLOW RATE (l/h)
Tests performed with a 30% glycol/water solution.

7
GENERAL
7 WATER CIRCUIT
TYPICAL WATER SYSTEM SCHEMATIC
Solar regulator
°C
M
10
10
10
6
7
9
8
12
11
13
PS
5
16
2
R
M
4
3
UAC
EAF
11
98
10
10
10 10
7
15 14
17
19
PR
10
10
16
SB1
SCo
Water control system
1
Solar collector
2
Collector temperature sensor socket
3
Manual bleed valve
4
Vent cock
5
Vent valve
6
Pressure gauge
7
Safety valve
8
Drain
9
Expansion vessel
10
Disconnect valves
11
Temperature gauge
12
Flow regulator
13
Flow meter
14
Pressure reducer
15
Water softener filter
16
Non-return valve
17
Thermostatic mixer valve
18
Solar storage cylinder
19
DHW recirculation temperature sensor
UAC
Domestic hot water outlet
EAF
Domestic cold water inlet
M
Collector outlet
R
Collector return
PR
DHW recirculation pump
PS
Solar collector circuit pump
SB1
Storage cylinder bottom temperature sensor
SCo
Collector probe
Note! The above schematic is purely indicative.
b B
IDRA MS
storage cylinders are delivered without a boiler heating pump. A suitably rated pump must be
provided and installed separately. Flow rate from the solar collector circuit depends on the type and number of
collectors installed. For further information, consult the manual for the collectors.
b The domestic hot water system MUST INCLUDE an expansion vessel, safety valve, automatic vent valve and
storage cylinder drain cock.
b Safety valves must be connected to a suitable collection and drain system. The manufacturer declines all
responsibility for damage caused by water escaping from safety valves.
b The choice of system components and the method of their installation are left up to the heating engineer installing
the system. Installers must use their expertise to ensure proper installation and functioning in conformity to all
applicable legislation.
b Circuits filled with anti-freeze must be fitted with water disconnectors.

8
GENERAL
8 LOCATION OF SENSORS
B
IDRA MS
storage cylinders are equipped with dedicated sockets for the storage cylinder TEMPERATURE GAUGE
or TEMPERATURE SENSOR.
b
The installer is responsible for making all necessary connections to the boiler and solar collectors. Installers must use
their expertise to ensure proper installation and functioning in compliance with all applicable legislation.
Psr
B
A
C
A
Temperature sensor socket
B
Temperature sensor
C
Guide
Psr
Solar controller temperature sensor socket
b Joins between temperature sensor cables and control panel extension cables must be soldered and protected by
sheaths or other forms of electrical insulation.

9
GENERAL
9 OVERALL DIMENSIONS AND WATER FITTINGS
IDRA MS
200 - 430
(*) Hoses FE
35
M R
D
C
B
A
G
H I
L
(*)
N
UAC
Psr
EAF (SB)
RL
RE
TR
ICP
ICP
DSA
AD AD
DSA
DESCRIPTION
IDRA MS
200 430
UAC Domestic hot water outlet 1” F Ø
M Outlet from solar collector 1” M Ø
R Return to solar collector 1” M Ø
RL DHW recirculation 3/4” F Ø
EAF (SB) Domestic cold water inlet (storage cylinder drain) 1” F Ø
Psr Diameter/length of solar controller sensor socket 16/175 mm
RE Sleeve for electric heating element (not supplied) 1 ½” F mm
AD Diameter/length of magnesium anode 33/450 33/520 mm
TR Temperature gauge
DSA Sensor/power cable entrance
ICP Rear cable entrance
A 1030 1330 mm
B 675 910 mm
C 625 860 mm
D 365 460 mm
E 605 755 Ø mm
F 640 790 mm
G 170 205 mm
H 425 480 mm
I 140 300 mm
L 1170 1440 mm
N 1330 1630 mm
b We recommend that you install isolating valves in the outlet and return lines.
b Check the efficiency of the seals when filling/refilling the storage cylinder.

10
GENERAL
IDRA MS
300 - 550
(*) Hoses FE
35
M R
D
C
B
A
G
H I
L
(*)
N
UAC
Psr
EAF (SB)
RL
RE
TR
ICP
ICP
DSA
AD AD
DSA
DESCRIPTION
IDRA MS
300 550
UAC Domestic hot water outlet 1” F Ø
M Outlet from solar collector 1” M Ø
R Return to solar collector 1” M Ø
RL DHW recirculation 3/4” F Ø
EAF (SB) Domestic cold water inlet (storage cylinder drain) 1” F Ø
Psr Diameter/length of solar controller sensor socket 16/175 mm
RE Sleeve for electric heating element (not supplied) 1 ½” F mm
AD Diameter/length of magnesium anode 33/450 33/520 mm
TR Temperature gauge
DSA Sensor/power cable entrance
ICP Rear cable entrance
A 1490 1650 mm
B 955 1080 mm
C 875 960 mm
D 365 460 mm
E 605 755 Ø mm
F 640 790 mm
G 170 205 mm
H 445 505 mm
I 510 520 mm
L 1670 1785 mm
N 1840 1980 mm
b We recommend that you install isolating valves in the outlet and return lines.
b Check the efficiency of the seals when filling/refilling the storage cylinder.

11
INSTALLER
10 UNPACKING THE PRODUCT
B
IDRA MS
storage cylinders are delivered in a single
package, protected by a cardboard box on a wooden
pallet.
The following items are delivered in a plastic bag inside the
packaging:
- Instruction manual
- Spare parts catalogue
- Hydraulic test certificate.
A
B
H
MODEL A B H Weight
(Kg)
200 700 700 1480 85
300 700 700 1980 115
430 850 850 1790 150
550 850 850 2130 165
11 HANDLING
Make sure that any lifting equipment is of adequate
capacity to lift and move the storage cylinder. Remove the
brackets (1) to free the storage cylinder.
To lift the storage cylinder, remove the plug (2) and
insulation (3) and screw an eyebolt (Ø 10 mm) of suitable
capacity for the weight of the cylinder into the hole (4).
1
1
1
2
4
3
If suitable equipment is not on hand to lift the storage
cylinder off the pallet using the eyebolt, proceed as follows.
- Place a platform of about half the height of the pallet
near the storage cylinder. Make sure the platform is
able to support the weight of the storage cylinder
- Remove the brackets (1) then carefully rotate and
slide the storage cylinder off the pallet on to the
platform
- Make sure that the storage cylinder is perfectly
stable, and then remove the pallet
- Carefully rotate and slide the storage cylinder off the
platform on to the floor
- Remove the platform. Position the storage cylinder as
required.
Adjust the feet to ensure that the storage cylinder is
perfectly level.
17
b Wear suitable personal protective equipment and use
suitable safety devices.
a Do not dispose of packaging material into the
environment, or leave it within the reach of children,
since it can become a potential hazard. Dispose of
packaging material in compliance with applicable
legislation.
Installer

12
TECHNICAL ASSISTANCE CENTRE
12 PLACE OF INSTALLATION
B
IDRA MS
storage cylinders can be installed in any
room where there is no specific requirement for an electrical
protection rating higher than IP X0D.
b Respect the minimum specified installation distances
to ensure correct installation and access for
maintenance.
≥ 0,4 m
≥ 0,6 m
≥ 0,3 m ≥ 0,4 m
13 INSTALLATION IN OLDER
SYSTEMS AND SYSTEMS
REQUIRING MODERNISATION
When installing B
IDRA MS
storage cylinders in old
systems or systems requiring modernisation, always
perform the following checks.
- Make sure that the system is fitted with safety and
control devices in accordance with applicable
legislation and standards
- Make sure that the central heating circuit has been
flushed out to remove all sludge and lime scale, and
has been vented and seal tested
- Make sure that a suitable water treatment system is
installed if the quality of the supply/recirculation water
so demands (refer to the reference values listed in the
table alongside).
REFERENCE VALUES
pH 6-8
Electrical conductivity less than 200 μS/cm (25°C)
Chlorine ions less than 50 ppm
Sulphuric acid ions less than 50 ppm
Total iron less than 0.3 ppm
Alkalinity M less than 50 ppm
Total hardness less than 35°F
Sulphur ions none
Ammonia ions none
Silicon ions less than 30 ppm
TechnicalAssistanceCentre
14 PUTTING INTO SERVICE
It is essential to perform the following checks before
starting up or testing the functioning of the storage cylinder.
In particular, check that:
- The supply cocks in the domestic water circuit are
all open
- The water connections to the solar storage cylinder's
valve group have been made correctly
- All the pipes in the water circuit have been insulated
in conformity to relevant standards
- The electrical connections have been made correctly
(use the flexible cable conduits provided to route the
cables. See pages 9 - 10 as well as the manuals for
all installed accessories
- The solar collector circuit has been correctly flushed
out and filled with water-glycol mix, and all air has
been bled out of the circuit (see the manual for the
solar collectors)
- Put the solar collectors into service. See the manuals
for the solar collectors and associated accessories.
Once the system has been started up, perform the following
checks.
- Make sure that all pumps are free and rotate in the
right direction
- Check that the flow rate in the solar collector circuit is
equivalent to 30 l/h for each m2of collector area
- Check that the solar collector circuit has been
properly bled
- Turn the main power switch OFF and make sure
that the solar water heating system shuts down
completely.
Provided the above checks have been completed
satisfactorily, restart the system and verify its performance.

13
TECHNICAL ASSISTANCE CENTRE
15 TEMPORARY SHUTDOWN
If you are going away for a short period of time like a
weekend or a short holiday, etc., and outdoor temperatures
are going to remain above ZERO, proceed as follows.
- Adjust the storage cylinder thermostat to its minimum
setting.
b If outdoor temperature may drop below ZERO (risk
of freezing) perform the operations described in the
“Preparing for extended periods of disuse” section.
16 PREPARING FOR EXTENDED
PERIODS OF DISUSE
If the storage cylinder is not going to be used for an
extended period of time, perform the following operations:
- Cover the solar collectors with suitable protection
- Switch the electricity supply to the storage cylinder’s
valve group and to any associated boiler OFF at the
main switch and at the control panel
- Close the shut-off cocks for the domestic hot water
circuit.
b Drain the domestic hot water circuit if there is any risk
of freezing.
Contact your local BTechnical Assistance Centre
if you encounter any problems in completing the above
procedure.
17 MAINTENANCE
Scheduled maintenance is essential for the safety,
efficiency and long working life of your storage cylinder.
Proper maintenance also reduces energy consumption and
ensures reliability over time. Have your storage cylinder
serviced either by the manufacturer’s Technical Assistance
Centre or by a qualified heating engineer at least once a
year.
Perform the following operations before beginning any
maintenance:
- Switch the electricity supply to the storage cylinder’s
valve group and to any associated boiler OFF at the
main switch and at the control panel
- Close the shut-off cocks for the domestic hot water
circuit
- Drain the storage cylinder’s DHW (secondary) water
circuit.
18 CLEANING AND REMOVING
INTERNAL COMPONENTS
EXTERNAL CLEANING
Clean the outside of the storage cylinder with a soft cloth
damped in soapy water. To remove stubborn marks, use a
cloth damped in a 50% mix of water and denatured alcohol
or a suitable cleaning product. Dry the storage cylinder
after cleaning it.
a Do not use abrasive products, petrol or triethylene.
INTERNAL CLEANING
Removing and checking the magnesium anode
- Remove the plug (1) and insulation (2), and use a
suitable wrench to unscrew the anode holder (3)
- Check the magnesium anode for wear and replace it
if necessary.
On completion of cleaning, follow the above steps in the
reverse order to refit all removed parts.
NOTE: Tighten the anode plug to a torque of 25-30 Nm.
1
2
3
Cleaning inside the storage cylinder
- Remove the screws (4)
- Remove the flange cover (5)
- Remove the insulation (6)
- Unscrew the bolts (7) and remove the cover (8)
- Remove the seal (9)
- Clean inside the storage cylinder and remove any
residues through the access hole.
b Check the seal for wear and replace it if necessary.
On completion of cleaning, follow the above steps in the
reverse order to refit all removed parts.

14
TECHNICAL ASSISTANCE CENTRE
b Tighten the bolts (7), proceeding diagonally around
the flange to apply pressure uniformly around the
seal.
- Fill the storage cylinder’s DHW (secondary circuit)
and check that there are no leaks from any of the
seals
- Check the performance of the storage cylinder.
9
8
7
6
5
4
19 RECYCLING AND DISPOSAL
At the end of its useful working life, do not abandon the
storage cylinder in the environment, but dispose of it
through the proper channels in accordance with applicable
legislation.
20 TROUBLESHOOTING
SUPPLEMENTARY HEATING CIRCUIT
FAULT CAUSE SOLUTION
The storage cylinder functions
incorrectly or irregularly
Flow rate too high
- Fit a pressure limiter
- Fit a flow reducer
There are blockages or deposits in the
domestic hot water circuit - Check and clean as necessary
The pump is malfunctioning - Check the pump
The water temperature from the boiler
is too low - Check the temperature setting
There is air in the primary circuit - Bleed the circuit
SOLAR COLLECTOR CIRCUIT
FAULT CAUSE SOLUTION
The storage cylinder functions
incorrectly or irregularly
There is air in the circuit - Bleed the circuit
The flow rate is too low or too high - Check the flow rate of the collector
circuit
Pressure is too low - Check that circuit pressure is
approximately 3 bar when cold
There is lime scale or sludge in the
cylinder - Check and clean as necessary
The storage cylinder loses a lot of
heat overnight
There is natural circulation to the
collectors
- Make sure that the non-return valve is
efficient and closes properly. Replace
if necessary

15
END USER
END USER INSTRUCTIONS
Refer to the GENERAL SAFETY INFORMATION and PRECAUTIONS section for safety-related information.
21 START-UP
The storage cylinder must be put into service for the first
time by personnel from the manufacturer’s Technical
Assistance Centre.
Under certain circumstances, such as after long periods of
disuse, the user may need to re-start it without involving the
Technical Assistance Centre. Before doing so, perform the
following checks and operations.
- Check that the supply cocks in the domestic water
circuit are all open
- Switch the electricity supply ON at the mains power
switch and at control panel switch (if fitted).
22 TEMPORARY SHUTDOWN
To reduce impact on the environment and save energy,
before leaving for the weekend or a short break, etc.,
provided outdoor temperatures will remain above ZERO,
simply adjust the storage cylinder’s thermostat to its
minimum temperature.
b If outdoor temperature may drop below ZERO (risk
of freezing) perform the operations described in the
“Preparing for extended periods of disuse” section.
23 PREPARING FOR EXTENDED
PERIODS OF DISUSE
If the storage cylinder is not going to be used for an
extended period of time, ask the manufacturer’s Technical
Assistance Centre to make the system safe.
24 EXTERNAL MAINTENANCE
Clean the cover, painted and plastic parts with a cloth
damped in soap and water. To remove stubborn marks,
use a cloth damped in a 50% mix of water and denatured
alcohol or a suitable cleaning product.
b Do not use fuels, sponges impregnated with abrasive
solutions or powder detergents.
Enduser

20058916 - Rev. 5 (12/16)
Commercial Ofces: Via Risorgimento, 23 A
23900 - Lecco
www.berettaboilers.com
Beretta reserves the right to modify the characteristics and
specications given in this publication at any time and without prior
notice as part of its policy of continuous product improvement.
This publication cannot therefore be understood as a contract with
third parties.
This manual suits for next models
3
Table of contents
Other Beretta Inverter manuals
Popular Inverter manuals by other brands

National Instruments
National Instruments NI 5421 s Specifications

Northern Lights
Northern Lights Lugger OM944W Operator's manual

Agilent Technologies
Agilent Technologies E8257D/67D installation guide

Stanley
Stanley MAX 160 user manual

SUNKET-ESS
SUNKET-ESS HF2420S40-75 user manual

MUND CLIMA
MUND CLIMA MUCR-HF Service manual