Bermar LE VERRE DE VIN classic User manual

classic
Инструкция по установке


You will also require:
1.A standard 1/8 inch (3mm) drill bit for wood
or A standard 1/4 inch (8mm) drill bit for dry walls
or A standard 1/4 inch (8mm) masonry bit for solid
walls
2.A food grade C02 cylinder with universal
connector
3.An adjustable wrench
4.A cross-head screwdriver
También requerirá:
1. Una broca estándar de 1/8 de pulgada (3 mm)
para madera
o una broca estándar de 1/4 de pulgada (8 mm)
para paredes secas
o una broca de mampostería estándar de 1/4 de
pulgada (8 mm) para paredes sólidas
2. Un cilindro de C02 de grado alimenticio con
conector universal
3. Una llave ajustable
4.Un destornillador de estrella
Sie benötigen außerdem:
1.Ein 3 mm (1/8 Zoll) Standardbohrer für Holz oder
Ein 8-mm-Standardbohrer für trockene Wände
oder Ein normaler 8 mm (1/4 Zoll) Steinbohrer für
massive Wände
2.Ein C02-Zylinder in Lebensmittelqualität mit
Universalanschluss
3. Ein verstellbarer Schraubenschlüssel
4. Ein Kreuzschlitzschraubendreher
Vous aurez également besoin:
1. Un foret standard de 1/8 pouce (3 mm) pour le bois
ou un foret standard de 1/4 pouce (8 mm) pour les murs secs
ou Un foret de maçonnerie standard de 1/4 pouce (8 mm) pour les murs pleins
2. Un cylindre C02 de qualité alimentaire avec connecteur universel
3. Une clé à molette
4. Un tournevis cruciforme
x1 x1
x4
x4
В комплект входит:
x1
x1
Вам также потребуется:
1. Стандартное сверлоз 1/8 дюйма (3 мм )для
дерева
или 1/4 дюйма (8 мм) для стен
или 1/4 дюйма (8 мм) для твердых стен
2.Газовый баллон С02 с универсальным разъемом
3.Разводной ключ
4.Крестовая отвертка

(a)
(b) (c)
Step 1 - Removing the Mounting Plate
At the base of the classic system you will see three screws. On fig.1 above, these are labelled a, b & c.
DO NOT attempt to remove screw (a). It is a permanent fixing.
1.Remove bolts b & c
2. Remove the Mounting Plate from the back of the Classic system and put it safely aside, along with the two bolts.
Paso 1 - Retirar la placa de montaje en la pared
En la base del sistema clásico verá tres tornillos. En la figura 1 anterior, estos están etiquetados como a, b & c.
NO intente quitar el tornillo (a). Es una fijación permanente.
1.Retire los tornillos b & c
2. Retire la placa de montaje de la parte posterior del sistema clásico y guárdela a un lado, junto con los dos tornillos.
Schritt 1 - Entfernen der Wandmontageplatte
An der Basis des klassischen Systems sehen Sie drei Schrauben. In Abb. 1 sind diese mit a, b und c gekennzeichnet.
Versuchen Sie NICHT, die Schraube (a) zu entfernen. Es ist eine dauerhafte Befestigung.
1.Entfernen Sie die Schrauben b und c
2. Entfernen Sie die Wandhalterung von der Rückseite des Classic-Systems und legen Sie sie zusammen mit den beiden
Schrauben sicher beiseite.
Étape 1 - Retrait de la plaque de montage mural
À la base du système classique, vous verrez trois vis. Sur fig.1 au-dessus de ceux-ci sont étiquetés commo a, b & c.
N'ESSAYEZ PAS de retirer la vis (a). C'est une fixation permanente.
1.Retirez les vis b et c
2.Retirez la plaque de montage mural à l'arrière du système classique et mettez-la de côté en toute sécurité, avec les
deux vis.
g.1
Монтажная пластина
Mounting plate
Placa de montaje
Montageplatte
Plaque de montage
Шаг 1 - Снятие монтажной пластины
В основании классической системы вы увидите три винта. На рис.1 выше они обозначены как a, b и c.
НЕ пытайтесь снять винт (а). Это постоянное крепление
1. Удалить болты B & C
2. Снимите монтажную пластину с задней части системы Classic и отложите ее в сторону вместе с двумя болтами.

Step 2 - Positioning the Mounting Plate
The classic system should be positioned at the back bar where it can be easily seen by customers and staff. The lower
edge of the Mounting Plate should be 1420 to 1625mm (56" to 64") from floor level. You will need a clear space of at
least 380mm (15") between the base of the Wall Mounting Plate and the work surface or bar top. Make sure the power
lead will reach the power supply.
IMPORTANT: check the wall for hidden pipes or wires
1. With a pencil, mark the wall where you wish the base of the system to be.
2. Place the Mounting Plate in position and, through the slots, mark with the pencil where you wish to drill the four holes
for the screws. For the best fixing, keep the holes to the centre of the slots and avoid drilling between bricks.
3. Put the Mounting Plate aside and select the correct drill-bit for the wall type.
4. Drill four holes, each to a depth of 35mm and, protecting your eyes, blow clear any loose dust.
5. For solid and dry lined walls, push in the Wall Plugs (narrow end first) and make sure that they are flush to the wall.
6. Place the Mounting Plate in position and insert the four screws into the holes. Tighten lightly and then level the Mounting
Plate. Tighten the screws.
The Wall Mounting Plate is now secure.
2
Шаг 2 - Размещение монтажной пластины
Классическая система должна быть размещена на задней панели, чтобы ее
могли легко увидеть клиенты и персонал.
Нижний край монтажной пластины должен находиться на расстоянии
1420-1625 мм (56-64 дюйма) от уровня пола.
Вам потребуется свободное пространство не менее 380 мм (15 дюймов)
между основанием настенной монтажной панели и рабочей поверхностью
или верхней панелью.
Убедитесь, что провод питания дойдет до источника питания.
ВАЖНО: проверьте стену на наличие скрытых труб или проводов
1. С помощью карандаша отметьте стену там, где вы хотите, чтобы
основание системы было.
2. Установите монтажную пластину на место и отметьте карандашом там,
где вы хотите просверлить четыре отверстия для винтов. Для лучшей
фиксации держите отверстия в центре пазов и избегайте сверления между
кирпичами.
3. Отложите монтажную пластину в сторону и выберите правильное сверло
для типа стены.
4. Просверлите четыре отверстия, каждое на глубину 35 мм, и, защищая
глаза, удалите пыль.
5. Для сплошных и сухих облицованных стен вставьте дюбели (сначала
узким концом) и убедитесь, что они находятся на одном уровне со стеной.
6. Установите монтажную пластину на место и вставьте четыре винта в
отверстия. Слегка затяните, а затем выровняйте монтажную пластину.
Затянуть винты.
Настенная монтажная панель теперь закреплена.

WICHTIG: Überprüfen Sie die Wand auf verdeckte Rohre oder Drähte
1.
2.
3.
4.
5.
6.
IMPORTANT: vérifiez le mur pour les tuyaux ou les fils cachés
1.
2.
3.
4.
5.
6.
Paso 2 - Colocación de la placa de montaje
El sistema clásico debe colocarse en la barra posterior, donde los clientes y el personal puedan verlo
fácilmente. El borde inferior de la placa de montaje en pared debe estar entre 1420 y 1625 mm (56 "a 64") desde el nivel del
piso. Necesitará un espacio libre de al menos 380 mm (15 ") entre la base de la placa de montaje en pared y la superficie de
trabajo o la parte superior de la barra. Asegúrese de que el cable de alimentación llegue a la fuente de alimentación.
IMPORTANTE: revise la pared en busca de tuberías o cables ocultos
1. Con un lápiz, marque la pared donde desea que esté la base del sistema.
2. Coloque la placa de montaje en la pared en posición y, a través de las ranuras, marque con el lápiz el lugar donde desea
perforar los cuatro agujeros para los tornillos. Para la mejor fijación, mantenga los agujeros en el centro de las ranuras y
evite perforar entre ladrillos.
3. Coloque a un lado la placa de montaje en la pared y seleccione la broca correcta para el tipo de pared.
4. Taladre cuatro agujeros, cada uno a una profundidad de 35 mm y, protegiendo sus ojos, elimine el polvo suelto.
5. Para paredes revestidas sólidas y secas, presione los tapones de pared (primero el extremo estrecho) y asegúrese de
que estén al ras de la pared.
6. Coloque la placa de montaje en la pared en su posición e inserte los cuatro tornillos en los agujeros. Apriete
ligeramente y luego ajuste la placa de montaje en pared para que esté lo más vertical posible. Apriete completamente los
tornillos.
La placa de montaje en pared ahora es segura.

Step 3 - Securing the system to the wall
1.
2.
Paso 3 - Asegurar el sistema a la pared
1.
2.
Schritt 3 - Befestigen Sie das System an der Wand
1.
2.
Étape 3 - Fixation du système au mur
1.
2.
Шаг 3 - Закрепление системы на стене
1. Возьмитесь обеими руками за систему Classic и совместите прорезь сзади с кромкой на верхней части монтажной
панели. Подвесьте систему на губу и осторожно потяните вниз. Основание системы будет опираться на две ноги
монтажной пластины.
2. Возьмите два винта, которые вы удалили ранее в шаге 1, и закрутите их на место. (b и c)
Система теперь полностью установлена
1.
2.
1.
2.
1.
2.
1.
2.
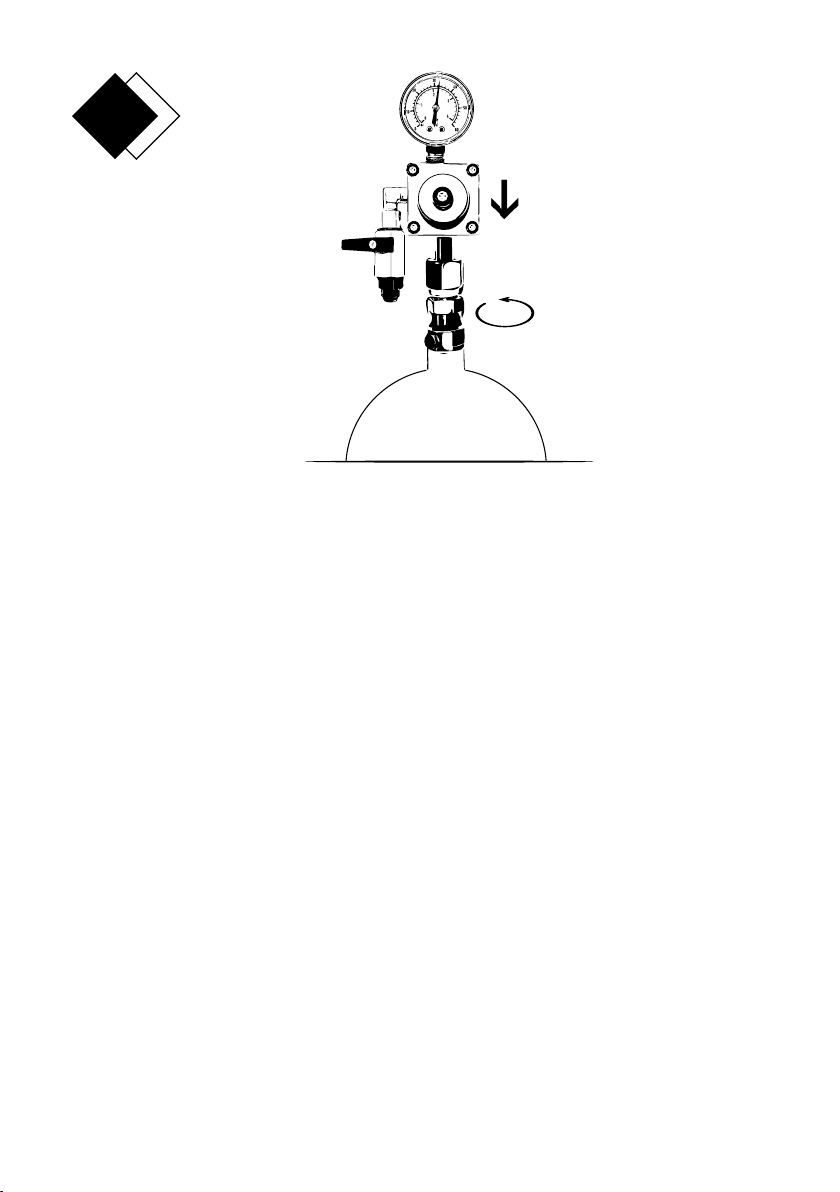
Шаг 4 - Подключение регулятора к баллону с диоксидом углерода (СО2).
Регулятор имеет универсальный фитинг, который будет соответствовать всем стандартным пищевым баллонам С02.
Рабочее давление предварительно установлено и не требует регулировки.
1. Установите регулятор и аккуратно прикрутите соединительную гайку к верхней части вертикального цилиндра.
2. Закрепите регулятор, затянув гайку с помощью разводного ключа. Поместите цилиндр C02 и регулятор в безопасное
место, где их нельзя опрокинуть.

1.
2.
3.
1.
2.
3.
1.
2.
3.
1.
2.
3.
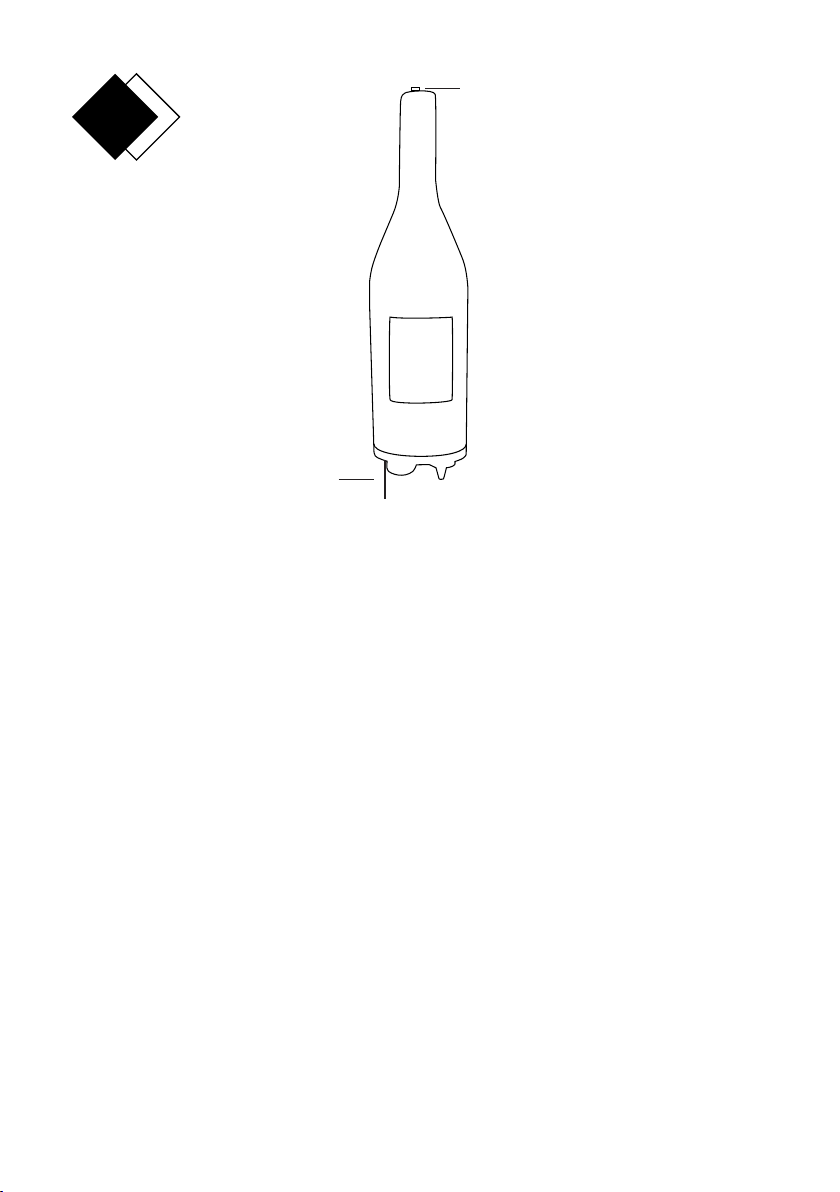
(x)
Трубка подачи CO2
g.2
Шаг 5 - Подсоедините черную трубу подачи C02 от регулятора к задней части системы.
1. Убедитесь, что на трубе нет перегибов и препятствий.
2. Надежно вставьте подающую трубу C02 в черный разъем (x) в основании системы Classic, чтобы закрепить ее.
(Пожалуйста, убедитесь, что подача CO2 отключена, прежде чем подсоединять трубу подачи CO2, как показано на рис.2
выше)
3. Потяните трубу вниз, чтобы проверить соединение.
Труба теперь безопасна и герметична. Включите питание C02 и проверьте на утечки (слушайте шипящий звук)
Step 6 - Power Supply
1.
2.
3.
Your Le Verre de Vin+ Classic is now ready to use. Please now refer to the User Instruction Manual.
Paso 6 - Fuente de alimentación
1.
2.
3.
Su Le Verre de Vin + Classic ya está listo para usar. Consulte ahora el Manual de instrucciones del usuario.
Schritt 6 - Stromversorgung
1.
2.
3.
Ihr Le Verre de Vin + Classic ist jetzt einsatzbereit. Bitte beziehen Sie sich jetzt auf die Bedienungsanleitung.
Étape 6 - Alimentation
1.
2.
3.
Votre Le Verre de Vin + Classic est maintenant prêt à l'emploi. Veuillez maintenant vous référer au manuel
d'instructions de l'utilisateur.
выключатель
interruptor encendido / apagado
Ein / Aus Schalter
interrupteur marche / arrêt
Адаптер питания
Power cord adapter
Adaptateur de cordon d'alimentation
Шаг 6 - Блок питания
1. Подключите блок питания к адаптеру шнура питания, который выходит из основания системы.
2. Вставьте вилку в розетку и включите электропитание.
3. Включите систему с помощью выключателя в верхней части системы.
Ваш Le Verre de Vin + Classic теперь готов к использованию. Пожалуйста, обратитесь к руководству
пользователя.


Официальные представители в России Салон Винных Шкафов Винкейс.
Санкт-Петербург, пр. Энергетиков 19, офис 215
bermar.ru | +7 (952) 372-75-95 | [email protected]
Table of contents
Other Bermar Wine Cooler manuals


