Best Choice Products SKY5085 User manual
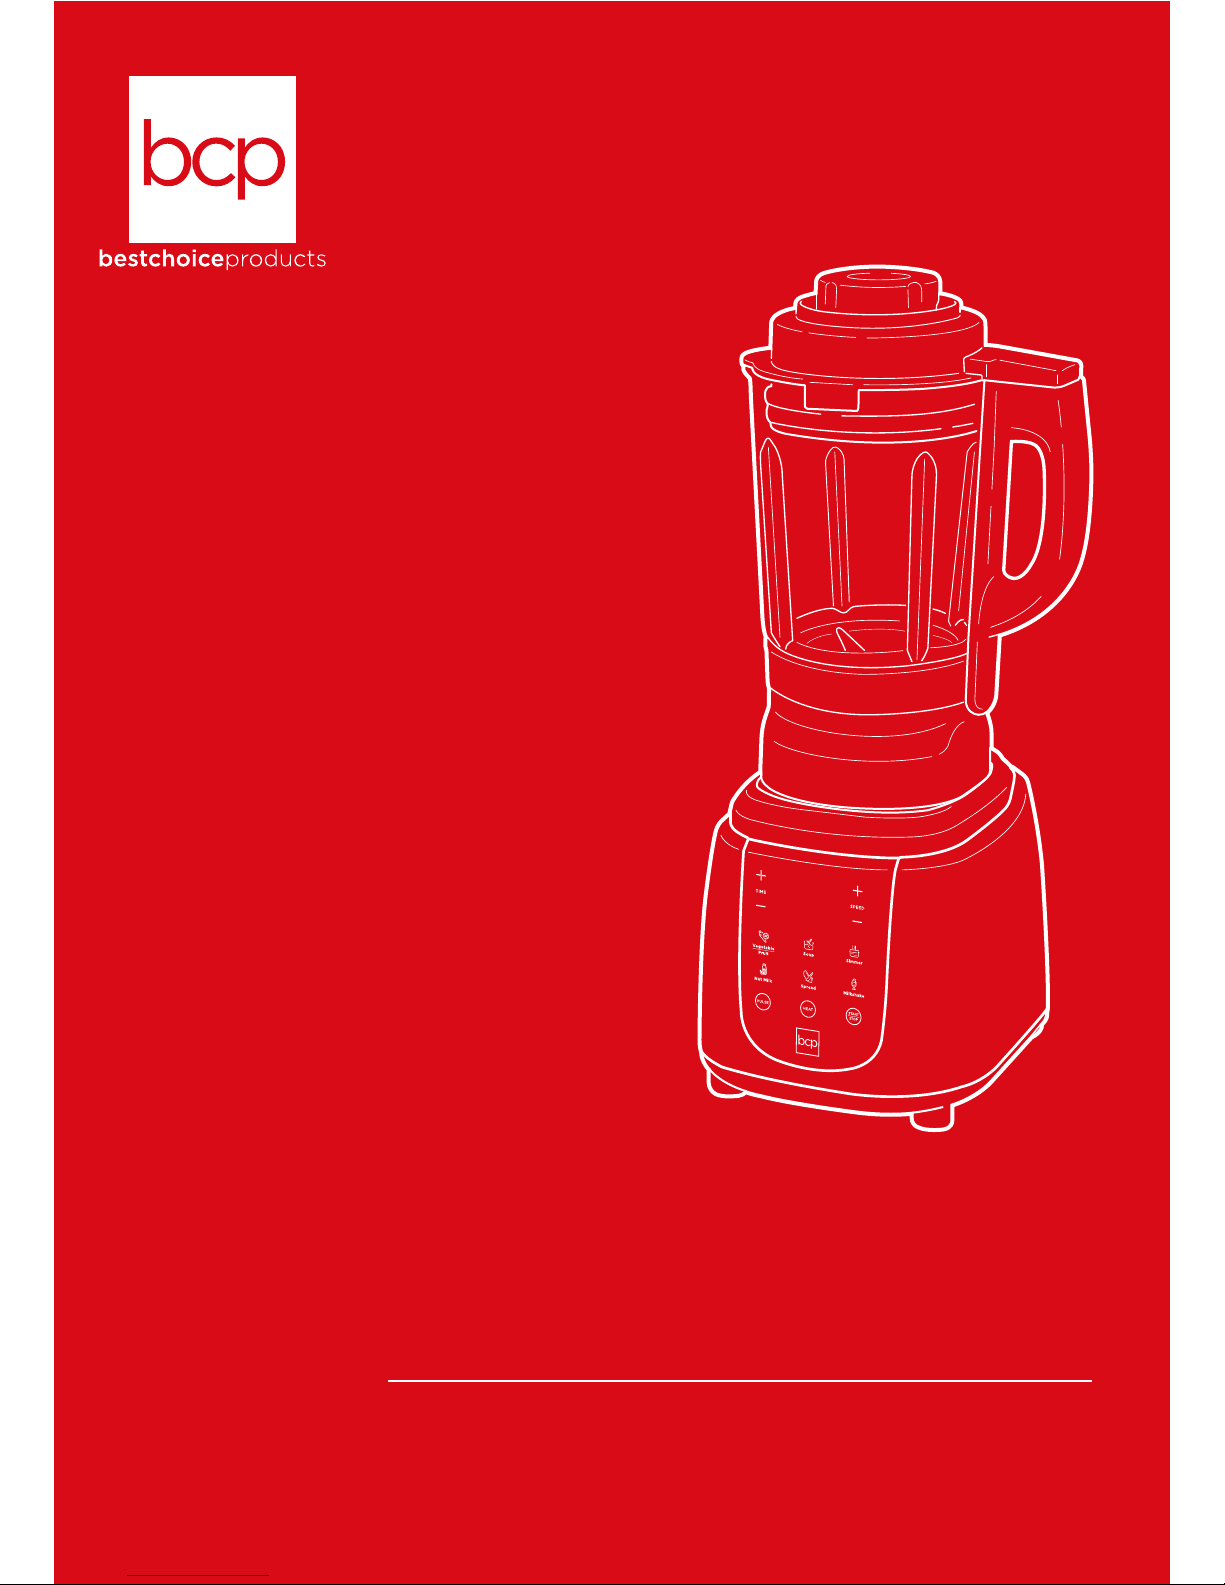
SKY5068 + SKY5085
Ver. 1
INSTRUCTION
MANUAL
Multi-function Blender

Thank you for choosing us! Since 2002, Best
Choice Products has been bringing customers
high-quality products at the absolute lowest
price. With everything ranging from instruments
and toys to furniture and outdoor, we’ve got
your everyday living essentials covered. We’re
centered around a customer-first philosophy –
with free shipping, exceptional customer
service, and a catalog sourced with you in mind.

|3
WARNING
Please retain these instructions for future reference.
NOTICE
•Do not allow children to operate this appliance. Keep appliance out of reach of children.
•This item is intended for indoor, household use only.
•Place appliance on a stable and level surface.
•Unplug appliance if it is left unattended and before assembly, disassemble, or cleaning.
•Ensure that your voltage is consistent with specifications: 120V, 60Hz.
•Using an extension cord is not recommended as it may overheat and cause a risk of fire.
•This appliance is not intended for use by persons (including children) with reduced physical, sensory or
mental capabilities, or lack of experience and knowledge, unless they have been given supervision or
instruction concerning use of the appliance by a person responsible for their safety.
•If any parts are missing, broken, damaged, or worn, stop using this product until repairs are made
and/or factory replacement parts are installed.
•Do not use this item in a way inconsistent with the manufacturer’s instructions as this could void the
product warranty.
•Keep appliance away from direct sunlight and other sources of heat (stove, heater, etc.).
•Make sure the jar, jar cover, and feeding lid are firmly in place before turning on the blender.
• Do not turn on blender without jar cover locked and secured. It is dangerous to turn on blender without
the jar cover.
•Do not run power cord over sharp edges/corners or a hot surface.
•Do not immerse the appliance in water or any other liquid.
•Do not spill water on the electrical components or connectors.
•Do not unplug the appliance by pulling on the power cord. Always grasp the plug firmly and pull
straight out from the outlet.
•Do not operate this appliance with no load or overloaded.
•Do not insert your hand or a sharp object into the jar when the appliance is turned on.
•Do not move this appliance or touch any of its components while it is in motion.
•Do not open the jar cover when the appliance is in operation.
•Do not use if the plug or any components are damaged.
•Do not use any accessory or fitting other than original accessories and fittings.
•Do not use this appliance with an external switching device or timer.
SPECIFICATIONS
VOLTAGE
FREQUENCY
POWER
CAPACITY
HEATER POWER
120V
60Hz
1200W
1.75 Liters
800W

DIAGRAM
4 |
SETTING UP THE BLENDER
1. Remove all packaging and accessories.
2. Place appliance on a stable and level surface.
3. Arrange appliance so it is at least 12 inches away from other kitchen appliances.
FEEDING LID
JAR COVER
CHASSIS
JAR
CONTROL PANEL
FOOD PUSHER
LOCK/UNLOCK
(Do not turn on without
jar cover locked and secured)
BRUSH
MEASURING CUP

|5
• TIME: Increase/decrease heat or blend time.
•SPEED: Increase/decrease blend speed – 1 is lowest and 8 is highest.
•START/STOP: Start/stop operation or preset program.
- Press to take out of idle mode.
•HEATING: Press to heat for 60 minutes max, press and hold to warm for 360 minutes max
USAGE TIPS
•Make sure that your workspace is clean and free of grease and dirt.
•Take extreme care when handling the cutting blades to avoid cutting yourself.
•Do not overload the jar. The maximum volume should not exceed 56 ounces for cold liquids and
48 ounces for hot liquids/soup.
•Cut ingredients into small pieces. Pieces should not exceed a ¾inch per side.
•If ingredients have kernels, remove kernels and add them directly to the jar.
•Be careful pouring hot liquid into or from the blender as liquid may be ejected due to steam.
•Do not use blender to directly heat thick liquids such as milk to prevent food from burning to the
bottom of the jar.
•Do not add sugar or seasoning directly to the jar as it may stick to the bottom of the jar when heated.
•During operation, do not allow continuous stirring time to exceed 6 minutes.
•If the chassis overheats, stop use for about 20 minutes. Do not operate the appliance until it has cooled.
•This appliance is equipped with overheating protection. If the motor overloads or overheats, the unit
will automatically stop.
•If material jams the motor during operation, immediately turn unit o, pull the plug, remove the
container, and carefully remove the jammed material. Continue use after the motor has cooled.
•Turn appliance o, unplug, and clean appliance after every use.
CONTROL PANEL
INCREASE/DECREASE
BLEND SPEED
PRESET PROGRAMS
PULSE/WASHING
HEATING
START/STOP
INCREASE/DECREASE
HEAT/BLEND TIME

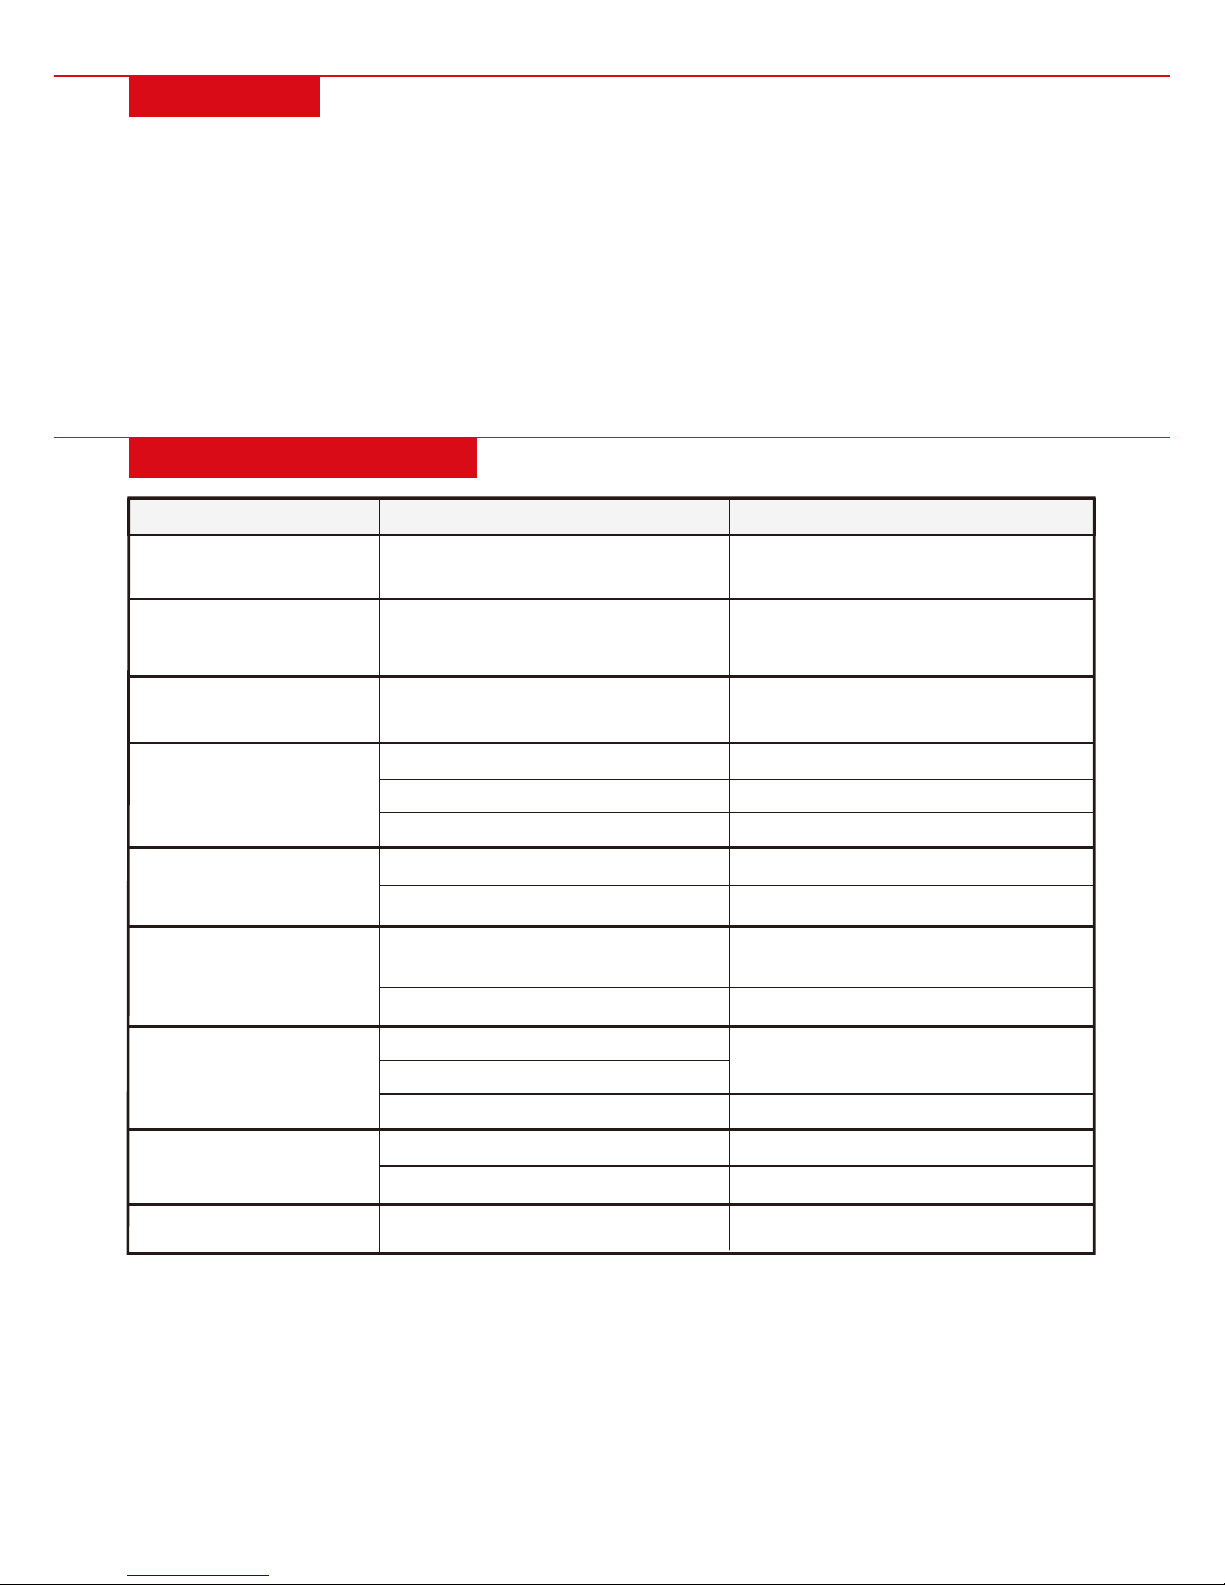
CONTROL PANEL FUNCTIONS
6 |
TIME
PROGRAM
Nut Milk
Spread
Milkshake
Simmer
Soup
Vegetable/Fruit 2 min.
15 min.
45 min.
23 min.
24 min.
30 sec.
50 sec.
max
Heat: 60
min. max
Warm: 360
min. max
BLEND SPEED (1-8)
8 and 4
2 and 4
None
3 and 8
1 and 8
8
8
None
HEATING TEMPERATURE (°F)
None
208
208
205
199
None
None
Heat: 140, 160, 175, 195, 210
Warm: 130
PURPOSE
Make vegetable/fruit juice
or smoothies
Cook or heat soup
Simmer soup
Make various plant-based
milks (almond, soy, etc.)
Make warm spreads
and dips
Make milkshakes
Hold down button to pulse
the blender/wash the jar
Heat liquids/soup
(routinely blends to
maintain temp.)
Pulse/Washing
Heating
OPERATING INSTRUCTIONS
1. Cut food ingredients into pieces no longer than ¾inch per side.
2. Use the measuring cup to measure ingredients according to the recipe. Pour food materials into the jar.
Add water or liquid according to the recipe. Use a measuring cup or the guidelines on the jar.
NOTE: Do not overload the jar. The maximum volume should not exceed 56 ounces for cold liquids and
48 ounces for hot liquids/soup.
3. Place the jar cover on the jar and twist it clockwise to secure it. Firmly insert the feeding lid. Place the
jar onto the blender chassis.
4. Plug the blender into a wall outlet. Press the start button, then select your desired time/speed or
preset program. Press start again to begin operation.
NOTE: If necessary, press stop to cancel operation and change time/speed or select a dierent program.
5. The blender will sound to indicate it is finished. Remove the jar and carefully pour out the contents.
Add additional ingredients if necessary.
NOTE: Be careful of steam. Do not violently pour liquid.
NOTE: Heating temperatures are approximate. The exact temperatures will fluctuate up and down for the
duration of the program.
TROUBLESHOOTING
|7
REASON
Did not push start
System not fully reset yet
Plug not inserted correctly Properly insert plug
PROBLEM
Food not blended
Food sticking to
bottom of jar
E1 error
Buttons not responding
Indicator light on but
blender not working
Power indicator
light not on
SOLUTION
Push start to begin selected function
Disconnect from power for 3 minutes
then power on
Jar not clean
Too many ingredients added
Clean the jar
Use correct amount of ingredients
Food ingredients too large, or too
many ingredients
Water on connecting surface
Clean the jar
Wipe o water
Blending with no load
Water on connecting surface
Disconnect power and reset
Wipe o water
Too much or too little water
Power voltage low
Too much or too little food ingredients
Ensure water level is correct
Connect to correct voltage
Use correct amount of ingredients
Blending with no load
Jar lifted when blender is working
Water on connecting surface
Disconnect power and reset
Wipe o water
E2 error
E3 error
E4 error Wipe o waterWater on connecting surface
CLEANING
NOTE: Do not immerse or soak the appliance in water or any other liquid. Both the jar and chassis have
electrical components.
•Unplug the appliance before cleaning or storage.
•Add clean water and mild detergent to the jar and hold the “Pulse/Washing” button to clean the interior
of the jar. Repeat if necessary.
•Clean the exterior of the appliance with warm water and a soft cloth.
•Rinse the interior of the jar and accessories with warm water and dry it with a soft cloth. Be careful not
to cut yourself when cleaning the blade.
•Do not clean with steel wool, abrasive detergents, or corrosive liquids like gasoline or acetone.
•Place the jar and chassis in a cool, well-ventilated place to dry.

All items can be returned for any reason within 60 days of the receipt and will receive a full refund as long
as the item is returned in its original product packaging and all accessories from its original shipment are
included. All returned items will receive a full refund back to the original payment method. All returned
items will not be charged a re-stocking fee.
All returned items require an RA (Return Authorization) number, which can only be provided by a Best
Choice Products Customer Service Representative when the return request is submitted. Items received
without an RA may not be accepted or may increase your return processing time. Once an item has been
received by Best Choice Products, refunds or replacements will be processed within 5 business days.
All returns must be shipped back to the Best Choice Products Return Center at the customer’s expense. If
the reason for return is a result of an error by Best Choice Products then Best Choice Products will provide
a pre-paid shipping label via email. Boxes for return shipping will not be provided by Best Choice Products,
and is the customer’s responsibility to either use the original shipping boxes or purchase new boxes.
Pictures may be required for some returns to ensure an item is not damaged prior to its return. Items
returned are not considered undamaged until they are received by Best Choice Products and verified as
such. All damages to items are the customer’s responsibility until the item has been received by and
acknowledge by Best Choice Products as undamaged.
CONTACT US; WE’RE HERE 7 DAYS A WEEK TO HELP YOU!
WARNING
Manufacturer and seller expressly disclaim any and all liability for personal injury, property damage or
loss, whether direct, indirect, or incidental, resulting from the incorrect attachment, improper use,
inadequate maintenance, or neglect of this product.
PRODUCT WARRANTY INFORMATION
bestchoiceproducts.com customerservice@
bestchoiceproducts.com 844.948.8400 LEARN MORE!
ENJOY YOUR PRODUCT!
This manual suits for next models
1
Table of contents
Other Best Choice Products Blender manuals


