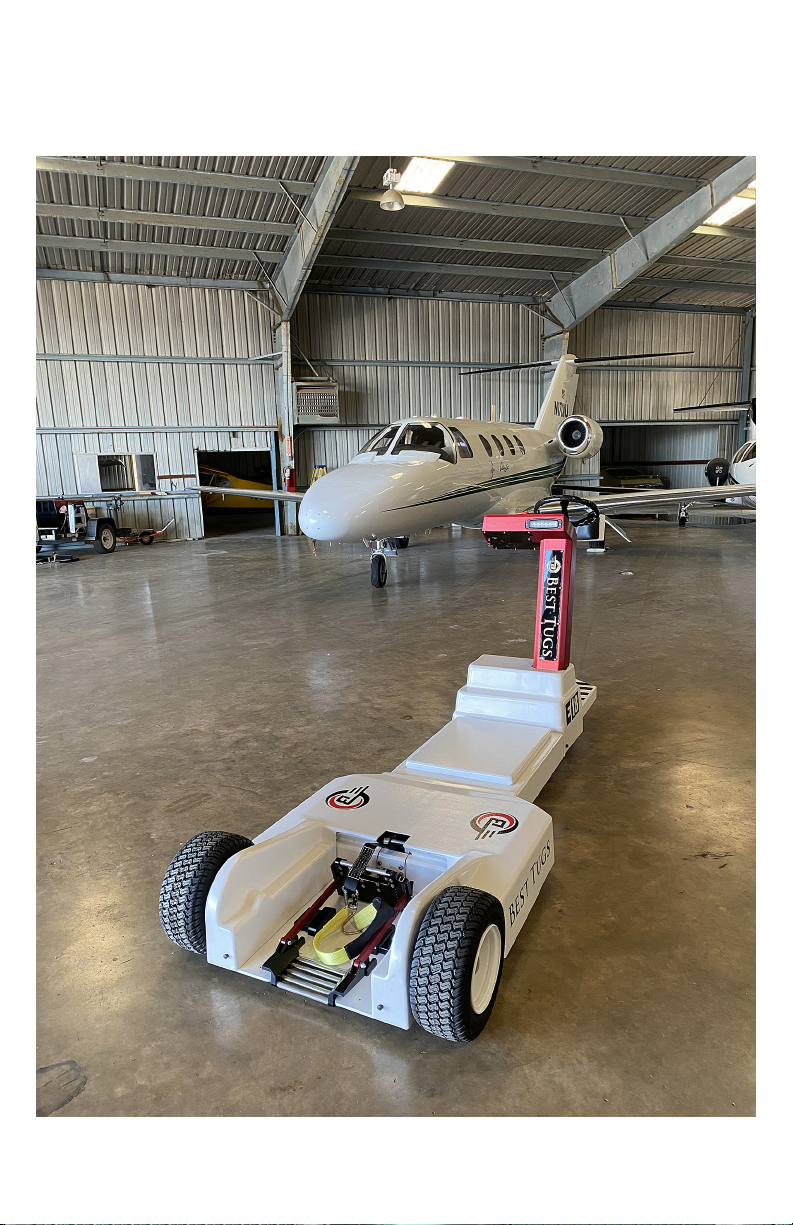
Best Tugs Echo 12 User manual
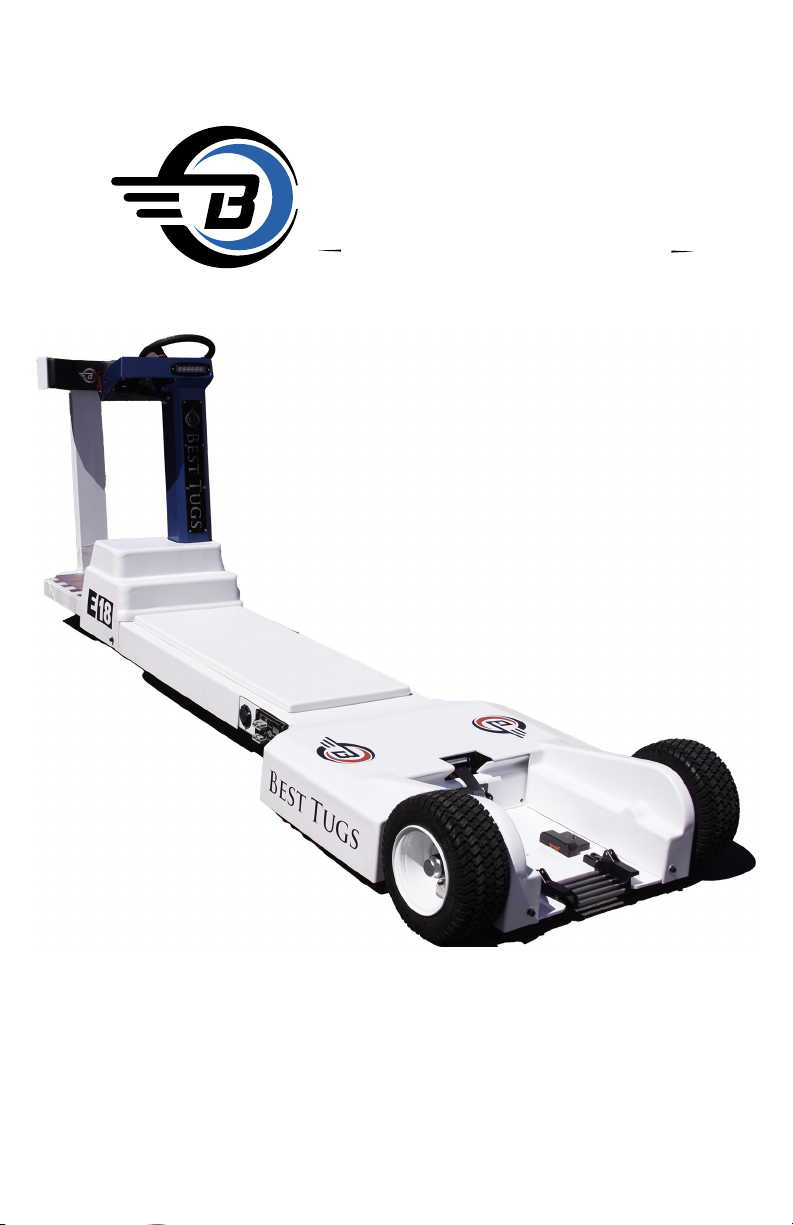
Echo
USER MANUAL
12, & 18
Best Tugs
Because Your Pla ne Deserves It

252 West 3560 North
Spanish Fork, UT 84660
800.914.2003
INTRODUCTION
Best Aviation
Products
At Best Tugs™, we pride ourselves on building the most innovative
and advanced tugs in the world. We work diligently to ensure
that the quality and workmanship of your tug exceeds your
expectations and are confident that you will see the difference in
every part of your Best Tugs™experience.
We designed this guide to provide you the information needed to
make your experience even better… and while we are confident
that this guide will answer your questions, we are always here to
chat with you on the phone. You can reach us at 800-914-2003.
Thank you again for choosing Best Tugs™.

4
CONTROL PANEL FUNCTIONS
Touch Panel
Echo uses a special weather-resistant
touch panel to control the tug’s func-
tions. Hand controls control steering
and throttle; the touch screen controls
everything else.
Navigation is similar to working with
your smartphone; with a main-screen
and sub-menus. The screen is self-doc-
umented. If you have any questions,
please call us at 800.914.2003
Note: You may not have everything
shown on the example screen.
The tug is unlocked from the factory.
You can lock the tug so that it requires
an access code. You can set up as
many access codes as there are opera-
tors. The factory default code is 8181
Notice the two icons at the top right
of the touch screen. The icon with
three-bars will let you navigate to the
sub-menus.
The yellow warning is only present
when reporting a fault; if you en-
counter a fault, please check trouble
Press “Accept” to start the tug
Warning!
You must correctly select the LOAD (upper-right) the tug will
be handling. The load indicator bar on the right side of the
screen will turn from green to yellow and then red if you are
over-stressing the plane.
If you selected an 18,000 lbs load and moved a 4,000 lbs
plane, you will never see yellow or green, and you probably
overstressed and damaged your nose gear.
shooting on page 15, or call us at
800.914.2003. Faults are verbosely re-
ported and you can check their history
in the sub-menu.

5

6
Please read these instructions
before beginning.
For any questions
call us at 800.914.2003
Tools Needed:
• Phillips Head
Screwdriver
(Drill/Impact is easiest)
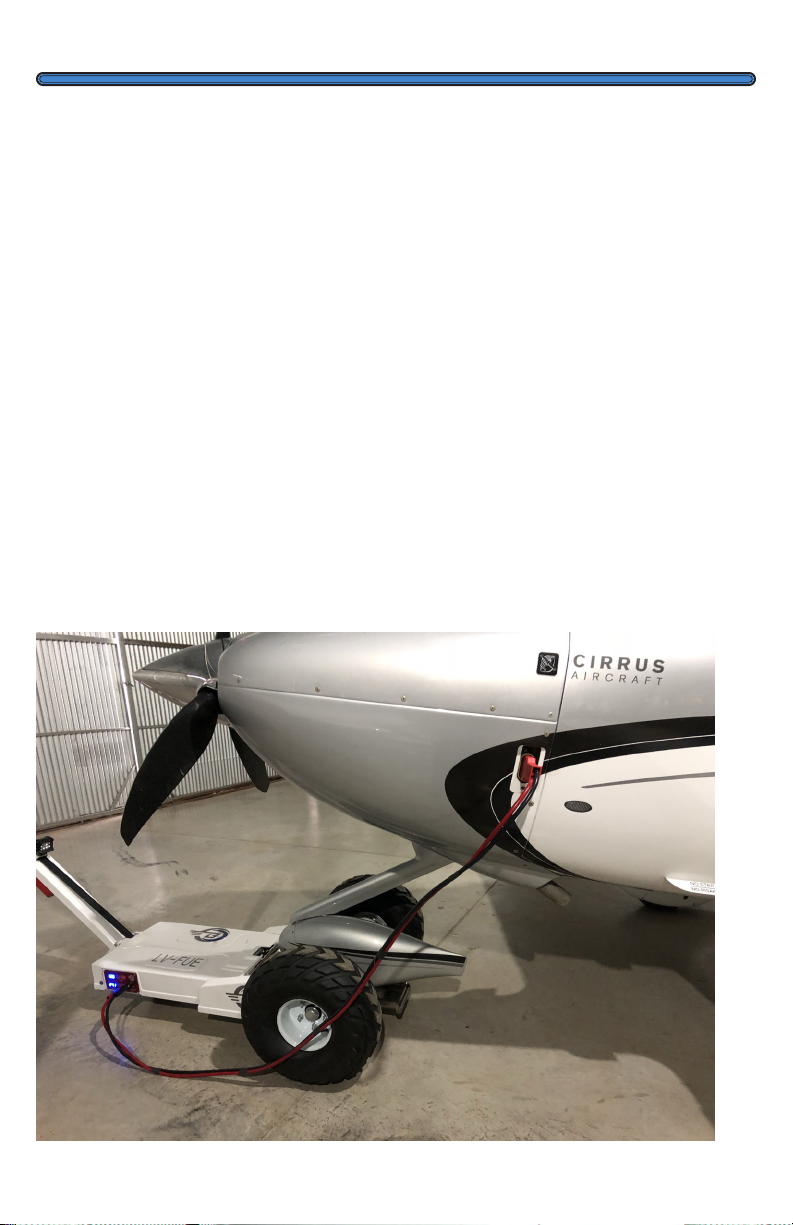
1. The Echo tug is ready to drive off of
the crate that it ships in.
2. Remove the screws marked with red
paint. Remove both the front and
back end panels and release/remove
the standard ratchet straps that are
holding the tug in place. The panel
at the rear of the tug has a double
hinge on it. Lay down the end panel
and flip the second panel over to
make a ramp.
3. Turn the tug on by rotating the red
E-Stop on the end of the control
panel clockwise and stepping on the
footswitch.
4. To operate, someone must be
on the tug and depressing the
safety master switch on the
floorboard.
5. Press accept. Slowly ease the
direction/speed control, found to the
right of the steering wheel, towards
you to carefully back the tug out of
the crate.
6. Continue reading for further
instructions on how to operate your
tug safely.
UNCRATING INSTRUCTIONS
Please Email cool pictures of
your tug and plane to sales@
besttugs.com. You may see
it on our website or social
media. (By sending images, you
expressly permit us to use these
images for marketing purposes.)
Note: Foam filed tires
have a screw in the
tire from the factory.
It is safe to remove
the screw.
Safely cocooned for shipment

7
INITIAL USE
Your tug arrives ready to operate.
Hop on and drive.
1. Power/Emergency Stop
Rotate clockwise to power on,
push in to turn off. CAUTION! Do
not turn off while in motion, unless
an emergency stop is needed,
this aggressively shuts down the
system and locks parking brake.
2. Master Switch Foot Control
Turns tug on and off. The operator
must be standing on the tug,
depressing the foot control to
operate the tug. NOTE: Tug will
not turn on if E-Stop is depressed.
3. Read the warning screen
Press accept to begin operation.
Warning: Tight turns create
massive centrifugal forces. You can
turn so tightly that it is possible to
fling yourself off of the tug. Think
smooth and gentle.
We strongly recommend using
your tug without an aircraft
attached to get used to the
controls and movements; this is a
very user-friendly system, but it can
take a bit of practice to get familiar
with initially. Change the drive
direction (PUSH/PULL), vary the
speed by how much you push/
pull the direction/speed control.
Make sure you are comfortable
with the throttle, maneuverability,
and functionality of the tug before
moving your plane.
INITIAL USE
Please familiarize yourself with
how long it takes for your plane
to ramp up/down and stop; that
“coast” when slowing is due to the
software that protects your nose
gear from unnecessary damage
and stress. Take the time to get
used to this feature and be aware
of it as you move your aircraft.
Check your plane’s POH to verify
the maximum turn radius for your
particular nose gear. The tug
can turn your plane at an angle
that may exceed the nose gear’s
maximum turn radius. Best Tugs™
assumes no responsibility for
any damage caused by the tug
operator misusing the equipment.
As the operator, you have the
responsibility to be familiar with
your tug, your plane, and their
specific limitations.
Check the surroundings of the
plane, remove any obstructions,
verify that your path is clear, and
your propulsion systems (prop),
wings, and tail clear. Please verify
that your wheel is secure on the
tug, including strapping it down.
Finally, remove the wheel chocks.
You are ready to move your plane.
Always use LOW speed when
a plane is loaded.
8
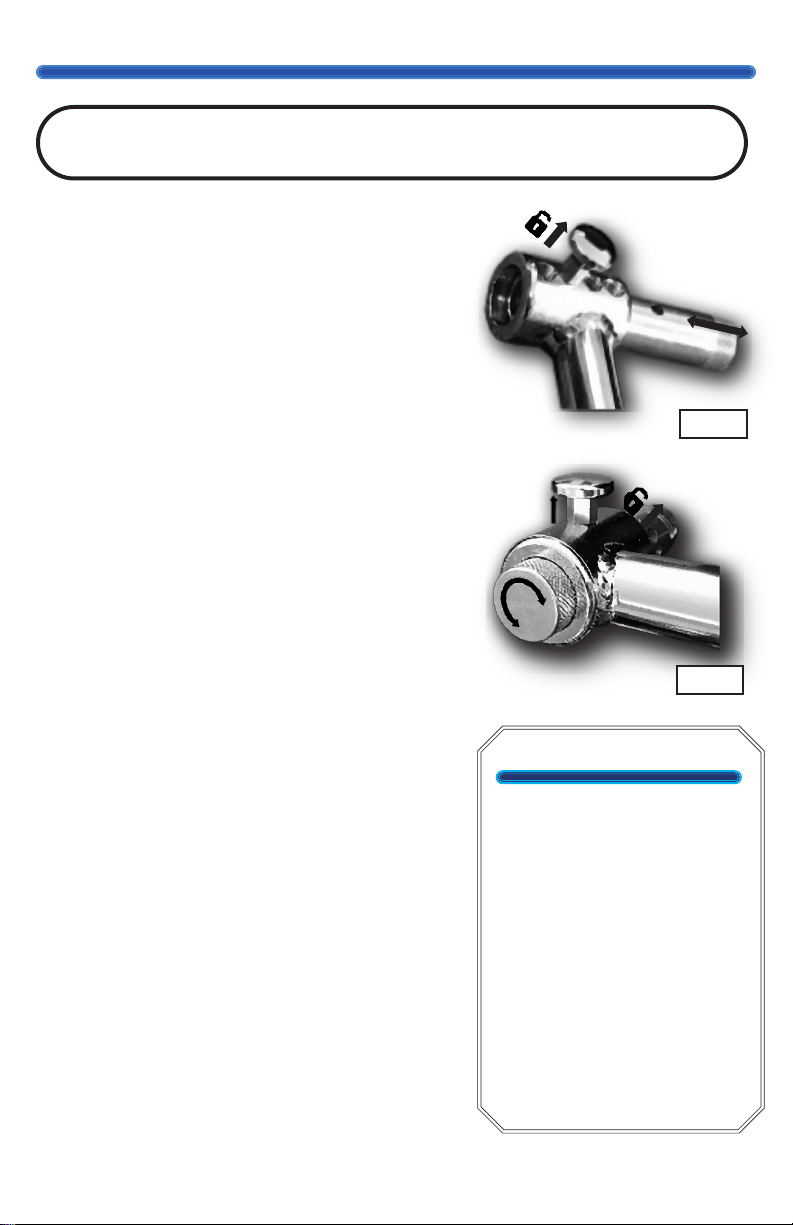
NOTE: Quick Lock Fork and Retractable Gear Attachment
ARE NOT USED TOGETHER
FIG 7
FIG 8
INITIAL USE
Setting Up the Quick Lock Fork
Option: Standard Ramp
TIP: It is easier to set up your QLF—if you
give yourself plenty of slack in the strap.
1. Right Fork - Push the spring-loaded
locking slide on the right fork of the QLF
to the left until it locks into place. It is
locked when the slide does not return
to the open position on its own. (FIG 7)
To release the slide, lift the drop pin and
allow the slide to return to its original
position.
2. Place the QLF over/in the nose gear
connection.
3. Left Fork - Lift the drop pin on the left
fork and rotate the slide until it fits firmly
against the nose gear. (FIG 8) The less slop
and wiggle, the better. Once the slide is
fitting snugly, release the drop pin and
continue twisting until it falls into place to
lock the slide. See FIG 10 and FIG 11.
Setting Up the Wheel Chock
The wheel chock drops into the loading
tray between the two brackets. Line up
the holes on the RGA to the holes on the
bracket in the loading tray and insert the
pin. Make sure both ends of the pin are
clearly visible and pin is fully inserted.
(FIG 12)
First Use
If you are using an Easy Load
or Lazy Susan configuration:
the tug comes from the
factory with the tire cradle
in a loaded position. Unlock
the hook and then physically
pull the locking hook back
to release the cradle before
physically moving the ramp
to the loading position. Note:
Before each use, double-
check your loading tray.
Repeat the step of manually
lowering the ramp if needed.

9
DO NOT USE QUICK
LOCK FORK AND
RETRACTABLE GEAR
ATTACHMENT
AT THE SAME TIME
INITIAL USE
Loading
Double-check your attachments to
make sure they are correctly attached,
and the setup steps followed.
1. Chock aircraft mains. Position the
tug with its nose wheel centered
on the ramp.
2. Put the winch in neutral/reverse
and pull enough slack in the strap
to attach QLF for wheel pant
planes or axle strap for retractable
gear aircraft.
3. Before you begin winching, set
the winch to retract and winch the
plane onto tug’s loading tray.
Note: If you are comfortable with
your throttle, you can choose to
winch the plane onto the tug
while very slowly driving the tug
forward, which makes winching
easier. Keep wheels chocked if you
decide to use this method.
Unloading
1. Make sure the tug is in line with
the plane. Chock the aircraft
mains.
2. Crank the winch handle slightly to
release stress on winch direction
selector; switch to unload/neutral.
3. Select “PULL” on the control panel
and slowly drive tug
away from aircraft.
See BestTugs.com for instructional videos on loading.
Standard Ramp Operation
Switching from
Wheel Chock to QLF
Pull the long pin and remove the wheel chock from
the loading tray and take the carabiner off the tow
strap. Take the winch strap in one hand and the
QLF in the other. Take the QLF pin out of its hole by
pushing the springing wedge down and removing
the pin. Slip the winch strap onto the pin and push
the pin to the original position. (FIG 9) Line the strap
loop up with the QLF pin holes then push the pin
back through the strap and QLF holes. Ensure the
spring wedge holds the pin in place.
Now that your wheel chock is
set up for your specific plane,
you are ready to winch it into
place and move your aircraft.

10
UNLOAD
UNLOADUNLOAD
Lazy Susan/EZ Load Operation
Your Cage can and should be
adjusted to more tightly fit your
wheel. Both the diameter (thumb-
screws) and width (slider) can be
adjusted. See Initial Use on page 7
for set up instructions.
If you have a Lazy Susan, lock the
rotation before loading or unload-
ing. Locked, the Lazy Susan now
behaves as an EZ Load. Be sure
your tug and aircraft are in line
with each other before loading/
unloading to avoid damage to your
tug/aircraft.
To lock the Lazy Susan so it cannot
rotate, engage the locking mecha-
nism by selecting Load or Unload/
Down, depending on what you
are going to do, and line up the
plane and tug until the locking
mechanism engages. You can not
unload a plane until the Lazy Susan
is alighed AND locked. To allow the
Lazy Susan to rotate—push Rotate/
UP, to disengage the locking mech-
anism.
In the Unload/Down switch posi-
tion (hold the silver button down
on older models), the EZ load
locking device releases when the
weight of the plane’s wheel shifts
from contacting the ramp and
presses against the back of the
Cage. Note: this is a safety feature
to prevent the tug from releasing
while you are pulling your tug.
Loading:
Make sure the ramp is down. If it
is not in the down position, select
Unload/Down and manually lower
the ramp. Drive the tug under your
wheel. When your plane is loaded
correctly, the ramp automatically
locks into the upright and locked
position.
Unloading:
Select Unload/Down on the rocker
switch (silver button on older mod-
els) to allow your plane to unload.
Carefully move the tug towards the
chocked aircraft; this causes the
nose wheel to contact the back of
the Cage, relieving pressure from
the ramp and disengages the lock-
ing device. Then as you pull away
from the plane, the tire pushes the
ramp open.
An advanced maneuver is; while
moving the plane towards you,
press the Unlock on the rocker
switch (silver button on older mod-
els) to allow the locking device to
release when the ramp pressure is
removed, then reverse the throttle.
The tug’s autothrottle allows the
plane to continue to move towards
you for a moment during the
autothrottle’s slow-down/reverse.
That lets your plane press against
the back of the Cage, removing the
pressure against the locking device,
and then you can pull the tug from
under your wheel.
11
Power Options
JumpStart: Provides High
cold-cranking amps to assist in start-
ing your engine (12 Vdc and 24 Vdc).
This option uses power from your
tug’s batteries to assist your aircraft’s
batteries when starting your plane.
Note: Even when the tug is off, the
JumpStart panel is live! (Although
the readouts won’t show until the
tug is on.)
GPU: The Ground Power Unit is
used to power your avionics and
other lower power demand systems
in your aircraft from the standard
110 Vac wall connection. You have
28.5 Vdc at 25/50 Amps. Note: Do
not use the GPU to power air con-
ditioning or pitot tubes. Warning:
battery damage is possible—the GPU
should not be used to charge either
the tugs or the aircraft’s batteries!
JumpStart + Boost: Press the
silver button to the right of the
JumpStart JumpStart panel, and the
tug gives you thirty minutes (from
the time you pushed the button.)
with over 28 Volts from the GPU
and all those amps from the batter-
ies providing power to the plane.
The disadvantage of using only the
JumpStart option is that you are us-
ing the tugs batteries that discharge
with time, and some planes require
over 28 Volts before they can recog-
nize the external power source. With
the JumpStart plus Boost, you can
combine both sources of power for
an excellent source of current at the
correct voltage to start your plane.
GPU PANEL
W/ EXPOSED 110 VAC PORT
JumpStart Panel
JumpStart Panel
w/Silver Boost Button
Plug the cable into your plane
first! Which service your plane
gets depends on which pow-
er panel you insert the cable.
See page 16

12
Tighten the wheel lugs once
a quarter to 70 ft/lbs. The
recommended tire pressure for inner
tube equipped tires is 45 PSI.
The steer tire needs to be re-greased
every year, the drive tires need to be
repacked every two years.
Tighten chains annually for safe
operation. To tighten chains, remove
a couple cover screws in the front
and then loosen the velcro around
the perimeter of the cover, loosen
five (5) bolts on the motor mount.
Using a pry bar, tighten the chains by
pushing against the axle until there
is little to no slack in the chains, while
keeping chain tension, re-tighten
bolts. If you have any questions about
this process, give us a call.
Winch straps (on tugs equipped with
winches): Before each use, check
straps for damage or loose stitching.
If the strap is damaged, replace it
before use. Replace your winch straps
annually; there is cumulative UV
and oxidation damage that can be
invisible to the eye.
Best Tugs™ will replace your strap
once a year for free—as long as you
own your tug. Just pay shipping and
handling. Call sales at 800.914.2003
to order; exclusions
apply.
The Lazy Susan option needs to
have the central bolt tightened and
moving parts lubed with lightweight
oil annually. It is found centered
under the Lazy Susan. Failure to
maintain this may cause the failure of
the bearing ring. Loosen the locking
nut and tighten the central nut until
tight, but not so tight that the Lazy
Susan cannot rotate. Re-tighten the
locking nut after you have completed
the adjustments.
If the Lazy Susan’s locking
mechanism fails to engage,
disconnect the wires (unplug the
pins) of the solenoid (Left side
when looking from the ramp side
and golden in color) and twist
counterclockwise to remove. On
older models, manually align the
Lazy Susan until you find the only
opening. Clean the opening below
of oils and debris. Replace the
Store your tug in an area that is
dry and safe from the elements.
Electrical systems are not affected
by limited exposure to rain and
snow. We do not recommend
extended exposure.
Always turn off your tug and
accessories.
If you do not plan on using your
tug for an extended period, leave
your tug plugged in so the smart
charger can take care of the
battery. If you leave the tug on and
the charger plugged in, the charger
could fry your batteries because it
would not switch to trickle mode.
Storage
Maintenance

13
Maintenance
solenoid and re-plug in the wires.
Cleaning
Automotive cleaners, waxes,
and polishes are suitable to use
on your tug.
We designed your tug to resist
rain and snow. However, it is
not waterproof. Exercise the
same type of care with your tug
as you would for your aircraft or
automobile.
Under the cover
Periodically cleaning under
the cover helps protect against
corrosion and possible electrical
control problems created by dirt,
grime, and chemicals that are
part of the operating environ-
ment and that typically exist in
battery-powered systems.
When working around any
battery-powered system, proper
safety precautions should be
taken. These include, but are not
limited to: proper training, wear-
ing eye protection, and avoiding
loose clothing and jewelry.
Use the following cleaning pro-
cedure for routine maintenance.
Never use a high-pressure wash-
er to clean the interior.
1. Remove power by discon-
necting the battery.
2. Discharge the motor con-
troller’s capacitors by con-
necting a load (such as a
contactor coil) across the
controller’s B+ and B- termi-
nals, or wait 15 minutes.
3. Remove any dirt or corrosion
from the power and signal
connector areas. The inte-
rior components should be
wiped clean with a moist rag.
Dry it before reconnecting
the battery.
4. Make sure the connections
are tight.
14
Battery Care
Your tug has a smart charger
with trickle charge and battery
maintenance cycles. To charge,
plug the charger cord into the
tug, then the power cord into
a standard power outlet. You
cannot overcharge when using
the included charger.
Always turn off the master
switch when charging.
We suggest charging your tug
when the battery falls below
around 70% (at rest) for optimal
battery life (for sure before 30% at
rest). Note: The tug continuously
and instantaneously calculates
the state of charge, which is why
the percentage fluctuates while
moving your plane. We have seen
as low as a 10% charge displayed
when using a fresh battery and
moving a heavy plane. To read
the resting battery’s charge,
leave the tug at rest for at least
60 seconds. We have seen a 10%
drop from freshly charged just by
moving the tug in and out of the
hanger. The discharge rate is non-
linear.
If you notice shorter times needed
between charges, your batteries
are beginning to wear out.
Lead Acid batteries are
surprisingly delicate—damaged
by direct and indirect effects:
environmental, user induced,
misapplication, and on and on.
For instance, charging with
a voltage above 14.4 volts or

15
12 Volt 35 AH Sealed AGM Battery.
Battery Care
Continued
Acceptable brands include Duracell, UPG, Bright Way Group, Panasonic,
Interstate, and others. (The previous are registered trademarks of the respective companies.)
Length: 7.68 in
Width: 5.12 in
Height: 7.09 in
Volt age: 12
Lead Acid Type: Deep Cycle
Capacity: 35AH
Chemistry: Lead Acid
Lead Acid Design: AGM
Product Category: Sealed Lead Acid
Product Subcategory: Deep Cycle
Terminal Type: J
allowing the battery to discharge
completely are the two most
common ways to damage a lead-
acid battery.
Even new batteries can be
ruined in just a few weeks by
being discharged too much or
left uncharged for too long; for
this reason, Best Tugs cannot
warranty the batteries as we have
no control over the end-users’
actions.
Modern microprocessor-based
smart chargers use switching
circuits; they are lightweight and
designed to protect themselves
against reverse polarity
connection. They also have an
annoying feature of not charging
if the battery’s voltage is below
some arbitrary value.
If you left the tug on and it no
longer charges, a cheap 12-volt
car charger with a volt-meter is
your best option to try and restore
the battery. Note: Most local
battery/automotive stores carry
replacement batteries.
To recover the battery pack or
diagnose their condition:
• Connect a twelve (12) Volt
charger with a meter across
the terminals of each battery,
one battery at a time.
• If you get a reading of zero
(0) volts, a short circuit has
occurred, replace the battery.
• If your battery reads less than
10.5VDC when charging, then
the battery has a dead cell,
replace the battery
• The battery charger indicates
fully charged, but the voltage
is below 12.4VDC? The battery
is sulfated, replace the battery
soon.
Are all batteries fully Charged?
The tug should be able to resume
normal functions. If not, call us.

16
Check the surroundings of the
plane, remove any obstructions,
and the wheel chocks. The
throttle is also the directional
control (PUSH/PULL), then twist
the throttle to start moving. Make
sure you familiarize yourself with
how long it takes for your plane
to ramp up/down and stop. That
“coast” when slowing is due to
the software that protects your
nose gear from unnecessary
damage and stress; take the time
to get used to this feature and be
aware as you move your aircraft.
We strongly recommend moving
your tug without aircraft attached
to get used to the controls and
movements. As you are moving
your plane, be sure your nose
gear can handle the turns you
are taking. As the operator, you
are responsible for knowing the
limitations of your specific aircraft.
Moving Your Plane
Tips, Tricks, and Warnings
Always use wheel chocks
when loading and unload-
ing your plane.
CAUTION
The winch handle rotates quickly
as your plane unloads from the tug,
keep hands clear (FIG 15)
Leave the slack left from unloading
the plane unspooled; this leaves
the attachment/strap ready to be
attached for your next flight.
Anchor your hand against the control
tower and move the throttle with your
thumb. In effect, you’re cuddling the
throttle under your thumb, not just
the tip; this assists in minimizing any
jerkiness. Switching to low is strongly
suggested when working in tight
spaces.
Always turn off the master
switch when charging.
Common Error Codes
50: Under Voltage
52: Under temperature
53 Over Temperature
90: Motor Over Temp Cutback
95: Controller Under Temp
96: Stall Detected
97: Controller Over Temp
99: Undervoltage Cutback
102: User pressed the E-Stop

17
The Echo’s EZ Load tire cradle
can handle a variety of tire sizes
depending on what options you
chose. Note: exceeding these
parameters may force and hold
the locking mechanism into a
locking position. The oversized
tire must be lifted out of the
cradle manually to release it.
After first loading your aircraft
into the EZ Load cradle, adjust
the cradle so that it properly
cradles your tire and tight-
en. Note: these bolts are only
hand-tightened from the factory.
Adjust the side plates to cen-
ter your tire and tighten. Use
a 3/16” allen wrench. Using a
metric size may damage the tug.
Exceeding the tug parameters
creates situations where the
locking hook or Lazy Susan
locking pin may not engage or
disengage. Carefully jogging
the tug back and forth may
help. Calling the Best Tugs™
support team is suggested.
800.914.2003
Always turn off the master
switch when charging.
Customization, Tips, and Tricks

18
TROUBLE SHOOTING
QUESTION SOLUTION
The tug was
left on and the
Batteries are
dead
A cheap 12 volt battery charger (commonly
found at Walmart) can sometimes save
the batteries. If recovery is unsuccessful,
replacement batteries can be purchased at
most battery/automotive stores in the U.S.
Quick Lock
Fork and
Retractable
Gear
Attachment
were used at
same time.
DO NOT use these two attachments together.
Please go to page 5 for instructions
The master
switch is “on”
but the tug is
not moving.
There are two possible solutions.
1. The tug will turn off the computer after 20
minutes of inactivity. To reset the computer,
turn the tug’s e-stop switch off for three
seconds and then back on.
2. Make sure the red E-Stop is not pushed in.
The tug will not turn on unless E-Stop has
been twisted out, and someone is stepping
of the foot switch.
I started to
move my
plane, but my
tug stopped, a
light is flash-
ing.
See faults on the sub-menu for details.
Tug died
outside
of hangar
with the
parking brake
engaged.
There is a manual override under the cover. It
is a red handle on the motor pointing at the
batteries. Pull it up (it will only pop up a few
degrees) the parking brake will disengage and
allow the tug to be pushed freely.

19
Our tugs do not instantly stop.
This feature is to protect your aircraft’s
landing gear. Failure to compensate
for this soft stop can cause damage to
your aircraft. “Slowly” is the word to
live by when you are in tight spaces
or loading the tug. We recommend
practicing with the tug before using it
on your aircraft to allow familiarization
with this soft stop feature.
Chock your mains! You don’t want
to push your aircraft into the hanger
wall...
During operation, be aware of
your surroundings. Never put your-
self between the tug and any object!
A tug capable of pushing thousands
of pounds of aircraft can push you
against an obstacle with thousands of
pounds of pressure. There is a risk of
serious injury, death, or dismember-
ment. Proper operation is your respon-
sibility.
Best Tugs™tugs do not have sec-
ondary brakes. The motor/transmis-
sion provides all braking. Your aircraft
can roll freely if your transmission fails.
As the operator, it is your responsi-
bility to keep your aircraft within safe
limits. Never move an aircraft on a
slope or environment where the loss
of tug breaking would put you or your
aircraft in danger.
Exceeding the parameters of the
tug can cause future transmis-
sion failure. Best Tugs™tugs load
ratings are designed for hard flat and
level surfaces. Use on a slope drasti-
cally changes those parameters. The
steeper the grade, the more energy
it takes to move your plane—it is as if
the plane’s load parameter increased.
The transmission’s gears have a special
hardened surface, a one-time event
that exceeds the tug’s parameters can
degrade that surface.
Rough surfaces, such as grass, can
increase the rolling resistance of your
tires. The lower your tire pressure,
the larger the tire’s contact patch, the
deeper the tire deflection, resulting in
more rolling resistance. It now takes
more energy to move the airplane—
which is functionally equivalent (In
regards to the loaded weight charts)
to the plane weighing more. Even a
ten percent under-inflation could cause
your load to be over the limit—you
have just damaged the gears. Failure is
now a matter of when—not if.
DC motors heat up from the inside
out. If the casing is hot to your touch,
the internal components are probably
red hot. The larger the aircraft, the
more energy it takes to move that
load, causing heat buildup. Slopes and
rough terrain are like moving a larger
aircraft causing more heat buildup.
Moving aircraft long distances also
causes heat buildup. Excessive heat
buildup can damage the tug’s motor,
drastically reducing the tugs life span.
Best Tugs™tugs are designed for inter-
mittent use. The larger the tug, with an
appropriately smaller than rated load,
the longer a tug can be in continuous
usage. If you must move your aircraft
a long-distance, slow down or pause
now and then (See Loaded Weight
Tables) to allow for heat dissipation.
Critical Cautions

20
LOADED WEIGHT
These charts show the load capacity, in U.S. pounds, that each tug is capable of—for
specific grades, in degrees, for a given duty cycle.
Example 1: you have a E12 tug spec’d
for a King Air C90gtx and you do your
buddy a favor and move their King Air
350—you have just damaged the gears.
Failure is now a matter of when—not if.
Example 2: you used a E12 spec’d for
your King Air C90gtx, and pulled it up
a “short” 3-degree slope—you have just
damaged the gears. Failure is now a
matter of when—not if.
If you find that you have the wrong
tug for your plane’s environment,
please call us and exchange your tug
for the appropriate model. We have a
30-day exchange policy; you only pay
for the price difference and freight.
Did we mention that you need to
chock your mains?
E12 Load & Duty Cycle
Degree 6,250 9,375 12,500
0.0 100 100 100
0.5 100 91 68
1.0 100 67 N/A
1.5 79 52 N/A
2.0 65 N/A N/A
2.5 55 N/A N/A
3.0 N/A N/A N/A
E18 Load & Duty Cycle
Degree 9,000 13,500 18,000
0.0 100 100 100
0.5 100 87 66
1.0 96 64 N/A
1.5 76 50 N/A
2.0 62 N/A N/A
2.5 53 N/A N/A
3.0 N/A N/A N/A
Note: The issue with power train dam-
age is that it is cumulative. Typically it
does not cause immediate catastrophic
system failure, but rather a one-time
out-of-spec usage could damage your
power train such that regular in-specs
operation is now causing small cumula-
tive damage.
Critical Cautions
Continued
This manual suits for next models
1
Table of contents
Other Best Tugs Jack manuals


Popular Jack manuals by other brands

VONROC
VONROC TJ501XX Original instructions

Stromberg Carlson Products
Stromberg Carlson Products JET-3555 installation instructions

VEVOR
VEVOR TJP-5002S-B quick start guide

Clarke
Clarke Strong-Arm CTJ2250Q Operation & maintenance instructions

Sunex Tools
Sunex Tools NSJ0101 quick start guide

SCA
SCA PLU 382375 Owners and installation manual


