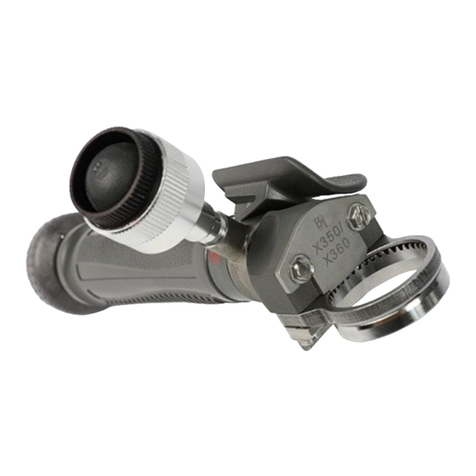
BETTCHER INDUSTRIES AirShirz Guide

Operating Instructions & Spare Parts List
Manual # 108057
Re-Issued: September 7, 2006
TMC # 805
For Assistance Contact:
BETTCHER INDUSTRIES, INC.
P.O. Box 336
Vermilion, OH 44089
U.S.A.
Phone: 440-965-4422
800-321-8763
Fax: 440-328-4535
www.bettcher.com

OPERATING BETTCHER AIRSHIRZ®
INSTRUCTIONS INDUSTRIES, INC. Rev. September 24, 2016
Page i
Information in this document is subject to change without notice.
No part of this document may be reproduced or transmitted in any form or any means, electronic
or mechanical, for any purpose, without the express written permission of Bettcher Industries, Inc.
Written permission to reproduce in whole or part is herewith granted to the legal owners of the
AirShirz®with which these Operating Instructions have been supplied.
Operating Instructions in other languages are available on request. Additional copies of Operating
Instructions are available by calling or writing your Regional Manager, or by contacting:
BETTCHER INDUSTRIES, INC.
P.O. Box 336
Vermilion, Ohio 44089-336
U.S.A.
Telephone: 440/965-4422
(In the U.S.A.): 800/321-8763
Fax: 440/328-4535
www.bettcher.com
The Information Provided in these Operating Instructions is
Important to your Health, Comfort and Safety.
For Safe and Proper Operation, Read this Entire Manual
Before Using this Equipment.
Copyright 2016 by Bettcher Industries, Inc.
All Rights Reserved.
Original Instructions

OPERATING BETTCHER AIRSHIRZ®
INSTRUCTIONS INDUSTRIES, INC. Rev. September 24, 2016
Page ii
TABLE OF CONTENTS
SECTION 1.0 Introduction 1
1.1 Machine Specifications 1
SECTION 2.0 Designated Use 2
2.1 Warning 2
2.2 Recommended Operation 3
SECTION 3.0 Function 11
3.1 Machine Function 11
3.2 Safety Recommendations & Warnings 11
SECTION 4.0 Safety Features 13
4.1 Air Supply Quick Disconnect 14
4.2 Blade Latch 14
4.3 Fully Enclosed Finger Loop 15
SECTION 5.0 Ergonomics & Environment 16
SECTION 6.0 Unpacking 16
SECTION 7.0 Installation 17
7.1 Configuration #1-Permanent Mount to 17
End of Air Supply Pipe
7.2 Configuration #2-Mount to Air Hose or Pipe 18
with Standard Quick Disconnect
SECTION 8.0 Instructions for Operation 19
8.1 The Blade Set 19
8.1.1 Blade Installation Sequence 20
8.1.2 Blade Removal Sequence 23
8.2 MicroBreak Strap 25
8.2.1 Adjusting the MicroBreak Strap 26
8.2.2 MicroBreak Strap Removal 26
8.2.3 MicroBreak Strap Installation 27
8.3 Operation and Product Handling 28
8.4 Fault Detection & Correction 30

OPERATING BETTCHER AIRSHIRZ®
INSTRUCTIONS INDUSTRIES, INC. Rev. September 24, 2016
Page iii
TABLE OF CONTENTS
(Continued)
SECTION 9.0 Maintenance 34
9.1 Daily/Periodic Checks 34
9.1.1 Blade Sharpness 34
9.1.2 Leak Tests 34
9.1.3 Lubrication 37
9.2 Adjustments 39
9.2.1 Finger Loop Post Screw Setting 39
9.2.2 Smoothness Adjustment 40
9.2.3 Stroke Adjustment 41
9.3 Blade Sharpening and Maintenance 43
9.3.1 Steeling the Blades 43
9.3.2 Grinding the Blades 44
9.3.3 Checking Blade Sharpness 47
9.3.4 Adjusting the Blade Nut 48
9.3.5 Replacing Blade Pivot Bushing 50
9.4 Assembly/Disassembly Procedures 51
9.4.1 Cover Removal 51
9.4.2 Cover Installation 52
9.4.3 Blade Latch Removal 52
9.4.4 Blade Latch Installation 53
9.4.5 Disconnecting Master Link 53
9.4.6 Connecting Master Link 54
9.4.7 Servo Linkage Removal 54
9.4.8 Servo Linkage Installation 55
9.4.9 Finger Loop & Spring Removal 57
9.4.10 Finger Loop & Spring Installation 57
9.4.11 Drive Link Removal 59
9.4.12 Drive Link Installation 62
9.4.13 Power Cylinder Removal 63
9.4.14 Power Cylinder Installation 72
9.4.15 Control Valve Removal 73
9.4.16 Control Valve Installation 74
9.4.17 Rear Fitting Assembly Removal 75
9.4.18 Rear Fitting Assembly Installation 75
9.4.19 Air Line Coiled Tubing Replacement 76
9.4.20 Air Line Filter Element Replacement 77
9.4.21 Removing Tubing from Barbed Fittings 79

OPERATING BETTCHER AIRSHIRZ®
INSTRUCTIONS INDUSTRIES, INC. Rev. September 24, 2016
Page iv
TABLE OF CONTENTS
(Continued)
SECTION 10.0 Cleaning 79
SECTION 11.0 Spare Parts List 82
11.1 Airshirz®Exploded View 82
11.2 Small Power Cylinder Assembly 88
11.3 Large Heavy Duty Power Cylinder Assembly 90
11.4 X-Large Heavy Duty Power Cylinder Assembly 92
11.5 AirShirz® Magnum Exploded View 94
11.6 XX-Large Power Cylinder Assembly 100
11.7 Optional Equipment Available 102
SECTION 12.0 About These Operating Instructions 103
12.1 Other Languages 103
12.2 Document Identification 103
12.3 Software and Duplication 104
SECTION 13.0 Contact Addresses and Phone 104

OPERATING BETTCHER AIRSHIRZ®
INSTRUCTIONS INDUSTRIES, INC. Rev. September 24, 2016
Page v
THIS PAGE INTENTIONALLY LEFT BLANK

OPERATING BETTCHER AIRSHIRZ®
INSTRUCTIONS INDUSTRIES, INC. Rev. September 24, 2016
Page 1
SECTION 1.0 INTRODUCTION
The Bettcher AirShirz®is a lightweight, yet powerful, pneumatic cutting tool designed to perform
operations previously performed by hand operated scissors or shears. It is highly effective for use
in poultry and industrial environments, designed with the highest possible standards for safety,
ergonomics, and productivity. This versatile tool, with its carefully engineered stainless steel
blades, brings consistent yield control to all operations.
The Bettcher AirShirz® described in this Operating Instruction has been tested
by an independent and certified body, the Pruef- und Zertifiezierungsstelle der
Fleischerei-Beruffsgenossenschaft, Mainz, Germany and complies with
Machine Directive 89/392/EEC and is also in conformity with prEN
12984:1997E "Food Processing Machinery Portable And/Or Hand Operated
Machines and Appliances Equipped With Mechanical Driven Cutting Tools
Safety and Hygiene Requirements", which includes compliance with the
following standards :
EN 292:1991 Parts 1 and 2
EN 31688 Acoustics
ISO 3744 Noise Measurement
EN 28662-1 Vibration Measurement
In addition, the Bettcher AirShirz® is also authorized by the USDA and Agriculture and Agri-Food
Canada for use in federally inspected meat and poultry plants.
1.1 Machine Specifications
Weight :
Power Unit
17 oz. – 24.6 oz. (480 g – 694 g) (Depending on Model)
Blade Set 4 oz. – 9.3 oz. (113g – 262g) (Depending on Model)
Size :
Power Unit
1-3/4 x 4 x 6 inches (4.5x10x15 cm)
Blade Set
Approx. 5 inches (13 cm) (Depending on Model)
Coiled Tubing 8 feet (244 cm) When Straight
Power Supply
Filtered Air At 80 to 120 PSI (5.5 To 8.3 Bars)
Air Usage
Approximately .2 Standard Cubic Ft/Min.
(5.5 l/min.) At 30 Cuts/Min.
Operating Temperature Range
0°C (32°F) to 40°C (100°F)
Exposed Materials
Stainless Steel, Anodized Aluminum, Nylon, Acetal,
Polypropylene, Nitrile, Polysulfone, Polyurethane, and
Polyetheretherketone

OPERATING BETTCHER AIRSHIRZ®
INSTRUCTIONS INDUSTRIES, INC. Rev. September 24, 2016
Page 2
SECTION 2.0 DESIGNATED USE
2.1 Warning
The Bettcher AirShirz®is used for the removal of fat and tissue, the recovery of lean meat
from fat in the poultry industry and as a universal cutting tool in other applications where
manual scissors are used. Any use of this tool other than those applications for which the
AirShirz® has been designed and built may result in serious injury.
WARNING
THE MANUFACTURER ASSUMES NO LIABILITY FOR ANY UNAUTHORIZED DESIGN CHANGES,
MODIFICATIONS,OR USE OF PARTS NOT SUPPLIED BY THE MANUFACTURER OR THE USE
OF
PARTS NOT DESIGNED FOR USE ON THAT SPECIFIC MODEL,AND INCLUDES CHANGES IN
OPERATING PROCEDURES MADE BY THE OWNER OR ANY OF HIS PERSONNEL.
FOR SAFE AND PROPER OPERATION,READ THE ENTIRE
MANUAL BEFORE USING THIS EQUIPMENT.
WARNING
SHARP BLADES MAY CAUSE CUT INJURY!
ALWAYS DISCONNECT POWER AND REMOVE
THE BLADE SET PRIOR TO SERVICING.
WARNING
THE BLADES ARE VERY SHARP.WEAR CUT RESISTANT
GLOVES WHILE OPERATING THE AIRSHIRZ
®
.
WARNING
AIRSHIRZ®MAGNUM
AMPUTATION IS POSSIBLE.THE BLADES ARE VERY SHARP.WEAR METAL
MESH CUT RESISTANT GLOVES WHILE OPERATING THE AIRSHIRZ
®
MAGNUM.

OPERATING BETTCHER AIRSHIRZ®
INSTRUCTIONS INDUSTRIES, INC. Rev. September 24, 2016
Page 3
2.1 Warning (Continued)
WARNING
ALWAYS CLOSE THE BLADES AND LOCK THE BLADE LATCH WHEN NOT IN USE.
CAUTION
USE ONLY REPLACEMENT PARTS MANUFACTURED BY BETTCHER INDUSTRIES
,
INC
.
USE OF SUBSTITUTE PARTS WILL VOID THE WARRANTY AND MAY CAUSE INJURY
TO OPERATORS AND DAMAGE TO EQUIPMENT.
2.2 Recommended Operation
There is an assortment of accessories available from Bettcher Industries to adapt the AirShirz®to
particular applications. Blade sets come standard in straight, curved, and ball-tip styles. Multiple
blade configurations allow for a variety of poultry processing applications such as those listed on
the following pages. These blades are not intended for cutting bones.
Special blade sets can be supplied for certain applications by contacting Bettcher Industries. Air
pressure regulators and air filters for industrial compressed air systems are also available through
Bettcher Industries. Food grade lubricants and spare parts are supplied by Bettcher Industries.
(See Section 11.2)
The following recommendations are not intended to be a total and comprehensive listing, but are
offered as a guide. Additional applications are possible.

OPERATING BETTCHER AIRSHIRZ®
INSTRUCTIONS INDUSTRIES, INC. Rev. September 24, 2016
Page 4
2.2 Recommended Operation (Continued)
Straight Blades
Part
Number
Description Typical Application
108498
1-3/8” Straight Blade Assembly (Serrated)
*General Applications
108499
1-11/16” Straight Blade Assembly
*General Applications
108539
2-1/2” Straight Blade Assembly (Serrated)
*General Applications
108169 3-1/4” Straight Blade Assembly
Cut tendons from tenders
*General Applications
108702
3-3/4” Micro-Serrated
Kevlar® and Fiberglass
108053
4-1/4” Straight Blade Assembly
*General Applications
108361
5-1/4” Straight Blade Assembly
*General Applications
* General Applications
Thigh Trim
Mark Tails For Tucking
Breast Trim
Hearts-Livers Separation and Trim-Gizzard
Cut Up Wings (Trim)
House Inspection
Remove Wing Tips
Back Up USDA Inspector
Remove Tails
Mirror Inspection Station

OPERATING BETTCHER AIRSHIRZ®
INSTRUCTIONS INDUSTRIES, INC. Rev. September 24, 2016
Page 5
2.2 Recommended Operation (Continued)
Gizzard Blades
Part
Number
Description Typical Application
108146
4-1/4” Gizzard Blade Assembly
Gizzard Open and Trim
108375
5-1/4” Gizzard Blade Assembly
Gizzard Open and Trim

OPERATING BETTCHER AIRSHIRZ®
INSTRUCTIONS INDUSTRIES, INC. Rev. September 24, 2016
Page 6
2.2 Recommended Operation (Continued)
Ball Tip Blades
Part
Number
Description Typical Application
108209
3-1/4” Short Ball Tip Blade Assembly
J-Cut Turkey Hens / Vent Opening
108055
4-1/4” Ball Tip Blade Assembly
Backup Vent Opener and J-Cuts
108208
4-1/4” Broiler Vent Ball Tip Blade Assembly
Backup Vent Opener

OPERATING BETTCHER AIRSHIRZ®
INSTRUCTIONS INDUSTRIES, INC. Rev. September 24, 2016
Page 7
2.2 Recommended Operation (Continued)
Low Profile Blades
Part
Number
Description Typical Application
108496
2-1/2” Low Profile Straight Blade Assembly
*General Applications
108475
4-1/4” Low Profile Straight Blade Assembly
*General Applications
* General Applications
Thigh Trim
Mark Tails For Tucking
Breast Trim
Hearts-Livers Separation And Trim-Gizzard
Cut Up Wings (Trim)
House Inspection
Remove Wing Tips
Back Up USDA Inspector
Remove Tails
Mirror Inspection Station

OPERATING BETTCHER AIRSHIRZ®
INSTRUCTIONS INDUSTRIES, INC. Rev. September 24, 2016
Page 8
2.2 Recommended Operation (Continued)
Tabletop Blades
Part
Number
Description Typical Application
108700
Micro-Serrated Tabletop Blade Assembly
Fiberglass and Textiles
108505
Tabletop Blade Assembly
Upholstery
108720
Kevlar® Tabletop Blade Assembly
Kevlar® and Heavy Fabrics

OPERATING BETTCHER AIRSHIRZ®
INSTRUCTIONS INDUSTRIES, INC. Rev. September 24, 2016
Page 9
2.2 Recommended Operation (Continued)
Curved Blades
Part
Number
Description Typical Application
108054
4-1/4” Curved Blade Assembly
*General Applications
108210
4-1/4” Evis Curved Blade Assembly
*General Applications
103799
4-1/4” Reverse Curve Blade Assembly
*General Applications
* General Applications
Thigh Trim
Mark Tails For Tucking
Breast Trim
Hearts-Livers Separation And Trim-Gizzard
Cut Up Wings (Trim)
House Inspection
Remove Wing Tips
Back Up USDA Inspector
Remove Tails
Mirror Inspection Station

OPERATING BETTCHER AIRSHIRZ®
INSTRUCTIONS INDUSTRIES, INC. Rev. September 24, 2016
Page 10
2.2 Recommended Operation (Continued)
Neck Breaker Blades
Part
Number
Description Typical Application
108170
Neck Breaker Blade Assembly
Rework / Salvage Necks
108224
Neck Breaker Inverted Blade Assembly
Rework / Salvage Necks

OPERATING BETTCHER AIRSHIRZ®
INSTRUCTIONS INDUSTRIES, INC. Rev. September 24, 2016
Page 11
SECTION 3.0 FUNCTION
3.1 Machine Function
The smooth actuation of the AirShirz®is achieved by controlling the amount of pressurized air
delivered to both sides of the power cylinder. The servo linkage detects the positions of the
movable blade and the finger loop, and generates a command signal to open or close the blade.
This command signal is delivered to the control valve which then feeds or vents pressurized air to
the power cylinder. The power cylinder drives a rod which rotates the drive link assembly. A
roller in the drive link assembly engages a slot in the movable blade and causes it to pivot,
opening or closing the blades.
The AirShirz®has the advantage of requiring much less hand force to operate, since the actual
cutting power is supplied by air pressure. A second advantage is that it requires less movement of
the operator's hand for a given size cut. The blades will open and close 45° while the finger loop
only moves about 23°.
The AirShirz®is held and operated in the same way as a pair of hand scissors. There is a thumb
hole and a finger loop. The blades close like scissors as the finger loop is squeezed, and open as it
is released. The movement of the blades follows the movement of the finger loop.
A return spring moves the finger loop outward to the "blades open" position, relieving the
operator's finger muscles during this phase of the cutting cycle. Since the AirShirz®gets its
cutting power from the air line, the only force the operator feels during a cut is the force required
to overcome the return spring. Therefore, the amount of exertion by the operator is constant
regardless of the difficulty of the cut.
The basic AirShirz®consists of 3 parts - the Power Unit; the Blade Set; and the Filter/Coupler.
The compressed air supply line should have a standard filter and pressure regulator. A lubricator is
not required.
3.2 Safety Recommendations and Warnings
When used properly, the AirShirz® is safe and easy to use. However, since this is a high powered
cutting device, it can cause serious injury if used carelessly.

OPERATING BETTCHER AIRSHIRZ®
INSTRUCTIONS INDUSTRIES, INC. Rev. September 24, 2016
Page 12
3.2 Safety Recommendations and Warnings (Continued)
WARNING
THIS ENTIRE OPERATION SECTION MUST BE READ
AND UNDERSTOOD BEFORE USING THE AIRSHIRZ
®
.
The blades are driven by linkages connecting them to the power cylinder. These linkages are
driven with a lot of force. Care has been taken in the design of the AirShirz® such that the
operator's fingers will be safely away from any pinch points as long as the unit is held in the
normal manner and operated with cover in place. For left handed users, an additional finger
guard is available to prevent the accidental placement of the finger in the blade opening (part
number 108455).
Never leave the AirShirz®with the blades open as serious injuries could result! When the
tool is not in use or is being handled in any way other than cutting product, (i.e., cleaning,
maintenance, etc.), the air supply should be disconnected at the quick disconnect.
WARNING
LEFT HANDED USERS!
ALL FOUR FINGERS MUST BE KEPT IN THE FINGER
LOOP DURING USE TO AVOID INJURY!
WARNING
IF AT ANY TIME THIS MACHINE DOES NOT APPEAR TO OPERATE NORMALLY,
OR EXHIBITS A MARKED CHANGE IN PERFORMANCE,IT SHOULD BE
IMMEDIATELY DISCONNECTED FROM THE AIR SUPPLY AND
TAGGED AS UNSAFE UNTIL SUCH TIME AS PROPER REPAIRS
ARE MADE AND THE MACHINE AGAIN OPERATES NORMALLY.

OPERATING BETTCHER AIRSHIRZ®
INSTRUCTIONS INDUSTRIES, INC. Rev. September 24, 2016
Page 13
3.2 Safety Recommendations and Warnings (Continued)
WARNING
SHARP BLADES MAY CAUSE CUT INJURY!
ALWAYS DISCONNECT POWER
AND REMOVE THE BLADE SET PRIOR TO SERVICING.
WARNING
THE BLADES ARE VERY SHARP.WEAR CUT RESISTANT
GLOVES WHILE OPERATING THE AIRSHIRZ
®
.
WARNING
AIRSHIRZ®MAGNUM
AMPUTATION IS POSSIBLE.THE BLADES ARE VERY SHARP.WEAR METAL
MESH CUT RESISTANT GLOVES WHILE OPERATING THE AIRSHIRZ
®
MAGNUM.
WARNING
ALWAYS CLOSE THE BLADES AND LOCK
THE BLADE LATCH WHEN NOT IN USE.
SECTION 4.0 SAFETY FEATURES
The AirShirz®is designed to be safe and easy to use. The functions of these features should be
clearly understood before operating this tool.

OPERATING BETTCHER AIRSHIRZ®
INSTRUCTIONS INDUSTRIES, INC. Rev. September 24, 2016
Page 14
4.1 Air Supply Quick Disconnect
The push of a tab will disconnect the twin coiled tubing from the coupler (see Figures #1 and #2).
To reconnect the air, push the couplings back together until the tab on the coupler clicks into
position. (Sometimes it may be necessary to push the tab inward while inserting the connector).
This connector should be disconnected when the tool is not in use.
WARNING
ALWAYS CHECK THAT THE BLADES ARE CLOSED
AND THE BLADE LATCH IS IN THE LOCKED
POSITION BEFORE CONNECTING THE AIR LINE.
4.2 Blade Latch
There is a latching ring just forward of the finger loop. When the finger loop is pulled inward
against the power cylinder, ("blades closed" position), this ring can be rotated down against the
finger loop. (See Figures #3 and #4). In this position, the finger loop will be locked closed and
will be unable to drive the blades once they are closed.
Care should be taken to assure that the blades are closed before locking the blade latch. If the
AirShirz®is connected to the air supply, simply hold the tool as if to make a cut, pull the finger
loop fully inward, causing the blades to close, and rotate the latch to the locked position.
If the air supply is not connected, close the blades manually by squeezing them together with a
gloved hand. Then pull the finger loop fully inward and rotate the latch to the locked position.
This is the normal rest position for handling the AirShirz®, i.e., Blades Closed - Latch
Locked. Failure To Follow This Procedure Can Lead To Serious Injury.
PRESS
TAB
FIGURE # 1
FIGURE # 2
Table of contents
Other BETTCHER INDUSTRIES Commercial Food Equipment manuals
Popular Commercial Food Equipment manuals by other brands
Costan
Costan VELVET CURVE User instructions
Diamond
Diamond Atomix DH42AL/T2V user manual
Berner
Berner BGI40 operating instructions

Henny Penny
Henny Penny FlexFuison GOLD FGE-615 installation manual
Hussmann
Hussmann R3B Installation & operation guide
Lotus
Lotus LIBR.ISTR.BM110E Installation and operating instructions
Fama
Fama FIC 30M operating manual
Vollrath
Vollrath Stoelting SF144 I2 Operator's manual
Diamond
Diamond SA/61G Instructions for use and installation
CARTER-HOFFMANN
CARTER-HOFFMANN CD27 Cleaning, Operating, Maintenance Instructions, Parts List & Warranty

Piper
Piper 7QT-D-T-R-120 Installation and operating manual

Ruhle
Ruhle MPR 400 Original instructions
