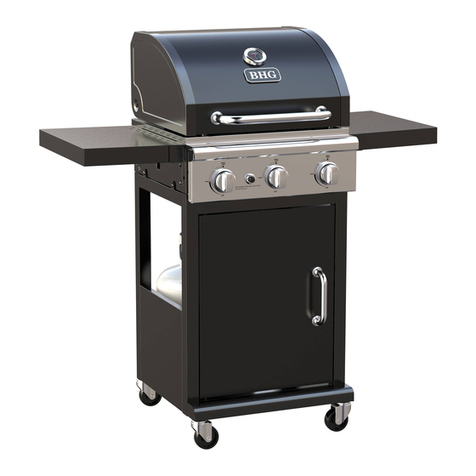
Better Homes and Gardens BH15-101-099-03 User manual

1
Natural Gas Conversion
Instruction for
MODEL NO.:BG2503B-DG
VENDOR STOCK NO.: BH15-101-099-03
BH15-101-099-08
BH15-101-099-09
BH15-101-099-10
WARNING
For Outdoor Use Only (outside any enclosure)
WARNING
1. Improper installation, adjustment, alteration,
service or maintenance can cause injury or
property damage.
2. Read this instruction manual thoroughly
before installing or servicing this equipment.
3. Failure to follow these instructions could
result in fire or explosion, which could cause
property damage, personal injury or death.
4. This instruction manual contains important
information necessary for proper assembly and
safe use this appliance.
WARNING
1. Do not store or use gasoline or other
flammable vapors and liquids in the vicinity of
this or any other appliance.
2. An LP tank not connected for use should not
be stored in the vicinity of this or any other
appliance.
DANGER
If you smell gas:
1. Shut off gas to the appliance.
2. Extinguish any open flames.
3. Open the lid.
4. If the odor continues, keep away from the
appliance and immediately call your gas
supplier or fire department.
DANGER
Never operate this appliance unattended.
Save these instructions for future reference.
If you are assembling this unit for someone else,
give this manual to him or her to read save for
future reference.
Call Customer Service Hotline
1-855-242-6887
DO NOT RETURN YOUR GRILL TO THE STORE
Question, problems, missing parts? Don’t return the grill to stores, please call our customer service
department at 1-855-CHANT-US (1-855-242-6887) from 8:00am to 5:00pm Eastern time, Monday
through Friday for assistance.

2
SAFETYINFORMATION
DANGER: Failure to follow the dangers, warning and cautions in this manual may in result
in serious bodily injury or death, or in a fire or an explosion causing damage to property.
The installation and repairs of this appliance must
conform with local codes or, in the absence of local
odes, with either the National Fuel Gas Code, ANSI
Z223.1/NFPA 54, or Natural Gas and Propane
Installation Code, CSA/CGA-B149.1.
All pipe sealants must be an approved type and
resistant to the actions of L.P. gases. Never use pipe
sealant on flare fittings. All gas connections should be
made by a competent qualified service technician and
in accordance with local codes and ordinances. In the
absence of local codes, the installation must comply
with the National Fuel Gas Code, NFPA 54-2002/ANSI
Z223.1-2002.
This grill must be isolated from the gas supply piping
system by closing its individual manual shut-off valve
during any pressure testing of the gas supply piping
system at test pressures equal to or less than 1/2 PSI
(3.5 kPa.).
This grill is intended for use outdoors and should not
be used in a building, garage or any other enclosed or
covered area.
A minimum clearance of 24 inches from combustible
constructions to the sides of the grill and 24 inches
from the back of the grill to combustible constructions
must be maintained. This outdoor cooking gas
appliance must not be placed under overhead
combustible construction.
Natural Gas (NG) Characteristics:
a. NG is flammable and hazardous if handled
improperly. Become aware of the characteristics
before using any NG products.
b. NG is explosive under pressure, heavier than air and
settles and pools in low areas.
c. NG in its natural state has no odor. For your safety,
an odorant is added than smells like rotten cabbage.
d. Contact with NG can cause freeze burns to skin.
Do not block holes in sides or back of the grill.
A fire causing, serious bodily injury or damage to
property may occur if above is not followed exactly.
The use of alcohol, prescription or non- prescription
drugs may impair the consumers’ ability to properly
assemble or safely operate the appliance.
Never use charcoal, lighter fluid, lava rocks, gasoline,
kerosene or alcohol with this product.
Check for leaks even if your unit was assembled for
you by someone else.
Do not operate if gas leak is present. Gas leaks may
cause a fire or explosion.
You must follow all leak-checking procedures before
operating. To prevent fire or explosion hazard when
testing for a leak:
a. Always perform leak test before lighting the grill and
each time the tank is connected for us.
b. No smoking. Do not use or permit sources of
ignition in the area while conducting a leak test.
c. Conduct the leak test outdoors in a well-ventilated
area.
d. Do not use matches, lighters, or a flame to check for
leaks.
e. Do not use grill until any and all leaks are corrected.
If you can unable to stop a leak, turn off the main
valve on the NG supply line. Call a gas appliance
serviceman or your local NG supplier.
Never attach an unregulated gas line to the appliance.
Connection to an unregulated gas line can cause
excessive heat or fire.
The appliance and its individual shutoff valve must be
disconnected from the gas supply piping system
during any pressure testing of that system at
pressures in excess of 1/2 psig (3.5kpa).
The appliance must be isolated form the gas supply
piping system by closing its individual manual shutoff
valve during any pressure testing of the gas supply
piping system at test pressures equal to or less than
1/2 psig (3.5kpa).
Do not store or use gasoline or other flammable
liquids or vapors within 25 feet (7.62 m) of this
appliance.
Do not use in an explosive atmosphere. Keep grill area
clear and free from combustible materials, gasoline
and other flammable vapors and liquids.
It is essential to keep the grill’s valve compartment,
burners and circulating air passages clean.
Use only the gas pressure regulator supplied with this
appliance. This regulator is set for an outlet pressure
of 11.0 wc
The cylinder used must include a collar to protect the
cylinder valve.
Do not store a spare LP-gas cylinder under or near this
appliance.
Do not alter grill in any manner. Any alteration will void
your warranty.
Do not use grill in high winds.
Do not use the grill unless it is COMPLETELY
assembled and all parts are securely fastened and
tightened.
Do not build this model of grill in any built-in or slide in
construction. Ignoring this warning could cause a fire
or an explosion that can damage properly and cause
serious bodily injury or death.
This grill should be thoroughly cleaned and inspected
Clean and inspect the hose before each use of the
appliance. If there is evidence of abrasion, wear, cuts
or leaks, hose must be replaced prior to the appliance
being put into operation.
Use only the regulator and hose assembly provided.
The replacement regulator and hose assembly shall be
that specified by the manufacturer.
on a regular basis.
Use only Chant Kitchen Equipment (H.K.) Ltd.
company authorized parts. The use of any part that is
not company authorized can be dangerous. Doing so
will also void your warranty.
Never fill the cylinder beyond 80 percent full.
Inspect grill before each use.
Do not operate this appliance without reading
“Operating Instructions” in this manual.
This grill is designed with to operate at an inlet
pressure of: LP gas: 11 inches water column; NG
7inches water column.

3
SAFETYINFORMATION
Never operate grill without heat plates installed.
Do not leave a lit grill unattended, especially keep
children and pets away from grill at all times.
Always use a meat thermometer to ensure food is
cooked to a safe temperature.
Use protective gloves when assembling this
product.
Do not force parts together as this can result in
personal injury or damage to the product.
Never lean over the grill when lighting.
Do not place empty cooking vessels on the
appliance while in operation.
Use caution when placing anything on the grill
while the appliance is in operation.
Do not touch metal parts of grill until it has
completely cooled (about 45 minutes) to avoid
burns, unless you are wearing protective gear (pot
holders, gloves, BBQ mittens, etc…).
Do not attempt to move grill when in use. Allow the
grill to cool before moving or storing.
Always open grill led carefully and slowly as heat
and steam trapped within grill can severely burn
you.
Do not attempt to disconnect the gas regulator from
the tank or any gas fitting while the grill is in us.
Always place your grill on a hard, on-combustible,
level surface. An asphalt or blacktop surface may
not be acceptable for this purpose.
Move gas hoses as far away as possible from hot
surfaces and dripping hot grease.
Keep all electrical cords away from a hot grill
After a period of storage and/or nonuse, check for
leaks, burner obstructions and inspect for any
abrasion, wear or cuts to the hose.
Failure to open lid while igniting the grill’s burners,
or not waiting 5 minutes to allow the gas to clear if
the grill does not light, may result in an explosive
flam-up.
All electrical accessories (such as rotisserie) must
be electrically grounded in accordance with local
codes, or National Electrical Code, ANSI / NFPA 70
or Canadian Electrical Code, CSA C22.1. Keep any
electrical cords and/or fuel supply hoses away from
any hot surfaces.
When cooking, fire extinguishing materials shall be
readily accessible. In the event of an oil/grease fire,
do not attempt to extinguish with water. Use type
BC dry chemical fire extinguisher or smother with
dirt, sand or baking soda.
Do not leave grill unattended while preheating or
burning off food residue on high If grill has not
been cleaned, a grease fire can occur that may
damage the product.
To protect against electric shock, do not immerse
cord or plugs in water or other liquid.
Unplug from the outlet when not in use and before
cleaning. Allow to cool before putting on or taking
off parts.
Do not let the cod hang over the edge of a table or
touch hot surface.
Do not use an outdoor cooking gas appliance for
purposes other than intended.
When connecting, first connect plug to the outdoor
cooking gas appliance then plug appliance into the
outlet.
Use only a ground Fault Interrupter (GFI) protected
circuit with this outdoor cooking gas appliance.
Never remove the grounding plug or use with an
adapter of 2 prongs; and use only extension cords
with a 3 prong grounding plug, rated for the power
of the equipment, and approved for outdoor use
with a W-A marking.
OUTDOOR USE ONLY. DO NOT EXPOSE TO RAIN.
CAUTION: Risk of Electric Shock. Keep extension
cord connection dry and off the ground.
Use only on properly grounded outlet.
Deaths, serious injury or damage to properly may
occur if the above is not followed exactly.
Never cover entire cooking area with aluminum foil.
WARNING
WARNING
Place the grill on a flat, level surface before
starting the conversion.
We strongly recommend that you hire a
professionally trained technician to install this
Natural Gas Conversion Kit. Incorrect installatio
n
may result in explosion and serious injury.
CALIFORNIA PROPOSITION 65
1. Combustion by-products produced when using
this product contain chemicals known to State
of California to cause cancer, birth defects and
other reproductive harm.
2. This product contains chemicals, including lead
and lead compounds, known to State of
California to cause cancer, birth defects or
other reproductive harm.
3. Wash your hands after using this product

4
NATURAL GAS CONVERSION
1. Turn off as supply and then remove cap on gas supply side.
2. Recommended: Install a shut-off valve on gas supply side before installing the socket.
3. Socket should be installed by an authorized technician in accordance with the national fuel gas code (NFPA
54/ANSI223.1).
4. Before inserting plug, turn on gas supply and leak test all connections including the stem of the shut-off valve
and the opening of the socket. For best results, use an ammonia-free soap and water solution.
Leak Check
When checking for gas leaks, do not use an open flame. Use a soapy water solution and apply it to the pipe
joints and fittings with a brush and check for bubbles. Check flexible hoses for cuts and wear that may affect the
safe operation of the grill. Only use original equipment replacement hoses. Use only replacement hose
assemblies specified by manufacturer.
Before operating your grill, after refueling, check carefully to be certain that all connections
are tight and there are no gas leaks.
1. Make 2-3 ounces of leak solution by mixing liquid dishwashing soap with water.
2. Make certain all control knobs are in the “OFF” position.
3. Brush small amounts of the leak solution on all the fittings and turn the gas on.
4. If bubbles appear, there is a leak. Proceed to step 5.
5. Turn the gas off and tighten all connections.
6. Go back to step 1 to retest the fittings.
7. If bubbles continue to appear, turn the gas off. Contact customer service.
WARNING:Never use a match or open flame for leak detection. Use of an open flame could result in a fire,
explosion and bodily harm.
IMPORTANT: When connecting or replacing any gas pipe or fittings, all joints must be sealed with approved
leak-proof sealing compound or plumber's tape.
IMPORTANT: When connecting or replacing gas pipe or fittings, all joints must be sealed with approved
leak-proof sealing compound or plumber's tape. After making connections, check all joints for leaks using a
soapy water solution and a brush.
WARNING: Never use an open flame to test for gas leaks. Use of an open flame could
result in a fire, explosion and bodily harm.
Before beginning conversion, make sure all parts are present. Compare parts with package
contents. If any part is missing or damaged, do not attempt to convert. Please have your owner’s
manual and part number available for reference, and contact customer service 1-855-242-6887 fo
r
replacement parts.

5
NATURAL GAS CONVERSION
IMPORTANT:
After your grill is converted to natural gas, the working pressure for natural gas is 7 in. water column (WC).
Gas pressure is affected by gas line size and the length of gas line run from house. Follow the
recommendations in the chart below.
NG Conversion Kit ( Part No. 5207434) Package Content:
Orifice 1.45 mm
QTY: 3pcs
Orifice removal Tool
QTY:1pc
NG Rating Label
QTY: 1 pc
NG Conversion
Instruction
QTY: 1 pc
※ The Natural Gas Conversion kit is located inside of the door.
Tools required for assembly (Not Included):
12X3mm
Slotted Screwdriver
QTY: 1pC
17X19mm Wrench
QTY:1pc
NG Hose
QTY: 1 pc
19
17
From House to Grill
Distance Tubing Size
Up to 25 ft. 3/8 in. DIA
26 – 50 ft. 1/2 in. DIA
51 – 100 ft. 2/3 in. of run 3/4 in.
1/3 in. of run 1/2 in.
More than 101 ft. 3/4 in. DIA

6
NATURAL GAS CONVERSION
WARNING:
Place the grill on a flat, level surface.
Before the conversion, make sure all control knobs are in the OFF position, LP tank valve is
closed, and tank is disconnected from regulator and removed from grill
1, Open the lid and remove cooking grates and heat tent.
2. Removed the R-pins at the back of main burners to detach burners from bracket.
Lift back of burners while sliding burners out of firebox, disengaging burners from gas valves as shown

7
NATURAL GAS CONVERSION
3, Loosen the screw from LPG setting, rotate the shutter opening counterclockwise, adjusting it from LP setting
to NG setting. Re-tighten the screw into NG setting for securing the air shutter opening.
4, Unscrew the old LP orifice from each gas valve with the orifice removal tool. Put a new NG orifice into the
valves and tighten with tool. Repeat this step for all three main burners.

8
NATURAL GAS CONVERSION
5. Reinstall the main burners and R pin. Make sure to engage the burner valves.
Then Put the heat tents, cooking grates back to grill.
6, Remove the Grease Tray out of the grill. Then use a wrench to detach the LP regulator and hose from fitting
as shown. Replace with the NG hose and pull out the hose clip hook (30) to secure the NG hose into the hook
again. Re-attach the Grease tray back into the grill.
NG Hose

9
NATURAL GAS CONVERSION
7, Remove the 3 main burner control knobs by grasping and pulling out.
Insert slotted screwdriver (Not included) into the hole of each control valve shaft as shown. Rotate the shaft
counterclockwise (to the left) as far as it will go (about 2 complete turns) until it stops. The shaft will now be set in
the NG position. Re-attach the control knobs. Paste the new rating label for NG under the original LP rating label
on the cart door inner panel.
Now NG conversion is completed.
!CAUTION:
If low flames or burner problems are observed after converting from LPG to NG, the natural gas
lines may not be large enough. Refer to the “From House to Grill” chart on page 5 for natural gas
supply line specifications. Please contact a plumber to assure proper pressure at 7 in. water
column.
DO NOT RETURN YOUR GRILL TO THE STORE.

10
TROUBLESHOOTING
Many solutions given here can make your grilling experience safer and more enjoyable. You
can also call customer service department at 1-855-CHANT-US(1-855-242-6887) from 8:00am to
5:00pm Eastern time, Monday through Friday for assistance.
PROBLEM POSSIBLE CAUSE CORRECTIVE ACTION
Grill will not
light.
1. The ignition wire came off the
igniter/valve.
2. The distance between the ignition
pin and the burner is greater than
5/32 in. - 3/16 in.
3. The ignition wire is broken.
6. The electrode tip does not
produce sparks at the burner port.
7. No gas supplied.
8. Air shutter opening is too big.
1. Reconnect the ignition wire to the
electrical igniter/valve.
2. Loosen the ignition pin and adjust the
distance, then fasten it again.
3. Call customer service for a
replacement ignition wire.
6. Reinstall the electrode.
7. Turn on the regulator valve.
8. Loosen the air shutter and adjust the
opening to a smaller size.
Burner flame
is yellow and
gas odor can
be smelled.
1. The air shutter opening is not
properly set.
2. Spiders or insects block the air
shutter.
3. Possible gas leaks.
1. Loosen the air shutter and adjust the
opening to have blue flames.
Make sure burners are set for NG.
2. Clean blockages.
3. Check for the source of gas leaks.
Low heat
with the knob
in “HIGH”
position.
1. Low heat is found in natural
gas models.
2. Ports are blocked.
3. LP tank has run out.
1. This model is set for 7 in. natural gas
usage. Please check your natural gas
supply system to have correct gas
pressure. Regulator is not needed for
NG model.
Check the orifice if you installed NG
nozzles. Conversion kit provides the
following nozzles:
Burner Orifice Size
Main Burner Φ1.45mm
2. Clear ports of any obstructions.
3. Refill the LP tank.
Low heat,
natural gas.
Gas pressure is significantly affected
by gas line and length of gas line
from house gas line.
Check your gas line and make
corrections by following the chart below:
From House to Grill
Distance Tubing Size
Up to 25 ft. 3/8 in. DIA
26 – 50 ft. 1/2 in. DIA
51 – 100 ft. 2/3 in. of run 3/4 in.
1/3 in. of run 1/2 in.
Over 101 ft. 3/4 in. DIA
This manual suits for next models
4
Table of contents
Other Better Homes and Gardens Grill manuals
Popular Grill manuals by other brands
Tenneker
Tenneker Charcoal Kettle user manual
Heatlie Barbecues
Heatlie Barbecues Roaster R3000SS Instructions and general information

GreenPan
GreenPan CC006812 Instruction manual & warranty

TEFAL
TEFAL MALAGA manual
Polini
Polini PIAGGIO CIAO-BRAVO-BOXER-SI-CBA-ECO-GRILLO Assembling instructions
SOLIS
SOLIS DELI quick start guide

Equipex
Equipex Sodir PANINI VG Operation manual
Everdure
Everdure E5SSSLPC-08 Operation & maintenance instructions
SEVERIN
SEVERIN PARTYGRILL MIT NATURGRILLSTEIN RG 2619 Instructions for use

GREADEN
GREADEN GR-3B31NA Instruction manuals

Vermont Castings
Vermont Castings VANGUARD XE user manual
BRINKMAN
BRINKMAN 4345 Ower's manual

