PAGE 8
Add:Rm1817, Dongcheng Int’l Plaza,No.3, Huangpu East Road,Guangzhou City, China
E-mail:sales@bevsinfo.com Http://www.bevsinfo.com
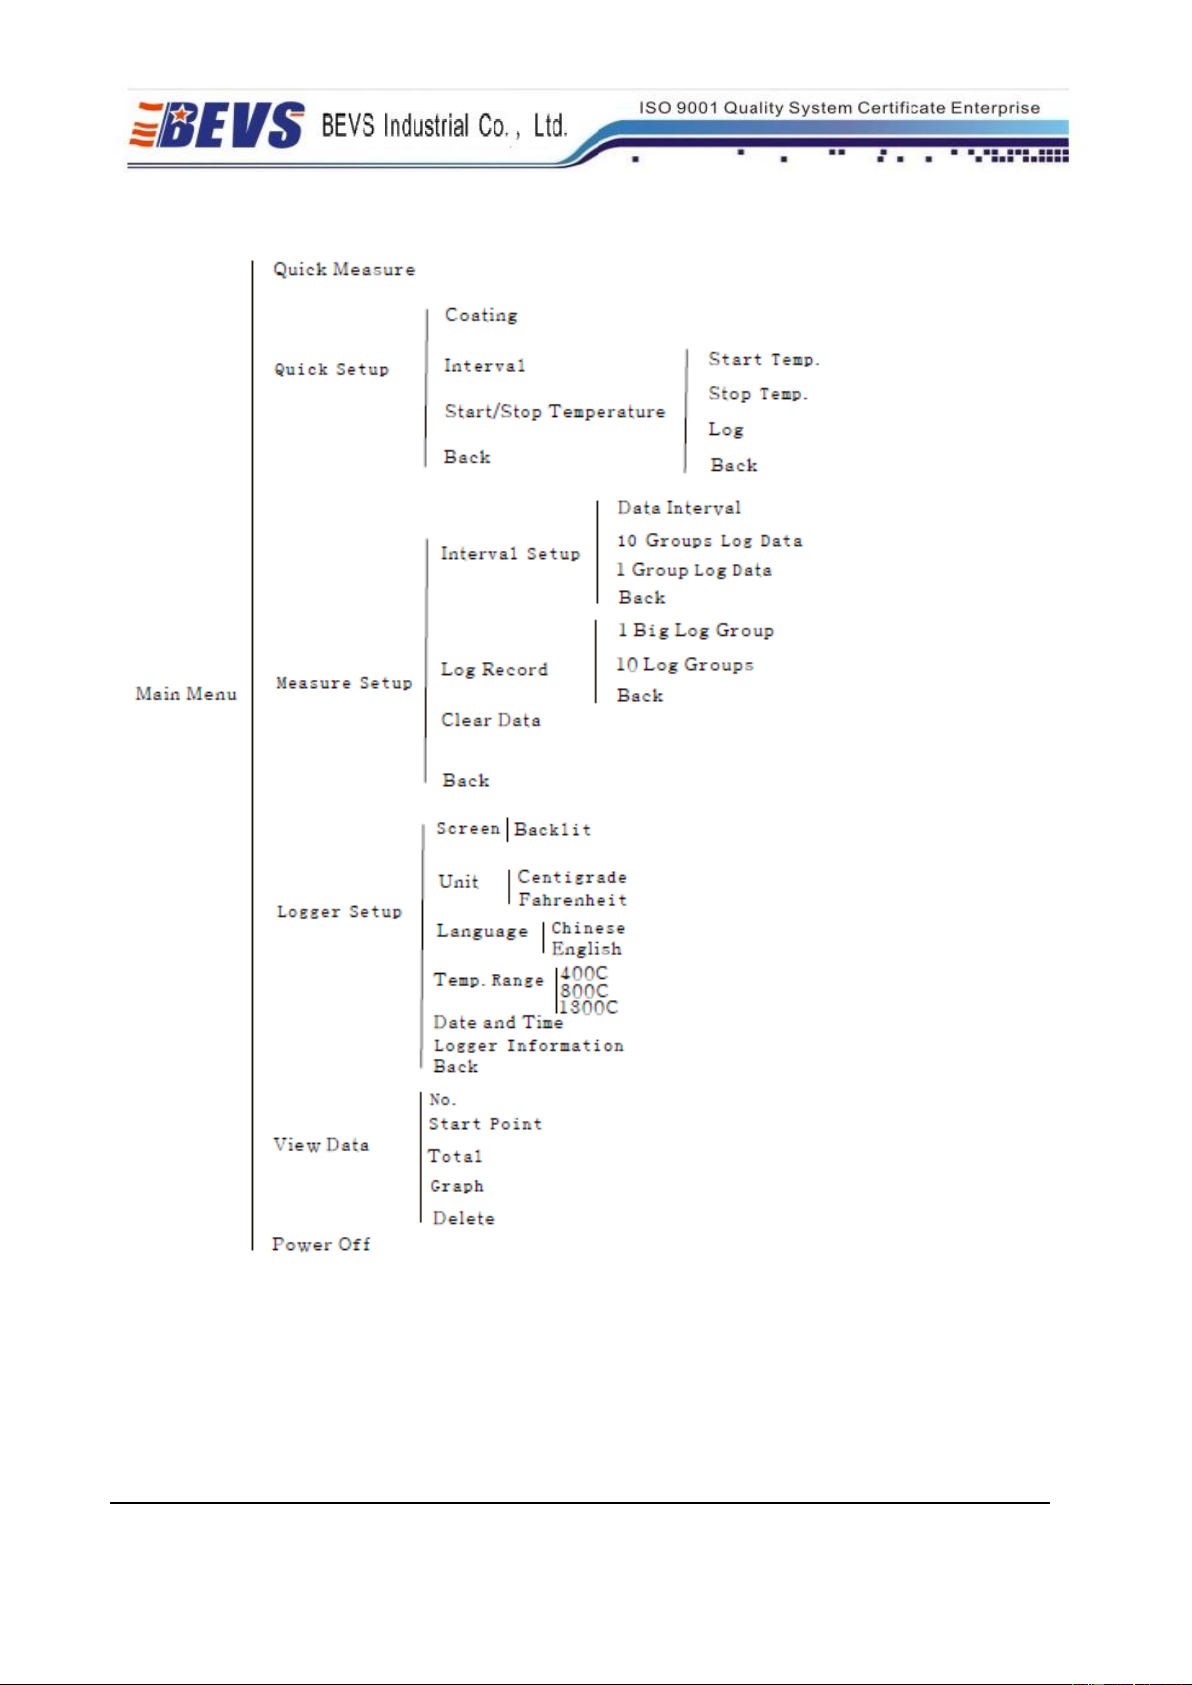
2.2.2 Function Instruction
Quick Measure: Start with the original setup unless “Cover it” or “No Probe Detected”displayed.
Paint: Set paint type
Interval: Set the logging frequency from 1-3000 second.
Start/Stop Temperature: Set start or stop point to log in the sub-menu. The logging will start when a
rising temperature passes the start point and will stop when a falling temperature passes the stop
point.
Data Interval: Set the logging frequency from 1-3000 second. The “Records of Ten Groups”and
“Records of One Group”mean that the time needed to use out the memory.
Testing record: the capacity of the data logger is 500000 readings, separated into 10 memory zones,
50000 readings each zone. Each data contains 6 probes, which means that each tiny memory zone
can save 83333 pieces of data, 10 zones most. Or used as a whole zone of the ability recording
500000 pieces of data. Every new data will be recorded in the next zone no matter where the fore
zone status is and it will stop beyond 50000.
Clear data: Clear out all the data, please be cautions.
Backlight: Adjust the backlight from off to highlight or stay the original setup screen off in 10
seconds without any operating.
Set Unit: SELECT this option to set the instrument in either Celsius or Fahrenheit.
Set Language: choose your favored language
Temperature Range: set the max temperature, but the lower, the more accurate. Please be cautious
that the actual temp beyond the setting will lead an error.
Date and Time: Set the date and time as the logging date and time.
Review Stored Data: Checkup the stored data and curve, which named after the testing date and