Beward DK103M User manual

DK103M IP Converter
Operation User Manual

Table of Contents
IP Converter DK103M Operation User Manual
1
Table of Contents
CHAPTER 1. SAFETY INSTRUCTIONS...........................................................................................3
CHAPTER 2. GENERAL INFO .........................................................................................................5
2.1. BEWARD DK103MIP CONVERTER OVERVIEW.......................................................................5
2.1.1. Key Features................................................................................................................5
2.1.2. Package contents.........................................................................................................6
2.1.3. Default Settings............................................................................................................6
2.2. PURPOSE OF THIS MANUAL.....................................................................................................6
CHAPTER 3. GETTING STARTED...................................................................................................8
3.1. INSTALLATION OF ACTIVEXCOMPONENTS AND AUTHORIZATION ...............................................8
3.2. MAIN WINDOW (LIVE VIEW) ..................................................................................................12
CHAPTER 4. REPLAY....................................................................................................................15
CHAPTER 5. CONFIG: LOCAL CONFIG.......................................................................................17
CHAPTER 6. CONFIG: AUDIO SETTINGS.....................................................................................18
CHAPTER 7. CONFIG: VIDEO SETTINGS ....................................................................................20
7.1. ON-SCREEN TEXT................................................................................................................20
7.2. VIDEO CODING ....................................................................................................................21
CHAPTER 8. CONFIG. NETWORK SETTINGS .............................................................................23
8.1. BASIC..................................................................................................................................23
8.2 LAN.....................................................................................................................................25
8.3. PPPOE...............................................................................................................................26
8.4 UPNP .................................................................................................................................27
8.5. E-MAIL ................................................................................................................................28
8.6. FTP....................................................................................................................................29
8.7. DDNS.................................................................................................................................30
8.8. VPN ...................................................................................................................................31
8.9. RTSP.................................................................................................................................32
8.10. HTTPS.............................................................................................................................33
8.11. SIP...................................................................................................................................35
8.12WI-FI.................................................................................................................................38
8.13 4G.....................................................................................................................................42
CHAPTER 9. CONFIG: RECORD SETTINGS................................................................................43
9.1. MEMORY CARD....................................................................................................................43
9.2. VIDEO RECORDING ..............................................................................................................44
9.3. SNAPSHOTTING ...................................................................................................................45
CHAPTER 10. CONFIG: ALARM SETTINGS.................................................................................46
10.1. MOTION DETECTION SETTINGS...........................................................................................46
CHAPTER 11. CONFIG: DOOR OPEN ..........................................................................................48
CHAPTER 12. CONFIG: SYSTEM..................................................................................................49
12.1. SYSTEM INFO ....................................................................................................................49
12.2. SYSTEM TIME ....................................................................................................................50
12.3. ACCESS POLICY.................................................................................................................51
12.4. FW UPGRADE....................................................................................................................52
12.5. RESTORE ..........................................................................................................................54
12.6. REBOOT............................................................................................................................55
12.7. SYSTEM LOG.....................................................................................................................56
CHAPTER 13. ALARM ...................................................................................................................57
CHAPTER 14. RECOMMENDATIONS ON SETTING AND OPERATION OF DKS103M...............58
14.1. ACOUSTIC ECHO CANCELLATION ........................................................................................58
14.2. SOUND GAIN AND VOLUME ADJUSTING................................................................................59
APPENDICES.................................................................................................................................60
APPENDIX A. FACTORY DEFAULTS...............................................................................................60
APPENDIX B. MAINTENANCE........................................................................................................60

Chapter 1. Safety Instructions
IP Converter DK103M Operation User Manual
3
Chapter 1. Safety Instructions
Before using the product.
This product complies with all safety rules. However, improper use of any electric device
can cause fires and severe damage. In order to avoid accidents, please read this Manual carefully
before you start using this device.
ATTENTION!
Use accessories specified by the manufacturer only. Use of improper accessories may case device
breakdown.
Follow this Operation Manual.
Do not use or store the door station in severe environment:
Avoid extremely low and high temperatures (The operating temperature of this IP
Converter is 0°~+50°).
Avoid prolonged exposure to direct sunlight, do not install near water and heat sources.
Avoid exposure to water.
Do not install near electromagnetic transmitters
Avoid exposure to high vibration.
ATTENTION!
Contact out Service Center in case of malfunction.
In case of:
Smoke or strange smell coming from the IP Converter.
Water or foreign matter getting inside the IP Converter.
The IP Converter getting damaged:
Do the following:
Unplug the power cord and disconnect all other cords from the IP Converter.
Contact our Service Center. You can find our contact information on our website:
http://www.beward.ru/.

Chapter 1. Safety Instructions
IP Converter DK103M Operation User Manual
4
Transportation
Transport the IP Converter carefully, using the original box and protective packing
Air flow
In order to avoid overheating, ensure that nothing is blocking the air circulation around the
IP Converter!
Cleaning
Use a soft dry cloth to clean the surface of the device. To remove obstinate stains, apply a
small amount of detergent on the cloth, then wipe the surface dry.
Do not use volatile solvents (alcohol-containing products, Benzene etc.) to avoid damaging
the housing of the device.

Chapter 2. General Info
IP Converter DK103M Operation User Manual
5
Chapter 2. General Info
2.1. BEWARD DK103M IP Converter overview
BEWARD DK103M IP Converter is designed for organizing IP intercome systems based on
already existing local networks without using any additional equipment (e.g. separate internal
monitors). To start using the device you only have to install the software on your PC or
Smartphone device and set it up. This device is:
Low-cost
Easy to install
Remote Access Supported
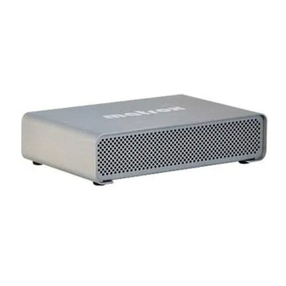
Pic. 2.1
DK103M is used for analog-to-digital conversion and managing analog wired matrix
intercom devices. In other words, this device converts analog intercoms into digital intercoms,
while retaining the ability to use the analog monitor. The device allows for establishing video and
audio connection between the Guest and the Client, conducting surveillance of the nearby territory,
control of other devices that are connected to the single-user door station (electronic locks, garage
door openers, light switches, alarm systems etc.) via Ethernet. The device is supported by modern
network technologies, allowing it to be used a part of a complex IP Surveilance system.
DK103M is connected to the network via-T/100BASE-TX Ethernet interface. Its power is
supplied from a DC 12V power source.
The device is even more reliable due to its SD card support that prevents loss of data in
case of network failures.
2.1.1. Key Features
Simultaneous encoding: H.264/H264, Н.264/MJPEG, MJPEG /MJPEG
Built-in web server for viewing and adjusting settings
Built-in player for recorded videos
Build-in microphone and speaker
Power: DC 12 V
Temperature: -0°С~+50°С

Chapter 2. General Info
IP Converter DK103M Operation User Manual
6
Supported protocols: TCP/IP, SIP v.2.0, VPN, STUN, HTTP, HTTPS, FTP, SMTP,
DDNS, DHCP, PPPoE, RTP, RTSP, UDP, UPnP, NTP, ONVIF v.2.41
ONVIF v.2.41 support
2.1.2. Package contents
DK103M IP Converter
Self-tapping screws
Wi-Fi antenna (for DKxxxW option)
4G USB modem (for DKxxx4G option)
Terminal block (4 pcs.)
CD with software and documentation
ATTENTION!
Package contents and device specification are subject to change without notice
2.1.3. Default Settings
IP address: 192.168.0.99
Subnet Mask: 255.255.255.0
Gateway: 192.168.0.1
Username: admin
Password: admin
HTTP port: 80
Data Port: 5000
2.2. Purpose of this Manual
Beward DK103M IP Converter can be used as a video surveillance device with a built-in
web server and a web interface.
You can view the video broadcast by this device via the standard internet browser or via the
free software included in the CD (Also can be downloaded from App Store and Play Market).
This User Manual contains the full information on how to operate the IP Converter via the
web interface. It explains how to set up the web interface for use in local network or the Internet.
To learn more about using the IP Converer software, please read the Software User Manuals
Despite the fact the several functions are only available in Beward Software (see BEWARD
Intercom Software Operation Manual), the web version allows users to operate the IP Converter
from any location with Internet access
This Manual contain the information needed to use the DK103M IP Converter without
installing additional software.

Chapter 2. General Info
IP Converter DK103M Operation User Manual
7
2.3. Minimum System Requirements
Please make sure your PC meets the following minimum requirements:
Item
Requirement
CPU
2.6 Ghz Intel Core or AMD Athlon X2
Video Card
256 mb RAM or similar
RAM
2 Gb
OS
Windows 7, Windows 8
Internet Browser
Internet Explorer 11.0 or higher
ATTENTION!
Windows 7 Professional иInternet Explorer 11.0 are used in this Manual (though in some screenshots
other OS and browser version may be depicted). In other OS and browsers some menu names may differ.

Chapter 3: Getting Started
IP Converter DK103M Operation User Manual
8
Chapter 3. Getting Started
3.1. Installation of ActiveX components and Authorization
Step 1: Connect the device following the Installation User Manual.
Step 2: Run Internet Explorer and enter the following path in the address :
http://<IP>:<PORT>, where <IP> is the IP address of the IP Converter, <PORT> is number of the
port used for HTTP connection to the device.
NOTE:
The default IP address is 192.168.0.99, default HTTP-port is –80. You don’t need to enter the port
number if you connect via the default HTTP port.
Pic. 3.1
If the path is correct, the authorization window will open.
NOTE:
There are 2 ways to obtain the IP address for the device: 1)Obtain the address automatically from the
DHCP server according to your LAN setup. 2) Use the user-defined IP address. See 8.2 of this manual to
learn more about the available network options. Please consult your system administration before using
the device..
Step 3: To work with the web interface you need to install the ActiveX add-on. You will see the
following system notification at the bottom of the window: “This webpage wants to run the following
add-on: “AxMediaControl ActiveX Control Module” from “BEWARD Co., Ltd”

Chapter 3: Getting Started
IP Converter DK103M Operation User Manual
9
Pic. 3.2
Click [Allow] to start installation.
ATTENTION!
Installation of ActiveX components is only possible for 32-bit Internet Explorer..
Step 4: By default, the Internet Explorer security system will block the ActiveX installation.
Click [Install] to continue (Pic. 3.3).
Pic. 3.3
Step 5: Close Internet Explorer and click [OK]in the Warning window (see Pic 3.4) if it pops
up.

Chapter 3: Getting Started
IP Converter DK103M Operation User Manual
10
Pic. 3.4
Step 6: Click [Install] (see Pic. 3.5).
Pic. 3.5
Step 7: After completing the installation you will see the following «Register OCX
success(С:\)» Click [Close] (see Pic. 3.6).
Pic. 3.6
NOTE:
Names of menus and option may differ when using different OS and internet browsers.
NOTE:
In Windows 7 with enabled user account control you an additional installation blocking window may
appear. Give a positive answer permit installation
Step 8: Run Internet Explorer and enter the IP address of the IP Converter in the path field. .
Step 9: Enter username and password and click [Login]. Default username –admin, default
password –admin (Pic. 3.7).
Attention!
After authorization you can change login and password in Config –System –Access Policy. If you lose
your login and password, you can reset the IP Converter to default settings. To do so you need to press
and hold the reset button 3 times for 10 seconds with 1 second pauses between each press

Chapter 3: Getting Started
IP Converter DK103M Operation User Manual
11
Pic. 3.7
If successful, you will gain access to IP Converter’s Web Interface (Pic. 3.8).
Pic. 3.8

Chapter 3: Getting Started
IP Converter DK103M Operation User Manual
12
The interface window has 5 following: [Live View], [Replay], [Config], [Alarm], [Log Out],
Each tab is explained in this Manual.
If you failed to install ActiveX correctly you can do it again by clicking the link in the
authorization window (see pic.3.9) and following the instructions above
Pic. 3.9
3.2. Main Window (Live View)
The following functions are available in the [Live View] tab: Choose Main/Sub video stream.,
Snapshot. Video recording, “Talk”and “Listen”modes, Zoom, Full Screen mode, “Width:Height”
mode, Original resolution, Open door and Image settings.

Chapter 3: Getting Started
IP Converter DK103M Operation User Manual
13
Pic. 3.11
Main Stream / Sub Stream: Display the main or the sub stream in the Live View window. The
main stream is displayed at a higher resolution compared to the sub stream. The stream parameters
can be adjusted in Config –Video Settings –Video coding(see paragraph 7.2).
Snap: Press this button to make an instant snapshot of the camera display.Snapshots are
stored in the local folder specified by the user (see paragraph 5) as JPEG files.
Rec: Press this button to start recoding the livestream. The recorded footage will be saved in
the in the local folder specified by the user (see paragraph 5) ).as H.264 video files
Talk: Press this button to activate the two-way audio mode. When activated, sound transmits
from the door station to the PC and vice-versa.
Listen: Press this button to listen to the sound from the door station microphone via PC
speakers
Zoom:Press this button to enlardge a specific area of the video. Press [Zoom], then press
and hold the left mouse button to frame the area. The enlarged area of the video will appear in a new
window. Close the “Zoom In” window and press the [Zoom] button to disable this function.
Full: Press this button to enter Full Screen mode. Press the [ESC] key or click the right mouse
button to turn off Full Screen mode.
W:H: Press this button to apply the correct width to height ratio to the livestream display.
Original: Press this button to display the livestream at the original resolution. If the image is
too big to fit the screen, you can use the scrollbars to navigate.
Open door: Press this button to open the door connected to the door station.

Chapter 3: Getting Started
IP Converter DK103M Operation User Manual
14
Image: Use this toolbar to adjust the following parameters: «Brightness», «Contrast», «Hue»,
«Saturation». If you want to restore to the default parameters, click [Default] (Pic. 3.12).
Pic 3.12

Chapter 4.Replay
IP Converter DK103M Operation User Manual
15
Chapter 4. Replay
Press «Replay», to open the web interface player tab where you can open videos and images
that are stored in the memory card or your PC (Pic. 4.1).
Pic. 4.1
Size: Change the width to heigh ratio. Available options: Full (screen), 4:3, 16:9, 11:9.
Storage: choose the location of the files you saved. Available options : «PC» and «Memory
Card»:
PC: Search for files in a PC folder. The default path is «C:\MyIPCam\».
Memory Card: Search for files in your SD card.
Type: Choose the file Type. Available types: «All Rec»,«Alarm Rec»,«Schedule Rec» and
«Images».
Date: choose the date for searching files.
[Search]: Press this button to start searching files.
File list: The search results are listed here in chronological order
[Play]: Select a file in the File List and press this button to play it.
You can use the following toolbar (see Pic. 4.2).
Pic. 4.2

Chapter 4.Replay
IP Converter DK103M Operation User Manual
16
[Save]: Press this button to save the files from the SD card on your PC. Select a file in the File
List and press [Save]. A new window will appear that shows progress (Pic. 4.3).
Pic. 4.3
IPCam: Door Station/IP Converter ID and its IP address.
Chn: Channel #, choose “1” for the door station/IP Converter
Time: Set the date and the time period you want to save.
NOTE:
All footage from the time period you set will be saved as one file.
Make sure that you have the rights to create new objects in the storage catalog you chose. In Windows 7
you may need to run Internet Explorer as administrator to allow saving files on the local disk
[>>]: Choose the path to save files.
[Start]: Start saving files.
[Stop]: Stop saving files.
Note!
In Windows 7 (and later OS version) you may have to run Internet Explorer as administrator to ensure that
the web interface player is working properly.

Chapter 5. Config: Local Config
IP Converter DK103M Operation User Manual
17
Chapter 5. Config: Local Config
Go to the “Config” tab to work with settings menu of the device
The following picture shows the Local Config menu:
Pic. 5.1
Preview Mode:–«Real Time and «Fluency»modes are available.
«Real Time»mode does not use the buffering procedure and the videostream is displayed
without delay in the «Live View»tab. Any delays and visual defects might be cause by the high load
on your LAN.
«Fluency»mode uses the buffering procedure and the videostream is displayed with slight
delay (less than 1 second) in the «Live View»tab. Use this mode in case of delay of visual defects.
Enhanced Quality: Enabling this option improves the video quality but also increases the
CPU load.
Record Duration: Set the duration of recorded files (in minutes).
Archive Folder Path: Set the local folder to store video and image files. Default Path:
C:\MyIPCam\.
NOTE:
Make sure that you the rights to create new objects in the archive folder. Otherwise you will be unable to
save files.
In Windows 7 you need to run Internet Explorer as administrator to save files in the local disk.
Press [Save] to apply new settings.

Chapter 6. Config: Audio Setting
IP Converter DK103M Operation User Manual
18
Chapter 6.Config: Audio Settings
The following picture shows the “Audio Parameters” Menu.
Pic. 6.1
Compression Type: Default –G.711U. Also available: G.711A иG.726.
Echo Cancellation: Enable / disable additional echo cancellation. Use this option if the
hardware echo cancellation is insufficient.
Play melodies in single subscriber Intercom: if this option is enabled, the call melodies will
be played via IP Converter. Disable this option if a single-user intercom monitor is connected to your
IP Converter. Otherwise the monitor will play the call melodies.
Single Subscriber Intercom Microphone Volume: set the volume level of single-user video
intercom microphone . (0~15).
Single Subscriber Intercom Speaker Volume: set the volume level of single-user video
intercom speaker. (0~15).
Auto answer: If this option is enabled, the IP Converter will immediately answer the call (Client-
side) from the multi-user video intercom, establishing audio/video connection. Is the option is disabled, the
connection will be established only when Client answers the call (make sure your single user intercom
monitor is able to turn off video feed in the door station during calls). If you are not using a single-user
intercom monitor, disable this option.
Multi subscriber intercom microphone sensitivity: set the microphone sensitivity of the
multiuser intercom. (0~15).
Multi subscriber intercom speaker volume: set the speaker sensitivity of the multiuser
intercom. (0~15).
See Table6.1to see microphone/speaker sensitivityvaluesfor popular single-user video intercoms

Chapter 6. Config: Audio Setting
IP Converter DK103M Operation User Manual
19
Single-User Video Intercom
Microphone Sensitivity
Speaker Sensitivity
Kenwei KW-139MCS
12
10
JSB-V05M
10
10
Activision AVC-305
14
13
Kocom KC-MC20
13
11
Polyvision PVD-104CM2
15
12
Quantum QM-305N
12
8
Commax DRC-4CHC
11
14
Attention!
The sound quality depends on the intercoms currently used. After a series of in-house tests, we have
found out that sound quality varies in all intercoms.
Press [Save].to apply new settings
Other manuals for DK103M
1
Table of contents
Other Beward Media Converter manuals

