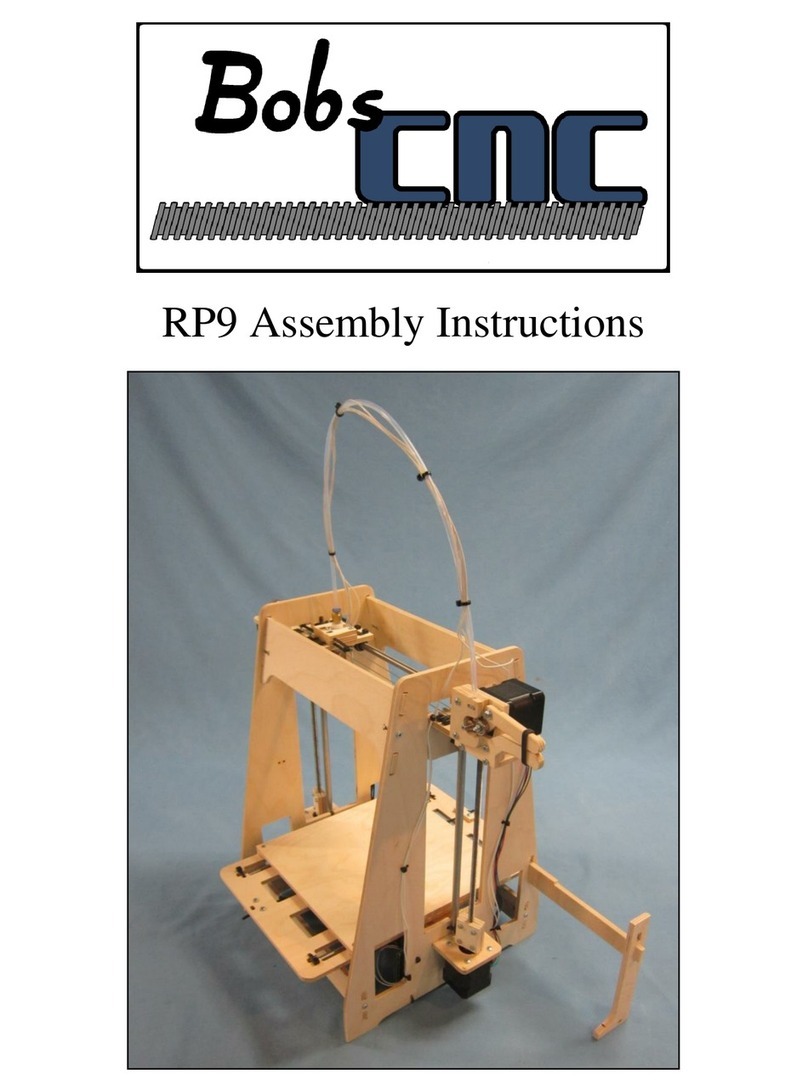
Bfb 3D Touch Setup guide

Page 1

Page 2
1. 3D Touch Set Up and Operations Manual . . . . . . . . . . . . . . . . . . . . . . . . . . . . . . . . . . . . . . . . . . . . . . . . . . . . . . . . . . . . . . . . . . . . . . . . . . . 3
1.1 1. Introduction . . . . . . . . . . . . . . . . . . . . . . . . . . . . . . . . . . . . . . . . . . . . . . . . . . . . . . . . . . . . . . . . . . . . . . . . . . . . . . . . . . . . . . . . . . . . 6
1.2 2. How this manual works . . . . . . . . . . . . . . . . . . . . . . . . . . . . . . . . . . . . . . . . . . . . . . . . . . . . . . . . . . . . . . . . . . . . . . . . . . . . . . . . . . . 7
1.3 3. Manual symbols . . . . . . . . . . . . . . . . . . . . . . . . . . . . . . . . . . . . . . . . . . . . . . . . . . . . . . . . . . . . . . . . . . . . . . . . . . . . . . . . . . . . . . . . 8
1.4 4. Process overview... how the 3D Touch works . . . . . . . . . . . . . . . . . . . . . . . . . . . . . . . . . . . . . . . . . . . . . . . . . . . . . . . . . . . . . . . . . 9
1.5 5. Print material . . . . . . . . . . . . . . . . . . . . . . . . . . . . . . . . . . . . . . . . . . . . . . . . . . . . . . . . . . . . . . . . . . . . . . . . . . . . . . . . . . . . . . . . . . . 15
1.6 6. Pre-print checks . . . . . . . . . . . . . . . . . . . . . . . . . . . . . . . . . . . . . . . . . . . . . . . . . . . . . . . . . . . . . . . . . . . . . . . . . . . . . . . . . . . . . . . . 17
1.6.1 a. Clearing the print bed . . . . . . . . . . . . . . . . . . . . . . . . . . . . . . . . . . . . . . . . . . . . . . . . . . . . . . . . . . . . . . . . . . . . . . . . . . . . . . . 18
1.6.2 b. Check the print bed is fitted correctly . . . . . . . . . . . . . . . . . . . . . . . . . . . . . . . . . . . . . . . . . . . . . . . . . . . . . . . . . . . . . . . . . . . 20
1.6.3 c. Power up . . . . . . . . . . . . . . . . . . . . . . . . . . . . . . . . . . . . . . . . . . . . . . . . . . . . . . . . . . . . . . . . . . . . . . . . . . . . . . . . . . . . . . . . . 22
1.6.4 d. Test all axes . . . . . . . . . . . . . . . . . . . . . . . . . . . . . . . . . . . . . . . . . . . . . . . . . . . . . . . . . . . . . . . . . . . . . . . . . . . . . . . . . . . . . . 23
1.6.5 e. Check the hot-end nozzles are clean from plastic debris . . . . . . . . . . . . . . . . . . . . . . . . . . . . . . . . . . . . . . . . . . . . . . . . . . . . 24
1.6.6 f. Check the print bed is level . . . . . . . . . . . . . . . . . . . . . . . . . . . . . . . . . . . . . . . . . . . . . . . . . . . . . . . . . . . . . . . . . . . . . . . . . . . 25
1.6.7 g. Check the bed is referenced to the extruder nozzles . . . . . . . . . . . . . . . . . . . . . . . . . . . . . . . . . . . . . . . . . . . . . . . . . . . . . . . 29
1.6.8 h. Load the extruders . . . . . . . . . . . . . . . . . . . . . . . . . . . . . . . . . . . . . . . . . . . . . . . . . . . . . . . . . . . . . . . . . . . . . . . . . . . . . . . . . 31
1.6.9 i. Extruder control . . . . . . . . . . . . . . . . . . . . . . . . . . . . . . . . . . . . . . . . . . . . . . . . . . . . . . . . . . . . . . . . . . . . . . . . . . . . . . . . . . . . 36
1.6.10 j. Purge the extruder . . . . . . . . . . . . . . . . . . . . . . . . . . . . . . . . . . . . . . . . . . . . . . . . . . . . . . . . . . . . . . . . . . . . . . . . . . . . . . . . . 37
1.6.11 k. How to start a print . . . . . . . . . . . . . . . . . . . . . . . . . . . . . . . . . . . . . . . . . . . . . . . . . . . . . . . . . . . . . . . . . . . . . . . . . . . . . . . . 38
1.6.12 l. Print a successful raft . . . . . . . . . . . . . . . . . . . . . . . . . . . . . . . . . . . . . . . . . . . . . . . . . . . . . . . . . . . . . . . . . . . . . . . . . . . . . . . 39
1.7 7. Print the first model . . . . . . . . . . . . . . . . . . . . . . . . . . . . . . . . . . . . . . . . . . . . . . . . . . . . . . . . . . . . . . . . . . . . . . . . . . . . . . . . . . . . . . 43
1.8 8. Essential post-print operations . . . . . . . . . . . . . . . . . . . . . . . . . . . . . . . . . . . . . . . . . . . . . . . . . . . . . . . . . . . . . . . . . . . . . . . . . . . . . 44
1.8.1 b. Check print bed flatness . . . . . . . . . . . . . . . . . . . . . . . . . . . . . . . . . . . . . . . . . . . . . . . . . . . . . . . . . . . . . . . . . . . . . . . . . . . . . 45
1.8.2 c. Empty the waste bin . . . . . . . . . . . . . . . . . . . . . . . . . . . . . . . . . . . . . . . . . . . . . . . . . . . . . . . . . . . . . . . . . . . . . . . . . . . . . . . . 46
1.8.3 a. Print removal and post-processing . . . . . . . . . . . . . . . . . . . . . . . . . . . . . . . . . . . . . . . . . . . . . . . . . . . . . . . . . . . . . . . . . . . . . 47
1.9 9. Further printing . . . . . . . . . . . . . . . . . . . . . . . . . . . . . . . . . . . . . . . . . . . . . . . . . . . . . . . . . . . . . . . . . . . . . . . . . . . . . . . . . . . . . . . . . 49
1.10 10. Further operations . . . . . . . . . . . . . . . . . . . . . . . . . . . . . . . . . . . . . . . . . . . . . . . . . . . . . . . . . . . . . . . . . . . . . . . . . . . . . . . . . . . . . 50
1.10.1 c. Setting the extruder pressure bearings . . . . . . . . . . . . . . . . . . . . . . . . . . . . . . . . . . . . . . . . . . . . . . . . . . . . . . . . . . . . . . . . . 51
1.10.2 b. Reloading the extruders . . . . . . . . . . . . . . . . . . . . . . . . . . . . . . . . . . . . . . . . . . . . . . . . . . . . . . . . . . . . . . . . . . . . . . . . . . . . 53
1.10.3 d. Control panel functions . . . . . . . . . . . . . . . . . . . . . . . . . . . . . . . . . . . . . . . . . . . . . . . . . . . . . . . . . . . . . . . . . . . . . . . . . . . . . 54
1.10.4 a. Power down . . . . . . . . . . . . . . . . . . . . . . . . . . . . . . . . . . . . . . . . . . . . . . . . . . . . . . . . . . . . . . . . . . . . . . . . . . . . . . . . . . . . . 58
1.10.5 e. Upgrading your printer firmware . . . . . . . . . . . . . . . . . . . . . . . . . . . . . . . . . . . . . . . . . . . . . . . . . . . . . . . . . . . . . . . . . . . . . . 59
1.10.6 f. Adjusting the nozzle wipe . . . . . . . . . . . . . . . . . . . . . . . . . . . . . . . . . . . . . . . . . . . . . . . . . . . . . . . . . . . . . . . . . . . . . . . . . . . . 60
1.10.7 g. Fine adjustment to level the nozzles . . . . . . . . . . . . . . . . . . . . . . . . . . . . . . . . . . . . . . . . . . . . . . . . . . . . . . . . . . . . . . . . . . . 61
1.10.8 h. Handling a ground-out filament . . . . . . . . . . . . . . . . . . . . . . . . . . . . . . . . . . . . . . . . . . . . . . . . . . . . . . . . . . . . . . . . . . . . . . . 63
1.10.9 i. Handling snapped filament in the delivery tube . . . . . . . . . . . . . . . . . . . . . . . . . . . . . . . . . . . . . . . . . . . . . . . . . . . . . . . . . . . 65
1.11 11. Troubleshooting . . . . . . . . . . . . . . . . . . . . . . . . . . . . . . . . . . . . . . . . . . . . . . . . . . . . . . . . . . . . . . . . . . . . . . . . . . . . . . . . . . . . . . 70
1.12 12. Specifications . . . . . . . . . . . . . . . . . . . . . . . . . . . . . . . . . . . . . . . . . . . . . . . . . . . . . . . . . . . . . . . . . . . . . . . . . . . . . . . . . . . . . . . . 71
1.13 13. Appendix . . . . . . . . . . . . . . . . . . . . . . . . . . . . . . . . . . . . . . . . . . . . . . . . . . . . . . . . . . . . . . . . . . . . . . . . . . . . . . . . . . . . . . . . . . . . 72
2. Home . . . . . . . . . . . . . . . . . . . . . . . . . . . . . . . . . . . . . . . . . . . . . . . . . . . . . . . . . . . . . . . . . . . . . . . . . . . . . . . . . . . . . . . . . . . . . . . . . . . . . . . 73
2.1 BFB-Touch Set Up and Operations Manual . . . . . . . . . . . . . . . . . . . . . . . . . . . . . . . . . . . . . . . . . . . . . . . . . . . . . . . . . . . . . . . . . . . . . 74

3D Touch
Page 3
3D Touch Set Up and Operations Manual
Welcome to the 3D Touch Setup and Operations Manual. This manual is designed to get you up and running as quickly as possible. It can be read
either on-line or off-line (see below).
Requirements
To complete the exercises in this manual the user will need:
All the items included in the 3D Touch box. Items should be unpacked. Unpacking instructions (which should be included in the top of the
box) can be downloaded .here
The setup print files:
The print files required are already included on the USB memory stick supplied in your toolkit.
If you do not have these files you can download them by clicking on the icon on the left. After downloading:
Unpack the files to the root of your USB stick.
The printer can only see uncompressed files at the root of the USB stick i.e. do not put them inside a folder.
On-line reading (essential notes)
Online reading includes embedded 3D content. However, if left idle for over 120 minutes, technical resources will automatically time-out, and direct
you to a log in page. Please note the details below. Simply enter:
Username: bfbcustomer
Password: 3D printing
Check the "Remember me" box
This will prevent the timeout from happening again during your session.

3D Touch
Page 4
You can start reading the manual by clicking the links on the navigation bar at the left of the screen:
Off-line reading
Simply click on the "Export this space" button at the top left of the screen to export the manual to a PDF. Follow the on screen instructions.

3D Touch
Page 5
If you have a slow internet connection, it is possible to select individual sections of the manual to export, making it possile to download small
sections at a time. Simply tick the boxes next to the sections you need.
Alternatively, if bandwidth is not an issue, select all.

3D Touch
Page 6
1. Introduction
Thank you for purchasing your 3D Touch.
Before first use, the 3D Touch needs careful setting up. The list below illustrates some of the essential operations which must be carried out before
operation:
Make sure the bed is clear of any build material
Check the bed is fitted correctly
Check the hot-end nozzles are clean from plastic debris
Check the bed is level
Check the bed is referenced to the extruder nozzles
Load the extruders correctly
Print a successful raft
Failure to carry out of the set-up procedures contained in this document will damage the machine.all
This document has been designed to illustrate the procedures and get you up and running as quickly as possible. Please take time toessential
understand how the process works and complete each procedure in the order set out in this manual. Setting up can take from 20-60 minutes
depending on the skill level of the operator.
Support is available by raising a ticket at www.bitsfrombytes.com
We welcome any feedback you may have, and wish you well in your 3D printing!

3D Touch
Page 7
2. How this manual works
This manual guides the user from basic principles to an actual 3D print.

3D Touch
Page 8
3. Manual symbols
notes to prevent damage to the machine.CAUTION:
notes to prevent injury to the operator.DANGER:

3D Touch
Page 9
4. Process overview... how the 3D Touch works
Before reading this section, please ensure that the unpacking instructions have been completed.
3D Touch
Tool kit
The image below identifies the tools included in the tool kit.

3D Touch
Page 10
Creating a 3D model
The images below illustrate the process of creating a 3D model.

3D Touch
Page 11
Note 1: Most CAD packages export to STL format. However, STL quality depends on the CAD package. Poor quality STLs may need repairing
before loading into "Axon". STL fixing programs are readily available (e.g. NetFabb).

3D Touch
Page 12

3D Touch
Page 13
The extruders pull filament from the reel via the delivery tubes and drive through a hot-end to produce a thin molten filament of plastic. The extruder
draws each layer with this filament. After each layer is produced the bed increments down so that a new layer can be drawn on top of the last,
building up the 3D model.
Overhanging features

3D Touch
Page 14
A second (optional) extruder can print support filament for printing overhanging-features. This support structure can be automatically generated in
Axon if desired.

3D Touch
Page 15
1.
2.
5. Print material
We support two print materials: PLA and ABS. Both have different properties and can be used in different build/support combinations. Typically, PLA
performs well as a build material with an ABS raft, and (if needed) ABS support.
PLA
PLA is a hard plastic with a low environmental impact. It is not a petrochemical - it is derived from renewable resources, such as starch. It is a
relatively new plastic and has excellent print characteristics.
As a build material: Good for large and small prints. Stable for 20 years up to 50 degrees Celsius
As a support material: Supports ABS well as it peels away easily. May be dissolved if required (see below).
PLA support can be dissolved by:
Leaving the model in an ultra-sonic with water and caustic soda. Time and concentration depends on the volume ofsupport removal tank
the material needed to dissolve.
Leave the model in water at 80°C for over 48 hours. The also provides this functionality.support removal tank
ABS
ABS is a well-known plastic with excellent toughness characteristics.
As a build
material: Good for small prints with high toughness requirements. Do not print area larger than 100 mm square – ABS has relatively
high shrinkage on cooling, and some geometries for larger prints are prone to warping.
As a
support
material:
Supports PLA well as it peels away easily.
Material storage
All polymers degrade with time. The following conditions ensure the filament remains high quality:
Do not unpack until filament is needed.
Store at room temperature: 15-20 °C.
Keep away from UV light (e.g. sunlight).

3D Touch
Page 16
If machine is to left unused for an extended period of time, repack filament with silica-gel sachet to maintain dryness (if present).
Use within 12 months of receipt.

3D Touch
Page 17
6. Pre-print checks
It is that all pre-print checks are carried out before starting a print on the 3D touch. This section of the manual guides the user throughessential
these checks:
a. Clearing the print bed
b. Check the print bed is fitted correctly
c. Power up
d. Test all axes
e. Check the hot-end nozzles are clean from plastic debris
f. Check the print bed is level
g. Check the bed is referenced to the extruder nozzles
h. Load the extruders
i. Extruder control
j. Purge the extruder
k. How to start a print
l. Print a successful raft

3D Touch
Page 18
a. Clearing the print bed
It is essential to clean the print bed before printing. This makes sure that the first printed layer makes a good contact with the bed.
Ensure the bed transport stopper has been removed
For transit, a white stopper is fitted to the front bed keyhole. This prevents the bed from coming off the bed arms during transport. Remove this
stopper and retain for future transport.
Do not print attempt to print with the white stopper in place. Remove the white bed stopper before printing.
Remove existing prints from the print bed
We do test prints on each 3D Touch as part of our quality control. We leave these on the print bed to show that the printer has been checked, and to
demonstrate some basic prints.
Remove any previous prints with the model removal tool. Slide the edge between the bed and the first layer to remove the entire print.

3D Touch
Page 19
If the model is difficult to remove from the bed in situ, you can take the whole bed out of the machine to make the removal
process easier (refer to ).b. Check the print bed is fitted correctly
Check the bed is clear of any build material
Ensure that all build material is completely removed from the bed. Use the model removal tool to remove any stuck-fast tracks.
It is normal for prints to leave marks on the bed, and for the model removal tool to lightly scratch the surface of the bed. This will
not affect the printer's operation. However, take care to avoid gouging the surface with the material removal tool – the bed must
be flat.

3D Touch
Page 20
b. Check the print bed is fitted correctly
Ensure that bed is correctly fitted to the printer. The three bed bolt heads should sit flush in the countersinks. If not, remove the bed, then refit it - as
shown in the next two sections.
How to remove the bed
Tip: removal is easier if the bed is near the bottom of the machine. If it is too high, you can manually lower the z-axis (see "Manual move").
Table of contents
Other Bfb 3D Printer manuals
