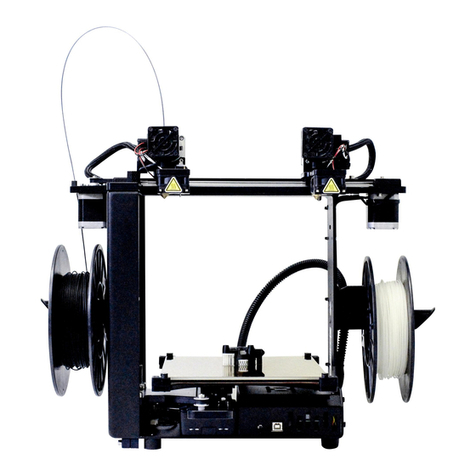
MAKERGEAR Ultra One User manual


Your shipment includes everything you need to run. The
power cord and a large sample print are in your lament
compartment.
The white box contains two spools of PLA lament, coffee
mug, sample print, sucker, tools, tweezers, spare hot end,
spare probe tips, Simplify 3D license, and this user guide.
Welcome
Your MakerGear Ultra One 3D Printer has arrived! To ensure
safety as well as high quality printing, carefully follow the
checkpoints laid out in this guide.
This printer was assembled at the MakerGear shop in
Beachwood, Ohio, USA, and was thoroughly tested to ensure
that it was fully operational at the time of shipping.
What’s Included

Important Safeguards
3. To protect against electrical shock, do not put the printer body,
cord, or electrical plug in liquid. If the printer falls into liquid, do not
touch it. Instead, unplug the printer from power outlet, then remove it
immediately. Do not reach into the liquid without unplugging the printer
rst.
4. This printer should not be used by children unless supervised by an
adult who understands the risks and precauons involved in its use. To
avoid potenal injuries, close supervision is necessary when the printer is
used by or near children.
2. Unplug the power cord when the printer is not in use. To unplug, grasp
the plug and rmly pull it from power outlet. You should never pull the
cord.
5. Avoid any contact with moving parts. The printer can move quickly, so
stay clear to avoid being struck or pinched.
6. Keep hands/hair/clothing away from printer aachments while the
printer is operang to reduce risk of injury to persons and/or damage to
the printer.
7. Do not operate the printer if it has a damaged cord/plug, is
malfunconing, or has been dropped or damaged in any way. If you
are having any problems with the printer (such as temperature errors,
unexplained shutdowns, or other errac behavior), unplug the printer
from power outlet and contact support. Do not operate a malfunconing
printer.
1. The following safeguards exist to ensure the safety of users and to
avoid potenal risks. Ignoring these safeguards can cause damage to the
printer and its environment.
8. Keep area around the printer clear. The enclosure door and lament
door move horizontally and vercally and may cause the printer to move
or damage other equipment if they strike them.
Soware Check Points
The check points below are also at setup.makergear.com/u1, where
further informaon and applicable links are available for each check
point.
1. Uncrate your printer and move it to a sturdy surface.
Remove the orange belt clamps from each of the four belts.
2. Remove the power cord from your lament compartment,
plug in your printer to a dedicated 20 A circuit, and power
on your printer.
3. Connect to your printer and log into Octoprint
a. Ethernet:
-Connect your printer to your router with an ethernet cable
-Login to Octoprint with username “printer” and your serial
number as the password
b. WiFi:
-Connect to your printer’s Access Point from your computer
-Login to Octoprint with username “printer” and your serial
number as the password
-Migrate your printer to your wireless network
-Re-connect to Octoprint using the same credenals
Detailed WiFi Setup Instrucons
Step 1: Enter your printer’s serial number, which is located on the inside of
the printer’s lament compartment. Next, connect your computer to the Ultra
One’s Wi-Fi, using the provided network name and password, in the same way
that you would connect to any other Wi-Fi source.
Step 2: Aer moving to the Step 2 tab, click the temporary setup link and log
in to OctoPrint with the provided username and password.
Step 3: OctoPrint will inform you that you are not connected to the internet.
Click “Wireless Conguraon,” then select your home network and enter your
home network’s password. Connecng may take a few minutes. If OctoPrint
connues to say you are not connected to the internet, refresh the page.
You will not have to go through the setup process again unless you change
networks or factory restore the printer.

4. Run Quick Check in Octoprint:
Aer you’re connected to the printer, proceed to OctoPrint’s
Quick Check, which will help you load the lament and
ensure that the heated build plaorm of the printer stayed
level during shipping.
5. Print 4 hour, 42 minute sample:
Once you complete the Quick Check, we recommend that
you print the sample print and compare it to the print that
we shipped with the printer. More details on how to print
this object are on the nal page of Quick Check.
6. Learn about slicing and prinng your own objects:
Please visit hp://makergear.zendesk.com
7. Learn to use LCD
Also available at hp://makergear.zendesk.com
About Octoprint
The onboard soware supplied on the MakerGear Ultra One is a
specialized version of OctoPrint called OctoPrint for MakerGear. It is
an open-source, easy-to-use tool that gives users total control over
their 3D prinng work-ow.
OctoPrint’s basic funcons include simple tasks such as controlling
and monitoring your printer, as well as more advanced operaons
like slicing les. It can be expanded through its versale plugin
system, a diverse library of community developed plugins oering
specialized funconality, which is useful for all users.
Noce
This is a Class A product. In a domesc environment, this product may
cause radio interference requiring the user to take adequate measures
to migate. The MakerGear Ultra One can, in very rare cases, stop
operang due to electrostac discharge (ESD). Operaon can be
restored by turning the machine o and on again.

Important Tips and Informaon
Main Enclosure Door
Keep the main enclosure door closed except when loading lament,
preparing your bed, or removing a printed object. This will deliver
beer print quality and more consistent results as well as keep
everyone in the area safe. There are many pinch points and heated
components inside the enclosure around which to be careful. When
opening and closing the door, ensure that no one could be potenally
harmed by the moving mass.
Nozzles and Hot Ends
The nozzle is the brass conical piece with a six sided base. It aaches
to the other parts of the hot end and dispenses material through a
precisely sized hole. If you wish to remove or change the nozzle,
you must rst remove the enre hot end. Aempng to unscrew
the nozzle directly from the Ultra One will damage the hot end.
Glass Build Plate
The lm of yellow polyimide tape on the Ultra One’s glass build
plate funcons as the print surface and is on both sides. Once an
object has been printed and the build plate has cooled, users can
remove the build plate by rotang the build plate clips in each corner.
Removing a print from the build plate can be done by further cooling
the glass plate with compressed air and tapping the object soly unl
it releases. Tools used directly on the plate may damage the lm.
USB Port
G-code and .stl les stored on a USB drive in a folder named “toprint”
(case sensive) will be automacally copied to the internal storage of
the Ultra One in the folder named “USB”.
Cancel Buon
To immediately cancel a print and stop any machine operaons, press
the cancel buon. Before resuming use of the printer, ensure that
the cancel buon is not pressed in. We recommend re-boong your
printer aer hing the cancel buon.


Warranty & Support
New Ultra Ones ordered from MakerGear or from an authorized
MakerGear distributor have a Twelve-Month Limited Warranty.
MakerGear will replace defecve parts on Ultra Ones that are
under warranty. Replacement parts may be new or refurbished
and include free shipping in the US. Non-US customers are
responsible for shipping costs for replacement parts.
The Ultra One has an open design (no proprietary lament
cartridges) and Ultra One owners are free to use third party
lament. However, the MakerGear hot end is only covered when
MakerGear lament and authenc MakerGear components are
used. Due to variance in quality, MakerGear is unable to provide
technical support for issues related to third party lament. If
you are using lament or extruder components from a third
party, you must contact your supplier for technical support. The
twelve-month warranty oered by MakerGear does not cover
printer abuse.
Technical Support lives on our website at
www.makergear.com/pages/support
Warranty
Excepons
Support
Table of contents
Other MAKERGEAR 3D Printer manuals

MAKERGEAR
MAKERGEAR M3-ID Installation and operation manual

MAKERGEAR
MAKERGEAR M2 User manual

MAKERGEAR
MAKERGEAR M2 User manual

MAKERGEAR
MAKERGEAR M3-ID User manual

MAKERGEAR
MAKERGEAR M3-SE User manual

MAKERGEAR
MAKERGEAR M2 User manual

MAKERGEAR
MAKERGEAR M2 User manual

MAKERGEAR
MAKERGEAR M3 User manual

MAKERGEAR
MAKERGEAR V4 Quick start guide