bg edelstahl euroMAT light Bedpan Operating instructions
Mit Steuerung
Bedienungsanleitung und
Technische Hinweise
Last updated: 18/05/2020
bg edelstahl und kunststotechnik
für krankenhaus, industrie und wasserwirtschaft gmbh
Bedpan cleaning and
disinfection unit
With controller,
operating manual and
technical information

2 Last updated: 18/05/2020
Operating and maintenance manual
Steckbeckenreinigungs- und Desinfektionsautomat
1. Introduction
2. Safety information
3. General information
3.1 Overview of functions
3.2 Requirements for the functional area
4. Control elements
4.1 Operation
4.2 Commissioning
4.3 Loading
4.4 Description of the programs
4.4.1 The standard program
4.5 Notications on the display
4.5.1 Operating notications
4.5.2 Error messages
4.6 Program end and unloading
4.6.1 Mechanical unlocking during a power failure
5. Warranty / guarantee
6. Maintenance and care
6.1 Warehousing / storing a bedpan cleaning unit
6.2 Maintenance schedule
6.3 Proof of maintenance
6.4 Uninstalling / disposal
bg edelstahl und kunststotechnik für krankenhaus, industrie und wasserwirtschaft gmbh reserves the right to
make changes to the text and illustrations without prior notice. The contents of this publication may not be reproduced or copied
in whole or in part without the prior consent of bg edelstahl und kunststotechnik für krankenhaus, industrie und wasserwirt-
schaft gmbh.
7. Spare parts
7.1 Electrical parts
7.2 Installation materials
7.3 Mechanical parts
7.4 Disinfection
7.5 Chemical consumption
7.6 Electrical data
7.7 Noise emission
7.8 Water
7.9 Dimensions and weight
8. Medical devices book
8.1 Unit master data
8.2 Functional test and brieng
8.3 Brieng sta
8.4 Malfunctions or repeated similar
operating errors
8.5 Reporting incidents to authorities
and manufacturers
8.6 Installation log
9. Personal notes
10. Important addresses
CONTENTS
3
3
3
3
3
4
4
4
4
5
5
5
5
5
7
7
7
7
8
9
10
11
11
11
11
11
11
11
11
11
11
11
12
12
13
14
15
16
17
18
20
Last updated: 18/05/2020
3
Last updated: 18/05/2020
1. Introduction
This operating and maintenance manual is intended to ensure that the
following automatic cleaning and disinfection units are used properly
and to give you the opportunity to carry out minor maintenance work
yourself. You must carefully read through the operating and maintenan-
ce manual to avoid operating errors and unit failures. Please keep this
manual in a place where it is accessible to all users.
2. Safety information
The product must be used in accordance with this safety infor -
mation. If there are any points that you are unsure about, please
contact the manufacturer.
• Prior to each use, check that the bedpan cleaning unit is ready for
operation.
• Avoid ushing in larger quantities of pulp, as otherwise there is a risk
of drain blockage and a worse cleaning result should be expected.
• Only use reusable, thermostable dishes that are suitable for their
intended use as a medical device (holding bodily excretions) and
carry the CE mark as a medical device.
• Check that all the accessible cables and hoses are undamaged on a
regular basis. If defective parts are discovered, immediately
• press the emergency stop switch and do not use the unit any more.
Then notify the Service department.
• If excessive steam or water escapes during rinsing, the unit must be
disconnected from the mains immediately and the manufacturer
must be informed. Never put toilet cleaner or other unauthorised
chemicals in the rinsing chamber.
• The mains plug must be unplugged prior to opening the control ca-
binet. The unit may only be opened by trained specialist personnel.
• The bedpan cleaning unit must not be used for disinfecting other
medical devices.
• Do not use the unit in the event of an epidemic.
• The unit must not be cleaned from the outside with a hose or high-
pressure cleaner.
Please note: The bottom unit cover must be properly closed again af-
ter it has been opened. The key must then be removed from the prole
cylinder and stored separately and securely.
3. General functional description
Congratulations on purchasing your euroMAT basic bedpan cleaning
unit. Below, you will be guided through your unit’s functions and how
to care for it. Read the manual carefully before and also after being brie-
fed about the unit and always keep the operating manual in a dry place
near the unit. The operating manual also contains the maintenance and
installation logs that must be made available to the service technician.
3.1 Overview of functions / intended purpose
The euroMAT basic bedpan cleaning unit is used for cleaning and disin-
fecting urine bottles, bedpans and commode buckets. Three programs
for dierent types and degrees of soiling are available to the user. In
each program, the dishes are pre-rinsed, cleaned, disinfected and then
cooled by means of a further rinse, so they can be removed immediately
after the program has ended and are then ready for use again.
Warning: When using the decentralised, thermal disinfection process
with an A0 value of 600 to 3000, not all existing pathogens (e.g. spo-
res) can be eliminated. In the course of maximised risk management,
some infections (e.g. patients with Clostridium dicile) require that their
reusable dishes (bedpan, urine bottle) be ADDITIONALLY subjected to
a downstream chemical treatment, depending on the pathogen, follo-
wing cleaning / thermal disinfection in the bedpan cleaning unit.
To be able to use the unit with all degrees of water hardness in the
long term, the decalcifying agent euroMATIC pH neutral or euro-
MATIC pH acid is automatically added to the cleaning water. The
storage tank, which needs to be replaced on a regular basis once a
notication to this eect has appeared in the text display, is loca-
ted in the cabinet under the rinsing chamber.
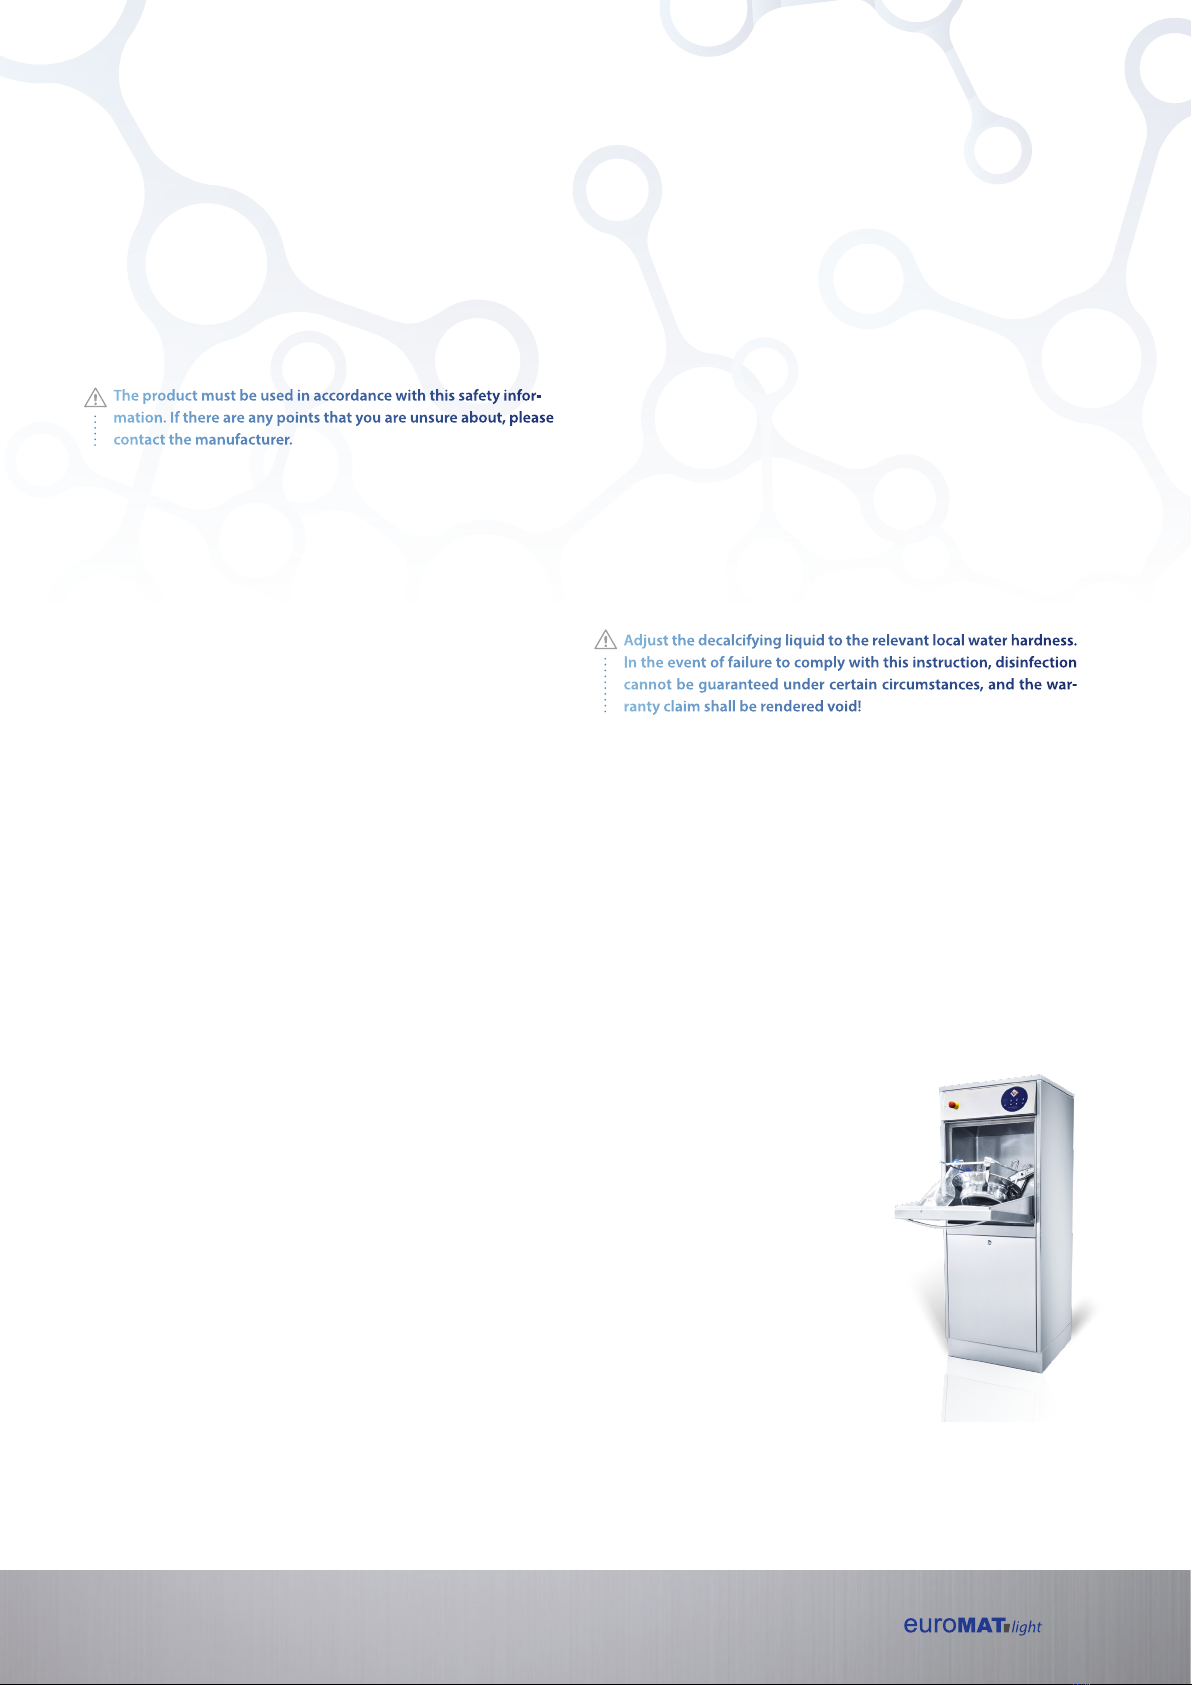
Adjust the decalcifying liquid to the relevant local water hardness.
Intheeventoffailuretocomplywiththisinstruction,disinfection
cannot be guaranteed under certain circumstances, and the war -
ranty claim shall be rendered void!
3.2 Requirements for the functional area
(unclean working area / faecal area)
The design of the functional areas (particularly the unclean working
area) is subject to the relevant federal state’s or country’s state building
regulations and the local regulations. In addition, the operator of a bed-
pan cleaning unit is required to design the environment in such a way
that contamination of the cleaned and disinfected dishes is prevented.
This means, for example, that bedpans or other reusable dishes contai-
ning human waste must not be stored openly in an unclean working
area. In particular, the air being contaminated with germs due to pos-
sible wind / draught air must be taken into account in this respect. The
operator must ensure that they have
sucient bedpan cleaning units avai-
lable to guarantee rapid cleaning and
disinfection of the dishes. Furthermo-
re, no dirty laundry of any kind may be
stored in this room. Cleaning utensils
such as buckets, oor cloths or mops
must not be stored or dried in this
room. The hygienist or the appointed
specialist is responsible for maintai-
ning a clean environment. Their inst-
ructions must be followed according
to the manual and hygiene plan to
avoid cross-infections.
1. Einleitung
Diese Bedienungs- und Wartungsanleitung soll den korrekten Gebrauch
der folgenden bg-Reinigungs- und Desinfektionsautomaten sicherstellen
und geschultem hauseigenem Personal die Möglichkeiten geben, kleinere
Wartungsarbeiten selbst durchzuführen.
Das genaue Durchlesen der Bedienungs- und Wartungsanleitung
sollte jedem Benutzer ermöglicht werden, um Bedienungsfehler
und Ausfälle des Gerätes zu vermeiden.
Bitte positionieren Sie diese Anleitung so, dass sie jedem Benutzer
zugänglichist.
2. Sicherheitshinweise
Das Produkt muss nach diesen Sicherheitshinweisen benutzt wer-
den. Sollte es Punkte geben, bei denen Sie nicht sicher sind kontak-
tieren Sie Ihren lokalen bg-Vertreter bzw. den bg-Kundendienst.
Prüfen Sie vor jeder Verwendung die Betriebsbereitschaft des Steckbe-
ckenspülgerätes.
Vermeiden Sie das Einspülen größerer Zellstoffmengen, da sonst die
Gefahr der Abflussverstopfung besteht und eine Verschlechterung des
Reinigungsergebnisses zu erwarten ist.
VerwendenSie nurthermostabiles Geschirr, dass der Zweckbestimmung
(Aufnahme von Körperausscheidungen)entspricht und ein CE - Zeichen
trägt.
Prüfen Sie regelmäßig die Unversehrtheit aller zugänglichen Kabel und
Schläuche. Wenn defekte Teile entdeckt werden, ist sofort der Netz-
stecker zu ziehen und das Gerät nicht mehr zu verwenden. Informieren
Sie anschließend den Service.
Bei übermäßigem Dampf- oder Wasseraustritt während des Spülens ist
das Gerät sofort vom Netzzu trennen und der Service zu verständigen.
Geben Sie niemals WC-Reiniger in die Spülkammer.
Vor dem Öffnen des Steuerschrankes ist der Netzstecker zuziehen.
Das Öffnen des Gerätes darf nur durch geschultes Fachpersonal
geschehen.
-inizidemnerednanovnoitkefniseDruzthcinfradrelüpsnekcebkcetSreD
schen Produkten verwendet werden.
Verwenden Sie das Gerätnichtim Seuchenfall.
Das Gerät darf nicht mit einem Schlauch oder Hochdruckreiniger von
außen gereinigt werden.
3. Allgemeines
Wir gratulieren Ihnen zu Ihrem Steckbeckenspüler der Serie euroMAT
pro. Im Folgenden werden Sie durch die Funktionen und die Pflege Ihres
Gerätes geführt. Lesen Sie die Anweisung vor und auch nach der Geräte-
einweisung sorgfältig durch und bewahren Sie die Bedienungsanleitung
immer an einem trockenen Ort in Gerätenähe auf. Die Bedienungsanlei-
tung enthält auch die Wartungs- und Installationsprotokolle, die dem Ser-
vicetechniker zur Verfügung gestellt werden müssen.
3.1 Funktionsübersicht
Der Steckbeckenspüler der Serie euroMATpro dient der Reinigung und
Desinfektion von Urinflaschen, Steckbecken und Nachtstuhleimern. 3 Pro-
gramme für unterschiedliche Verschmutzungen und Verschmutzungs-
grade stehen dem Anwender zur Verfügung. In jedem Programm wird
das Geschirr vorgespült, gereinigt, desinfiziert und anschließend durch
eine weitere Spülung abgekühlt, so dass es nach Programm-Abschluss
sofort entnehmbar und wiedereinsatzbereit ist.
Um das Gerät mit allen Wasserhärtegraden lange verwenden zu
können wird dem Reinigungswasser automatisch das Entkalkungs-
mittel euroMATIC oder euroMATIC ph-sauer hinzugeführt. Der Vor-
ratsbehälter, der nach entsprechender Meldung in der Text- Anzeige
unter der Spülkammer.
härte ein. Bei Nichteinhalten erlischt der Garantieanspruch!
3
bg Doku 28, Revision 16.01.2018
4 Last updated: 18/05/2020
4.1 Operation
Below, you will be provided with a detailed guide to the steps to be
taken to achieve an optimum cleaning and disinfection result. Please
read through each of the steps described carefully and follow the advice
and instructions for use.
4.2 Commissioning
Prior to each cleaning cycle, you should routinely check some things.
The check only takes a few seconds, but saves you the bother of annoy-
ing and time-consuming troubleshooting later on.
• Check the cleaning chamber, rinsing nozzles and the rotary rinsing
arm for paper residue, dirt and such like.
• Check the rotary rinsing arm for ease of movement. It must be possi-
ble to rotate the rinsing arm by hand without any diculty.
• Check the drain for paper residue, dirt or blockages and remove /
rectify them.
Use the text display to check whether the unit is ready
for operation.
• Check whether the rinsing chamber door is easy to open and close.
If any of the above points are not met and you are unable to correct the
deviation yourself, please notify the manufacturer and do not use the
unit until the issue has been rectied.
4.3 Loading
Now that you have briey checked that the unit is ready for operation,
you can begin the cleaning process. For this purpose, the dishes with
contents are inserted into the holder located on the inside of the clea-
ning chamber door.
• Avoid ushing in larger quantities of pulp, as otherwise there is a risk
of drain blockage and a worse cleaning result should be expected!
• Only use dishes that are suitable for their intended use as a medical
device (holding bodily excretions) and carry the CE mark as a medical
device. Only then can you be sure that the unit will not be damaged!
If, for any reason, the dishes do not
t properly into the holder, do not
load the rinsing chamber with the
dishes in question. Urine bottles
are pushed (with the opening to
the front) through the retaining
ring on the left-hand side as far as
the stop. Bedpans and commo-
de buckets are pushed into the
holder with the opening facing
upwards. The lid of the bedpan
can also be inserted into the holder (the lid handle points towards the
cleaning chamber door). The dishes are emptied automatically when
the door is closed. Select the desired program on the control element
once the chamber door has been closed.
Texte für Programmablauf
A Wert-Anzeige
Kurzprogramm
Normalprogramm
IntensivprogrammRandspülung oder WC-Spülung
Menüanwahl
Ausgabe 2016 Rev. BG-Dok 28
Das Bedienfeld
4. Das Bedienfeld
Im Folgenden erfahren sie detailliert die durchzuführenden Schritte, um
ein optimales Reinigungs- und Desinfektionsergebnis zu erhalten.
Lesen Sie die im Einzelnen beschriebenen Schritte bitte sorgfältig
durch und beherzigen Sie bitte die Ratschläge und Hinweise zur
Benutzung.
4.1 Inbetriebnahme
Vor jedem Reinigungszyklus sollten Sie routinemäßig einige Dinge über-
prüfen. Die Überprüfung dauert nur wenige Sekunden, spart jedoch spä-
ter eine eventuell ärgerliche und zeitraubende Fehlersuche.
• Überprüfen Sie die Reinigungskammer, Spüldüsen und den Rotations-
spülarm auf Papierreste, Verschmutzung oder ähnliches.
• Überprüfen Sie den Rotationsspülarm auf Leichtgängigkeit. Der
Spülarm muss sich von Hand leicht drehen lassen.
• Überprüfen Sie den Abuss auf Papierreste, Verschmutzung oder Ver-
stopfung.
Prüfen Sie anhand der Text-Anzeige, ob das Gerät betriebsbereit ist.
• Prüfen Sie, ob die Spülkammertür leichtgängig zu önen und zu ver -
schließen ist.
Sollte einer der oben genannten Punkte nicht erfüllt sein und Sie
können die Abweichung selber nicht beheben, benachrichtigen Sie bit-
te den Servicetechniker und benutzen das Gerät vorerst nicht.
4.2 Beladen
Nachdem das Gerät nun von Ihnen kurz auf Betriebsbereitschaft hin über-
prüft wurde, können Sie mit dem Reinigungsprozess beginnen. Zu die-
sem Zweck werden die Geschirre mit Inhalt in die auf der Innenseite der
Reinigungskammertür befindliche Aufnahmevorrichtung gesteckt.
• Vermeiden Sie das Einspülen größerer Zellstomengen, da sonst die Ge-
fahr der Abflussverstopfung besteht und eine Verschlechterung des Rei-
nigungsergebnisses zu erwarten ist!
• Verwenden Sie nur Geschirr, dass der Zweckbestimmung (Aufnahme
von Körperausscheidungen) entspricht und ein CE-Zeichen trägt. Nur
dann können Sie sicher sein, dass das Gerät nicht beschädigt wird!
der Öffnung nach oben in die Aufnahmevorrichtung geschoben. Der
Deckel des Steckbeckens kann ebenfalls in die Aufnahmevorrichtung
gesteckt werden (Deckelgriff zeigt dabei zur Reinigungskammertür).
Beim Schließen der Tür entleeren die Geschirre sich selbsttätig. Nach dem
Schließen der Kammertür wählen Sie das gewünschte Programm am Be-
dienelement.
Sollte aus irgendeinem Grunde das
Geschirr nicht ordentlich in die
Halterung passen, dürfen Sie die
Spülkammer mit diesem Geschirr
nicht beladen. Urinaschen werden
mit der Öffnung nach vorn durch den
linksseitigen Haltering bis zum
Anschlag geschoben. Steckbecken
und Nachtstuhleimer werden mit
4
4. Control elements
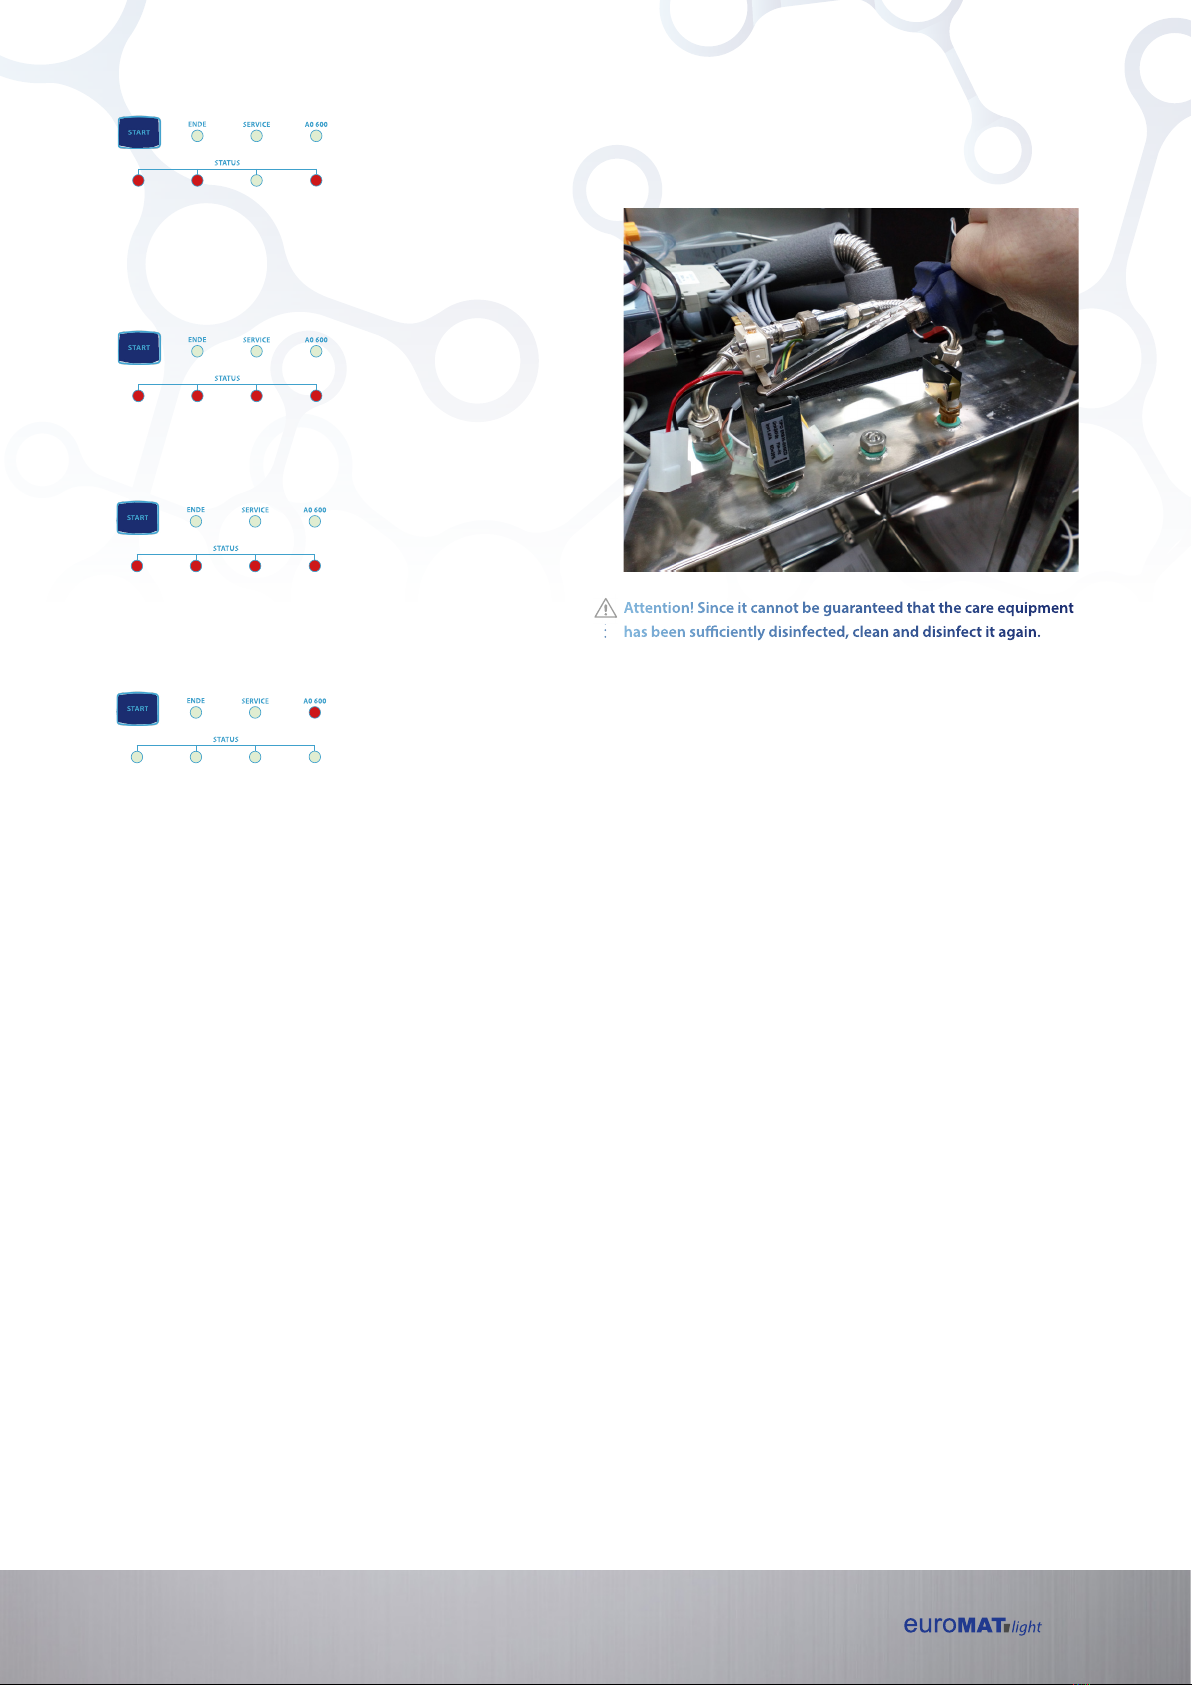
Control panel
Status messages, error
messages and maintenance
intervals via diode display.
Start
Rinsing programs for cleaning
bedpans, urine bottles, commode
buckets, kidney dishes, etc.
5
Last updated: 18/05/2020
4.4 Description of the programs
The door is locked throughout the entire cleaning process and cannot
be opened until cleaning, disinfection and cooling are all complete.
The selected program is indicated by an LED in the relevant keyboard
icon. The door remains locked if an error occurs. Caution! The door gets
slightly warmer during the disinfection stage. However, there is no risk of
burns in the event of contact. The door handle remains at approximately
room temperature even when in continuous use.
4.4.1 The standard program
Please use the standard program for cleaning and disinfecting bedpans
or commode buckets with normal levels of soiling. It has an average
rinsing time with the same disinfection performance.
The following parameters are programmed as standard:
A0 600
Hot water consumption Approx. 9 litres
Cold water consumption Approx. 18 litres
Power consumption Approx. 0.300 kWh
The authorised specialist reserves the right to change these parameters.
However, they can be changed on request. The manufacturer oers trai-
ning (for a fee) in this respect.
4.5 Notications on the display
4.5.1 Operating notications
In error-free operation, the individual stages of the selected program
can be followed in the text display.
Here is a list of the possible messages and what they mean:
4.5.2 Error messages
The following notications may appear if an error occurs or if there is an
impending shortage of equipment (euroMATIC):
Ready for operation
Program start
Rinsing stage
Disinfection
A0 value has reached
600
Recooling stage
Dish drainage stage
Program end
Drain blocked
(also for‘Cable breakage – sensor’)
Cause: Blockage in the siphon
or drain; the water level in the
chamber is rising too high during
rinsing Remedy: Clean the drain
Water sensor – base
(also for‘Cable breakage –
sensor’) Cause: Leaky tank or
siphon; water spilled in front of
the machine Remedy: Check and
seal the leak; mop up the water;
dry the sensor
Error – door contact
Cause: The door contact’s switch
is generating invalid signal com-
binations; switch or
cable defective Remedy: Check
the switch and cable and replace
them if necessary (Service)
Door lock defective
(also for‘Error – door lock’) Cause:
The door lock’s switch is generating
invalid signal combinations; switch
or cable defective Remedy: Check
the switch and cable and replace
them if necessary (Service)
Tank sensor defective
Cause: The tank sensor’s switch is
generating invalid signal combi-
nations; switch
or cable defective; oat is jammed
Remedy: Check the oat; check
the switch and cable and replace
them if necessary (Service)

6 Last updated: 18/05/2020
No cold water supply
Cause: Valve or activation
defective; cable defective; water
tap turned o Remedy: Check
the water tap. Check the valve /
cable (Service). Potential time-out;
increase the value in the Service
menu
No hot water supply
Cause: Valve or activation
defective; cable defective; water
tap turned o Remedy: Check
the water tap. Check the valve /
cable. Potential time-out; increase
the value in the Service menu
(Service)
Tank is not emptying
Cause: The pump is jammed /
defective or the activation is de-
fective Remedy: Check the pump
and activation. Potential time-out;
increase the value in the Service
menu (Service)
Heating defective
Cause: The set temperature is not
reached. A temperature fuse may
have tripped; the activation may
be defective; the mains voltage
may be too low; steam may be
escaping Remedy: Check the
temperature fuse on the heating
element; check the activation
(Service)
UV lamp defective
Cause: The lamp’s current sensor
is not detecting current ow
Remedy: Check / replace the
lamp. The control unit may be
defective (Service)
A0 value not reached
Cause: Temperature or time-out
set too low Remedy: Increase the
target temperature or time-out
Temperature sensor
defective
Cause: Dierent temperatures
> +-3°C between processor and
co-processor, or co-processor is
not responding Remedy: Check
the sensor and cable; replace the
controller (Service)
Error – deadbolt
(also for‘Error – door lock’) Cause:
The door cannot be locked; the
magnet or tappet is blocked
Remedy: Close the door cor-
rectly; adjust the mechanics if
necessary
Water sensor – drain
defective
(also for‘Drain blocked’) Cause:
Cable to the water sensor in the
siphon broken Remedy: Check
the cable (Service)
Water sensor – base
defective
(also for‘Water sensor – base’)
Cause: Cable to the water sensor
at the base broken Remedy:
Check the cable (Service)
Close the door
IMMEDIATELY
(also for‘Water inlet valve de-
fective’) Cause: The tank is lled
higher than the setpoint (inlet
valve defective) or automatic 24 h
disinfection is on.
Remedy: Close the door
Rinse aid empty
(also for‘Descaler empty’)
Cause: The canister is empty
Remedy: Replace the canister
once the program has ended
Descaler empty
(also for‘Rinse aid empty’)
Cause: The canister is empty
Remedy: Replace the canister
once the program has ended
Disinfectant empty
Cause: The canister is empty
Remedy: Replace the canister
once the program has ended
7
Last updated: 18/05/2020
4.6 Program end and unloading
If none of the above error messages are visible in the text display once
the entire cycle has ended, the cleaning program has been completed
successfully. The door is locked throughout the entire cleaning process
and cannot be opened until cleaning, disinfection and cooling are all
complete. The dishes then have a temperature of 40°C. They can be
removed and used immediately. The dishes should then be visually in-
spected to check the cleaning performance. After the inspection, the
dishes should be stored properly to avoid recontamination.
Otherwise, if faults occurred, the door lock is not released and a new
program is started. This is the case, for example, when the power fails
during the cleaning cycle. If there is a serious error that prevents a pro-
cess from being repeated, the door remains locked and the service tech-
nician must be notied.
Water inlet valve defective
(also for‘Close the door imme-
diately’) Cause: The tank is lled
higher than the setpoint (inlet
valve or activation defective)
Remedy: Turn o the water tap;
check the valve or activation
(Service)
Error – SD card
(also for‘Software error’)
Cause: The SD card is not
writable or not present Remedy:
Check the SD card (Service)
Internal software error
(also for‘Error – SD card’) Cause:
The check of the processor’s
internal ROM or RAM has failed
Remedy: Reprogram; replace the
controller
Automatic 24 h cleaning
Cause: Automatic 24 h cleaning
is currently in progress Remedy:
Wait until the cycle is complete
Display: A0 LED is ashing
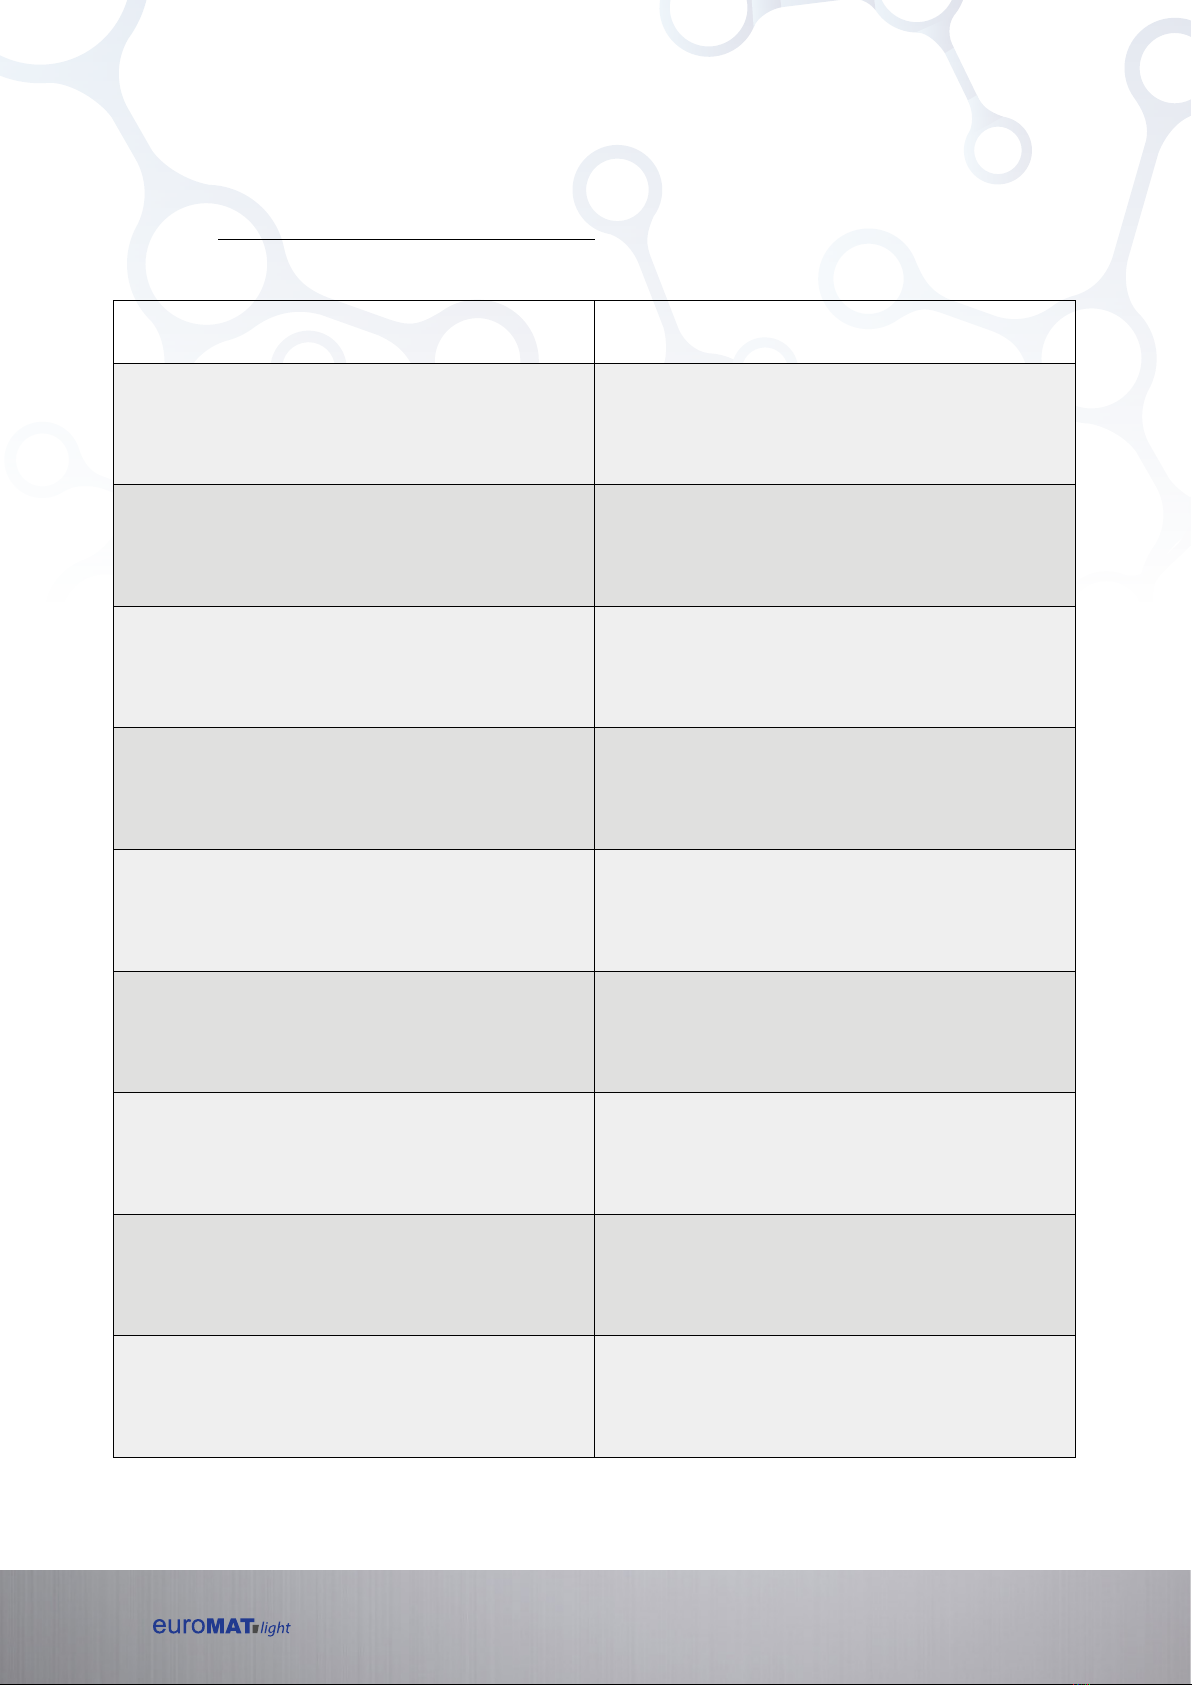
4.6.1 Mechanical unlocking during a power failure
Open the top revision panel. Pull the tappet upwards slightly using
pliers (gure).
Attention! Since it cannot be guaranteed that the care equipment
has been suciently disinfected, clean and disinfect it again.
5. Warranty / guarantee
Unless agreed otherwise, the warranty / guarantee (which covers the
design, material and manufacture) corresponds to the manufacturer’s
General Terms and Conditions. The warranty claim shall become void in
the event of improper use, failure to observe the care and maintenance
instructions, unit failure caused by contamination in the inlet and outlet
pipework due to improper use, or external inuences. Only a non-foa-
ming agent, which you can also purchase from the manufacturer, may
be used as a lime binder. The manufacturer recommends euroMATIC in
the variants pH neutral or pH acid. The warranty claim shall become void
if unsuitable agents are used.
1. Einleitung
Diese Bedienungs- und Wartungsanleitung soll den korrekten Gebrauch
der folgenden bg-Reinigungs- und Desinfektionsautomaten sicherstellen
und geschultem hauseigenem Personal die Möglichkeiten geben, kleinere
Wartungsarbeiten selbst durchzuführen.
Das genaue Durchlesen der Bedienungs- und Wartungsanleitung
sollte jedem Benutzer ermöglicht werden, um Bedienungsfehler
und Ausfälle des Gerätes zu vermeiden.
Bitte positionieren Sie diese Anleitung so, dass sie jedem Benutzer
zugänglichist.
2. Sicherheitshinweise
Das Produkt muss nach diesen Sicherheitshinweisen benutzt wer-
den. Sollte es Punkte geben, bei denen Sie nicht sicher sind kontak-
tieren Sie Ihren lokalen bg-Vertreter bzw. den bg-Kundendienst.
Prüfen Sie vor jeder Verwendung die Betriebsbereitschaft des Steckbe-
ckenspülgerätes.
Vermeiden Sie das Einspülen größerer Zellstoffmengen, da sonst die
Gefahr der Abflussverstopfung besteht und eine Verschlechterung des
Reinigungsergebnisses zu erwarten ist.
VerwendenSie nurthermostabiles Geschirr, dass der Zweckbestimmung
(Aufnahme von Körperausscheidungen)entspricht und ein CE - Zeichen
trägt.
Prüfen Sie regelmäßig die Unversehrtheit aller zugänglichen Kabel und
Schläuche. Wenn defekte Teile entdeckt werden, ist sofort der Netz-
stecker zu ziehen und das Gerät nicht mehr zu verwenden. Informieren
Sie anschließend den Service.
Bei übermäßigem Dampf- oder Wasseraustritt während des Spülens ist
das Gerät sofort vom Netzzu trennen und der Service zu verständigen.
Geben Sie niemals WC-Reiniger in die Spülkammer.
Vor dem Öffnen des Steuerschrankes ist der Netzstecker zuziehen.
Das Öffnen des Gerätes darf nur durch geschultes Fachpersonal
geschehen.
-inizidemnerednanovnoitkefniseDruzthcinfradrelüpsnekcebkcetSreD
schen Produkten verwendet werden.
Verwenden Sie das Gerätnichtim Seuchenfall.
Das Gerät darf nicht mit einem Schlauch oder Hochdruckreiniger von
außen gereinigt werden.
3. Allgemeines
Wir gratulieren Ihnen zu Ihrem Steckbeckenspüler der Serie euroMAT
pro. Im Folgenden werden Sie durch die Funktionen und die Pflege Ihres
Gerätes geführt. Lesen Sie die Anweisung vor und auch nach der Geräte-
einweisung sorgfältig durch und bewahren Sie die Bedienungsanleitung
immer an einem trockenen Ort in Gerätenähe auf. Die Bedienungsanlei-
tung enthält auch die Wartungs- und Installationsprotokolle, die dem Ser-
vicetechniker zur Verfügung gestellt werden müssen.
3.1 Funktionsübersicht
Der Steckbeckenspüler der Serie euroMATpro dient der Reinigung und
Desinfektion von Urinflaschen, Steckbecken und Nachtstuhleimern. 3 Pro-
gramme für unterschiedliche Verschmutzungen und Verschmutzungs-
grade stehen dem Anwender zur Verfügung. In jedem Programm wird
das Geschirr vorgespült, gereinigt, desinfiziert und anschließend durch
eine weitere Spülung abgekühlt, so dass es nach Programm-Abschluss
sofort entnehmbar und wiedereinsatzbereit ist.
Um das Gerät mit allen Wasserhärtegraden lange verwenden zu
können wird dem Reinigungswasser automatisch das Entkalkungs-
mittel euroMATIC oder euroMATIC ph-sauer hinzugeführt. Der Vor-
ratsbehälter, der nach entsprechender Meldung in der Text- Anzeige
unter der Spülkammer.
härte ein. Bei Nichteinhalten erlischt der Garantieanspruch!
3
bg Doku 28, Revision 16.01.2018
6. Maintenance and care
Maintenance work
• The surface of the euroMAT basic bedpan cleaning unit should be
treated with the manufacturer’s stainless steel care oil. It can be
applied as required.
• Before and after the cleaning process, the chamber must be che-
cked for the presence of foreign matter and dirt.
Attention! No toilet cleaner or other unauthorised chemicals may be
put in the rinsing chamber.
• Check the rotary rinsing arm for ease of movement on a regular
basis. It must be possible to rotate the rinsing arm by hand without
any diculty.
• Check the rinsing nozzles and the steam outlet for foreign matter or
blockages on a regular basis
Servicing work
Servicing work may only be carried out by trained medical device ser-
vice technicians who have received training on the units and who com-
ply with the safety regulations.

8
Last updated: 18/05/2020
6.1 Warehousing / storing a bedpan cleaning unit
The operator / client is responsible for properly warehousing / storing
a bedpan cleaning unit. With regard to storing a euroMAT bedpan
cleaning unit, ensure that the room temperature is 20°C and the hu-
midity is less than 2% to avoid oxidation and diusion on electronic
components (this applies explicitly to units that are not in operation).
A sample solution would be to use a moisture protection bag with an
appropriately sized bag of dessicant. There should be a vacuum with
a residual pressure of 6 mbar in the moisture protection bag. This bag
is then ooded with nitrogen so that oxidising agents or electrolytes
are no longer present. The unit must be stored in a dust-free, dry and
upright state. It is also imperative to ensure that the unit is secured so
that it cannot topple over. Prior to recommissioning, a comprehensive
functional test must be carried out in accordance with qualied com-
missioning as per the manufacturer’s specications and statutory requi-
rements. When used in an unclean working area, the bedpan cleaning
unit should ideally be stored at a room temperature of 21°C with the
lowest possible relative humidity.
Please proceed as follows to obtain the unit information
listed below:
1. Open the rinsing chamber door
2. Press and hold the Start button
The following information is displayed in order after approx. 2 seconds:
a) Batch counter status
b) Next maintenance
c) Last A0 value determined
d) Date and time
e) Chamber temperature
f ) Controller’s and display’s software versions
To ensure that the cleaning unit works faultlessly, the law stipulates that
regular maintenance must be carried out at least once a year. During
the warranty period, the bedpan cleaning unit must be maintained in
accordance with the manufacturer’s specications after every 5,000 rin-
sing cycles (the maintenance message will appear in the text display) or
once a calendar year has ended. Once the warranty period has elapsed,
in addition to performing annual maintenance we recommend inspec-
ting the bedpan cleaning unit every six months. The maintenance sche-
dule and the proof of maintenance for logging maintenance work form
part of this operating manual and can be found on subsequent pages.
Calibration
Disconnect the chamber temperature sensor and
connect the supplied calibration plug. Press the but-
ton with the door open. The display shows the tem-
perature – it should be 87°C ± 1°C.
Required equipment
• Unit tester (e.g. from Benning)
• Programming unit
• External temperature measuring device (DAkkS calibrated)
• Data logger (recommendation: from ebro)
Steps for carrying out calibration
1. Connect the programming unit to the‘pro’ D-Sub port.
2. When switching on the programming unit, press the letter‘b’and
then the red arrowhead in the logo.
3. Attach the external temperature measuring device (sensor) to the
bedpan cleaning unit’s existing temperature sensor at the same
height.
4. Let the cleaning unit rinse twice before the measurement to heat
up the unit. To do this, please use the short rinsing program in the
display (urine bottle).
5. Start the short rinsing program.
6. If the temperature displayed on the programming unit’s control
panel is 85°C – 87°C, the value on the external measuring device
must be noted simultaneously (within one second), otherwise the
result is falsied.
7. Wait for the rinse cycle to end.
8. Switch o the programming unit.
9. Switch on the unit and select the ‘Calibration’item in the menu.
10. Now enter the noted value from the programming unit’s display
under the ‘Displayed temperature’ item (control panel) using the
keyboard that appears on the touch panel and conrm with ‘OK’.
11. Then enter the noted value from the external measuring device
under the ‘Measured temperature’item (external measuring
device) using the keyboard that appears on the touch panel and
conrm with ‘OK’.
12. Finally, press the ‘Save button’on the programming unit.
13. Now go back to the main menu with the arrow key.
14. Calibration is now complete; the data has now been transferred.
15. Switch o the programming unit, disconnect it from the controller
box and restore the original state.
16. Finally, perform a test rinse. Please run a temperature logger (A0
value) for checking during this process.
17. At the end of the test rinse, the A0 value on the cleaning unit and
the A0 value on the logger must be almost identical, taking a small
tolerance (+ 10%) into account.
18. If this is not the case, the process must be repeated until the A0
values are almost identical.

9 Last updated: 18/05/2020
6.2 Maintenance schedule
The following parts must be inspected, cleaned and (if necessary) replaced during annual maintenance.
Abbreviations: I = Inspect C = Clean R = Replace V = Verication CA = Calibration
1. Adjust the dosage of the suitable coating inhibitor to the water hardness according to the unit manufacturer’s and agent manufacturer’s specications. Check the descaling agent’s shelf life.
2. When checking the suction hose, ensure that you use a neutral coating inhibitor in accordance with the manufacturer’s specications in this manual.The hose must be replaced if there is any noticeable hardening.
3. Every 4 years after initial commissioning, or every 20,000 rinsing cycles.
1 2 3 4 5 6 7 8 9 10
CW supply hoses I I I I RI I I I R
HW supply hoses I I I I RI I I I R
Existing dirt strainers C C C C C C C C C C
Solenoid valves I I I I RI I I I R
Rinsing chamber / pipe C C C C C C C C C C
Rinsing impeller I I I I I I I I I I
Clip-on device I I I I I I I I I I
Door spring / bearing I I I I I I I I I I
Rinsing chamber door
monitoring device I I I I I I I I I I
Door lock I I I I I I I I I I
Door seals I I I RI I I RI I
Water storage tank I / C R I / C R I / C R I / C R I / C R
Steam generator I I I I I I I I I I
Flex hose R R R R R R R R R R
Dosing pump I I I I I I I I I I
Descaling agent according
to the manufacturer’s dosing
instructions 1
I I I I I I I I I I
Suction lance I I I I I I I I I I
Suction hose 2IRIRIRIRIR
Tank level sensor I / C I / C I / C I / C I / C I / C I / C I / C I / C I / C
Capacitor ---R- - - R- -
Booster pump I I I I I I I I I I
Cleaning nozzles I / C I / C I / C I / C I / C I / C I / C I / C I / C I / C
Siphon / monitoring device I I I I I I I I I I
Controller I I I I I I I I I I
Control panel I I I I I I I I I I
UV Lamp 3I / C I / C I / C RI / C I / C I / C RI / C I / C
Reducing rubbers for UV
lamp and steam vent I / C I / C I / C RI / C I / C I / C RI / C I / C
Temperature sensor CA CA CA CA CA CA CA CA CA CA
Spring-loaded pressure piece R R R R R R R R R R
Disinfection A0 = 600 I I I I I I I I I I
DGUV V3 I I I I I I I I I I
Unit function I I I I I I I I I I
Year of operation
Part

10
Last updated: 18/05/2020
6.3 Proof of maintenance
The following tasks were carried out during maintenance work. Abbreviations: I = Inspect C = Clean R = Replace V = Verication CA = Calibration
1 2 3 4 5 6 7 8 9 10
Zulaufschläuche KW
Zulaufschläuche WW
Vorhandene Schmutzfangsiebe
Magnetventile
Spülkammer / -Rohr
Spülügel
Aufsteckvorrichtung
Türfeder / - Lager
Überwachung Spülkammertür
Türverriegelung
Türdichtung
Wasservorratstank
Dampferzeuger
Walkschlauch
Dosierpumpe
Entkalkungsmittel gemäß
Dosieranleitung des Herstellers
1
Sauglanze
Saugschlauch 2
Tankniveau-Sensor
Kondensator
Druckerhöhungspumpe
Reinigungsdüsen
Siphon / Überwachung
Steuerung
Bedienfeld
UV-Lampe 3
Temperaturfühler
Desinfektion A0=600
DGUV V3
Gerätefunktion
Date
Signature
1 2 3 4 5 6 7 8 9 10
CW supply hoses
HW supply hoses
Existing dirt strainers
Solenoid valves
Rinsing chamber / pipe
Rinsing impeller
Clip-on device
Door spring / bearing
Rinsing chamber door
monitoring device
Door lock
Door seals
Water storage tank
Steam generator
Flex hose
Dosing pump
Descaling agent according
to the manufacturer’s dosing
instructions 1
Suction lance
Suction hose 2
Tank level sensor
Capacitor
Booster pump
Cleaning nozzles
Siphon / monitoring device
Controller
Control panel
UV Lamp 3
Reducing rubbers for UV
lamp and steam vent
Temperature sensor
Spring-loaded pressure piece
Disinfection A0 = 600
DGUV V3
Unit function
Year of operation
Part

11 Last updated: 18/05/2020
7.2 Installation materials
Rinsing impeller Item no.: 0000091
Urine bottle nozzle, full jet, plastic Item no.: 0000199
Ceiling nozzle, full cone, stainless steel Item no.: 0000084
Cold or hot water supply hoses
Item no.: 0000085
Ceiling nozzle distributor Item no.: 0000086
DN 100 siphon Item no.: 0000089
DN 100 siphon sleeve Item no.: 0000090
Rinsing pipe made of plastic Item no.: 0000704
Screw-in connection, 22x3/4” OT Item no.: 0001178
Corrugated pipe steam line Item no.: 0000045
SS steam pipe kit Item no.: 0000119
30 / 50 reducing rubber Item no.: 0000551
7.3 Mechanical parts
Door spring Item no.: 0000073
Door mounting plate for repair Item no.: 0000074
Spring-loaded pressure piece Item no.: 0000072
Labyrinth door seal Item no.: 0000001
Bottom door seal Item no.: 0000150
Spare parts can only be ordered from the manufacturer or one of its sa-
les partners by stating the item number. Only original spare parts may
7. Spare parts
7.1 Electrical parts
Controller box (power unit incl. controller) Item no.: 0001314
Adapter board for connecting the Item no.: 0001324
operating lm and D-Sub cable
Cable set (oor-standing unit) Item no.: 0001316
Floor sensor Item no.: 0001317
Emergency stop button Item no.: 0001012
Module contacts for emergency stop Item no.: 0000689
Descaler suction lance Item no.: 0001008
Operating lm Item no.: 0001325
Tank level sensor Item no.: 0001313
Evaporator unit, SS, complete Item no.: 0000871
Flex hose pump Item no.: 0000847
Flex hose cartridge Item no.: 0000534
Booster pump Item no.: 0000067
Motor capacitor Item no.: 0000033
Temperature sensor Item no.: 0001258
Door lock Item no.: 0001201
Rinsing chamber monitoring device Item no.: 0001329
24 V DC double solenoid valve Item no.: 0000664
UV Lamp Item no.: 0000169
Siphon / monitoring device, complete Item no.: 0000172
4 GB SD card Item no.: 0001333
15-pin D-Sub cable Item no.: 0001265
7.4 Disinfection
The euroMAT light units are exclusively equipped
with decentralised, thermal disinfection. The dishes
and the entire rinsing chamber are disinfected once
cleaning is complete.
7.5 Chemical consumption
The unit only requires a lime binder. It is tailored to the euroMATIC
pro
duct, which can be purchased from the manufacturer or one of its
sales partners. Alternatively, euroMATIC pH acid can be used depending
on the °dH (water hardness). Please note: An agent with an acidic pH
must be used from a water hardness of 12°dH.
If other agents that are not approved by the manufacturer are
used, the warranty shall become void and even hygienic success
cannot be guaranteed.
7.6 Electrical data
Electrical connection: 230 V, 50 Hz, equipotential bonding cable
(mandatory).
Protection class: 1
Unit protection type: IPX1
Controller protection type: IP21
Power consumption: Approx. 3.0 kW
Energy consumption: Standby approx. 0.002 kWh
Edge rinsing approx. 0.010 kWh
Rinsing: Short program approx. 0.275 kWh
Standard program approx. 0.300 kWh
Intensive program approx. 0.325 kWh
7.7 Noise emission
The workplace level is 45.3 dB (A)
The accuracy class 2 measurement was conducted in accordance with
ISO 11203:1195 and ISO 3744:2010.
7.8 Water
Connections as per the ½ ”cold water
German Drinking ½ ”hot water, 70°C inow
Water Ordinance: DN 100 outow
Flow pressure: Minimum 100 kPa
Maximum 1000 kPa
Water consumption: Edge rinsing 5 l cold water
Rinsing:
Kurzprogramm 21,8 l cold water 11,7 l hot water
Normalprogramm 29,9 l cold water 13,3 l hot water
Intensivprogramm 37,9 l cold water 18,0 l hot water
7.9 Dimensions and weight
W x H x D: 496 x 1305 x 500 mm, weight: 65 kg
6.4 Uninstalling / disposal
Please proceed as follows to uninstall the bedpan cleaning unit:
• Unplug the mains plug.
• Switch o the water supply (indoor installation).
• Empty the rinsing chamber if necessary.
• Loosen the unit fastening.
• Loosen the drain pipe. Pay attention to residual water in the drai-
nage channel.
• Disconnect the water supply hoses from the building connection.
Empty any residual water!
• The bedpan cleaning unit can now be removed.
• Electronic components, plastics and metals must be disposed of sepa-
rately – please observe the regional disposal regulations in this respect!
be used, otherwise safety and hygienic success cannot be guaranteed.
Technical data
euroMAT basic is monitored – compliant – inspected in accordance with:
• Medical Devices Directive
• DIN EN ISO 15883 Parts 1 and 3
• System separation in accordance with DIN EN 1717
• Hygiene certicates based on DIN EN ISO 15883

12
Last updated: 18/05/2020
8. Medical devices book
8.1 Unit master data
Nature and type
Serial number
Heating number
Year of acquisition
Initial commissioning (MM/YYYY)
Manufacturer
Supplier
Company ID number
Location and operational assignment
Deadlines for safety checks
(see sticker on the product)

13 Last updated: 18/05/2020
8.2 Functional test and brieng
Inventory no.
Functional test
On:
By:
Briengs
Person responsible:
Time Manufacturer / supplier Name of the person respon-
sible for the brieng Signature

14
Last updated: 18/05/2020
8.3 Brieng sta
Time Person providing the
brieng Name of the person briefed Signature
15 Last updated: 18/05/2020
8.4 Malfunctions or repeated similar operating errors
Inventory no.
Time Description of nature and consequences
16
Last updated: 18/05/2020
8.5 Malfunctions or repeated similar operating errors
Inventory no.
Time Description of the reported incident
17 Last updated: 18/05/2020
Postal address:
Name of the company:
Street / no.:
Serial number:
Unit type / designation:
Installation: Yes No
Unit installed Housing
not defective
Hot and cold water connected Drainage
pipework connected Schuko plug
plugged into socket
Equipotential bonding cable connected to housing Water
hardness checked
Water hardness (degrees in dH)
Dosage time (descaler)
Used descaler agent (please indicate the manufacturer)
Functional test:
Water inlet checked for leaks
Cold water pipework checked for leaks
Drainage pipework checked for leaks
Functional test of short program
Functional test of standard program
Functional test of intensive program
Functional test of edge rinsing (if present)
A0 value reached Short Temp/sec.
Standard Temp/sec.
Intensive Temp/sec.
Installation company: Name of the installer:
Date of installation: Signature / stamp:
A0
A0
A0
Contact:
Postcode / Town/city:
Unit location:
Installation and commissioning log
IMPORTANT! Please ll out this log carefully and RETURN IT to the
manufacturer or to the relevant sales partner!
The measurement logs (DGUV V3 electrical test / hygiene test / temperature test)
must be attached to this log.
1. Einleitung
Diese Bedienungs- und Wartungsanleitung soll den korrekten Gebrauch
der folgenden bg-Reinigungs- und Desinfektionsautomaten sicherstellen
und geschultem hauseigenem Personal die Möglichkeiten geben, kleinere
Wartungsarbeiten selbst durchzuführen.
Das genaue Durchlesen der Bedienungs- und Wartungsanleitung
sollte jedem Benutzer ermöglicht werden, um Bedienungsfehler
und Ausfälle des Gerätes zu vermeiden.
Bitte positionieren Sie diese Anleitung so, dass sie jedem Benutzer
zugänglichist.
2. Sicherheitshinweise
Das Produkt muss nach diesen Sicherheitshinweisen benutzt wer-
den. Sollte es Punkte geben, bei denen Sie nicht sicher sind kontak-
tieren Sie Ihren lokalen bg-Vertreter bzw. den bg-Kundendienst.
Prüfen Sie vor jeder Verwendung die Betriebsbereitschaft des Steckbe-
ckenspülgerätes.
Vermeiden Sie das Einspülen größerer Zellstoffmengen, da sonst die
Gefahr der Abflussverstopfung besteht und eine Verschlechterung des
Reinigungsergebnisses zu erwarten ist.
VerwendenSie nurthermostabiles Geschirr, dass der Zweckbestimmung
(Aufnahme von Körperausscheidungen)entspricht und ein CE - Zeichen
trägt.
Prüfen Sie regelmäßig die Unversehrtheit aller zugänglichen Kabel und
Schläuche. Wenn defekte Teile entdeckt werden, ist sofort der Netz-
stecker zu ziehen und das Gerät nicht mehr zu verwenden. Informieren
Sie anschließend den Service.
Bei übermäßigem Dampf- oder Wasseraustritt während des Spülens ist
das Gerät sofort vom Netzzu trennen und der Service zu verständigen.
Geben Sie niemals WC-Reiniger in die Spülkammer.
Vor dem Öffnen des Steuerschrankes ist der Netzstecker zuziehen.
Das Öffnen des Gerätes darf nur durch geschultes Fachpersonal
geschehen.
-inizidemnerednanovnoitkefniseDruzthcinfradrelüpsnekcebkcetSreD
schen Produkten verwendet werden.
Verwenden Sie das Gerätnichtim Seuchenfall.
Das Gerät darf nicht mit einem Schlauch oder Hochdruckreiniger von
außen gereinigt werden.
3. Allgemeines
Wir gratulieren Ihnen zu Ihrem Steckbeckenspüler der Serie euroMAT
pro. Im Folgenden werden Sie durch die Funktionen und die Pflege Ihres
Gerätes geführt. Lesen Sie die Anweisung vor und auch nach der Geräte-
einweisung sorgfältig durch und bewahren Sie die Bedienungsanleitung
immer an einem trockenen Ort in Gerätenähe auf. Die Bedienungsanlei-
tung enthält auch die Wartungs- und Installationsprotokolle, die dem Ser-
vicetechniker zur Verfügung gestellt werden müssen.
3.1 Funktionsübersicht
Der Steckbeckenspüler der Serie euroMATpro dient der Reinigung und
Desinfektion von Urinflaschen, Steckbecken und Nachtstuhleimern. 3 Pro-
gramme für unterschiedliche Verschmutzungen und Verschmutzungs-
grade stehen dem Anwender zur Verfügung. In jedem Programm wird
das Geschirr vorgespült, gereinigt, desinfiziert und anschließend durch
eine weitere Spülung abgekühlt, so dass es nach Programm-Abschluss
sofort entnehmbar und wiedereinsatzbereit ist.
Um das Gerät mit allen Wasserhärtegraden lange verwenden zu
können wird dem Reinigungswasser automatisch das Entkalkungs-
mittel euroMATIC oder euroMATIC ph-sauer hinzugeführt. Der Vor-
ratsbehälter, der nach entsprechender Meldung in der Text- Anzeige
unter der Spülkammer.
härte ein. Bei Nichteinhalten erlischt der Garantieanspruch!
3
bg Doku 28, Revision 16.01.2018

18
Last updated: 18/05/2020
9. Personal notes
19 Last updated: 18/05/2020
9. Personal notes
Inventory no.
Notify the person responsible for operating the unit if
faults occur:
Name:
Phone:
Technical Service:
Name:
Phone:
Emergency call:
Name: bg edelstahl und kunststotechnik für krankenhaus,
industrie und wasserwirtschaft gmbh
Phone: +49 (0) 23 68 - 699 36 - 0
Instructions for use stored with:
If accidents involving personal injury occur:
Notify:
Phone:
Fax:
Notify:
Name: bg edelstahl und kunststotechnik für krankenhaus,
industrie und wasserwirtschaft gmbh
Phone: +49 (0) 23 68 - 699 36 - 0
Fax: +49 (0) 23 68 - 699 36 - 33
10. Important addresses
Manufacturer and person responsible as per
§ 5 of the German Medical Devices Act:
bg edelstahl und kunststotechnik für krankenhaus,
industrie und wasserwirtschaft gmbh
Karlstraße 18
45739 Oer - Erkenschwick
Phone: +49 (0) 23 68 - 699 36 - 0
Fax: +49 (0) 23 68 - 699 36 - 33
E-Mail: ser[email protected]
www.bg-edelstahl.de
bg doc 28 c, 18/05/2020, Revision 3
Table of contents
Other bg edelstahl Laboratory Equipment manuals


Popular Laboratory Equipment manuals by other brands

ORTEC
ORTEC 276 Operating and service manual

Markes International
Markes International Kori-xr installation manual

Research Instruments
Research Instruments WITNESS Installation and service manual

CTC Union
CTC Union INJ-IG02-PH Quick installation guide

ORBECO
ORBECO SP600 instruction manual

Agilent Technologies
Agilent Technologies 6890 Series operating manual


Analytik Jena
Analytik Jena qTOWER3 operating manual

Pentair
Pentair BIOSHIELD installation guide

Retsch
Retsch BB300 operating instructions

Thermo Scientific
Thermo Scientific BF51842C Installation and operation manual

Syngene
Syngene G:Box Chemi XRQ Installation quick guide

Kodak
Kodak Dryview 5800 user guide